Something went wrong. Try again later
    Follow

    Battlefield 3

    Game » consists of 15 releases. Released Oct 25, 2011

    Battlefield 3 is DICE's third numerical installment in the Battlefield franchise. It features a single player and co-operative campaign, as well as an extensive multiplayer component.

    Battlefield 3: Deathmatch Tips

    Avatar image for kgb0515
    kgb0515

    427

    Forum Posts

    0

    Wiki Points

    0

    Followers

    Reviews: 1

    User Lists: 0

    Edited By kgb0515
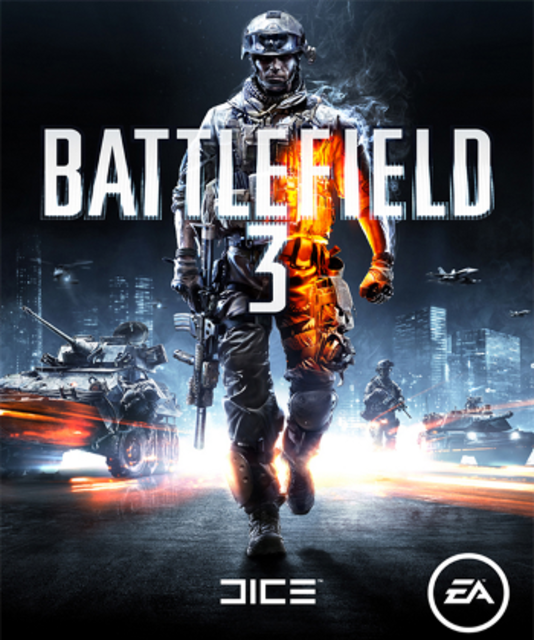
    360 box art (cropped)
    360 box art (cropped)

    Hardcore fans of the Battlefield franchise react to the deathmatch multiplayer modes available in Battlefield 3 in a variety of different ways. Conquest purists immediately write death match off as being a mode developed specifically to placate Call of Duty fans with gameplay that features higher kill counts and less objective based strategy. Others regard it with some neutrality and deem other game types like BF3's rush mode as a death match variant with objective based qualities. However, with a game that is as hardwired for team mechanics as BF3, deathmatch can be as tactically rewarding as some of the more popular game types. Its true that either team or squad deathmatch rounds can feel cheap or unforgiving, but the following is a list of tips for being a better deathmatch squad.

    1. Coordinate your perks: Once you have leveled up enough to start unlocking squad perks or specialized attributes, make sure that you are coordinating with other members of your squad regarding what attributes will be equipped throughout the round. With a full squad of four players, it should be fairly easy to make sure that each member has 4 active attributes that other squads may not possess. One team mate could equip squad suppression for the team, and your entire squad would have the ability to lay down covering fire to disorient your enemies on the field. A team supported by the squad explosives perk will be able to better destroy enemy cover and rack up collateral kills if enemies bunch together. Find the magical combination of squad attributes that best suits your play style, and have your team equip perks that will gain you the upper hand on the battlefield.

    2. Fill out your squad roles: This rule applies to every game mode without question, yet you will still find entire squads who play as the same class type on every map. Squads like these are easy prey for any truly coordinated squad. Make sure that each member of your squad has some proficiency with a class that compliments your own. If you play as a recon sniper, have a support class guy with you who can lay down suppressing fire and resupply your ammunition. If you like to run and gun as support, make sure that one of your squad mates is an assault class medic who can revive you or throw out health packs when your HP gets low.

    You may not need one of every class type on the field at once, but it is important to adjust your tactics as the round plays out. If enemies appear to be bunching up behind walls, spawn an engineer to take that cover out. If another squad is hanging back as snipers, suppress those fools with support gunners then counter snipe or use mortar fire. Just make sure your entire squad is on the same page at all times. One person on the team should have the situational awareness to coach your team to victory.
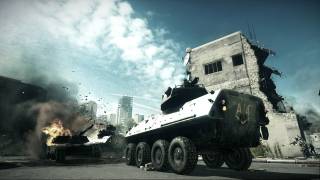
    Deadly in the right hands.
    Deadly in the right hands.

    3. Grab the light armor quickly, but use it wisely: Simply hoarding the LAV in death match games is not enough to guarantee victory, and you will most likely end up as a pile of burning rubble if you don't know how to effectively utilize this vehicle. Don't drive the LAV through the center of the war zone if things become heated. This, more often than not, will lead to instant death for you or any passengers you have aboard, and it will rack up instant multi-kill points for the other guys. Instead, use the LAV to take out cover positions around the perimeter of the map's "hot zone" while at least two of your squad mates make use of the distraction you create to sweep through standing structures looking for stragglers.

    Spawn points are randomized and can lead to unfair deaths, so an armored rolling spawn point can be vital to the survival of an effective squad. Also, make sure that at least one passenger is an engineer who can buff out the artillery dents from time to time if things get dire. Retreat whenever necessary, but first and foremost, defend your team mates and they will return the favor. Also, if the tank is about to blow up, make sure EVERYONE knows it before you abandon ship. Collateral kills can quickly tip the scales against your squad.

    4. Spread out, but stay together: Squads may only have four members, but squad death match is unique in that you can communicate with your ENTIRE team at any given time. If you need to flank an enemy position, send two of your mates around the enemy position while you lay down cover fire. An entire squad rushing across an enemy emplacement makes for easy targets. In squad death match, the only friendlies are those on your squad. Use the chaos of the three other squads fighting each other to your advantage and wipe out the stragglers.

    Some situations will call for a show of brute force with all four of your squad members coordinating on one point. Other times it will be more effective to split into two "kill teams" to roam around the map more effectively. Don't spread the squad too far across the map so you can still call out targets for the other half of your squad. If two of your squad mates can hold down a fixed position in a centralized area, send the other two off to flank enemies trying to root them out. Thinning out your group can be a double edge sword in some cases, but effectively gauging the flow of battle across the map will provide the cues needed to make the right decisions.
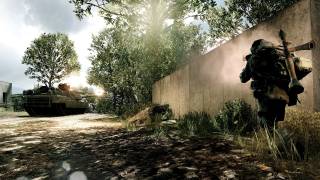
    Use rockets......lots of rockets.
    Use rockets......lots of rockets.

    5. Losing the LAV doesn't mean the round is lost: Even if a rival squad claims the LAV early in the round, it doesn't mean that the match is lost. Count on the fact that the LAV will be just as preoccupied with other squads on the map as they are with you. Also, don't forget to use the chaos the enemy LAV creates on the battlefield to your advantage. In squad death match, the LAV is bound to send other rival squads scurrying from cover to cover as it roams around the map. This is a great opportunity to stand your ground and pick off targets as they are flushed out of their hiding spots.

    Always remember that death match is about getting the most kills. If the other squads are preoccupied with trying to take out the LAV, they aren't thinking about you and your squad sneaking up behind them to stick a knife in their wind pipes. Another thing that most people don't realize is that even though AT mines may be visible on the map after the patch, they can still serve as barricades for roaming LAVs. Throw a few mines on the ground in an LAV's path, and they will have to stop to take them out, or they will have to go around them. This leaves them impeded enough to send a couple of engineers, or C4 toting support commandos after them. Use every tool at your disposal at all times.

    7. Silence is golden: Every fan of BF3 has his or her own taste in weaponry, and every weapon handles a little differently. However, the fact remains that every weapon will reveal your location on the mini map if fired without a suppressor. The red triangle that pops up doesn't last as long as the ones that pop up when you are spotted by enemies, but they appear nontheless. If you aren't fond of using suppressors, be sure to use trigger discipline and be aware of any nearby access routes leading to your position. The best tactic here is to take down your target(s) and fall back to an area where it is difficult for enemies to sneak up on you.

    Weapons with a high rate of fire negate the damage reducing qualities of suppressors to a certain degree, but you will still need to compensate for the high volume of amuntion needed to keep your kill count running between deaths. Equip the extra ammo perk or keep an ammo carrying support person nearby at all times. Also, assault rifles and light machine guns will take almost twice as many rounds to down a target at mid to long range with the suppressor equipped, so firing in short bursts is recommended.

    Carbines and personal defense weapons (PDWs) are devastating at close range whether suppressed or not and they make excellent close quarters alternates to shotguns which cannot be suppressed in BF3. The lesson here is to either shoot and move, or shoot a lot with a suppressor. Find balance with one or the other, and enemies will crumble before you.

    8: Play through to the end: All too often, players quit out of matches when the tide changes against their favor. There have been many instances when I thought my squad was down and out in a match and we ended up going on a run that brought us back into the lead. Some times it just takes some mid round adjustments to turn things around. Try switching classes, or adopt a more conservative play style if aggression is raising your death toll. Alternate weapon attachments and switch from CQC to ranged engagements to avoid becoming fodder for a dominant squad's blood lust. Just don't quit, otherwise you will never learn anything from your mistakes.

    9: Play with people you know: This is another tip that applys to any BF3 game mode, but having people you know on your squad is always important. Play with people that you know are capable and that will support you on the battlefield. If you play with someone who knows your play style, he or she will be less likely to step on your toes in the heat of battle. Conversely, they may be more inclined to tell you that you're being a dumbass if you mess up, but always take this with a grain of salt. Coordinate play times with people you know, and you will have a better idea of what to expect when the bullets start to fly. As we all know, if you can't predict what your team mates are going to do then you won't have any control of the matches outcome before the round even begins.
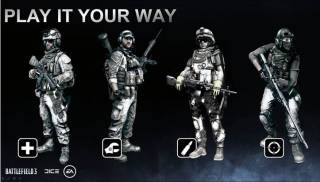
    See you on the battlefield!
    See you on the battlefield!

    10: Have fun: This one might seem like a little bit of a cop out, but it is all too often that I drop into a random game where one of my squad mates is raging over the mic about how bad everyone else on the team is playing. At the end of the day, Battlefield is a game, and games are meant to be fun. Help players who have limited experience with BF3's somewhat complicated game mechanics, and they will grow into a more proficient player with time. Furthermore, keep excessive team trash talk to a minimum. Obviously, nobody on the team is intentionally trying to lose. They may be trying to explore different weapon variations, or they may be new to the game in general. In short, if you aren't trying to offer solutions, you are the problem.

    Most of the aforementioned advice may seem like common sense to some players, but common sense is essential for success in Battlefield games. No matter what game mode may be your favorite, each type offers something different for different players. If conquest or rush become stale, don't be too quick to dismiss death match as a viable alternative. See you on the battlefield!
    Avatar image for kgb0515
    kgb0515

    427

    Forum Posts

    0

    Wiki Points

    0

    Followers

    Reviews: 1

    User Lists: 0

    #1  Edited By kgb0515
    360 box art (cropped)
    360 box art (cropped)

    Hardcore fans of the Battlefield franchise react to the deathmatch multiplayer modes available in Battlefield 3 in a variety of different ways. Conquest purists immediately write death match off as being a mode developed specifically to placate Call of Duty fans with gameplay that features higher kill counts and less objective based strategy. Others regard it with some neutrality and deem other game types like BF3's rush mode as a death match variant with objective based qualities. However, with a game that is as hardwired for team mechanics as BF3, deathmatch can be as tactically rewarding as some of the more popular game types. Its true that either team or squad deathmatch rounds can feel cheap or unforgiving, but the following is a list of tips for being a better deathmatch squad.

    1. Coordinate your perks: Once you have leveled up enough to start unlocking squad perks or specialized attributes, make sure that you are coordinating with other members of your squad regarding what attributes will be equipped throughout the round. With a full squad of four players, it should be fairly easy to make sure that each member has 4 active attributes that other squads may not possess. One team mate could equip squad suppression for the team, and your entire squad would have the ability to lay down covering fire to disorient your enemies on the field. A team supported by the squad explosives perk will be able to better destroy enemy cover and rack up collateral kills if enemies bunch together. Find the magical combination of squad attributes that best suits your play style, and have your team equip perks that will gain you the upper hand on the battlefield.

    2. Fill out your squad roles: This rule applies to every game mode without question, yet you will still find entire squads who play as the same class type on every map. Squads like these are easy prey for any truly coordinated squad. Make sure that each member of your squad has some proficiency with a class that compliments your own. If you play as a recon sniper, have a support class guy with you who can lay down suppressing fire and resupply your ammunition. If you like to run and gun as support, make sure that one of your squad mates is an assault class medic who can revive you or throw out health packs when your HP gets low.

    You may not need one of every class type on the field at once, but it is important to adjust your tactics as the round plays out. If enemies appear to be bunching up behind walls, spawn an engineer to take that cover out. If another squad is hanging back as snipers, suppress those fools with support gunners then counter snipe or use mortar fire. Just make sure your entire squad is on the same page at all times. One person on the team should have the situational awareness to coach your team to victory.

    Deadly in the right hands.
    Deadly in the right hands.

    3. Grab the light armor quickly, but use it wisely: Simply hoarding the LAV in death match games is not enough to guarantee victory, and you will most likely end up as a pile of burning rubble if you don't know how to effectively utilize this vehicle. Don't drive the LAV through the center of the war zone if things become heated. This, more often than not, will lead to instant death for you or any passengers you have aboard, and it will rack up instant multi-kill points for the other guys. Instead, use the LAV to take out cover positions around the perimeter of the map's "hot zone" while at least two of your squad mates make use of the distraction you create to sweep through standing structures looking for stragglers.

    Spawn points are randomized and can lead to unfair deaths, so an armored rolling spawn point can be vital to the survival of an effective squad. Also, make sure that at least one passenger is an engineer who can buff out the artillery dents from time to time if things get dire. Retreat whenever necessary, but first and foremost, defend your team mates and they will return the favor. Also, if the tank is about to blow up, make sure EVERYONE knows it before you abandon ship. Collateral kills can quickly tip the scales against your squad.

    4. Spread out, but stay together: Squads may only have four members, but squad death match is unique in that you can communicate with your ENTIRE team at any given time. If you need to flank an enemy position, send two of your mates around the enemy position while you lay down cover fire. An entire squad rushing across an enemy emplacement makes for easy targets. In squad death match, the only friendlies are those on your squad. Use the chaos of the three other squads fighting each other to your advantage and wipe out the stragglers.

    Some situations will call for a show of brute force with all four of your squad members coordinating on one point. Other times it will be more effective to split into two "kill teams" to roam around the map more effectively. Don't spread the squad too far across the map so you can still call out targets for the other half of your squad. If two of your squad mates can hold down a fixed position in a centralized area, send the other two off to flank enemies trying to root them out. Thinning out your group can be a double edge sword in some cases, but effectively gauging the flow of battle across the map will provide the cues needed to make the right decisions.

    Use rockets......lots of rockets.
    Use rockets......lots of rockets.

    5. Losing the LAV doesn't mean the round is lost: Even if a rival squad claims the LAV early in the round, it doesn't mean that the match is lost. Count on the fact that the LAV will be just as preoccupied with other squads on the map as they are with you. Also, don't forget to use the chaos the enemy LAV creates on the battlefield to your advantage. In squad death match, the LAV is bound to send other rival squads scurrying from cover to cover as it roams around the map. This is a great opportunity to stand your ground and pick off targets as they are flushed out of their hiding spots.

    Always remember that death match is about getting the most kills. If the other squads are preoccupied with trying to take out the LAV, they aren't thinking about you and your squad sneaking up behind them to stick a knife in their wind pipes. Another thing that most people don't realize is that even though AT mines may be visible on the map after the patch, they can still serve as barricades for roaming LAVs. Throw a few mines on the ground in an LAV's path, and they will have to stop to take them out, or they will have to go around them. This leaves them impeded enough to send a couple of engineers, or C4 toting support commandos after them. Use every tool at your disposal at all times.

    7. Silence is golden: Every fan of BF3 has his or her own taste in weaponry, and every weapon handles a little differently. However, the fact remains that every weapon will reveal your location on the mini map if fired without a suppressor. The red triangle that pops up doesn't last as long as the ones that pop up when you are spotted by enemies, but they appear nontheless. If you aren't fond of using suppressors, be sure to use trigger discipline and be aware of any nearby access routes leading to your position. The best tactic here is to take down your target(s) and fall back to an area where it is difficult for enemies to sneak up on you.

    Weapons with a high rate of fire negate the damage reducing qualities of suppressors to a certain degree, but you will still need to compensate for the high volume of amuntion needed to keep your kill count running between deaths. Equip the extra ammo perk or keep an ammo carrying support person nearby at all times. Also, assault rifles and light machine guns will take almost twice as many rounds to down a target at mid to long range with the suppressor equipped, so firing in short bursts is recommended.

    Carbines and personal defense weapons (PDWs) are devastating at close range whether suppressed or not and they make excellent close quarters alternates to shotguns which cannot be suppressed in BF3. The lesson here is to either shoot and move, or shoot a lot with a suppressor. Find balance with one or the other, and enemies will crumble before you.

    8: Play through to the end: All too often, players quit out of matches when the tide changes against their favor. There have been many instances when I thought my squad was down and out in a match and we ended up going on a run that brought us back into the lead. Some times it just takes some mid round adjustments to turn things around. Try switching classes, or adopt a more conservative play style if aggression is raising your death toll. Alternate weapon attachments and switch from CQC to ranged engagements to avoid becoming fodder for a dominant squad's blood lust. Just don't quit, otherwise you will never learn anything from your mistakes.

    9: Play with people you know: This is another tip that applys to any BF3 game mode, but having people you know on your squad is always important. Play with people that you know are capable and that will support you on the battlefield. If you play with someone who knows your play style, he or she will be less likely to step on your toes in the heat of battle. Conversely, they may be more inclined to tell you that you're being a dumbass if you mess up, but always take this with a grain of salt. Coordinate play times with people you know, and you will have a better idea of what to expect when the bullets start to fly. As we all know, if you can't predict what your team mates are going to do then you won't have any control of the matches outcome before the round even begins.

    See you on the battlefield!
    See you on the battlefield!

    10: Have fun: This one might seem like a little bit of a cop out, but it is all too often that I drop into a random game where one of my squad mates is raging over the mic about how bad everyone else on the team is playing. At the end of the day, Battlefield is a game, and games are meant to be fun. Help players who have limited experience with BF3's somewhat complicated game mechanics, and they will grow into a more proficient player with time. Furthermore, keep excessive team trash talk to a minimum. Obviously, nobody on the team is intentionally trying to lose. They may be trying to explore different weapon variations, or they may be new to the game in general. In short, if you aren't trying to offer solutions, you are the problem.

    Most of the aforementioned advice may seem like common sense to some players, but common sense is essential for success in Battlefield games. No matter what game mode may be your favorite, each type offers something different for different players. If conquest or rush become stale, don't be too quick to dismiss death match as a viable alternative. See you on the battlefield!

    Avatar image for karl_boss
    Karl_Boss

    8020

    Forum Posts

    132084

    Wiki Points

    0

    Followers

    Reviews: 0

    User Lists: 2

    #2  Edited By Karl_Boss

    You should just submit this as a guide.

    This edit will also create new pages on Giant Bomb for:

    Beware, you are proposing to add brand new pages to the wiki along with your edits. Make sure this is what you intended. This will likely increase the time it takes for your changes to go live.

    Comment and Save

    Until you earn 1000 points all your submissions need to be vetted by other Giant Bomb users. This process takes no more than a few hours and we'll send you an email once approved.