Tutorial :: Creating weapons for next-gen games ::
By warxsnake 29 Comments
Sup
So here I will be showing you the entire process behind making a weapon for a next-gen game/engine. I chose to make an organic weapon, a prehistoric / tribal dagger of sorts, since it's probably the easiest and fastest way to show the process. You can interpolate the same process for any other kind of organic weapon, staffs, bows, swords, etc... it just takes longer and there are more steps in the planning / sculpting stage to consider. Even though we are just dealing with a dagger here, all the important steps are there. Again this method is mostly used for organic non-mechanical objects.
While nothing stops you from sculpting a gun or rifle in zbrush (it's totally up to you), it's way more sensible to use a program like 3dsmax or XSI for mechanical hard-edge objects, so that you get good results.
People ask me all the time what takes longer to create, something organic or mechanical? While it depends what you are making first of all, it usually takes waaaaaaaaaaay longer to make mechanical stuff, like the Uzi Sub Machine Gun that I linked in the intro blog. That took 2 days to create the high res model, and if I have the time, I will show you exactly why. Whereas what I am about to show you, took about an hour or so to create (and texture) the high res.
So let's get started with the basics. It's organic, so we bust out the Wacom and zbrush to sculpt it. Usually when I do a 3D doodle and I'm not really sure what direction I will be taking, so I start everything in zbrush, like in the timelapse video I showed in the previous blog. However, since I know what I will be doing from the start in this case, it's easier to model a base mesh in 3dsmax of roughly what my model will be. When you create a base mesh in max to be imported into zbrush, you want your objects to have consistent subdivision of polygons, so when you subdivide the object in zbrush, you will not get areas which are more subdivided than others. And it's even more important to have your object in quads (4 sided polygons), and not triangles, which will subdivide like shit in zbrush.
So here we go, we are doing a dagger right? so we go into 3dsmax, and we model extremely basic shapes, as basic as you can have it, while determining the core shape of the object. This is what we get:
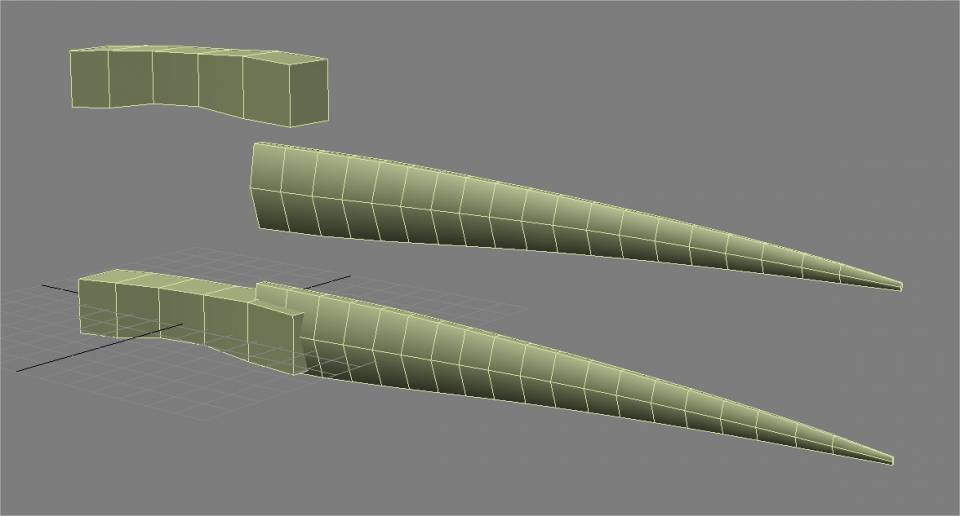
Now that we have our base mesh, we export it to zbrush. We could have used a single piece for the whole thing, but it's better to split your object into manageable parts.
So we export the handle, and then the blade, as separate files. We export them as .OBJ which is the most common 3D filetype in the industry (game/movies). Every 3D program should be able to read an OBJ file, if it doesn't, don't use it.
So now that we have both pieces exported and ready as OBJs, we import them into zbrush 1 by 1 and into the same zbrush document. We consequently get two subtools in zbrush, the handle, and the blade.
Now for the fun part! We are about to sculpt that piece of shit into a dagger. So what we do is go to giantbomb.com/podcast, load up the latest bombcast (this is key), and start working. I didn't use any references this time, so I kind of sculpted "whatever", but it's usually a good idea to bring up pictures of ancient weapons in this case, and put them up on the second monitor to get some good ideas; or obviously if you are working from a 2D concept or model sheet, put that up on the second monitor.
Now when you are sculpting, the main workflow is to work as much detail as you can at your current subdivision level (polygonal count). So at the low polygon levels, you want to move stuff around and get the general shape in. Once you start subdiving into the hundreds of thousands or millions of polygons, you can then start detailing. Once the sculpting process is complete, you can then paint color over the millions of polygons you have, which is called... holy crap... PolyPainting. Sculpting and coloring it took me roughly the amount of time to listen to the PAXcast, so roughly an hour and a few minutes. (sorry for the shit vimeo quality which blurs everything out, you can download the quicktime version at the video's webpage if you want)
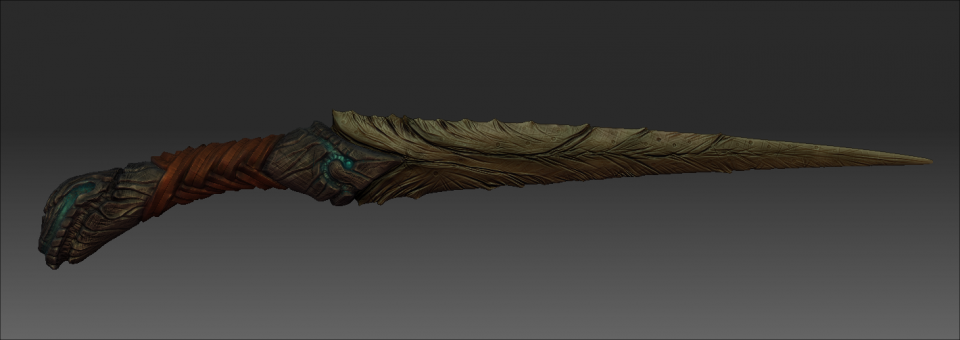
Okay, so now that the sculpting (and high res is complete), what we are going to take out from this is the high res mesh itself, the coloring (diffuse map) since we painted it, and also we are going to create our low-res model straight from zbrush thanks to a zbrush plugin called decimation master. What decimation master does is take a high-res model in the millions of polygons and reduces it down to whatever polycount you are aiming for.
In this case, our low-res will be about 5000-10,000 tris, which is good for First Person Games. That's actually a lot for a knife in a FPS, but that's fine for now. If we were making a low res of this for a Third Person Game, we would have had made a low res of 1000-5,000 tris, depending on the complexity. This dagger is pretty simple so we can keep things low.
Here comes a complicated part. We need to export our color painting off of the high res and onto the low res, right? To do that, we need it to have a texture unwrap on it. But wait, to decimate the model, we had to combine both subtools into a single piece. And when you combine both pieces into a single object, zbrush loses the unwrap that both subtools previously had, and also zbrush loses the subdivision history, so you can't go back to your low res version! So we have to reconstruct the object that you have above, while having it keep the coloring. This involves a tricky step in zbrush where you duplicate the model and reconstruct one of them so that you can have access to lower subdivisions. You also have it borrow the color polypaint. Once you do these two things, you will have an object that has all its subdivision states along with the colors! Now that you have that, to export the coloring into a PSD from zbrush, like every other object, you go to the lowest subdivision and export the color texture. Pretty complicated shit eh? I haven't even started.
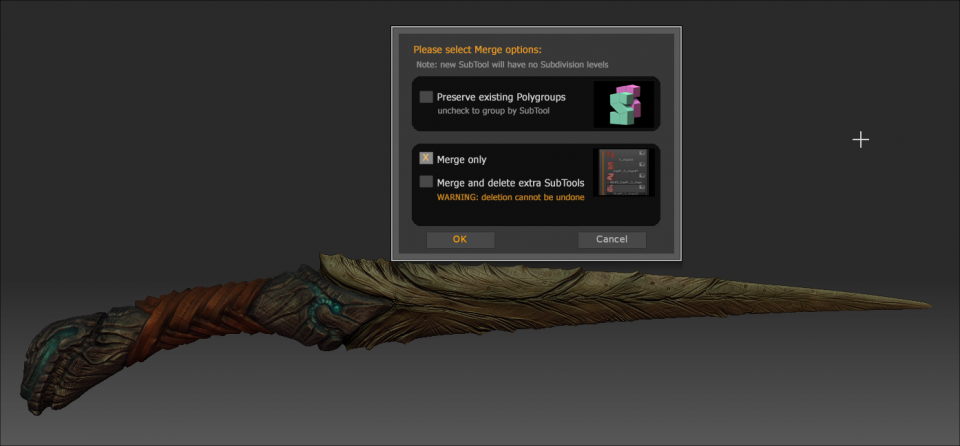

So now that I reconstructed the high res via a cloned high res, I can now go through all the subdivisions and I have the polypaint intact and available at the lowest subdivision! This is key because when you export a texture (the colors) from zbrush, you want to export from the lowest subdivision of your object so that it doesn't fuck up the texture you are exporting:
Dagger Reconstruct from Gregory Rassam on Vimeo.
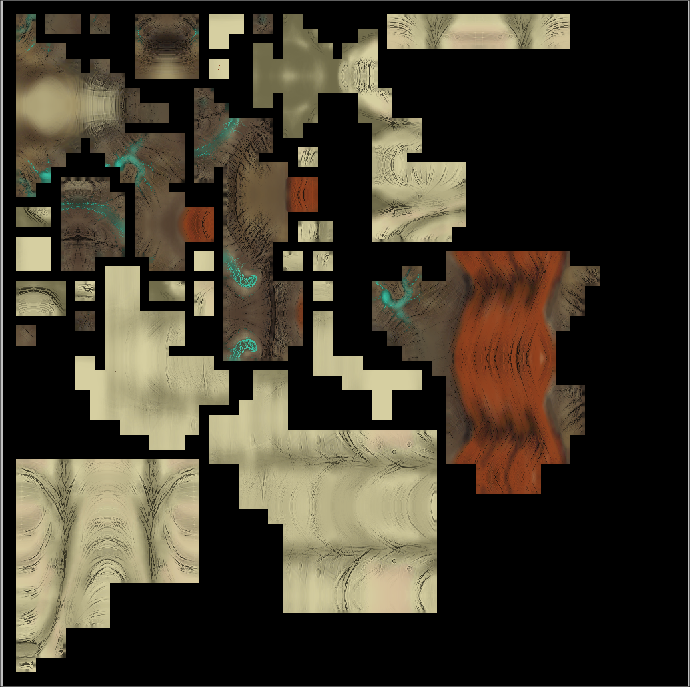
So from the lowest subdivision you see there at the end of the video, I use GUVTiles on the object so that it generates an unwrap for the object.
Now we decimate the high res model to get a cool looking low res model, you dont need to use Decimation Master, you can do this manually my modeling your own low poly over the high res, its just that decimation master is quicker for that stuff:
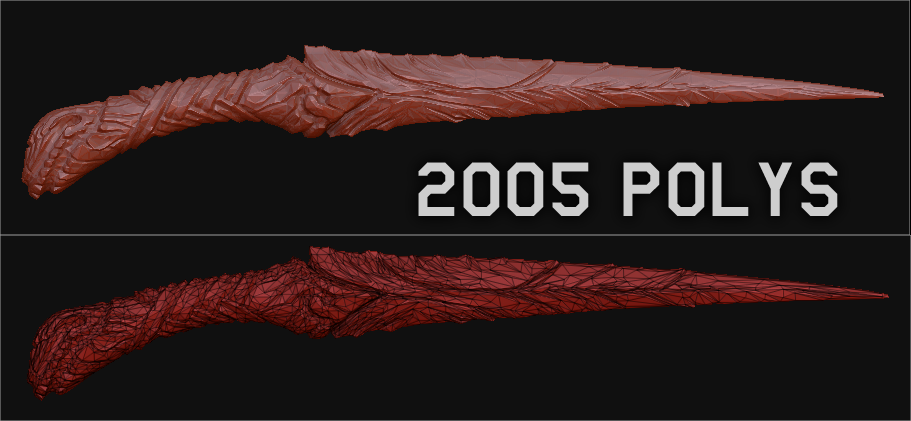
We then export the decimated low res and import into 3dsmax where we will unwrap the low res. This is so that the low res can "accept" the Color map, Normal map, Spec map, Ambient Occlusion map, that we will be giving it. Since the dagger is symmetrical, we can save texture space by deleting one side of the dagger and only unwrapping that part. Once one side is unwrapped, we then mirror the mesh so that it gets the other side back, just that the other side uses the exact same unwrap the first side is using. Unwrapping is the least fun job of an artist, like, ever.
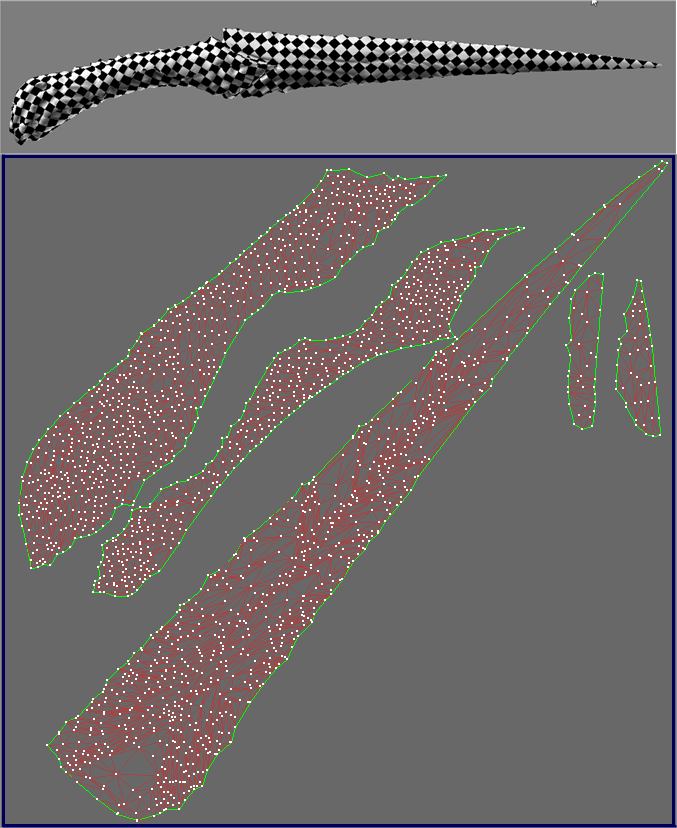
Now that we have our low res unwrapped, we can finally start the most important process, transferring all the shit from the high res to the low res. I use x-normal for that. In x-normal, you have to:
- Import High Res models
- Convert High Res Models from OBJ to SBM
- Import Low Res Models
- Apply Diffuse texture to High Res Models (zbrush's exported texture, has to be flipped vertically).
- Set values for proper normal baking (ray distances between high res and low res)
- Bake and save normal map
- Bake and save Diffuse map
- Bake and save Ambient Occlusion map
- Bake and save Cavity Map (optional)
Now for some photoshop magic, we will take these three maps and combine them in photoshop in different ways to create better textures than this default crap.
Once the awesome-sauce textures are done, we test them in 3dsmax on the model to see if anything is wrong. The textures I made in this case are:
- Diffuse map (color of object)
- Specular map (Shininess of object and color of shine)
- Normal map (3D light information of object)
- Self-Illumination map (Glow, for the blue parts of the knife)
After this it's pretty much exporting to whatever engine you want. I'll be exporting to Unreal Engine 3. I don't have much experience with it since we don't use it at Ubisoft, we use Anvil and Dunia instead. However, it's a learning process for all of us so let's do it for UE3.
After importing an ASE. of your low res and TGAs of your diffuse, normal, spec, emissive (self illumination) into the package of your choice, you can now place your object into the engine, create a new material and link those textures into the corresponding slots in the material.
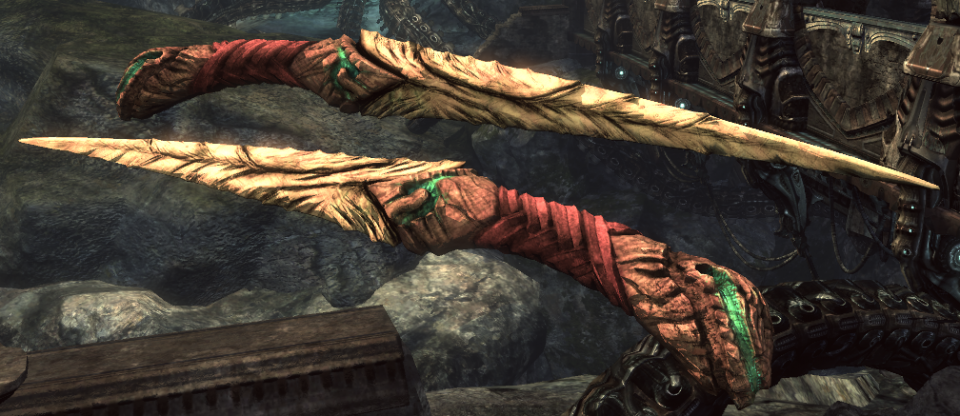
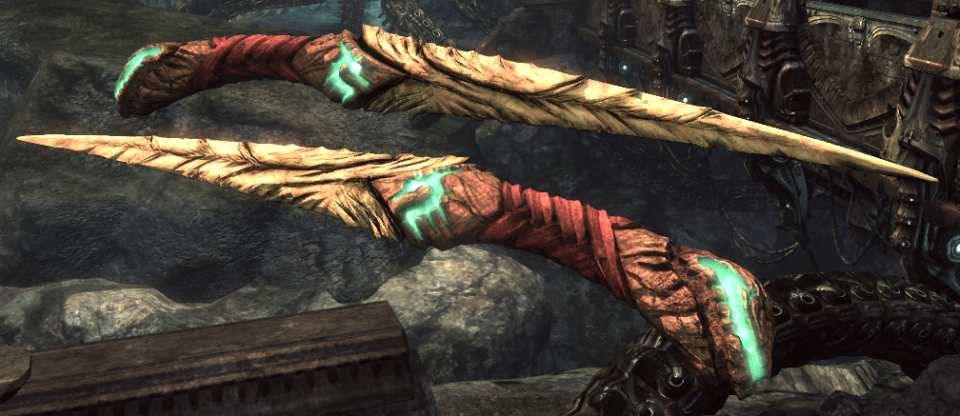
Tadaa! That's it. All that is left technically is to create LODs (level of detail over distance) and since its a weapon, animation riggers will set up bone systems on the weapon so characters in the game can hold it. As an artist, your part is done right about now.
Hope you enjoyed this little tutorial/look into what it takes to create assets for a game these days.