Overview
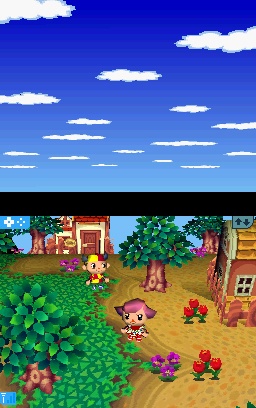 Look! TWO PEOPLE!
Animal Crossing: Wild World for the Nintendo DS is a simulation game developed by Nintendo EAD as a sequel to the Nintendo GameCube title Animal Crossing. The game's premise is simple, and follows in the footsteps of the original: the player moves to a new town, immediately gets in debt and has to pay it off while fishing, catching bugs, planting and picking fruit, and socializing with the myriad of neighbors. The game's clock is set with the system clock, thus allowing night in the "real world" to translate to night in the game, as well as certain season effects (snow in the winter, leaves turning red and orange in the fall).
Wild World improves on the original by adding a barber shop, new furniture, expanding the potential size of the player's home, and adding strong support through the Nintendo Wi-Fi system, including the ability for players to visit other players' towns after friend codes have been exchanged. The acre-system of movement was removed in favor of a rolling effect. For use of the DS's extra screen, the bottom is the main screen, while the top usually shows either the sky or the ceiling of the building you're in. In addition, the game is controllable by both touchscreen command and standard button-input. Specific holidays, such as Christmas and Halloween, have been either eliminated or replaced, with Christmas in particular being replaced by the very similar "Toy Day." The game has its own special holidays and events, though, so the loss of these is felt less since there are still events to celebrate.
Gameplay
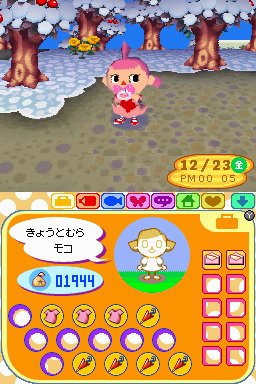 This person likes pink.
The player begins the game in a taxi cab in which the driver, Kapp'n, asks a series of questions that determine the appearance of the character, as well as making sure that the internal clock on the Nintendo DS is the correct time. After the dialogue sequence, the player arrives in a randomly-generated town and is greeted by Tom Nook, the town shopkeeper, who offers the player a house of residence. However, in order to retain and start paying off the house, the player must perform a series of jobs that serve as a type of tutorial to the game's basic socializing mechanics. After these are completed, the player is free to experience the game at their leisure, though it is encourage that players earn bells, the game's currency, in order to pay off and upgrade their home.
The upgrades for the home are the following:
| First House Expansion | Pay off 19,800 Bells in the Town hall |
| Second House Expansion | Pay off 120,000 Bells in the Town hall |
| Upstairs Room | Pay off 298,000 Bells in the Town hall |
| Left Room | Pay off 598,000 Bells in the Town hall |
| Right Room | Pay off 720,000 Bells in the Town hall |
| Back Room | Pay off 848,000 Bells in the Town hall |
While up to four human players may reside in a single game file, unlike with the original Animal Crossing's four separate houses, these players all live in the same house. The very top floor of each how is set as the player's bedroom, and as more players are added, more beds are added to the room. If you find a bed you like more than the one they give you to start with, you can go up to the bedroom and replace it (even things like a workout bench work).
 Fishing in the ocean.
Earning Money
The principle element of Wild World is the monetary system and the collection of bells. Bells are used not only to pay off Tom Nook for home upgrades, but also for various furniture pieces and items that he sells within his store. Likewise, as more goods are purchased, the store upgrades to offer larger selections. The most common means of earning bells include:
Fishing - Perhaps the most popular method of earning bells, a Fishing Rod costs 500 bells to start with, but begins to pay itself off right away. Shadows in the water (pond, river or ocean) are used to show where fish reside, and specific fish reside in specific areas-some netting as little as 100 bells, others netting close to 20,000. Upon catching, the player has the option of keeping the fish at home, selling it, or donating to the museum (for no monetary reward, though it's said donated fish become more populous).
Bug catching with a villager.Bug Catching - Similarly, bugs can also be caught using a 500 bell net. Bugs are traditionally less common and sell for less bells than fish, but they are typically very common during summer months. They tend to be harder to catch, as you must sneak up on them or find them underground, too. Once caught, the player has the same options as with fish-keep, sell or donate.
Digging - Small X-shaped holes in the ground mark places where the player can dig and find either a Gyroid or a fossil. Fossils can be identified by Blathers in the museum, and can then be either donated or sold. There are 3 fossils each day, and they tend to sell for large sums of bells. Gyroids are much more rare, tending to appear after a rain, and sell for around 800 bells each (and who'd sell them? They're adorable).
Tasks - When you talk to your neighbors, after their little spiel about eating or catching buts or something, they give you the option to ask for a task from them. Most of the tasks are pretty simple, where they give you some sort of item to deliver to someone, or a letter to give (unless you want to be bad and read it). Retrieving an item can take the longest, though, since neighbors tend to loan the things they don't own to other people. It can go through a chain of about 6 people before you get it back at times. It's also possible to fail at returning an item, specifically if the neighbor in question moves away. You don't get a reward if that happens. On that note, rewards tend to be furniture, carpets, shirts, or small sums of bells.
Various tree pots and an orange.Fruit Harvesting - Each town is assigned a specific fruit (Apple, Peach, Cherry, Pear, Orange) which can be sold for 100 bells a piece, or can be planted in the grown to grow a tree bearing that fruit (each tree holds three pieces of fruit, which grow back every three days if taken down). If the player sells a "foreign fruit"--that is, any fruit besides the specific "native fruit" of the town--the player will receive 500 bells. By planting several trees bearing foreign fruit, the player can make approximately 1500 bells per tree, allowing for a quick monetary reward. Coconut trees can also be planted near the beach area, but these trees bear only two fruits, and are sold for 150 bells each. It's not guaranteed that a planted fruit will grow into a tree, but to aid in your chances, plant a tree where a weed was just plucked from.
Selling items - During your stay in whatever you name your town, you're going to start collecting a lot of rather useless items. There's a few ways to get rid of these: you can gift them to neighbors (they gift back), put them in the lost and found, or sell them for quick cash to Tom Nook. They never sell for large amounts, but an authentic painting or rare item can fetch a very good price and clear up some inventory space for all those fish.
Tools of the Trade
Fishing Rod
The fishing rod is just that-a normal fishing rod that uses a bobbing lure. You can tap A or the touch screen to use it. In the river or ocean, the bob will float with the current, making it better to throw out the line ahead of the fish and let it float down there. Most fish will nibble a few times, but there's a definite splash sound and graphic to let you know when it's actually sunk its teeth in. Getting every single fish in the game will get you the Golden Fishing Rod. However, this is mostly for bragging rights, though it does have a lure that makes fish easier to catch.
Bug Catching Net
A simple net, it's quite effective at making sure you never have to handle some of the grosser of more dangerous bugs with your bare hands. Holding down on the screen or the button will let you sneak-most bugs are very finicky and will run away at the slightest provocation. Sneaking up is the best way to catch them. You can also hit the townspeople on the head with it, but they'll get very angry and yell at you if you do. Getting every bug gets you the Golden Net, which is twice as big, allowing easier catches.
Axe
The axe is used for chopping down trees. There's really very little reason to do this in the game- you can't sell chopped wood and the fruit drops off after the first hit. After that, you still have to dig the stump out anyways. The best reason to do this is to plant a new tree where that one had been-preferably fruit to help get a harvest. The Golden Axe is one of the most infinitely useful items in the game, though. Where the axe will chip away and be destroyed, the Golden Axe will last forever. However, getting it requires you to buy a Red Turnip. When Wendell comes to town, you give him the Turnip and he'll give you the Turban or Country Guitar. The guitar is a dead end, but give the Turban to Sahara and she'll give you a Red Vase or a Massage Chair. The vase is the bust this time around, and the Massage Chair goes to Tortimer. He'll give you a Scallop that goes to Pascal who, if you're lucky, will give you the Golden Axe.
Slingshot
With the top screen comes a view of presents hanging from balloons, floating across the sky. That, or a UFO, or possibly even just the mail man. Hitting any of them with this mischief maker will cause them to fall to the bottom screen, allowing you to talk to the person involved or collect the present. Hitting 15 presents will get you the Golden Slingshot, a useful tool that shoots 3 stones at once.
Shovel
Well...A shovel is used for digging. In true Indiana Jones fashion, X always marks the spot, and digging will find you Gyroids, random items/bells, and fossils. You can also dig spots to plant trees and fruit, or just bother a friend by digging a lot of holes around them. The Golden Shovel is received by planting a shovel and digging it up the next day. It lets the player grow money trees-though they only bloom once.
Watering Can
To grow a plant, you need some water, and no better way than a watering can! Just sprinkle a bit of water and bloom, bloom, bloom. Keeping your town garbage free and happy for 16 days will get one of the people in the Town Hall give the Golden Watering Can to you when you talk to them, which nurses withered black roses back to life as Golden Roses.
Main Characters
| Name | Description | Picture |
|---|
| Villager | The villager is the human character in the game, and can be either male or female. As mentioned, the appearance of this character is based on the answers to the questions posed by Kapp'n in the taxi cab at the beginning of the game. Things like hairstyle and clothing don't matter, since they can be changed as part of the game (hairstyle based on questions in the barber shop). Unsurprisingly, you can name your character whatever you want and get to earning them bells in a jiffy. | Male Villager |
| Tom Nook |
Tom Nook is a raccoon who provides the house at the start of the game, and is also the town shopkeeper. To pay off his debt, the player must perform various tasks such as delivering purchases to customers, planting flowers, and advertising his store-at first. After finishing the work, the player is free to explore the game, although they're encouraged to pay off the remaining loan (STRONGLY ENCOURAGED). After paying it off, the player can ask Tom Nook to upgrade his or her house, which can be done several times to increase size, add a new floor, and finish of with adding extra rooms. Tom Nook's main job, though, is managing his shop, which sells furniture, carpeting, wallpaper, paint, tools, stationary, and medicine (for bee stings). His shop starts as the tiny, brilliantly-named "Nook's Cranny" and, in the end, evolves into Nookingtons, which has a second floor and barber shop. Tommy and Timmy Nook run the furniture department, where as the barber shop is run by a poodle named Harriet. | |
K.K. Slider
|
K.K. Slider is a guitar playing dog who visits your village every Saturday night (around 8 PM) at the Café. He will play a song for you and also takes requests if there is something in particular you want to hear. After his performance he provides you with an 'aircheck' (tape) to play in your house. The songs in the Cafe have a very simple sound-just an acoustic guitar and his voice- whereas the airchecks have a much more professionally-produced sound. | |
| Mr. Resetti |
Mr. Resetti is an angry mole that will visit the village if the player attempts to turn off or reset the game without saving, which is considered cheating. The game attempts to simulate real life, and resetting is not possible in real life, according to Mr. Resetti (and he's right). Mr. Resetti punishes the player by not. Shutting. Up. At times he even has the player type his words in exactly as he spells them out (punctuation marks and everything). Attempting to shut him up by turning off the game is seen by all as a mistake. | |
| Blathers |
Blathers is the curator of the local museum. In addition to identifying fossils and determining whether paintings are authentic or not, Blathers will gladly take fish, bugs, and the aforementioned paintings and fossils. He is known for his love of fish (slobbering over them and offering his favourite way to cook them), his extreme fear of insects, and for getting "frightfully tired" during the day (to where you have to wake him every few minutes). The more that is donated to the museum, the happier Blathers becomes toward the player- not that he's ever sad to see you! | |
| Mayor Tortimer |
Tortimer is the mayor of your town. He can be seen 'working' in the back of the town office year round and comes out of the office for special events such as New Year's Eve. He often gives out free items such as Roman Candles and Firecrackers, and weird statues and trophies. He also hosts events such as the Bug-Off and the Fishing Tourney. It is highly suspected that Tortimer is also Cornimer, the leader of the Acorn Festival that lasts a week in October. | |
| Mabel Able |
One of the Able Sisters, Mabel is the more personal of the sisters who's in charge of running the store. She is the person you talk to in order to create custom design patters, and will also shine compliments upon the player after each piece of clothing he or she puts on in an attempt to make a sale.
| |
| Sable Able |
The other Able sister, Sable is very shy and spends most of her time doing the sewing for the store. It's possible to win her over, but only after saying hello to her for a number of days in a row can the player begin to talk to her more at length. | |
| Brewster |
Brewster is a pigeon who runs the coffee shop under the museum. He's there 24/7, and will quietly serve you a hot cup for about 200 bells. He offers light conversation, but keep talking to him over a few days and he'll start opening up more, even offering to put special ingredients in your coffee. Just remember: coffee is meant to be drank while it's hot! | |
| Lyle | Lyle is a weasel in both the literal and figurative meanings. He would have to be though, seeing as he's an insurance salesman. Every Saturday he shows up and begins to hound you, following you when you walk out of your house. The first policy he offers you covers bee stings and you tripping, which will get you 100 bells of compensation each time, and the second protects you from the forged paintings Redd sells...by paying 100 bells for them. Redd and he obviously have a good scam going, and talking to him will allow you to change the day that Redd comes to town. | |
| Celeste | On the DS, with the upper screen showing the sky, at night you may notice the stars coming out. Talking to Celeste, who runs the second story of the museum, will allow you to search the skies for constellations, which means making custom constellations wherever you see fit. It also lets you delete constellations, since going to other people's towns or having them visit may import some of theirs. It's up to you to keep the sky beautiful! | |
| Booker & Copper | The lovable police dogs from the Gamecube original make a return as town guards, keeping the gate shut and all but approved members of the Wi-Fi world out of your town. On top of that, talking to Copper will also change the town's flag to a design of your choice, and they still run the lost and found that you can still totally go in and jack all the fresh stuff that's not yours. They're in charge of you going to places, too, so you'll be talking to them a lot if you're a rather social person. | Booker |
Special Characters
| Name | Description | Picture |
|---|
| Crazy Redd |
Redd is the leader of the local Black Market. Once a week (determined by the player) he sets up a tent in Town. In order to get into his tent the player must obtain a password, which can be obtained by talking to other villagers or by getting on Redd's mailing list. He sells rare items and paintings at extremely marked up prices (up to double), though his paintings are quite often forgeries and unaccepted for display by Blathers in the museum. It is possible to get a good deal from him, but it takes a sharp eye and a lot of patience. | |
| Joan |
Buy low, sell high-the rule governing both the stock market and the turnip trade. Turnips are sold every Sunday from 6 a.m. to noon by the wandering boar Joan in bunches of 10, 50, or 100. After buying turnips the player may sell them to Tom Nook on any day of that week (except Sunday). His prices vary from day to day, thus allowing for either great profit or great loss from the selling of the turnips, which will spoil and sell for nothing after one week. In addition, Joan will sell a red turnip, which must be watered daily or else it wilts. This can be traded at a later time, on a trading path that will eventually net you the Golden Axe. | |
| Saharah |
Saharah makes her living selling rare and exotic carpets from far away lands. Like most of the game's other special characters, Saharah sells items that can't be found anywhere else. She does, however, have a different way of doing business- through a barter system. In order to obtain one of her carpets, the player must trade in one of his or her carpets along with some money. Her prices go up each time a carpet is bought on one visit. | |
| Wendell |
Wendell is a wandering walrus. His role has shifted quite strongly from the Gamecube predecessor, where he gave out wallpapers. In this version, he will instead give you special patterns if you bring him a fish (he's quite hungry). Though certain fish (especially more rare ones) will net you specific patterns, the majority will just see you rewarded with a random pattern. Aside from the fish, his service is otherwise free. | |
| Dr. Shrunk |
Given the greater lean on being social with other people in Wild World, it's only fitting that there should be emotions in the game. When Dr. Shrunk comes to town, if you find him, he will try to teach you a new emotion, starting with shyness. It's basically a timing based exercise, so when he says "go", you tap the screen and emote, and you'll have your new emotion. You can only hold so many, so there may come a time when you have to delete one for another. There are about 30 emotions in the game total. | |
| Gracie |
There's something wonderful about the idea of a giraffe who works as a fashionista, and Gracie delivers that in spades. Driving from town to town, she's one of the more complicated characters to get something special from. First, she gives you a quiz and a normal shirt, but if you bother her, she'll ask for 5,000 bells in order to give you a makeover. If you do, you get a special shirt and new accessory, but if you spurn her, she'll give you a moldy shirt. Stylish! | |
| Blanca |
Blanca is an interesting character who only appears after you've connected with someone over Wi-Fi. She was born with a very unfortunate problem-Blanca has no face, and she wants you to give her one. She'll then be unleashed into a database and can wind up in someone else's town- and you'll wind up your own awesome designs from other people if you're not careful. | |
| Katie & Kaitlin |
Similar to Blanca in that they only appear after visiting another town, Katie and Kaitlin are two cats who come to visit your town; only t he problem is that they're separated! If the player has the mother, then she will tell them the name of another town where she last saw Katie. The owner of that town must then guide Katie over to your town over the Wi-Fi Connection. It's a bit of a gyp, but only the player who guides Katie to her mother will get a reward-but it's something quite rare and special indeed!
| |
| Katrina |
Yet another cat who visits your town, Katrina tells fortunes. Startlingly accurate fortunes. However, they merely go down to whether or not you will have good luck or bad luck for the rest of the day. If it's good luck, you'll find more stuff, get more presents, and there will be more balloons to shoot down. Bad luck, though, will make you start tripping a lot and could cause some of your neighbors to begin acting a bit distant towards you. For 10,000 bells she can cleanse this bad spirit from you, but for the price of free, you could just stop playing until the next day- your luck wears off at midnight. | |
| Pascal |
Pascal is, like, kinda out there, you know, maaaan? Talking like an ex-hippie and about as spaced as The Dude, Pascal the Otter will show up on your beach, staring out into the distance like he's looking past it all (man). Talking to him gets a fat load of philosophizing dropped on your chest, but once he's done with that, he gives you a piece of Pirate furniture and disappears off into the ocean again. If you've been doing the trading route for the Red Turnip, then it ends here: the fabled Golden Axe will be yours if you give the right item to Pascal. | |
| Gulliver |
Gulliver is a traveler. But not some simple, namby-pamby boat or car or anything. Gulliver travels through space. He's no alien though- he's an astronaut, and when he appears, flying over the top of your screen, it's your duty to shoot him down with your slingshot. He'll be OK. And to thank you, he'll give you an extremely, extra rare (we're talking a purple here) item. Then, it's back into his ship and who knows when you'll see him again! | |
Fishing Index
Below you will find every fish, with it's appropriate price, location, and season.
Key: Morning = 4:00 AM - 9:00 AM, Noon = 9:00 AM - 4:00 PM. Evening = 4:00 PM - 8:00 PM, Night = 8:00 PM - 4:00 AM
| Fish Name | Value (To Tom Nook) | Location | Available | Peak Availability | Rarity |
|---|
| Bitterling | 900 Bells | River | November - February (All Day) | None | Common |
| Pale Chub | 200 Bells | River | All Year (Noon) | April - June, September - October (Noon) | Common |
| Crucian Carp | 120 Bells | River | All Year (All Day) | October - April (Night) | Common |
| Dace | 200 Bells | River | All Year (Morning, Evening, Night) | December - February (Morning, Evening, Night) | Common |
| Barbel Steed | 200 Bells | River | All Year (All Day) | October - April (Night) | Common |
| Carp | 300 Bells | River | All Year (All Day) | April - May, Oct - Nov (Morning, Evening, Night) | Common |
| KoiDa | 2000 Bells | River | All Year (Morning, Evening, Night) | None | Rare |
| Goldfish | 1300 Bells | River | All Year (All Day) | None | Rare |
| Popeyed Goldfish | 1300 Bells | River | All Year (Noon) | None | Rare |
| Killifish | 300 Bells | Holding Pond | April - August (All Day) | None | Rare |
| Crawfish | 250 Bells | Holding Pond | April - September | None | Common |
| Frog | 120 Bells | Holding Pond | May - August (All Day) | None | Common |
| Freshwater Goby | 300 Bells | River | All Year (Morning, Evening, Night) | None | Rare |
| Leach | 300 Bells | River | March - May (All Day) | None | Common |
| Catfish | 800 Bells | Pond | May - October (Morning, Evening, Night) | June - September (Night) | Common |
| Eel | 2000 Bells | River | June - September (Morning, Evening, Night) | July - August (Morning, Evening, Night) | Common |
| Snakehead | 5500 Bells | Pond | July - August (Noon) | None | Common |
| Bluegill | 120 Bells | River | All Year (Noon) | May - November (Noon) | Common |
| Yellow Perch | 240 Bells | River | October - March (All Day) | November - February (Morning, Noon, Evening) | Common |
| Black Bass | 300 Bells | River | All Year (All Day) | May - November (Morning, Evening, Night) | Common |
| Pond Smelt | 300 Bells | Pond | December - February (All Day) | None | Common |
| Sweetfish | 900 Bells | River | July - September (All Day) | July - August (Morning, Noon, Evening) | Common |
| Cherry Salmon | 1000 Bells | River | March - June, September - November (Morning, Evening) | March, April, September, October (Morning, Evening) | Common |
| Char | 3800 Bells | Waterfall | March - June, September - November (Morning, Evening) | None | Common |
| Rainbow Trout | 800 Bells | River | March - June, September - November (Morning, Evening) | March, April, October (Morning, Evening) | Common |
| Stringfish | 15000 Bells | River | December - February (Morning, Evening, Night) | None | Rare |
| Salmon | 700 Bells | River | September (All Day) | None | Common |
| King Salmon | 1800 Bells | River | September (All Day) | None | Rare |
| Guppy | 1300 Bells | River | April - November (Noon) | None | Rare |
| Angelfish | 3000 Bells | River | May - October (Morning, Evening, Night) | None | Rare |
| Piranha | 2500 Bells | River | June - September (Noon, Night) | None | Rare |
| Arowana | 10000 Bells | River | June - September (Morning, Evening, Night) | None | Rare |
| Dorado | 15000 Bells | River | June - September (Morning, Evening, Night) | None | Rare |
| Gar | 6000 Bells | Pond | June - September (Morning, Evening, Night) | None | Rare |
| Arapaima | 10000 Bells | River | July - September (Morning, Evening, Night) | None | Rare |
| Sea Butterfly | 1000 Bells | Ocean | December - February (All Day) | None | Common |
| Jellyfish | 100 Bells | Ocean | August (All Day) | None | Common |
| Seahorse | 1300 Bells | Ocean | April - August (All Day) | May - September (Noon) | Common |
| Clownfish | 650 Bells | Ocean | April - September (All Day) | May - August (Noon) | Common |
| Zebra Turkeyfish | 400 Bells | Ocean | April - November (all Day) | May - September (noon) | Common |
| Puffer Fish | 240 Bells | Ocean | July - September (All Day) | August (All Day) | Common |
| Horse Mackerel | 150 Bells | Ocean | All Year (All Day) | None | Common |
| Barred Knifejaw | 5000 Bells | Ocean | March - November (All Day) | None | Rare |
| Sea Bass | 160 Bells | Ocean | All Year (All Day) | None | Absurdly Common |
| Red Snapper | 3000 Bells | Ocean | All Year (All Day) | April - July (All Day) | Common |
| Dab | 300 Bells | Ocean | October - April (All Day) | None | Common |
| Olive Flounder | 800 Bells | Ocean | All Year (All Day) | December - February (All Day) | Rare |
| Squid | 400 Bells | Ocean | December - August (All Day) | February - June (Night) | Common |
| Octopus | 500 Bells | Ocean | September - January, March - July (All Day) | October - December, April - June (Morning, Evening, Night) | Common |
| Football Fish | 2500 Bells | Ocean | November - March (Morning, Evening, Night) | None | Rare |
| Tuna | 7000 Bells | Ocean | November - March (All Day) | None | Rare |
| Blue Marlin | 10000 Bells | Ocean | July - September (All Day) | None | Rare |
| Ocean Sunfish | 4000 Bells | Ocean | August - September (Morning, Evening, Night) | None | Rare |
| Hammerhead Shark | 8000 Bells | Ocean | June - September (All Day) | None | Rare |
| Shark | 15000 Bells | Ocean | June - September (Morning, Evening, Night) | None | Rare |
| Coelacanth | 15000 Bells | Ocean | During Snow Or Rain, All Year (Morning, Evening, Night) | None | Absurdly Rare |
Bug Index
Animal Crossing: Wild World offers a variety of offerings in terms of bugs. Below you will find the complete list of bugs in the game.
| Bug Name | Value (To Tom Nook) | Location | Available | Peak Availability | Rarity |
|---|
| Common Butterfly | 90 Bells | Near Flowers | March - September (Morning, Noon) | April - June (Noon) | Common |
| Yellow Butterfly | 90 Bells | Near Flowers | March - September (Morning, Noon) | April - June (Noon) | Common |
| Tiger Butterfly | 160 Bells | Near Red and Pink Flowers | March - September (Morning, Noon) | May - June (Noon) | Common |
| Peacock | 220 Bells | Near Blue, Purple, or Black Flowers | March - September (Morning, Noon) | May - June (Noon) | Common |
| Monarch | 140 Bells | Near Flowers | September - November (Noon) | None | Common |
| Emperor | 2,500 Bells | Near Flowers | June - September (Noon) | None | Rare |
| Agrias Butterfly | 3,000 Bells | Near Flowers | June - September (Noon) | None | Rare |
| Birdwing | 3,000 Bells | Near Flowers | June - September (Noon) | None | Rare |
| Moth | 60 Bells | Near Lighting (Outdoor) | May - September (Night) | June - August (Night) | Common |
| Oak Silk Moth | 1,200 Bells | On Trees | June - September (Night) | None | Rare |
| Honeybee | 100 Bells | Near Flowers | March - August (Noon) | March - June (Noon) | Common |
| Long Locust | 200 Bells | Grass | August - November (Noon) | September - October (Noon) | Common |
| Mantis | 430 Bells | On Flowers | August - November (Noon) | September - November (Noon) | Common |
| Migratory Locust | 600 Bells | Grass | September - November (Noon) | September - October (Noon) | Common |
| Orchid Mantis | 2,400 Bells | On Flowers | August - November (Noon) | September - November (Noon) | Common |
| Brown Cicada | 200 Bells | On Trees | July - August (Noon) | None | Common |
| Robust Cicada | 300 Bells | On Trees | July - August (Noon) | None | Common |
| Walker Cicada | 400 Bells | On Trees | July - August (Noon) | None | Rare |
| Evening Cicada | 550 Bells | On Trees | July - August (Morning, Evening) | None | Common |
| Lantern Fly | 1,800 Bells | On Trees | June - September (Evening, Night) | None | Rare |
| Red Dragonfly | 80 Bells | Airborne | September - October (Evening) | None | Common |
| Darner Dragonfly | 200 Bells | Airborne | June - August (Noon) | June (Noon) | Common |
| Banded Dragonfly | 4,500 Bells | Airborne | July - August (Noon) | None | Rare |
| Ant | 80 Bells | Ground | Year Round (Morning, Night) | None | Commom |
| Pond Skater | 130 Bells | On Ponds and Holding Ponds | June - September (Noon) | None | Rare |
| Snail | 250 Bells | On Flowers | April - September (All Day) | None | Rare |
| Cricket | 130 Bells | Grass | September - November ( Evening, Night) | September - October (Evening, Night) | Common |
| Bell Cricket | 430 Bells | Grass | September - October (Evening, Night) | None | Common |
| Grasshopper | 160 Bells | Grass | July - September (Noon) | September (Noon) | Common |
| Mole Cricket | 280 Bells | Underground | November - May (Morning, Night) | None | Rare |
| Walkingstick | 600 Bells | On Trees | July - November (Morning, Noon) | None | Rare |
| Ladybug | 200 Bells | On Flowers | March - June, October (Noon) | March - May (Noon) | Common |
| Fruit Beetle | 100 Bells | On Trees | July - September (Morning, Night) | July - August (Night) | Common |
| 6,000 Bells | On Trees | July - August (Night) | None | Rare |
| Dung Beetle | 800 Bells | Near Snowballs | December - February (Evening, Night) | None | Rare |
| Goliath Beetle | 6,000 Bells | On Coconut Palm Trees | June - August (Night) | None | Rare |
| Firefly | 300 Bells | Near Fresh Water | June (Night) | None | Common |
| Jewel Beetle | 2,400 Bells | On Trees | July - August (Noon) | None | Rare |
| Longhorn Beetle | 260 Bells | On Trees | June - August (Noon) | None | Rare |
| Saw Stag Beetle | 2,000 Bells | On Trees | July - August (Morning, Night) | July - August (Night) | Rare |
| Stag Beetle | 2,000 Bells | On Trees | June - August (Night) | July - August (Night) | Rare |
| Giant Beetle | 10,000 Bells | On Trees | July - August (Night) | None | Rare |
| Rainbow Stag | 10,000 Bells | On Trees | June - September (Night) | None | Rare |
| Dynastid Beetle | 1,350 Bells | On Trees | July - August (Night) | None | Common |
| Atlas Beetle | 8,000 Bells | On Coconut Palm Trees | July - August (Night) | None | Rare |
| Elephant Beetle | 8,000 Bells | On Coconut Palm Trees | July - August (Night) | None | Rare |
| Hercules Beetle | 12,000 Bells | On Coconut Palm Trees | July - August (Night) | None | Rare |
| Flea | 70 Bells | On your Neighbor | March - November (Morning, Night) | None | Rare |
| Pillbug | 250 Bells | Under Rocks | Year Round (Morning, Night) | None | Common |
| Mosquito | 130 Bells | Airborne | June - September (Evening, Night) | June - August (Evening, Night) | Common |
| Fly | 60 Bells | Rafflesia, Rotten Turnips, or Garbage | Year Round (Morning, Night) | None | Common |
| Cockroach | 5 Bells | On Trees | Year Round (Morning, Night) | None | Rare |
| Spider | 300 Bells | In Trees | March - November (Morning, Night) | None | Common |
| Tarantula | 8,000 Bells | On Ground | July - August (Night) | None | Rare |
| Scorpion | 8,000 Bells | On Ground | July - September | None | Rare |
Fossil Index
This index lists each one of the complete fossils, and it's components.
Ptera Fossil
| Fossil Name | Value at Nook's Store |
|---|
| Ptera Skull | 4,000 Bells |
| Ptera Right Wing | 4,500 Bells |
| Ptera Left Wing | 4,500 Bells |
| Ptera Body | 4,000 Bells |
Seismo Fossil
| Fossil Name | Value at Nook's Store |
|---|
| Seismo Skull | 5,000 Bells |
| Seismo Chest | 4,500 Bells |
| Seismo Hip | 4,000 Bells |
| Seismo Tail | 4,500 Bells |
Ankylo Fossil
| Fossil Name | Value at Nook's Store |
|---|
| Ankylo Skull | 3,500 Bells |
| Ankylo Torso | 3,000 Bells |
| Ankylo Tail | 2,500 Bells |
Apato Fossil
| Fossil Name | Value at Nook's Store |
|---|
| Apato Skull | 5,000 Bells |
| Apato Torso | 4,500 Bells |
| Apato Tail | 4,000 Bells |
Dimetrodon Fossil
| Fossil Name | Value at Nook's Store |
|---|
| Dimetrodon Skull | 5,500 Bells |
| Dimetrodon Torso | 3,500 Bells |
| Dimetrodon Tail | 4,500 Bells |
Iguanodon Fossil
| Fossil Name | Value at Nook's Store |
|---|
| Iguanodon Skull | 4,000 Bells |
| Iguanodon Torso | 3,500 Bells |
| Iguanodon Tail | 3,000 Bells |
Mammoth Fossil
| Fossil Name | Value at Nook's Store |
|---|
| Mammoth Skull | 3,000 Bells |
| Mammoth Torso | 2,500 Bells |
Pachy Fossil
| Fossil Name | Value at Nook's Store |
|---|
| Pachy Skull | 4,000 Bells |
| Pachy Torso | 3,500 Bells |
| Pachy Tail | 3,000 Bells |
Parasaur Fossil
| Fossil Name | Value at Nook's Store |
|---|
| Parasaur Skull | 3,500 Bells |
| Parasaur Torso | 3,000 Bells |
| Parasaur Tail | 2,500 Bells |
Sabertooth Fossil
| Fossil Name | Value at Nook's Store |
|---|
| Sabertooth Skull | 2,500 Bells |
| Sabertooth Torso | 2,000 Bells |
Stego Fossil
| Fossil Name | Value at Nook's Store |
|---|
| Stego Skull | 5,000 Bells |
| Stego Torso | 4,500 Bells |
| Stego Tail | 4,000 Bells |
Plesio Fossil
| Fossil Name | Value at Nook's Store |
|---|
| Plesio Skull | 4,500 Bells |
| Plesio Neck | 4,500 Bells |
| Plesio Torso | 4,500 Bells |
T-Rex Fossil
| Fossil Name | Value at Nook's Store |
|---|
| T-Rex Skull | 6,000 Bells |
| T-Rex Torso | 5,500 Bells |
| T-Rex Tail | 5,000 Bells |
Tricera Fossil
| Fossil Name | Value at Nook's Store |
|---|
| Tricera Skull | 5,500 Bells |
| Tricera Torso | 5,000 Bells |
| Tricera Tail | 4,500 Bells |
Miscellaneous Fossils
| Fossil Name | Value at Nook's Store |
|---|
| Amber | 1,200 Bells |
| Ammonite | 1,100 Bells |
| Dino Droppings | 1,100 Bells |
| Dinosaur Egg | 1,400 Bells |
| Fern Fossil | 1,000 Bells |
| Dinosaur Track | 1,000 Bells |
| Archaeopteryx | 1,300 Bells |
| Pecking Man | 1,100 Bells |
| Shark Tooth | 1,000 Bells |
| Trilobite | 1,300 Bells |
Places
Town Hall
The player in Town HallThe player may check what the other villagers think about the environment, change the Town Tune (which plays every time a villager is talked to and every hour that passes), donate Bells to the poor people of a foreign town called Boondox, or move out of the town (that is to say, delete a character from the card). One can also mail letters at the Post Office to the right area of the Town Hall, save and/or withdraw Bells into a bank account (which accrues interest), save a letter, and pay off Tom Nook for the house. The last thing on the Town Hall is the Recycling Bin, which is emptied Mondays and Thursdays at 6 a.m and will occasionally hold random items.
Tom Nook's Store
Concept art for Nook's CrannyAt the beginning, Nook's "store" is actually only a wooden shack, featuring an extremely limited amount of items to choose from. Tom Nook changes his stock daily, offering different furniture piece and tools each day, though rarely anything too rare. As the player buys and sells more items from Nook, the store will expand and grow larger. Here's a brief explanation of the expansions:
- Nook's Cranny: Available from the start. It's a wooden shack with a very limited amount of items for sale.
- Nook n' Go: The first expansion of the store. It looks more like a mini-market and has a fair selection of items to choose from. The store will expand to this once you pay Nook 25,000 Bells or get the same amount of money from him by selling.
- Nookway: A supermarket with a good selection of items to buy. This expansion will be done when you've paid Nook around 90,000 Bells and/or have received from Nook 90,000 Bells.
- Nookingtons: The final store upgrade, with a huge selection of items, two floors full of goodies, and a barber shop. Tom Nook takes care of needs on the first floor, while his two nephews, Timmy and Tommy, take over on the second. Available after spending/selling 240,000 bells worth of stuff and having a friend from a different town shop at the store.
Another thing that makes Nook's store different than a regular one is the PTM system, a machine in the corner of the store that gives points every time an item is bought. For every 100 bells, 1 point is added. After reaching 300 points, the player acquires Membership Status, which earns a model of Nook's Cranny. At 5,000 points a 5% discount is offered for every item bought and the Nook n' Go model is rewarded, at 10,000 points a 10% discount is offered and the Nookway model is rewarded, and at 20,000 points a 20% discount is offered and the Nookington's model is rewarded.
The Able Sisters
This store is right next to Tom Nook's. It's clothing-orientated, so you'll only visit the shop to buy new clothes and accessories like a cool hat or sunglasses, etc. You can also design a pattern of your own for 360 Bells, and you can use that pattern as your clothing, your hat, a floor/wall decoration, or the town flag. You can also have one of your patterns displayed in the store, allowing you to double the amount of patterns you have, and allowing villagers to buy a copy of it for themselves. You can sell stuff in this store as well, but only clothing-orientated items and for competitive prices. The shop is run by two hedgehog sisters, Mabel and Sable, listed above.
Museum
Speaking with BlathersThis museum is completely empty at the beginning, with only Blathers the Owl at the entry hall, sitting alone and waiting for guests. After speaking with Blathers, the player can donate fish, insects, fossils or paintings (paintings are only found on Crazy Redd's store). You can also gain information on the museum, identify a fossil and, of course, look at the exhibits. At the beginning Blathers says he's rather ashamed that there's next to nothing in the museum, but as the player donates more he becomes quite proud of the progress.
Observatory - Located in the Museum building, the Observatory is run by Celeste, the owl sister of Blathers. Here the player can gaze at the stars through the telescope or create constellations in the sky, which will be shown at night on the top screen of the DS. After creating a constellation, Celeste asks for a name, and a time in which it can best be seen.
Coffee Shop - The Coffee Shop is also located in the Museum building. The owner of the Coffee Shop (The Roost) is a pigeon named Brewster, who is initially not very friendly nor open to others. The asking price for a cup of coffee is 200 bells, and at the beginning he will only say "it might be a tad expensive but it's worth it" and "thanks..." As the player visits his shop more often and drinks coffee from him, he'll warm up, start talking more, and ask if he can put pigeon milk into the coffee. Several other NPCs hang around the Roost at specific times, including Kapp'n, Pelly, Phyllis, Ressetti, Rover and other people. On Saturday evenings at 8 p.m., K.K. Slider performs.
Town Gate
One of the most important areas in town is the Town Gate. To someone who doesn't play this game with friends, the town gate makes almost no difference to them. However, this is the gateway to the outside world: through this gate, one can visit another town or have others visit them. In addition, this is where you manage your town flag and use the lost and found.
K.K. Slider Songs
- Agent K.K.
- Aloha K.K.
- Café K.K.
- Comrade K.K.
- DJ K.K.
- Forest Life
- Go K.K. Rider
- I Love You
- Imperial K.K.
- K.K. Aria
- K.K. Ballad
- K.K. Blues
- K.K. Bossa
- K.K. Calypso
- K.K. Casbah
- K.K. Chorale
- K.K. Condor
- K.K. Country
- K.K. Cruisin'
- K.K. D & B
- K.K. Dirge
- K.K. Dixie
- K.K. Etude
- K.K. Faire
- K.K. Folk
- K.K. Fusion
- K.K. Gumbo
- K.K. Jazz
- K.K. Lament
- K.K. Love Song
- K.K. Lullaby
- K.K. Mambo
- K.K. Marathon
- K.K. March
- K.K. Metal
- K.K. Ragtime
- K.K. Rally
- K.K. Reggae
- K.K. Rock
- K.K. Rockability
- K.K. Safari
- K.K. Salsa
- K.K. Samba
- K.K. Ska
- K.K. Song
- K.K. Soul
- K.K. Steppe
- K.K. Swing
- K.K. Tango
- K.K. Technopop
- K.K. Waltz
- K.K. Western
- King K.K.
- Lucky K.K.
- Marine Song 2001
- Mountain Song
- Mr. K.K.
- My Place
- Neapolitan
- Only Me
- Pondering
- Rockin' K.K.
- Señor K.K.
- Soulful K.K.
- Steep Hill
- Surfin' K.K.
- The K. Funk
- To the Edge
- Two Days Ago
Reception
As of March 31 2016, Animal Crossing Wild World has sold 11.75 million copies worldwide.
Log in to comment