Something went wrong. Try again later

MisterBananaFoam

This user has not updated recently.

109 0 16 7
Forum Posts Wiki Points Following Followers

Levels in Good Games that I Always Hate to Play

I like to reminisce upon the games of my youth sometimes, but I always dread having to replay certain segments of each game. It could be that the level is just too challenging, or that the level design makes it a tiresome chore to navigate around. Maybe it's rather dull and repetitive in contrast to the levels before it, or it could very well be a mix of all three. Nevertheless, these levels often make me either spit profanity like a drill sergeant or go to sleep. Here are some examples of Levels in Good Games that I Always Hate to Play. (Keep in mind that levels unlocked after you get the game's basic ending or bonus levels that have no bearing on your progress whatsoever do not count unless it's a very special case, like levels that are hard if you're going for 100% completion. Per usual I will add more examples as I think of them. Hopefully.)

List items

  • SIRENA BEACH/CORONA MOUNTAIN

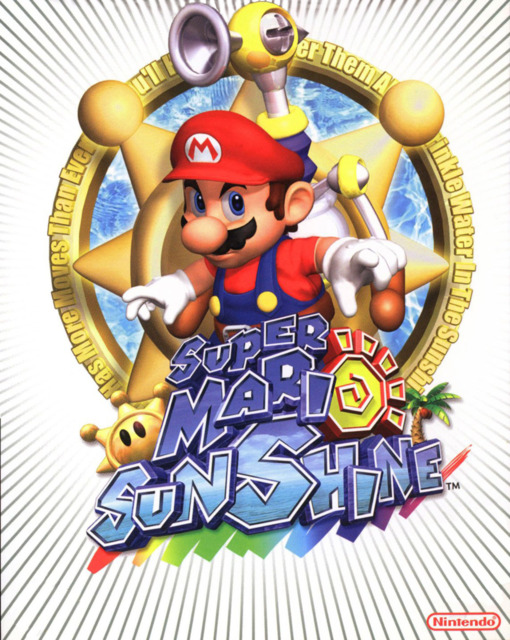
    Most of Sunshine is a pushover until you get Yoshi and open up the entrance to Sirena Beach, and at that point the difficulty curve practically forms a brick wall. To start the level off, you have to clean up a metric fuckton of goo splattered around the beach. Once you've done that, you have to fight the Manta Ray, which is widely considered to be one of the hardest boss fights in Sunshine. Spraying the Manta Ray splits it in half, and those halves split into more rays when sprayed until they get to the point where they can't divide themselves anymore and just disappear. What makes this boss a royal pain is that he likes to cover as much ground around the level as humanly possible, and since he's technically a transparent figure on the floor, there's no part of the ground he can't cover, which means you have to keep moving and hope you don't step on any of his clones. The fight gets much more tense once all of his replicas have split into their smallest sizes, at which point THEY ALL HOME IN ON YOU. And that's only the first Shine Sprite in the level! Wait until you have to contest with the bewildering puzzles hidden within the hotel, as well as yet ANOTHER boss whose length pretty much depends on how lucky you get. Add another F.L.U.D.D.-less mini-stage and a troublesome red coin mission and it's easy to see why Sirena Beach is one of Sunshine's least bright areas.

    Thus we get to Corona Mountain, the game's final stage before the fight with Bowser. Being inside an active volcano, the level is surrounded by a large vat of insta-kill lava, and there are several platforms embedded with timed spike traps. These aren't so bad once you get the timing down... but then you reach the wooden boat and all the confidence and skill you've used to get this far is tossed right the fuck out of the window. Using F.L.U.D.D., you have to spray water from the back of the boat and propel it forward. Simple enough, right? WRONG. The boat must have been programmed at the last minute or something, because it has a very annoying tendency to careen into the wall and break at the slightest burst of water. It's infuriating enough just trying to reach the final platform, but it gets even worse for those of you completionists out there, since you have to make a FULL CIRCLE PASS AROUND THE LAST PLATFORM to get the final remaining Blue Coins. And you thought making this thing go in a straight line was hard; just wait until you have to make it turn on a dime. Eeuch. If there was one point in the Mario series that seemed to be the most accurate representation of Hell on Earth, Corona Mountain definitely qualifies.

  • THE BLACK PALACE

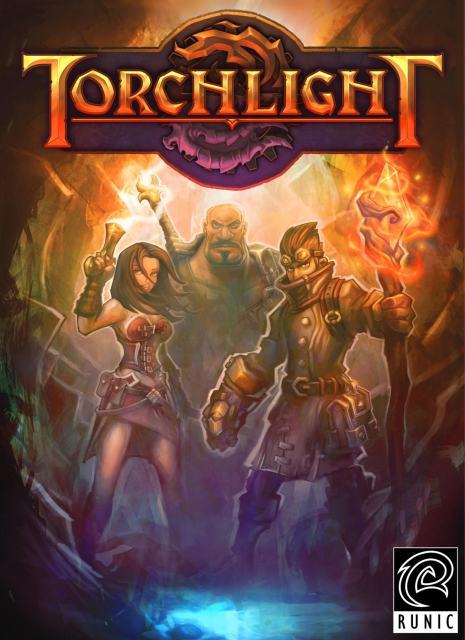
    I'm not going to mince words; most of Torchlight is thoughtlessly easy to play through. At a certain point, I had to force myself to keep playing just because of how overleveled I was compared to every other mob on that floor. Then you storm into the Black Palace and promptly get swarmed and charred to a crisp by a pack of Dragonkin.

    To simply call this level unfair would be selling it WAY too short. Whereas mobs would only spawn in small groups on previous dungeons, in the Black Palace they spawn in DROVES. You practically have to swim through an ocean of them just to get to the next floor, and not only are they plentiful, they're also highly deadly. Dragonkin are built tough and have a nasty fire breath attack that saps your health quickly, and Dark Zealots... ugh... just don't even get me STARTED on the fucking Dark Zealots. They can practically SNIPE you with their obnoxiously overpowered hitscan lightning attacks and they always spawn far away from you. If you don't immediately take out the Dark Zealots and the Dragonkin then you've just bought yourself a one-way ticket to Corpseville, Nebraska. If you decide to potion-spam your way through the Black Palace, well, I won't pity you, because I fail to see how this stupid dungeon can be beaten otherwise.

  • QUARANTINE ZONE/GRAVEMIND

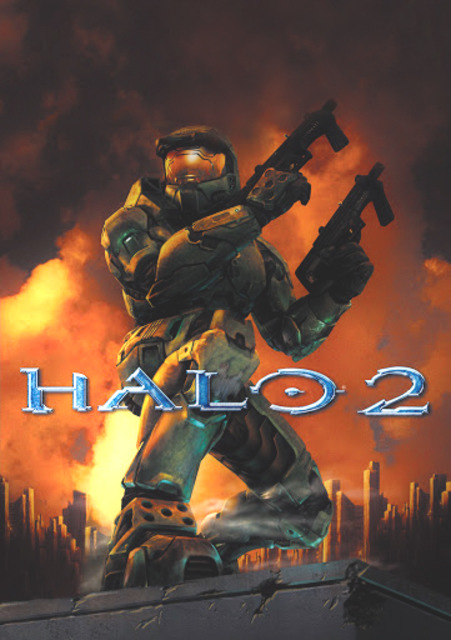
    Okay, so Outskirts is widely loathed on Legendary difficulty for the instant-kill, hyper-accurate jackal snipers that I mentioned on my 'game mechanics' list, but speaking from the viewpoint of a kid who never played games on a difficulty higher than Medium or Normal, I had a far less joyful time romping through levels 11 and 12.

    Quarantine Zone is basically a long hallway of flood-infested combat parasites that wield shotguns and rocket launchers in close combat. Notice that I said 'rocket launchers.' Fun thing to note is that rocket launchers tend to murder you instantaneously if they come into contact with anything solid that's standing within five feet of you. On Normal difficulty. Then you have the miniature infection parasites that come in swarms and latch onto you, draining your health at an alarming rate. And we have enemies that are specifically designed to carry these things around, and they have a nasty habit of either exploding and releasing them on their own or releasing them once they've been damaged enough. Oh, and there are sentinels, as well. Lovely.

    Gravemind sucks because it's basically the same as the above level, except the Flood are replaced with goddamn near EVERY ENEMY IN THE GAME, including Brutes, Elites, Grunts, Jackals, Drones, and yes, Hunters, with little cover to shield yourself and a section where you have to take on a party of Brutes and Hunters within a cramped room, and, to top it all off, the level takes eons to complete. You'll get used to reverting to past checkpoints quite a bit in this stage.

  • BOWSER'S BACK PAIN SEGMENT

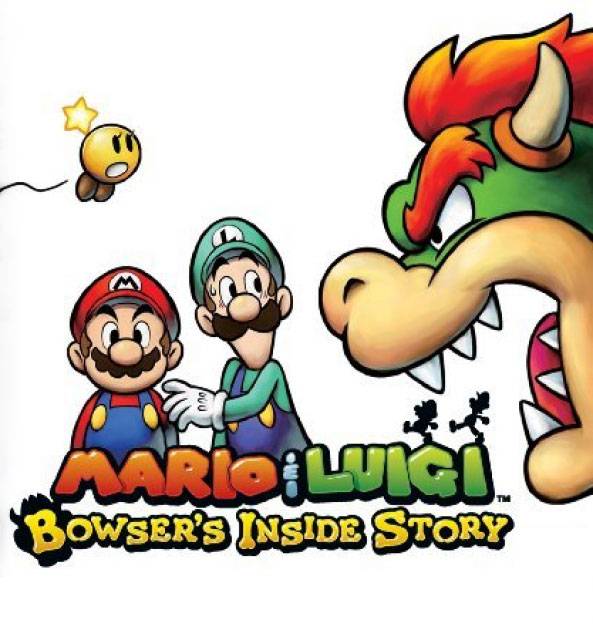
    Just reading that above statement makes it sound stupid, doesn't it? Well, spoiler alert, yes, it is indeed that stupid.

    This portion of the game is by no means hard. In fact, you literally don't have to do anything to complete it. But here's the kicker: you have to close your DS and wait, for an unspecified time, for Bowser's back pain to go away. I'm not entirely sure how long the segment lasts, but it's dumb, pointless, and drags out an otherwise substandard title. There is a cheat code that speeds up Bowser's recovery to a few seconds, but as I was on a trip to Washington D.C. at the time that I played through this game, I never found or utilized said code, so I just had to sit and wait it out.

    I mean, it would be one thing if the game had a day-to-day system like Pokemon Channel or Animal Crossing where you can only progress so far each day, but having to wait for one specific segment of the game to go away is cruel, especially when you have some spare time to kill.

  • MINE CART CARNAGE/MINE CART MADNESS

    Yeah, you all can stuff it with your Stop & Go Station, Snow Barrel Blast, and Oil Drum Alley and whatnot. At least on those levels you could attempt them at your own pace.

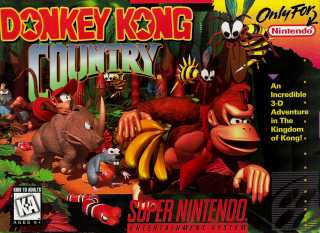
    The mine cart levels are on a whole other spectrum, though. You have, at maximum, two hit points to veer your way through a mine shaft riddled with cliffs, broken railings, Kremlings that charge at you head-on, bees, stationary hazards and all sorts of gobbledygook that I could keep mentioning for hours on end. It wouldn't be too much of a problem, except DK is always going at a set speed that can't be changed, you can't move the cart backwards or forwards, and the only think you CAN do is jump whenever you encounter a hazard on the tracks, which is ALL THE DAMN TIME. Mine Cart Carnage comes early on and is a difficult level in its own right, but Madness is very late into the game, is even more unpredictable and introduces a completely new jumping mechanic separate from the one in the first level, which you have to, once again, adjust to. I hope these levels suffer a massive cave-in one day, preferably with me outside of it.

  • DOWN HOME COOKING

    No, this level isn't a cooking minigame, (thank the heavens) but after the lengthy incursion I undertook just to get through it, I sorely wish it was.

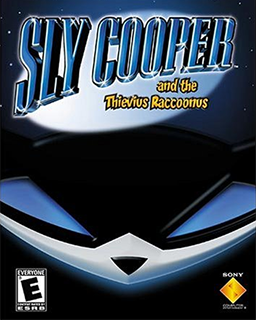
    To summarize the mission objectives, a ghastly floating cat, presumed to be one of Mz. Ruby's voodoo army, withholds the Treasure Key for this level until you manage to attack 50 chickens with your cane so the ghost can cook itself a pot of gumbo. For some arbitrary reason, however, you're also timed at 1 minute and 30 seconds, which means you have to keep moving posthaste in order to fill the quota, but THEN there are these bomb-toting roosters that get released into the room every five goddamn seconds and try to kamikaze you, and in the first Sly Cooper you're dead with one blow, so if one of these guys runs into you, not only do you lose a life but you have to start the entire challenge over again. The only pragmatic way to dispose of the roosters is to lure two of them into one another, which is hard enough considering both of them tend to spawn on opposite sides of the chicken coop. It becomes a little more bearable if you have a lucky horseshoe or two in your possession (which alleviates damage from a single hit) but if you're diving in without one you had better bring some keen reflexes with you.

  • GRUNTY INDUSTRIES

    I'm sensing a theme here. The two most frustrating levels in Banjo-Kazooie and its sequel seem to be oriented around nasty industrial workplaces. Perhaps it's a stealth pun at the hazardous conditions one has to deal with when working in the industrial field? Only the developers can answer that one, but I doubt they can answer for why they decided to make this level so aggravating.

    First off, acquired enough Jiggies to access Grunty Industries? Congratulations, you still can't explore most of the level yet. Turns out the massive front door is sealed tight even when the level is unlocked, and the only way to get into Grunty Industries is by TAKING THE TRAIN. Yeah, that one mechanic that is supposed to take you from level to level with nary a load screen, that's usually activated from within the levels themselves? Yeah, apparently you have to use that to get in. Who could have guessed THAT on their first playthrough?

    It only gets worse from here, though. Not only is it hard to even get in, it's also hard to get around. The level is divided into five different floors, each of them practically devoid of any sense of direction. This often means that you'll be stuck trying to figure out which of the five hundred friggin' passageways in the current room leads to the fourth floor. There are also some frustrating minigames as well, including the first-person area where you have to wade through a labyrinth of brick rooms and walls to eviscerate what can only be described as giant shit stains clinging to the ventilation shafts before they flood the air with toxic gas and kill you. There are several giant pistons and conveyor belts, a really underwhelming and unwieldy Wumba transformation that turns you into a goddamn washing machine, and an infuriating boss fight against a massive blowtorch that electrocutes the floor and has a crapton of health. I'm not exactly sure what Rare is going for with their take on the industrial, er, industry, but if it's anything like this then I'm staying as far away as I can from it.

    Also, what in the hell DO they manufacture in Grunty Industries? Brooms?

  • RUSTY BUCKET BAY

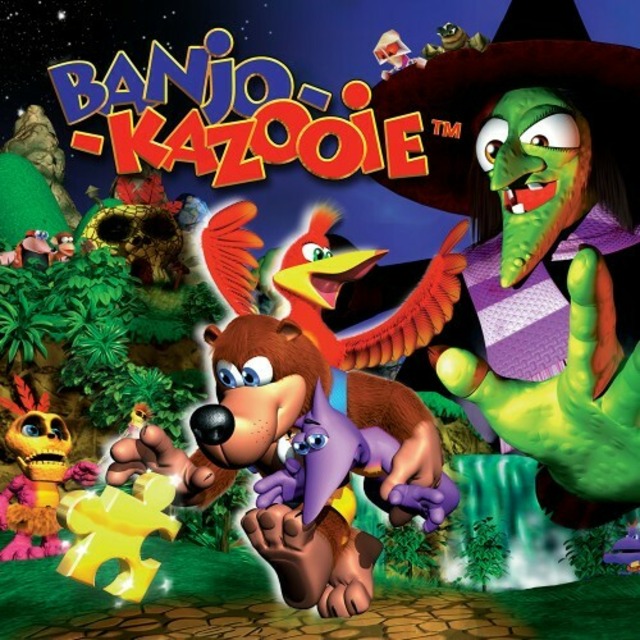
    In a time where Nintendo had practically monopolized the platforming genre, one game, Banjo-Kazooie, rose from the ashes of third-party development and practically trumped all others. I still consider this one of the best titles in gaming history to this day, and I often find myself crawling back to it for nostalgia's sake... well, until I reach Rusty Bucket Bay, that is. Then I gets drenched in my own sweat from trying to surmount all of this level's hazards.

    I don't think there's a friggin' portion of Rusty Bucket Bay that ISN'T trying to kill you. Let's see... there's the water in the docking area takes away air bubbles ON THE SURFACE, and drowns you TWICE as fast underwater, the invincible, mortifying tube monsters on the boat that chomp at you, the multiple rooms on the boat filled with hazards and tough sailors, the inner workings of the boat where you have to navigate a series of rotating cogs and metal platforms suspended above a bottomless pit, and countless, COUNTLESS other things. I defy anyone to attempt to collect all 100 notes on this level without dying and using a guide. It's immensely difficult, especially the cog section under the ship's hull, where I'm pretty sure everyone has died at least once in during their playthrough of Banjo-Kazooie.

    The 360 users luck out because the notes don't reset, but for kids like me who played BK the old-fashioned way on the Nintendo 64, this level gave me so much hell. Hope you've acquired a few health upgrades beforehand...

  • ACT IV: HIVE

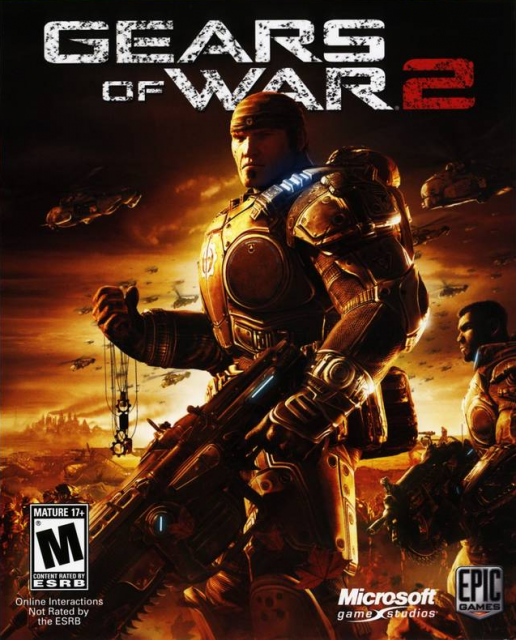
    The whole damn chapter. I'm dead serious. While there were some pretty ridiculous areas prior to Act IV, none of them even compare to it. A good chunk of your enemies are equipped with near-perfectly-accurate crossbows that fire explosive rounds that stick to you and blow you into a pile of bloodied giblets should they come into contact with your fucking chin hairs, your sense of direction WILL be put off by several passageways that look too similar to each other, and sometimes what little cover is available to you isn't permanent and is often switched off when someone pulls a level 100 feet away from you, requiring you to huddle around the lever and guard it from enemy personnel. Oh, did I mention you fight Skorge on this level? He's not as tough as General RAAM was in the first game, but he has at least a couple of instant-death moves and tends to flank you with Tickers at any given moment. It's fitting that the level that takes place in the Locust stronghold would be the hardest in the game, but it still gives me grief to this day. For those of you attempting it on Insane without any co-op partners to help you... heh... good luck with that.

  • THE FIRE TEMPLE

    Aaaaaaaaaah, I bet you thought I was gonna put the Water Temple down, didn't you? Well, surprisingly, while the Water Temple was set up in a pretty arbitrary fashion and Dark Link was somewhat of a pain, I had a far worse time with the Fire Temple earlier on.

    First of all, the level is absolutely overwhelming with fire bats and other monsters that can quickly become a nuisance. Second, every path is segmented so awkwardly that I can barely tell where the hell I'm supposed to be going even with judicious use of the dungeon map. Third, there are quite a few disorienting mazes, and if I recall correctly at least one of them has harmful walls. Fourth, there are a few areas where falling all the way down to the first floor is VERY likely, which means you'll not only lose a ton of health but you also have to trek back up to the spot that you fell from. Fifth, the item you get for this dungeon, the Megaton Hammer, is underwhelming; there are only a few specific uses for it in the entire game and it isn't very useful as a combat weapon except for the boss room. And last but not least, Volvagia, the level's boss, is a strong opponent who is usually invincible to your attacks and can plow right through you for an insane amount of damage.

    I remember specifically being stuck on this level forever because of this one STUPID FRIGGIN' DOOR that was hidden BEHIND A STATUE at the beginning of the dungeon that completely eluded my sight the first time I entered the level. To be fair, this was partially due to my poor path-finding skills, but it doesn't excuse the rest of this level's treachery.

  • NOVA PROSPEKT

    Half-Life 2 is an astounding game in terms of puzzle and combat variety, but there are quite a few low points here and there, and the lowest for me had to be Nova Prospekt. It's basically a gigantic romp through a Combine penitentiary, except all of the walls and areas look the same so you can't tell if you've already been to certain areas or not. Since this is after the chapter which you obtain the Bugbait and there's no longer any sand anywhere, you can't summon Antlions to assist you, but that's the least of your worries. Inside the dreary corridors of Nova Prospekt, you have to face off with practically an entire ARMY of Combine soldiers armed with machine guns and shotguns, and all of them choose to take cover in spots where it's practically impossible to land a shot on them. There is at least one point where you have to fend off an Antlion Guard, who is phenomenally more tough to kill than its simple counterparts as it has several times more health, is much bigger and faster and can crack your face open within seconds of fighting him, and there are at least THREE points where you have to stand your ground and defend against wave after wave of Combine soldiers, shotgunners, and elite commanders. All of the defense scenarios drag on for several minutes and require taking full advantage of turret placement strategies in order to move on unscathed. If all of that wasn't enough for you, then you'll be happy to find out that Nova Prospekt is no slouch when it comes to agonizing platforming puzzles and zombie infestations, either. Nova Prospekt takes every irritating obstacle this game could possibly throw at you, clumps it into an enormous ball of crap and runs a marathon with it. I would almost rather go to an actual prison than play this level again.

  • RAINING BLOOD

    Experienced veterans of the Guitar Hero franchise need only recognize two words before being driven into a crazed fit - Mosh 1. If you haven't outright mastered the hammer-on and pull-off techniques, this one 20-second long tidal wave of pure insanity will bring your progress to a screeching halt. A screeching, thrashing, and noisy halt.

  • FLEET GLIDE GALAXY

    I've probably already touched on this in my list of game mechanics that suck the fun out of certain parts of other games, but I'm not a huge fan of the Fluzzard levels. They sure do look pretty, and the first one isn't even that bad even with the wonky controls, but the second Fluzzard galaxy very well had me in stitches from hitting my head against the wall. The first Fluzzard flight took place in a calm forest and even IT was pretty challenging in its own merit. This mission takes place on a BATTLE CARRIER.

    Yeah. Pretty bad.

    Getting into detail a bit more, this iteration of the Fluzzard levels sees our hero avoiding massive swarms of Bullet and Banzai Bills, volleys from moles in turrets, several instant-death wall hazards and crumbling architecture in practically every area of the level. There's not a single point where you aren't avoiding anything, and to make matters worse you have to complete the level in 1 minute and thirty seconds, which would be doable if it wasn't for the stupid amount of crap being thrown at you at once. And keeping in tradition, the second challenge of this level is EVEN WORSE. Here, you have to race against a group of birds, come in first place, and avoid EVEN MORE enemies while doing so. It's goddamn insane. And don't even get me friggin' STARTED on the retarded Green Star missions. I swear, I spent DAYS looking for those things on this mission.

  • GHOSTLY GALAXY DAREDEVIL COMET

    It is REALLY hard for me to pinpoint a specific level in Galaxy that I had trouble with because I didn't have a hard time with it at all. Not even some of the out-of-the-way galaxies proved to be too problematic for me to complete, but if I was to narrow the criteria down to specific missions the Daredevil Comet within the Ghostly Galaxy certainly takes the cake.

    For those of you who haven't played this outing yet, Comets are basically level modifiers that add a certain challenge to an objective you already completed in the level, such as adding a time limit to the first level or having you race against a clone of yourself to the finish line. The Daredevil Comet takes your normal 3-point health bar and does away with it; if you come in contact with any hazards whatsoever, you die and have to start the entire level over again. One of the previous missions in the Ghostly Galaxy is a fight against Bouldergeist, a hulking, haunted rock formation in the shape of a ghost. His main attack is chucking a bunch of rocks at you in quick succession, and after you dodge them you have to pick up the Bomb Boos that materialize out of the black rocks and fling them into Bouldergeist's stomach a couple of times to break it open, then hurl another Bomb Boo at the boss's exposed welt and he takes damage. In the second half of the fight, he gains a pair of giant chiseled hands which he can use to pound the ground and punch at you. The problem with this portion of the fight is that trying to swing a Bomb Boo at Bouldergeist's main body is made much harder by his hands getting in the way, which often block your attacks if you don't time them carefully. Sure, they do fall apart after a few blasts, but they'll simply reanimate a few seconds later. All the while, you have to dodge rows of stalagmites and boulders being thrown at you. It's hard enough to do on its own.

    Now put two and two together here. You have Bouldergeist, a tricky foe and the hardest boss fight in the game bar none, and you're not even allowed to take a single hit from him. By adding this simple rule, the developers have created a disastrously formidable challenge that will take at least TWICE as long to get the hang of as most of the other missions, possibly combined. If only Mario had brought a pickaxe or something...

  • TINY-HUGE ISLAND/WING MARIO OVER THE RAINBOW

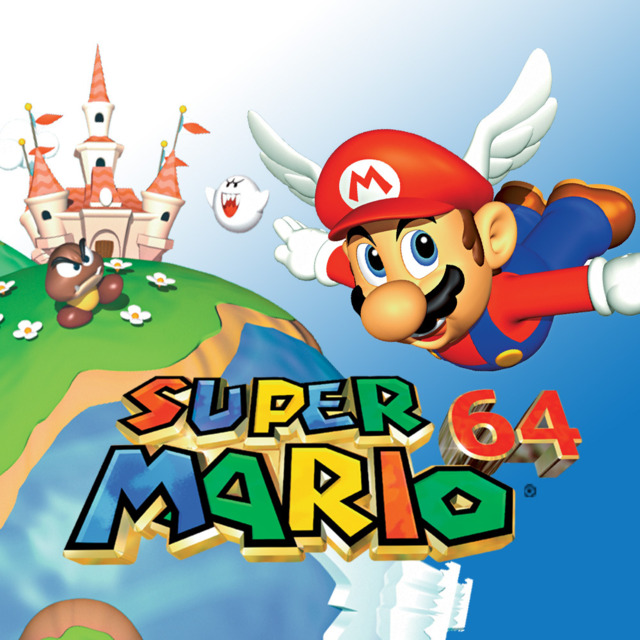
    Tiny-Huge Island seemed to be inspired by World 4 of Super Mario Bros. 3, in which the normal-sized level can be switched into an enlarged version and vice versa by traveling through specific areas or warp pipes. This world always represented the point of the game where my progress came to an abrupt end, and Tiny-Huge Island from Super Mario 64, while not quite as troublesome as its 2D predecessor, still has some major issues. In the painting room, you can actually choose which version of the level you want to start out in, although you always start the level in the same enclosed space behind a gravely wall. By jumping into a few set warp pipes throughout the level, you can change the level's size from minuscule to large. It doesn't matter too much, however, because the tiny version of the level mainly just serves as a means to get around faster and locate a couple of secrets. Almost all of Tiny-Huge Island's power stars must be obtained on the large portion, and they are pretty aggravating to collect, from battling it out against several gigantic Piranha Plants on a steep plateau to racing against the fleeting Koopa the Quick. The worst thing about Tiny-Huge Island, however, has to be the fire spewers. There are literally DOZENS of these things spread all over the island on both variations of the level, and being hit by one makes Mario run around uncontrollably while quickly losing a third of your life bar unless you can jump into a body of water fast. Since the level is situated above a bottomless pit, and there are several areas with precarious cliffs and gusts of wind, you REALLY don't want to lose control of Mario. Wiggler's cave is pretty bad, too, ESPECIALLY the 8 red coin mission where you have to make several cautious jumps over another looming abyss inside a cramped cave with little space to land on the platforms.

    The real kicker of Mario 64, however, is Wing Mario Over the Rainbow, hands down. It's not a regular 6-star level like Rainbow Ride, oh no; it's a level solely dedicated to a red coin mission. And it takes place in the clouds above another steep drop. There is very little ground in the level since most of the flooring is comprised of floating clouds, so you have to use the stiff Wing Cap controls to fly between the platforms. Some of them can be really far up into the air, requiring either extreme flight skills or a well-aimed shot from the cannon on the pink platform near the bottom, and one has you grabbing onto a POLE (in the defense of this case, there are quite a few poles under the cloud, but it's still VERY easy to miss your mark and fly right past them). Worse still, not every platform contains a wing cap, so if your power-up runs out while you're on a faraway cloud you're pretty much screwed and have to commit suicide. Actually, no, you can't even do THAT, because falling into the void under the level, rather than killing you, dumps you INTO THE CASTLE MOAT. This means wasting another two or three minutes going back into the castle and trekking up the stairs just so you can try again. It's pretty silly how the hardest level in Super Mario 64 happens to be a side-stage, but it's brutal nonetheless, and if you're not going for a 100% completion run you're better off just skipping this one out.

  • THE NIGHTMARE SEQUENCES

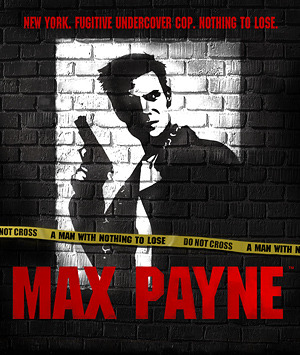
    Max Payne is a third-person shooter game filled with tons of action. There isn't as much time spent jumping between platforms or ledges as there is running, gunning, and slow-motioning your way through several squads of gangsters, criminals, and cultists, and this is why the Nightmare sequences are particularly vile in the eyes of many a gamer. The freaky imagery and distorted audio clips of Max's deceased wife and child are actually pretty neat, if not repetitive, but then you get to a large, pitch-black room with a blood trail stemming out into the nothingness. You have to walk across this trail of blood like a tightrope act, except the line is very thin and Max begins to slip if you're so much as a centimeter off balance. Fall off the trail and you plummet to your death and have to start again from your last save.

    But wait, there's more! Once you get past a certain point, you find out that the blood trail section is a MAZE. That's right, a maze of razor-thin blood splatter suspended above a dark void which is very easy to slip off of, and to make matters even worse, reaching a dead end plays the terrible noise of Max's wife belting out a blood-curdling scream, and the last thing you need while navigating a tightrope is a scripted audio jump scare. She also keeps calling out Max's name in the background throughout the ENTIRE SECTION, accompanied by Max's infant child's faint crying noises. One more thing... Did I mention there are certain points where you have to make LEAPS OF FAITH to progress? Holy God, what were these guys thinking?! It's no wonder they gave the PC version a save state feature. For all of you playing this on console, I weep for your poor souls.

  • SLIPPERY CLIMB

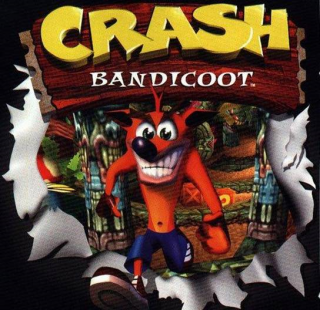
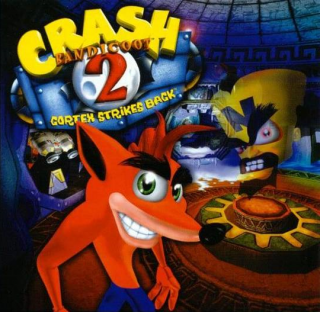
    Crash Bandicoot will always be a staple of excellency for the PlayStation in my mind, but Slippery Climb will congruently always affix itself as one of the most dreadful stages in the series' history.

    The entire level is presented on a 2D plane akin to Mario Bros, with a couple of wall pockets that Crash can jump into to collect hidden crates and other goodies, but that's beside the point. Right from the get-go you're challenged to hurl yourself over rotating platforms, bounce off of vultures to cross gaps and dodge indiscernible clawed arms reaching out at you from grates in the wall, and this being a Crash game, you're only given about one or two hit points to do it. This wouldn't be so bad but the checkpoints are so distant from each other that it could take a good five minutes to reach the first one. There are also staircases that retract and cause you to slip back down to the bottom, and those require exact timing in order to cross. Oh, and good luck going for the gem on this level, since a lot of the crates hiding in the aforementioned wall pockets are very hard to get to due to the erratic platform movement. Crash Bandicoot's levels can take mere minutes to beat, but with Slippery Climb you'll be lucky if you finish it within the hour.

  • MEDAL TOURNAMENTS

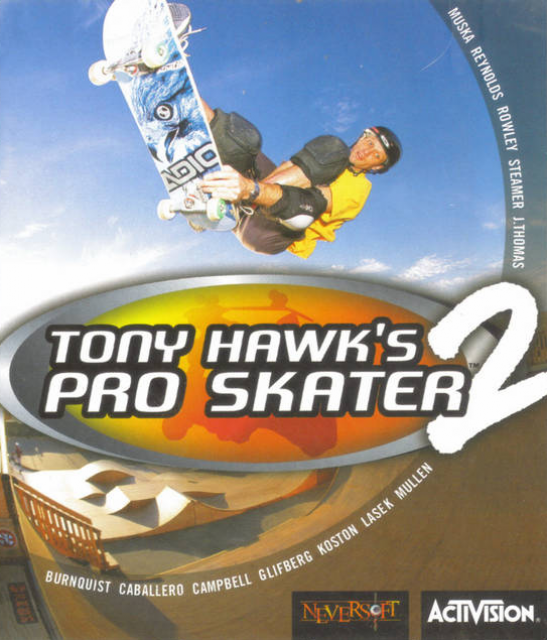
    To progress to the next stage in each Tony Hawk's Pro Skater game, most of the time you have to complete certain goals to get money or tapes, such as grinding a certain ledge or getting enough points within the two minute time limit. Then there are the tournament stages.

    The tournament judges each round by its own point system that goes up when the player performs and successfully lands long trick chains, and goes down whenever the player bails or repeats a trick too many times. If you bail more than twice, don't count on getting much further than third place if you're lucky. Your runs pretty much have to be flawless if you want the gold, and while you can try to play it safe by doing air tricks in the half-pipe you still won't get as many points as you would by performing a long combo, and if you screw one of those up your score drops tremendously. Getting gold on all three tournaments in the first few games is especially difficult due to the limited control scheme and, in the first game, not being able to perform a manual. The only saving grace is that you get three tries to get as good a score as you can and the game averages your two best scores, but those two scores better be at least 90 or you're not going anywhere.

  • 4-10

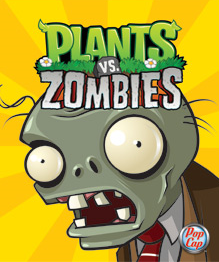
    PvZ is mostly easy-going fun and it's very pleasing to look at. It's a pity that on level 4-10 I can't see anything.

    First off, it's a conveyor belt level, which means whether you survive the night or not falls down upon hoping that you get enough good plants to hold off the horde. Second, it's a pool level. This means two rows are basically blocked off from you until you can plant lily pads on top of them, which is, again, based entirely on luck. Third, this level is pretty late in the game so by this point you're likely being bombarded with tough enemy types such as the dreaded Zomboni and the ruthless digger zombies.

    The real kicker of this level, though, is that it is COMPLETELY COVERED IN DARKNESS most of the time and the only way you can see what is going on is to wait for the lightning to flash. Very briefly. Before this, you had the fog levels, which were a pain but at least you could get rid of the fog and see your own battlements. Since the zombies are encased in darkness for a few seconds, you have to act very quickly when the lightning flashes to set up the rows you need to defend, and God help you if you get attacked by water zombies early on.

    Thunderbolts and lightning can be very very frightening indeed, but in this case, it's more like very very frustrating.

  • FULL MOON

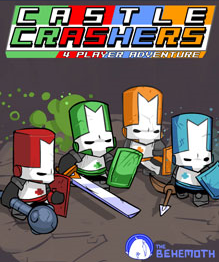
    Castle Crashers is one of my favorite beat-em-ups of this generation. It manages to strike a perfect balance with fluent controls, unique artwork and plenty of scenes that are worthy of a few chortles. Once you get about halfway through the game, however, you'll have to encounter the wrath of Full Moon, and trust me when I say it's not going to be pretty.

    A good strategy to getting through a sizable chunk of this game is to juggle your enemies with air attacks and the unlockable 'x+y' combo that uppercuts them skyward. That doesn't work here. The Black Knights that populate this grotto must have filled their suits with lead, since they're so heavy that lifting them in the air is impossible. To make matters worse, they can converge on you and hit you HARD, even if you've been consistently grinding and leveling up to this point. And if you thought fighting the normal black knights was challenging, wait until their muscular counterpart comes in to tear you a new one. Not only is it required to beat this level to complete the game, one of the secrets - a key that unlocks the door to one of the last animal orbs - is buried somewhere in the cliffs near the exit.

    The objective of Castle Crashers is to rescue all four princesses, but when you find yourself under the Full Moon, you'll probably suffice with two.

  • ROCK IT/PACK ATTACK

    Seriously, how do you take a jetpack space station level and fuck it up this bad?

    I'll tell you how; the controls. Instead of being a sidescrolling jetpack level, Naughty Dog decided to be bastards and coded it as a 3D, forward-motion level. Your jetpack maneuvers on an XZ plane with the control stick, and goes forward and backward by pressing the X and O buttons. If you could program tank controls onto a jetpack mission, this would be it, and since you're in space, friction barely exists, which means you'll inevitably barrel straight into a superheated beam if you don't keep alternating the forward and reverse buttons. Then there's the floating scientist enemy who zaps you if you get too close at the wrong time, so you'll have to be doing even more back-and-forth motions to avoid his attack and knock him back into the disintegration field behind him. It's hard enough for players who just want to beat the game, but for completionists? Have fun trudging back and forth with utmost precision trying to bash open all the crates, especially the ones next to the flailing electric cables and enormous lasers!

  • YOSHI VALLEY/BANSHEE BOARDWALK

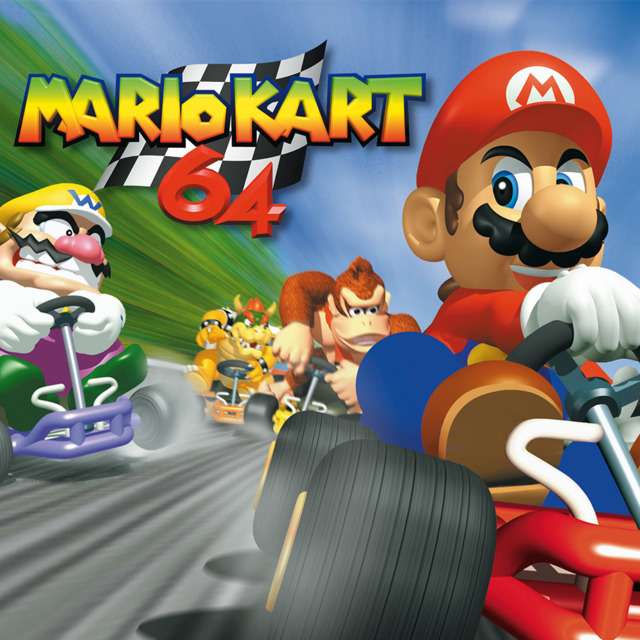
    It almost sounds crazy that Rainbow Road isn't the hardest level in Mario Kart for a change, but in 64 it was merely a lengthy course, and it even had guardrails everywhere, so you'd have to deliberately try to fall off the map. Two of the other courses in the Special Cup, Yoshi Valley and Banshee Boardwalk, didn't show such mercy.

    Yoshi Valley starts off like any other course... until you look to the left and you see QUESTION MARKS where the race positions usually are. Then you're dumped into the valley, and instead of being a conventional, one-way course, it's a monstrous maze of cliff top trails and pathways that makes the map look like a huge, deformed pretzel. I'm not kidding, go Google up the map and spend about half a minute trying to make sense of the passages through the valley. Worse still, the track is littered with Spinies, and if you run into one your chances of plummeting down to the bottom of the course escalate from very likely to almost certainly. If you somehow manage to get out of that hellhole and advance towards the bridge, there's a fucking gigantic Yoshi egg just rolling in circles that can flatten you and leave you motionless for a good four or five seconds.

    Now, I know what you're thinking, what could possibly be worse than all that? Well, if your answer was sharp turns on a decaying, broken boardwalk with holes in it and bats pushing you around and into said holes, then congratulations, you've described my experience with Banshee Boardwalk. The guardrails are supremely inconsistent on this map, and being hit with so much as a banana peel can end up flinging you into the ocean below, costing you about eight precious seconds as Lakitu drags you back up out of the water. The only, and I repeat, ONLY good thing about this level is the fact that its French title translates out to 'Lugubrious Pontoon,' which is one of the funniest things I've ever heard in my life.

  • PAC-LAND

    I thought Nintendo had taken a hint from Rainbow Cruise and Rumble Falls, but I guess not. Autoscrolling stages are the devil, and out of all the newest stages introduced in the new version for Wii U, Pac-Land definitely takes the cake as the worst of the lot.

    It looks absolutely fugly, for one. Everything in the background looks like it was hastily thrown together in MS Paint, and while I realize that it's how the original game was presented, Nintendo could have chosen many other stages from Pac-Man's historical lineage, such as a stage from one of the Pac-Man World games, or hell, even one from the reboot based off the kids cartoon show. Back on track, however, the second biggest nuisance about this stage is the random inclusion of fence posts, fire hydrants, and other assorted protrusions poking out of the landscape. It stops your momentum and allows for the opponents to easily recover from a well-timed smash attack. If none of that sealed the deal, the stage speeds up after it reaches the halfway point, often leaving most fighters in the dust, especially those with poor recovery options.

    Smash for Wii U was packed with stages with intrusive, unnecessary hazards, but Pac-Land trumps all of them in sheer luridness. I would much rather have had them port the excellent Pac-Maze stage from the 3DS version to the Wii U instead.

  • LABYRINTH ZONE

    I can't believe that SEGA took so much time into touting how great Sonic's speed mechanics were and then designed a miserable, bogged-down water level like Labyrinth Zone. It would be considered a slow, painful mess by ANY game's standards, let alone goddamned Sonic the Hedgehog's.

    My first gripe with it is that there is absolutely no indication beforehand that Labyrinth Zone is a water level. You can't tell by the title when going in, so you probably just expected another confined, puzzle-based level like Marble Zone was (and that one sucked to begin with, too). Once you're in, you're bound to stay in for a great while - Sonic moves about as fast as eroded soil underwater, and there are spikes abound just about anywhere you could imagine, with platforms lifting you up into said spikes and enemies entirely shielded BY spikes. They should've called this level 'Spike Shower Zone.'

    But that's not the worst part. Sonic, unlike Mario, is not blessed with the ability of underwater breathing, forcing you to stop at every patch of bubbles you see to refuel his invisible air meter. Your only clue as to how much oxygen you have left are the three chimes in the background, and if you wait too long, you'll be thrown into a panic from the increasingly-terrifying drowning motif.

    This mechanic, alongside everything else, further extends the length of an already insidiously-long level. They probably named it Labyrinth Zone because this is the level where most gamers get stuck and couldn't get out. Cheeky bastards.

  • STONE TOWER TEMPLE

    Majora's Mask's dungeons are a tad less straightforward than the other main series Zelda games, which does not play to its strengths when a malicious level like Stone Tower Temple shows up. Already at the tail end of the game, it takes the longest for most gamers to comprehend and complete by far, even moreso than the cryptic and sadistic Great Bay Temple.

    It really says something about the Stone Tower Temple when even so much as getting there is an exercise in patience and futility. You learn a song on the Ocarina of Time called the Elegy of Emptiness shortly before arriving at the base of the temple. This song, when played, constructs a stone statue of the character you are currently controlling. Like most songs, it slows you down tremendously, but unlike the other songs in the game, you don't have the fortune of only having to play it once to get to where you need to go. There are at least 8 switches leading up to the dungeon itself that you have to play the Elegy on, and watch a cutscene for, which means you'll be waiting a long damn time.

    And we're not even into the actual goddamn temple yet! Once you're inside, it gets even more maddening - there are several mechanics introduced in this dungeon alongside having to play the Elegy a few dozen times more, including light redirection with the Mirror Shield, utilization of every transformation mask and a very convoluted, incomprehensible gravity switch mechanic. Then you get to the boss itself, Twinmold, which, while a pushover in the original version, is a chaotic encounter in the 3DS version due to the revamped mechanics of the Giant's Mask. Lest we not forget the time limit mechanic and the Stray Fairy sidequest... we truly have met with a terrible fate.

  • LOST IZALITH

    Wouldn't you know it, the hardest level in one of the hardest games ever made is the mirror equivalent to Sheol, Hades, Heck, the Underworld... whatever you prefer. Sure, Dark Souls has plenty of areas where getting stuck for weeks on end is an inevitability... Blighttown, Sen's Fortress, the crystal cave before Seath's boss fight, they're all infamous in their own right, but they don't hold a candle to the melting inferno that is Lost Izalith.

    Lost Izalith is accessible after you surmount Blighttown and defeat Quelaag the Chaos Witch, which is roughly about a quarter of the way through the game. You won't bother going into it until well past that point if you wish to keep your sanity, however, because you have to defeat the Ceaseless Discharge to even gain access to most of the area, and with a name like that, you KNOW it means business. It's one of the dodgiest and cheap bosses you'll encounter if you fightit the normal way, but it can be lured to a spot where it cannot move or attack, and is easily dispatched by hacking at its arm, knocking it into a pit and killing it instantly.

    Unfortunately, this is where the level's mercy runs dry. Right after this, if you intend to go any further, you have to brute force your way through several minotaur demons, a battalion of CLONES OF A BOSS that you fought EARLIER IN THE GAME (sometimes TWO AT A TIME), gigantic centipede monsters that can degrade your equipment, and all sorts of nasty traps and miscellaneous hazards, all of which are easily capable of slicing off your life bar in one or two good hits.

    This isn't even delving into the boss fights, which are some of the most ludicrously taxing and soul-crushing fights in the ENTIRE SERIES. And there's four of them! FOUR! In pretty much every other area of the game, you may have to fight, say, two at maximum.

    There's the Demon Firesage, whose name is a lie as its attacks aren't even fire-based, pulling a bait-and-switch on players who stack fire resistance for the fight. Then you have to contend with the Centipede Demon to gain access to a ring that allows you to traverse over the lava, and you have literally two small islands of rock to fight the damn thing on, as the rest of his arena is covered in magma. Not to mention he can lay you out with maybe two attacks tops. At the culmination of your cumbersome trip to Hell is the Bed of Chaos, easily the cheapest and most frustrating fight in the game, as it's not even clear how you're supposed to HURT the damn thing and it gains so many stupid arena-spanning attacks that it practically becomes a luck-based fight.

    So there you have it, if you're looking for the creme de la creme of cheapness and unholy difficulty in Dark Souls, look no further than Lordran's own personal underworld. You'll link the fire, alright... when you burn in this place for damn near an eternity.
  • THE CORE

    It kind of goes without saying, but if you haven't played the game yet, do be warned that this entry does involve talking about near-endgame material.

    It's such a picky subject talking about this game. It's so ambiguous in its presentation and its story that giving away even the tiniest details about it is enough to fracture the whole experience. Keeping the plot-crucial elements out of the picture, all you need to know is that the most frustrating part of most Undertale runs, especially for those who are gunning for a True Pacifist ending, lies in the area just before the final stretch of the game.

    It makes sense in a way, given its placement towards the tail end of the game, but the Core takes so damn long to get through. It winds and bends every which way, making it nearly impossible to tell whether or not you're going the right way. You encounter several beefed-up enemies during this portion of the game, and they absolutely can and will gang up on you during certain encounters, which makes the combat even more stressful.

    Once you finally get past the labyrinthine madness of the central zone, you have to face a particularly tough boss fight at the end to boot. Without giving away too much, they rely on a particularly confusing 'Ratings' mechanic that has to be exploited in order to spare the boss, and with its tendency to release several increasingly-chaotic bullet patterns and mechanics in between turns, it can get out of hand really quickly.

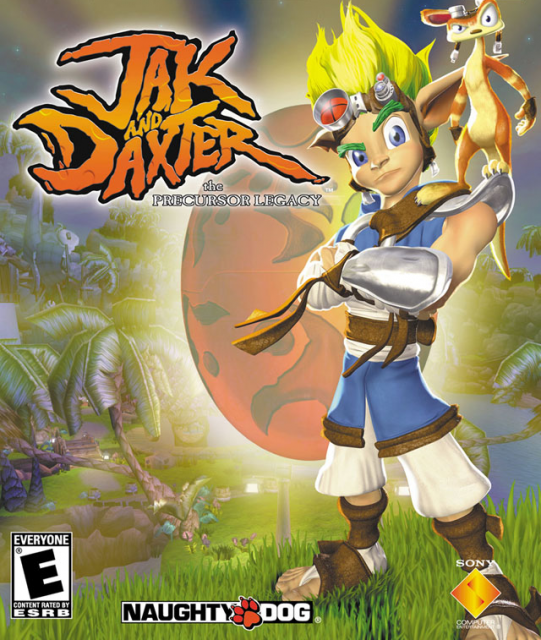
  • SPIDER CAVE

    The original Jak and Daxter was your run-of-the-mill collect-a-thon 3D platforming adventure romp, but I think what makes it stand the test of time to this day is its unique art style, incredible world-building elements and effective comic relief. It plays and looks very smooth throughout. Matter of fact, it's almost too smooth... like silk... silk from a spider's web... oh lord.

    Spider Cave is one of the final two main levels to explore before the end of the game, and it certainly pulls no punches. There are baddies tucked away in all sorts of places, with the Big Daddy lookalike Lurkers being some of the most troublesome to deal with in the game.

    It's also chock full of mission objectives that are a chore to complete at best and a nightmare to figure out at worst. Take your pick, really - you get to maneuver the pitch-black cave that has to be lit up with glowing crystals that only last a few seconds each, rummage around for dark Eco crystals that explore a few seconds after you touch them, hop over and avoid massive pits of instant-death dark Eco pools, and traverse a section that is nearly impossible without activating an Eco vent in another level.

    Then, of course, there's the infamous Power Cell that requires you to be powered up by yellow Eco for long enough to exit the level and blast open a metal box tucked away in a somewhat-secluded crevice near the entrance. That one's a right bitch and kept me from earning 100% completion as a kid.

    Granted, with such a welcoming and friendly name as the Spider Cave, you probably could have seen this coming, but whether or not you expected a bad time, you're likely gonna get one that's far worse.