
PART 1 - **NEW** PART 1.1 - PART 1.2 - PART 1.3 - PART 2 - PART 3 - PART 4 - PART 5 - PART 6 - PART 7 - PART 8 - PART 9 - PART 10 - PART 11 - PART 12 - PART 13 - PART 14 - PART 15 - PART 16 - PART 17 - PART 18 - PART 19 FINALE
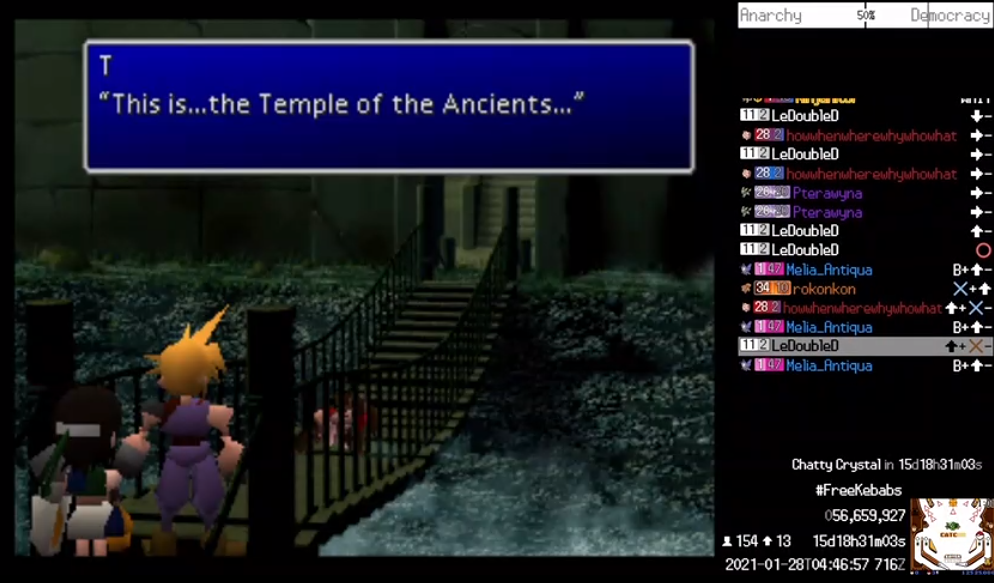
We have arrived. Temple of the Ancients is the largest, most complex and difficult dungeon of disc 1, possibly the whole game. This place actively hates you, filled with powerful debuffing enemies, an escher-esque maze, puzzles, traps and minigames. Oh, and two boss fights at the end. Numerous backup saves are made outside, including several in card slot 2. The trepidation from chat is warranted. This would be a significant challenge, no doubt about it. Aeris is forced into the party and Yuffie has resumed her reliable third place position. This is one of the reasons neglecting Aeris is a bad idea and adds to the struggle a lot of people experience here casually. For us, it's no problem, Aeris is wearing the best gear she can and has developed into a powerhouse. We're in as good a shape we could possibly be, so chat soldiers forward into the depths.

The first room presents a navigational nightmare by design, exacerbated by our crippled movement ability. Ladders and ramps abound, and the puzzle of this room is simply figuring out where to go. Even for the experienced player this segment can be confusing. Worse, every step here exposes you to threatening random encounters with enemies that can frog, poison, petrify and sleep you. We'll soon have a way to mitigate those dangers somewhat, but for now status effects are still a painful weakness we just have to power through. This section is ultimately just tedious though. The true test lies ahead.
Rocks Fall, Everybody Dies
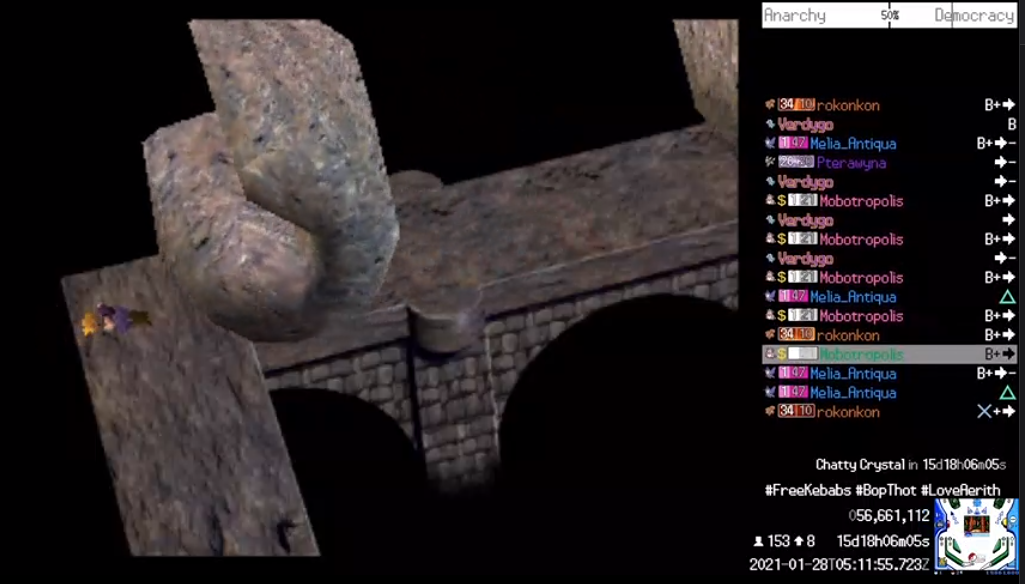
Chat clears the winding maze and faces off with the first minigame of the dungeon, the boulder puzzle. C shaped rocks roll down a walkway, the objective is to dash along the path pausing under the gap segments. The position of the safe spot constantly changes and the boulders are released at random intervals. Getting crushed returns you to the start of the path. There is a checkpoint halfway along the route, but that's it. Immediately upon entering, chat views the task ahead and is filled with intense fear and doubt. Most consider this completely impossible. This required not one timed input, but several in succession.
Nailing the inputs was clearly not going to happen. Even driving alone there was no way to react fast enough to determine the safe spot. Chat morale plummets. This could really be it. The one challenge we could not overcome. I refused to believe that. We defied every expectation so far, defeated every roadblock. Chat would not fail here, not now. I sounded the horn and led the rallying cry. The only way we could do this was together. For the first time this run, we need TPP chat to truly be TPP chat. To channel that Red energy from so many years ago. We needed to absolutely flood the channel with inputs, and pray.
What happened next was frankly astonishing. Chat answered the call and the command queue exploded. We swiftly reached the halfway checkpoint. A beacon of hope appeared. This is possible. We can do this. And after FIFTEEN MINUTES, boulder boss lay crushed and broken before us. Fifteen minutes, on a task deemed practically impossible by almost everyone. This is definitely my favorite moment from the whole run, and it's worth watching this section with the chat replay to get the full experience. Oh, and apologies to those who got temporarily global'd by Twitch during this. Your sacrifice will be remembered.
Telling Time
After a brief story break, we are given the opportunity to rest and save before the next puzzle. At the very least saves and rest points are generously strewn throughout this dungeon. They knew what they were subjecting you to. Proceeding a very critical save menu, chat can breathe a heavy sigh of relief. The largest expected roadblock had been swiftly overcome. We weren't out of the woods yet, but we weren't stuck for hours getting ground into paste either.

The next room contains the clock puzzle, which is fairly straightforward but a bit more fiddly with our inputs. We don't need to hit absolutely every path here since many are dead ends and manipulating the hands is a slow irritating process one press at a time. An errant circle input can also scramble the clock, requiring more tedious presses to fix. We grab the valuable components here, specifically Aeris' best weapon and the ribbon. Ribbon like most FF games protects from nearly all status effects and will pretty much be permanently attached to Cloud from here on. He is statistically the best character in the game and is capable of tanking long enough to get the party back up or soloing the end of a fight. This also gives us some much needed safety against the nasty mobs in here.
Looting the clock is diligently completed and around this time Melia retires for the night. She has a special attachment to a certain character and desperately wants to avoid experiencing a famous cutscene fast approaching. I vowed to do my best to shepherd chat past it. It was approaching the late night hours now, when chat usually becomes quite calm and most were there to just relax and watch the experience.
I'm going to talk VERY briefly about myself now, I've tried desperately to avoid making any of this focused on me, but some context might help. This is one of my favorite games ever, and one I play through to completion every year or two. But I'm not super hardcore. In my own casual play I skip a lot of things, or just loot everything without noting specific locations. I almost never bother to recruit Vincent, for instance. I also didn't want to just do this run while staring at a guide, that felt against the spirit, so I relied almost entirely on memory. This means that while my overall game knowledge is pretty decent, details are definitely lacking. I'm also just becoming an old man, so the brain don't work quite like it used to.
Which is to say, chat collectively didn't have full knowledge of quite how to proceed. After the clock we had reached the relative safety of old man ancient's shop, so we were at least saved and rested, with the ability to restock items. We were in no immediate danger, but were now spit back out into the first screen's maze and tasked with finding the boulder walkway once more. Chat wandered this area for quite a while, unable to determine which confusing ramp or ladder led back to our destination. After over forty minutes of stumbling, we finally retraced our steps and make haste towards the final puzzle and the boss gauntlet beyond it.
Teleporting Maze
The next puzzle involves navigating through a maze of doorways to catch old man ancient. He moves on a set path but the nature of the teleporting doors isn't entirely intuitive. There are two possible destinations for each door, and they flip each time you enter. This can be deceptively disorienting, but the puzzle itself is easily cheesed. You simply have to go to one of the doors old man has used and walk back and forth through it. Eventually you will catch him. A few minutes later the puzzle is defeated. We diligently rest and save, bracing ourselves for the imminent boss gauntlet ahead. But before all that, we have a fairly hefty lore segment to chew through.
The following story sequence basically sets up the events for the rest of the game. We encounter Sephiroth, who is here in search of the Black Materia, which will allow him to summon Meteor and destroy the planet. He's might have his reasons but that's still kind of a jerk move. We later learn that the temple itself actually is the black materia, manipulating a puzzle in the library room will cause the temple to shrink until it resumes its original materia form. This is a fairly clever defense mechanism, as it insures whoever seeks the black materia will be crushed in the act of retrieving it. Fortunately our remote controlled mechanical traitor catJAM is more than willing to sacrifice his toy body for the cause. We have a bigger problem though.

This sequence tends to be a bit confusing for people, and the translation doesn't help, so I'll briefly summarize. Sephiroth and by extension Jenova have been 'calling' Cloud all game. The weird dreams and incoherent flashbacks were all part of this. He was manipulated into coming here to achieve Sephiroth's goals all along. You are, after all, a puppet. Cloud manages to maintain control, for now, and we proceed into our first of two boss fights.
Boss Gauntlet
The first boss, Red Dragon, is probably more accurately described as a mini boss and doesn't present much difficulty. We're plenty powerful enough to just steamroll him at this point and chat just spams to victory. The upgrades and grinding we've done are still carrying us far. Meteorain in particular is an extremely powerful limit so Cloud mostly solos the fight. Incidentally, this battle is the main reason we didn't bring Vince along. His first limit form does fire damage the dragon will absorb and, much like Materia Keeper, he would be more a liability than anything.
The next fight however won't be nearly as easy, fortunately we are at least given the opportunity to rest and save in between. Demon's Gate is probably one of the hardest bosses in the game. He hits like a truck but has a decent amount of wind up time to let you get prepared. Demon Rush is an extremely powerful party wide attack and an ill equipped team can get crushed here for a while. He can also petrify your party, a status effect we can't easily mitigate outside of Cloud's ribbon. Once saved here there are no other screens available with random encounters, so whatever levels and gear you have now has to be sufficient to kill him. It would certainly be difficult but temple had been far too forgiving up to this point. Chat needed a challenge. The first attempt confirmed that some management would be required, spamming him down like Red Dragon would not cut it.
The second attempt didn't fare much better than the first. Doubt filled the hearts of many but something I learned very early on was to simply never doubt the chat. We were strong, we had all the equipment necessary, it was just a matter of time. I really enjoyed this segment too as I mostly stayed out of it, providing advice from the sidelines. Sure I could have driven the fight, but getting chat involved was very important to me and I did it as often as possible. I knew chat could do this, and they did. On the third attempt, despite a moment of panic as Cloud is dropped, the hardest boss in the game is overcome. Chat has cleared Temple of the Ancients, a little over three hours since entering.
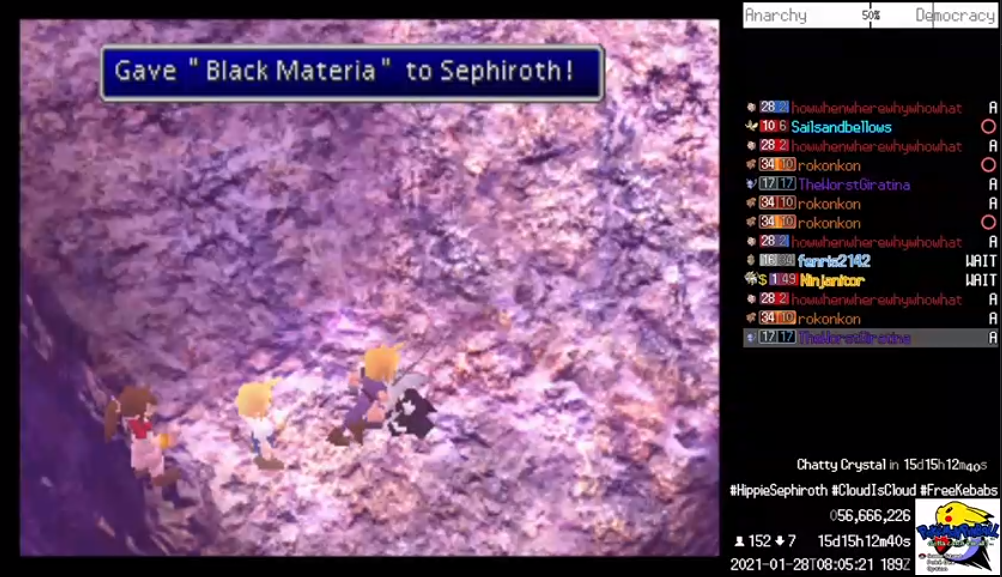
There's a fair bit of story to chew through at this point. Cait Sith nobly sacrifices his plushy body to complete the puzzle and return the temple to materia form, complete with tear jerking music as he makes his final journey. Rest well catJAM, we barely used you unless forced. After this the party races to retrieve the Black Materia from the pit formerly housing the temple, but a problem emerges. Poor Cloud isn't as in control as he thought, and at the critical moment, he instead hands the Black Materia directly to Sephiroth, nullifying all our hard work. Also catJAM is back, guess they have a warehouse of the things somewhere.
After a brief dream sequence, we say goodbye to Aeris for the last time and wake up in Gongaga village. Cloud is understandably upset and afraid, not really sure who he is or if he has free will. Cloud gets a lot of flak for being mopey, but cut the guy a break here. This is a messed up experience to go through, not knowing if anything is even real. We've already cleaned out this area and we're finished with the lore dump, so the only thing to do now is proceed onward. We're rapidly approaching THAT cutscene, and with it the end of disc 1. Before we even see any that though though, we have one more roadblock to get through. Thanks for reading and hope you're still enjoying this series!

PART 1 - **NEW** PART 1.1 - PART 1.2 - PART 1.3 - PART 2 - PART 3 - PART 4 - PART 5 - PART 6 - PART 7 - PART 8 - PART 9 - PART 10 - PART 11 - PART 12 - PART 13 - PART 14 - PART 15 - PART 16 - PART 17 - PART 18 - PART 19 FINALE
Log in to comment