Hook, Line and Tinker (or how I discovered I'm a PC Gamer at heart)
By big_denim 8 Comments
Hook, Line and Tinker
So Holiday season is upon us, and a part of my New Year's Resolution is to finally start some sort of blog. This in turn means you shouldn't get too connected, because like most resolution's my commitment will probably die down sometime around, oh I don't know, saaay March 14th.
Nevertheless, my creative juices are flowing and it's time to start writing again.
I'm starting a blog series called "Hook, Line and Tinker." Over the past 3 or 4 years, I've become obsessed with PC Gaming. Many of the 'negatives' you read online about PC Gaming are part of the reason I've come to love PC Gaming. Whether it's tweaking settings to get a game running just right, or it's upgrading a computer piece by piece over the course of a year, I'm always content doing it. I don't really know why I like the tinkering aspect of PC Gaming so much, and hopefully this blog will help me figure that out.
So without further ado, my first blog entry will be a short piece on my first HTPC build. Something I've had an itching to do for quite some time, and finally got enough courage to start building (though the Christmas season Newegg giftcards certainly helped kickstart the endeavor as well)!
Let the building - BEGIN!
- Processor: i3-6100 3.7 GHz
- Cooler: Noctua NH-L9i
- MoBo: MSI B150I Gaming Pro ITX
- Memory: G.Skill Ripjaws DDR4-2133 (2x4 GB)
- Storage: Samsung 850 EVO 500 GB SSD
- GPU: Asus Strix GTX 970
- Case: Fractal Node 202
- PSU: Corsair SF 450W
- Fans: 2 NF-F12 Static Pressure Fans (for GPU chamber), 1 NF-S12A Fan (for main CPU chamber)
For months now, I've been itching for a travel sized gaming rig. It would primarily sit on my bedroom TV center shelf for Saturday morning gaming in bed, with the occasional LAN party at friends' houses over the weekends. I've built a handful of ATX rigs for myself and friends now, but diving into something so compact was fairly new to me.
That craving is now a reality.
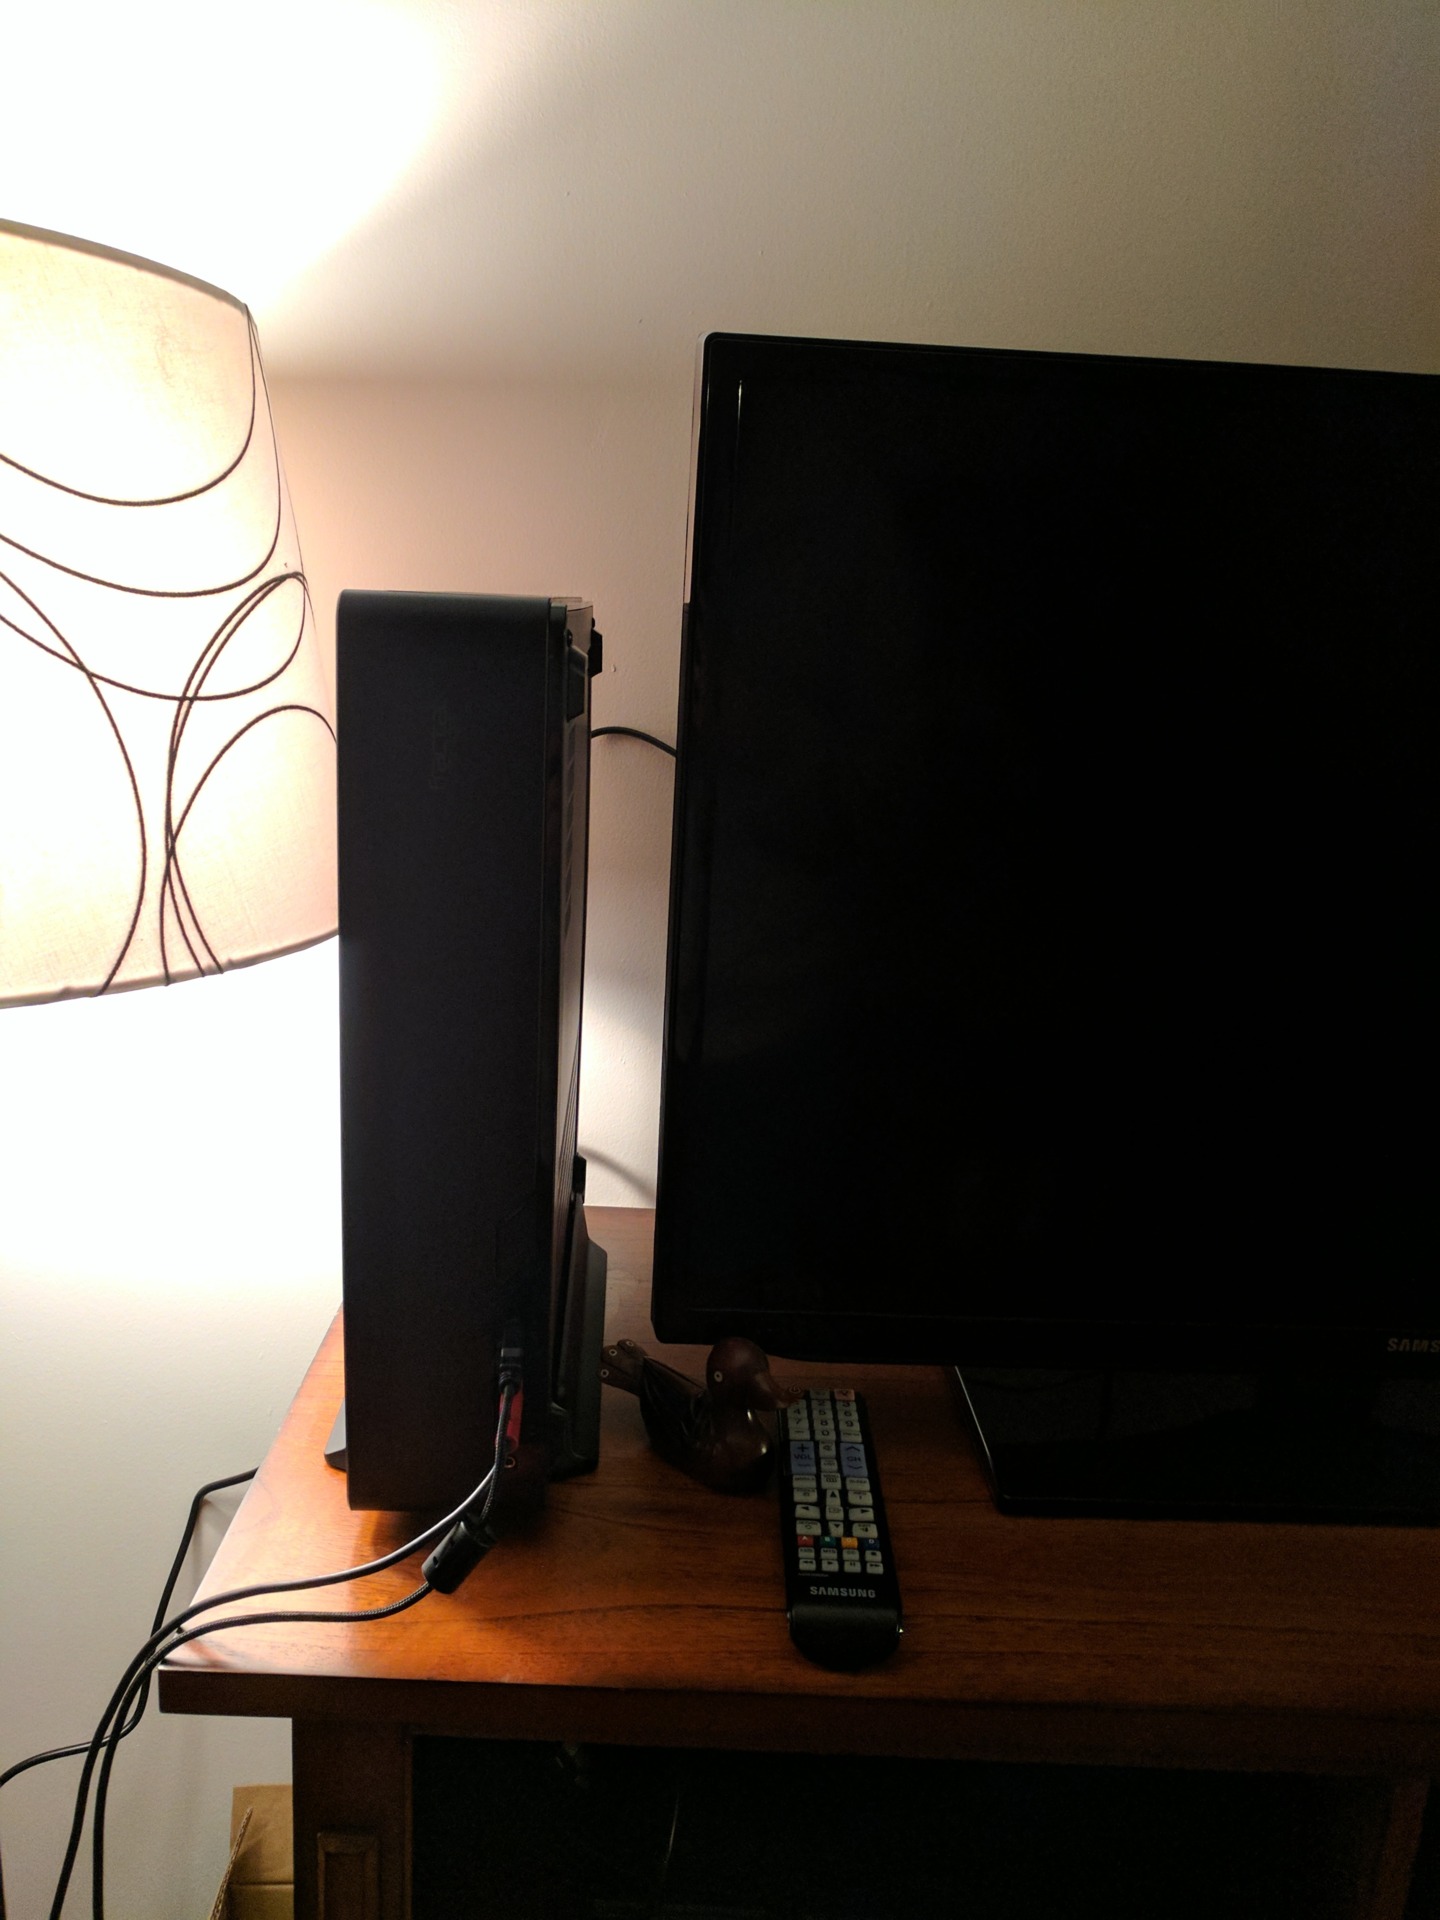
The parts are slowly trickling in this week as my various purchases via Christmas gift cards to Amazon and Newegg get delivered. While the 202 was slightly bigger than I was initially hoping for, it's still an impressive little case. It is slightly bigger than an Xbox One (one of the larger consoles to release), but it still fits in a shelf on my TV center, so it's really not a big deal. There's no external power prick to wrestle with either so that's a plus! ;)
On Wednesday morning, I was still missing memory, a processor, and peripheral fans, but my inner-child couldn't take it any longer. Work was breathing down my neck, and the thought of my vacation days winding down by the hour was too much to take. I was going to start the PC build whether I had all the parts or not.

The case itself, like all other Fractal cases I've used/seen, is very sturdy (though not too heavy). If there's one thing I hate about many case manufactures, it's that they skimp on quality to make something flashy. Fractal strikes a fantastic balance between elegant, sleek, and effective. The screws don't strip during assembly (one of my biggest pet peeves), the material feels solid, and everything detaches easily.
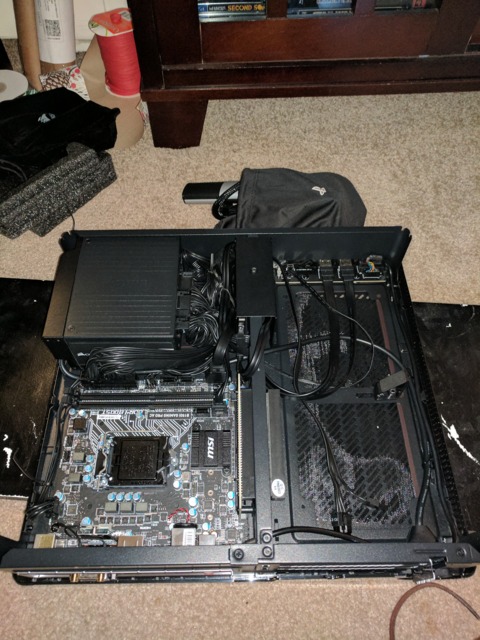
Turns out, I was glad I decided to start tinkering with the parts even if I was missing the most crucial pieces. As someone who's only recently gotten into PC building (3 or 4 years ago), I never appreciated how easy large-case ATX builds are until I started something like this. Laying out the PSU and MoBo and becoming familiar with the nooks and crannies of the case was extremely beneficial (pics below on cable management solutions).
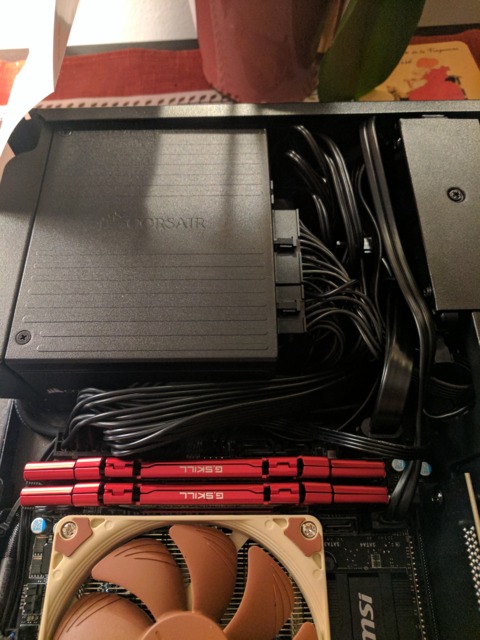
The Fractal Node 202's interior is cleverly designed though and allows you to tuck cables away behind the PSU and even sneak some into the small chamber in the top middle that stores your SSDs. Since I only have 1 SSD installed, I was able to use the 2nd slot to snake cables through and save the precious little space I had to work with. One thing to note was that the PSU hangs out on the side of the unit and then connects to an extension that hangs out in the back of the case. This may be something prevalent in all HTPC builds and I'm showing my ignorance here, but I didn't like how this was implemented. Because of the case's design, there is no access to the PSU's power switch from the exterior. This means the PSU must always be left in the ON position. Not too big of a deal, but I am someone that gets quite paranoid and anal about switching off the PSU before unplugging and moving the PC. As an HTPC build that's suppose to also function as my travel/LAN PC, this is a small but annoying knock towards the case.
After messing around with the case, MoBo, and PSU, I took a 2 hour disc golf and dinner break. Timing was perfect, and I was greeted with the wonderful sight of a Newegg box sitting outside my apartment door upon my return. It was only 5:00 and I was hopeful that I'd finish the build and install Windows with plenty of time to sit back, crack a beer, and enjoy some time with the wife.
Installing the processor and ram was even easier than I expected. In previous builds, I always skimped on the aftermarket cooler and got the Cooler Master 212. Don't get me wrong, the Cooler Master is a great cooler for the price, but no one can argue the fact that it's a total pain in the ass to install. For this build, I wanted something of a bit higher quality. Two reasons: airflow is restricted and anything I can do to keep temps down will help; the cooler creates less noise than stock and cheap aftermarket coolers.

After 10 minutes of screwing, snapping, pasting, and pushing, the processor, ram and cooler were installed. Unfortunately, I underestimated the cable management woes that come along with HTPC builds though. Getting all the parts in isn't an issue at all, but keeping room clear for air to flow is a whole other story. Air flow in an HTPC build geared towards gaming is of utmost importance, and any lost space can make or break safe GPU temps. This is where I lost precious hours of my dwindling vacation.
But like my mom always told me, with a few zip-ties in hand and a couple courage-boosting sips of beer in the belly, there's nothing you can't tackle (full disclosure: that was a lie, my mother never told me that).
Fortunately, the case has a few clever design features that made cable management doable. In the picture to the right, you'll notice a little screwed-in bracked cross from the PSU. This is a mount for your SSDs. Because I'm only working with 1 SSD in this build (for now...), I was able to use some of that space for cable routing. There's also a couple inches of space between the SSD mount and PSU for some of the larger cables (I'm looking at you 24 pin Molex). Then there is of course, the oh-so useful zip-tie points scattered throughout the case (and Fractal is very generous with them in that aspect).
Well it was 7:00, and after some scuffed hands and beads of sweat, the cables were all tucked away in their right place. So help me good if I ever decide to grab another SSD or swap out this GPU for one that needs more than a single power cable. I'm convinced I've reached the limit on the Fractal Node 202. Don't get me wrong, it's impressive that Fractal has even managed to make an HTPC case this small that can still house an aftermarket cooler and full-size discreet GPU, but this won't be my Fractal R4 media hub sitting in my living room either. It accomplishes exactly what I need it to accomplish - a small, form-factor bedroom PC for Saturday morning gaming.

My vacation tasks were just about finished. The extra GTX 970 I have laying around can't be installed quite yet since the peripheral static pressure fans I ordered don't come in until Thursday. In the meantime, I can load up Windows 10 and call it a night. Oh, but right...I'm a total idiot and forgot to get a Windows 10 key. No problem, I can get one through Reddit's glorious r/microsoftsoftwareswap thread and have a key in 10 minutes, right? Wrong. Rarely has reddit let me down, but for some reason, after multiple PMs, I wasn't getting a response from users (how dare them take even 10 minutes to enjoy vacation instead of helping addicts like me get their fix)! /sarcasm
No matter, the brunt of my efforts were complete, and my work paid off. I had a bootable PC, and all signs were green. My ram was recognized, the SSD was showing up, and everything in the BIOS looked right as rain.
I went to bed happy, knowing I was only a few clicks away from having a new HTPC gaming rig in my bedroom.
The next day, I came home from work with the sight of two Noctua F-12 fans sitting at my door. Newegg got me the fans a day earlier than expected and for that I commend them. A Reddit user had gotten back to me with a W10 key that morning as well. The luck ended shortly after work though. I came home, thinking "Great, just pop in 2 fans and a GPU and we're done."
Not so fast.
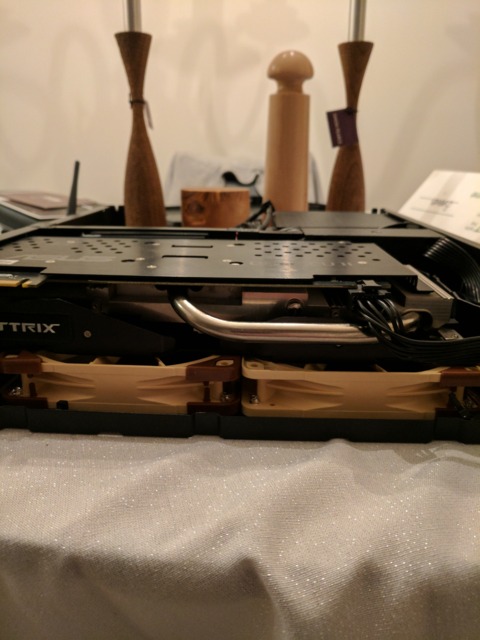
The cables in the GPU chamber proved tougher to reroute than I initially expected. Between the 2 Noctua static pressure fans and the GTX 970, there was absolutely no room for sloppy cabling. I ended up moving the PSU's extension cable to go along the backside of the case. The HD Audio cable had to follow the same path and slip through a hole that just barely avoids blocking the GPU's back panel. A few scrapes later though, and the PC was ready to go. An hour lost, but I'm still not too far behind schedule.
Not so fast.

Hitting the power switch resulted in a totally black screen. My stomach dropped, and I felt the uncontrollable urge to punt a puppy through a window. What the hell could have changed between the night prior and that moment then? I took out the GPU since that seemed to be the only change in variables since my successful boots the day before. That didn't work, and now I really had my head scratching. Tack on another hour of my night lost and I eventually came to a solution. For some reason the ram was not fully clicked into place. Why it worked last night is beyond me, but I was just grateful I didn't have to go through any annoying RMA processes (knock on wood, but I've actually never had to deal with that in any of my builds thus far).
So my issue was fixed, and that beautiful BIOS splash screen lit up my room like a Christmas tree and I couldn't have been happier (it really is one of the most relieving best sights to a PC Builder's eyes). Fortunately, Windows installations have come a long way since there years of the mid 90s when I remember shaving years off my life from the stress of installing the OS on some crumby Gateway desktop. The OS was installed in mere minutes, and my little bedroom gaming PC was good to go.
Everyone claimed the biggest issue with the Fractal Node 202 are the temps. I wanted to test this little sucker as much as I could. To do that, I figured there's no better way than to walk Helmut Kruger down a catwalk. 2016's HITMAN is one of the more taxing games to come out this year for both the GPU and CPU. It seemed like a solid benchmark to push the PC to heat up both the CPU and GPU chambers of the case.
Temps weren't as terrible as I expected to be honest. The CPU idles between 35 and 40 degrees, and during load on HITMAN (medium-high settings) it reached 65-70 degrees. Really nothing to sweat about at all. 65-70 under load is totally within reason. The GPU stands a bit higher during idle at ~45 degrees. Under load it'll go up to 70-75 degrees. Those temps are a bit higher than I typically like to see, but it's really nothing to worry about. So long as neither component hits the 85 degree mark, I'm happy. Either way, I'll keep the RivaTuner stats up in the corner of my screen for the next couple of weeks to monitor things. It's worth noting that I did adjust the fan curves quite a bit to get the temps in these ranges. The CPU was idling between 45 and 47 at first, but the default fan curve had the damn fan spinning at 13% until it hit 50 degrees, so I tweaked everything a bit. As a result, I have a cool ITX build that, while not the quietest, is at least tolerable.
In the end, I am extremely happy with how this build turned out. I cant' recommend an ITX build to a newcomer to PC gaming. The cable management is a nightmare, the noise of the fans may be a turn off to some (though if you're coming from a PS4 (read: jet engine) then this may not bother you), and temps require fan curve manipulation which newer builders may not want to deal with.
Any who, I hope you all enjoyed the read (though it was a bit longer winded than I initially intended). Now time to go figure out why my living room PC is showing a blue crash screen after installing a new nVidia driver. The woes of PC Gaming, am I right?
Until next time - enjoy the pics of my new PC! Cheers duders.


