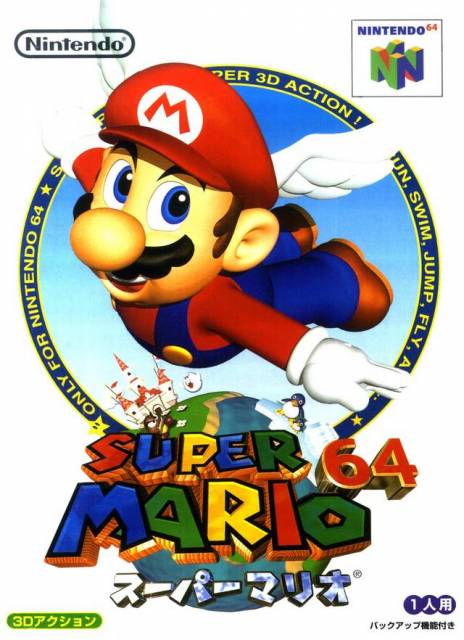
Welcome back to this in-depth look at Nintendo's 1996 banger Super Mario 64, one of the two global launch games for the Nintendo 64 (the other being Pilotwings 64, which seems like a pretty good launch catalog to me). The last one of these got a fairly warm reception so I believe I'll be sticking with it to the very end, roughly seven parts in all being the present prediction. Fortunately, we're past the comparatively dull initial two courses that ease the player into the game (it's a pioneering format, don't forget, so there's call for some virtual limbering up) and start looking at the more thematically curious worlds that the game explores. I say that, but a lot of Super Mario 64's concepts for world design really just come straight right out of Super Mario Bros. 3 and Super Mario World, just creatively reimagined for the 3D setting.
We'll look at the rest of what I consider the "ground floor" courses, which is to say courses 3 through 5. It's hard to say if the upper section of the lobby is a floor unto itself or if it's just a mezzanine (I'm sounding like a realtor again...) but I'm specifically referring to every location that's available before the first Bowser Road stage ("Bowser in the Dark World") and acquiring the key to the basement. (Unless you can sequence break all that, of course, and given the vibrant speedrunning community around this game it wouldn't surprise me.) We'll also cover that Bowser Road stage, its secret Star and another secret Star on this floor.
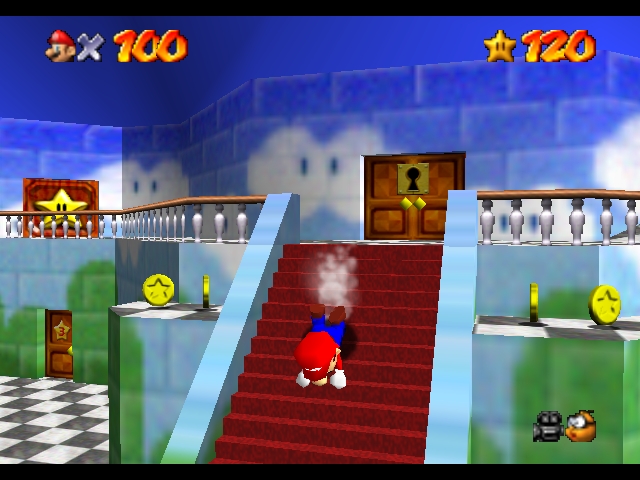
Before we start, though, we should talk about how many jump variations the developers chose to give Mario. To say it was unusual would be to erroneously surmise that there were extant conventions in place before Super Mario 64 regarding how 3D platformer heroes ought to act, but for whatever reason they really made sure that the player had plenty of options. For starters, there's Mario's regular jump, which tends to do the trick in most cases. Jumping again immediately after landing will cause Mario to jump slightly higher. He can do this "enhanced jump" from a standstill, which comes in use when navigating higher platforms over an abyss and you don't want the horizontal momentum to screw you over. Mario can also jump a third time in this sequence which creates a leap with the highest vertical clearance, but he needs to be running to make this happen and with the addition of the two prior jumps needs quite a bit of space to employ effectively. Also included are: a long jump, which is performed by quickly ducking and jumping while in motion and is great for clearing long gaps and getting around faster in general; the back somersault, which is a big backflip Mario does whenever he jumps while ducking and stationary; and a side somersault, which gets Mario further up than the second-level jump and only requires Mario quickly do a U-turn before jumping, a deft maneuver better suited for speedrunners and situations where there isn't much room to move around. There's the wall jump too, of course, which comes into play a handful of times while hunting Stars but is entirely dependent on having two close walls that face each other.
It feels as if the designers initially created these jump variations to respond to specific circumstances, but I wonder if it wasn't just the programmers giving Mario as many variations as possible for the sake of player choice and their own curiosity, as most of the variations aren't emphasized at all (besides the wall jump, which is name-checked by a Star hint). 2D Mario didn't really have a wide repertoire outside of the occasional fire-flower (and, later, the various suits, capes and Kuribo's Shoes), and now he suddenly has this whole suite of different leaps and hops and even a mid-air dive which barely gets the player a few extra horizontal feet if they're just short of the next ledge. I don't want to keep repeating myself, but it feels like giving Mario so many (yet not exactly superfluous) maneuvers was another carte blanche decision by the design team.
Jolly Roger Bay
The Course
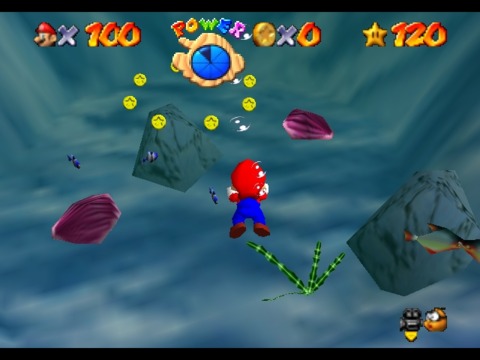
Jolly Roger Bay is the first (of two and a half, technically speaking) underwater-focused courses. These things were fairly divisive at the time and continue to be so, due to the unresponsive swimming controls and stringent oxygen limit (but then The Legend of Zelda: Ocarina of Time would do a lot worse for the reputation of 3D underwater stages, as time would tell). Of course, this is no big divergence from the very first Super Mario Bros., which regularly featured underwater levels with a slightly obtuse swimming mechanic that basically amounted to hopping slowly through water. Jolly Roger Bay starts the player on the coast around the level, letting them see a few objects above the water line but giving away nothing of what lies beneath. It's natural to have a hint of mystery with a course based on sunken ships and pirate treasures after all.
What is masterful about the course's music direction is how the soundtrack layers in a dulcet synth bassline to the music as soon as Mario dives under the surface, and we're talking music that had a sufficiently serene vibe to it already. This beatific nuance subconsciously goads the player into going deeper underwater, assuaging hydrophobic fears of drowning in the process (even though, ironically, this is the first Mario game in which he can actually drown). But then, once you see Mario asphyxiate once, his hands desperately grasping for oxygen that eludes him until he finally slumps over, it's debatable just how much of a calming influence the underwater soundtrack might still hold over the player.
A few other notable things about this stage: there are only a handful of enemies, and most are the goombas you bump into after going through the underwater cave. The only other dangers are entirely immobile and predictable clams and an enormous and terrifying moray eel that won't actually bother you if you don't bother it. Rather, the game chooses to minimize the number of hostile entities that can harm you, preferring instead to let the player worry solely about Mario's oxygen supply. The sunken pirate ship, once the first Star is obtained, will permanently move to its new home on the surface where it becomes a facet to acquiring another Star. This also displaces the eel, who moves to a nearby seaweed cave. Beyond the sunken ship lies an underwater cave with air, the perfect smuggler's hideout. There's little reason to go in here, however, barring a single Star and the 100-Coin Challenge. This course also introduces the first "timed block" instance, where hitting a purple "!" switch summons some sawdust-colored blocks for a few seconds. These are essentially the P-blocks in SMB3 and World but without the coin/block interchanging feature, creating a temporary means to reach an otherwise inaccessible part of the stage. Here it's simply used to provide mild assistance, rather than a necessity bridge, but future instances will rely more heavily on the player's quick reflexes.
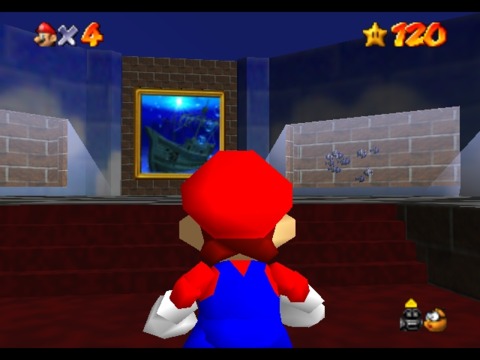
I also want to say, before we move onto the Stars, that the room in the castle that the Jolly Roger Bay portrait sits in might well be my favorite portrait room in the game. I love what they did with the lighting, keeping it low in the room itself and having it shine through the wall aquaria instead. For many logistical/technical reasons the rooms in the castle are unfurnished, so this felt like the closest thing to a room that might've existed in the castle before it got invaded and/or cursed by Bowser.
The Stars
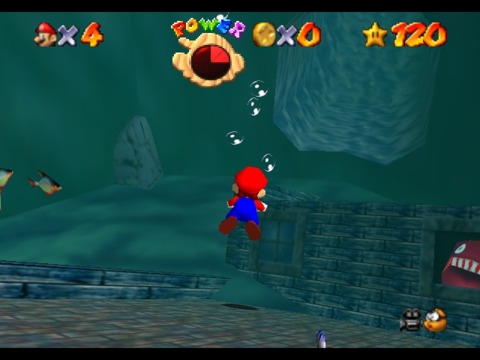
Plunder in the Sunken Ship, the first Star, is significant in the same way most of the first course Stars have been so far: its completion shifts elements of the stage around, lifting the ship and making other Stars accessible. Players need to swallow their fear by swimming straight down to the lowest point of the course where it'd be unlikely that they would be able to head back up again in time if they notice their oxygen meter in the red (just swimming to the bottom uses close to half the meter). They also need to have the presence of mind to cajole the eel out of the porthole he's settled into and swim in after he leaves, at which point it's simply a matter of opening the chests (which thankfully restore Mario's air) and letting the water drain out. The actual mechanics to this sudden shift in water pressure don't make a whole lot of sense, until you consider that the stage might well be an homage to One-Eyed Willie's ship from The Goonies, which triumphantly freed itself from its sorry state with one last booby trap at the movie's conclusion. Either way, the boat begins to float again, and the Star appears on the top of some platforms slippery with sea flora.
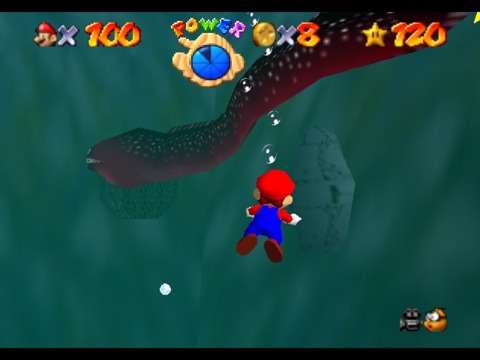
Star two requires more teasing of the giant moray eel, which the player might already be apprehensive about doing after their first encounter. In this case, the player must convince him to leave his new domicile and then grab a Star at the end of his tail. It's more a case of some underwater gymnastics as every part of this process - from swimming just out of range of its mouth to catching the Star on its tail - is tricky. It seems as if this Star in particular wants the player to be thoroughly used to the underwater controls before they head to Dire, Dire Docks, which involves considerably more danger and player skill. Sort of like having to grab the item on the Kung Fu master's outstretched hand before he can snatch it away in order to complete one's training.
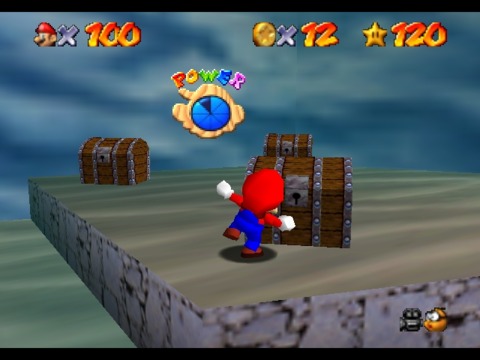
The third Star involves opening a series of chests in the cave, and is annoyingly dependent on some trial and error. There are four chests, but they must be opened in a specific order or else Mario will be shocked for a small amount of damage and the puzzle will reset. Add to this various other dangers in the cave like some wandering goombas and a few collapsing stalagmites, though all of this can be quickly alleviated by returning to the pool at the entrance and using the surface healing trick. For whatever reason, this non-puzzle is repeated again (under harsher circumstances, naturally) in Dire, Dire Docks. Say what you will about this crapshoot Star, but it's another clear indication that the designers of this game were testing every idea they had to see what clicked, not entirely dissimilar to how the player is testing every box to find the one that won't send a thousand volts up their arm.
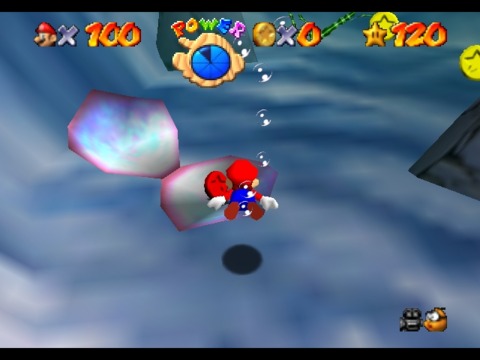
The red coin challenge for this stage is a little unusual. In most cases the red coins are either tied together by a theme (such as them all appearing in the same maze) or are spread out with little to connect them thematically. Instead, four of the red coins can be found by diving through clams as they precariously hinge open, while the other half can all be found along the path to the pirate ship (though the one high on the spiked pillar might need a slight detour). In a sense, it's like two unrelated mini-puzzles connected together.
The fifth Star involves blasting to one of the pointy pillars, which are one of the few landmarks you can actually see from the cannon. This is another one of those Stars you might accidentally acquire before you even get the hint, provided you actually found the Pink Bob-Omb elsewhere.
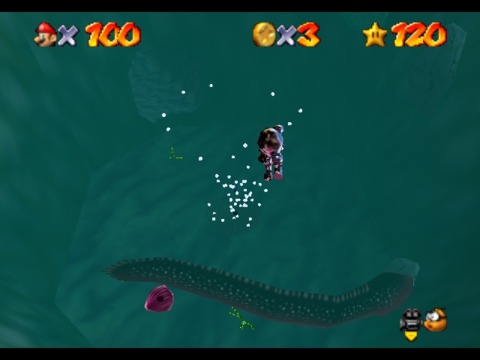
The sixth is another case of needing a new Cap, in this case the Metal Cap. The Star is impossible to reach without something to weigh Mario down. Fortunately, the secret course that leads to the Metal Cap switch tells you everything you need to know about Metal Mario's lack of buoyancy in water. To be fair, this is one of the few occasions where Metal Mario comes in useful for finding Stars. Normally, it's just a way to march past everything that might harm you, which is a desirable state for entirely different reasons.
100-Coin Challenge: The only notable thing about this one, and this is true for Dire, Dire Docks as well, is that the number of coins on the level is extremely sparse. The player more or less needs to grab every single one. Fortunately, there aren't a great many that can be missed besides the blue coins from the timed blue coin block. The relative lack of foes means there's little worry about missing a bunch of coins that fly out of enemies and either fall off the course or vanish, which tends to be a recurring nuisance in these 100-Coin Challenges.
The Hidden Aquarium
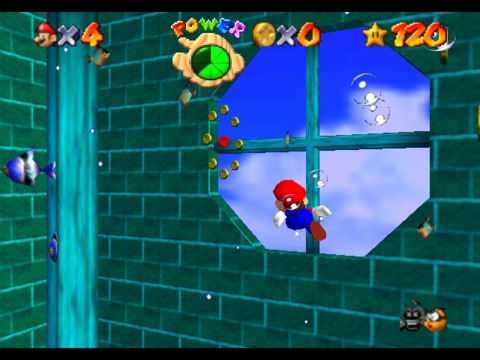
This secret Star almost feels like a crash course in deep-sea diving, especially as this bonus area has no surface with which to recover oxygen/health. Instead, there's plenty of coins everywhere, and the requisite eight red coins are all found in an easily identifiable pattern: four are mid-way up the area in the cardinal directions surrounded by rings, while the other four are in the bottom corners of the aquarium. It's an attractive little area presumably meant to test a player's swimming capabilities, though whether they expected players to find it before or after Jolly Roger Bay (the entrance to this secret zone is in Jolly Roger Bay's portrait room) is unclear. The order the player attacks them is probably not something they could account for either way.
Cool, Cool Mountain
The Course
The inevitable winter level (or one of them, I should say), the Super Mario 64 team clearly had some fun with their slippery snow and ice physics. Wisely, they kept must of the friction-free antics to the course's slide where it's apropos. I generally don't question the impossible space these separate areas take up, but I imagine the slide must constitute the entire core of the mountain. Due to the irreversible way slides (and gravity) work the course is vertically-oriented from the other direction this time, starting Mario at the top with most of the interesting stuff at the bottom. With the added benefit snow provides in absorbing all fall damage, the player is free to leap "off-piste" to a lower region of the mountain harmlessly, provided they don't accidentally leap off one of the sides that leads straight to oblivion.
The game gets a little cute with its "falling onto snow" animations. Most are familiar with the little animation that plays whenever Mario falls too far into the snow and ends up lodged up to his waist, as he spends a few seconds to emancipate himself from the tundra. There's a special variant for when Mario ground-pounds from too high up, where he only needs to pull his ass out of the snow. Then there's my personal favorite, which can only occur if the player does a mid-air dive and falls far enough: Mario's upper torso is what becomes trapped under the snow in this case, and his legs flail around in a panic until he manages to pull his way out. That they programmed three different animations for a simple little gag is kind of wonderful.
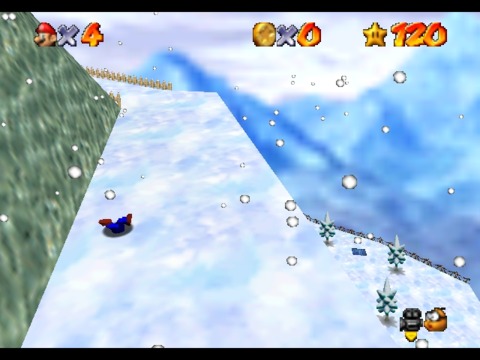
The slide actually features twice while hunting Stars: the first time, the player simply needs to reach the bottom. For the second, they must race an enormous penguin that threatens to push them off the slide with its girth. The game actually boosts the width of the penguin even further if the player collects all 120 Stars, adding an extra post-game challenge. There's also a secret shortcut that takes the player directly to the end of the slide, and once again your opponent calls foul if you should happen to use it during your race. The slide's also an important part of the 100-Coin Challenge, due to the large number of coins you can pick up while sliding down.
The course has the first instances of the "spin jump" and "runaround" enemies. The former is a type of enemy with propellers on their heads, which in this case is an unusual plant-like enemy called a Spindrift (though I prefer its Japanese name "Fuwafuwa-san", or Mr. Fluffy). Leaping on this enemy sends Mario soaring with a spinning leap that slows his descent back to Earth, which will come into far better use on the other snow level. The runaround enemies cannot be hurt by conventional means, but if Mario runs around them enough times they'll simply collapse. This type of creature is far better represented in Big Boo's Haunt. There's something clever about the idea of enemies that have to be defeated by acrobatics instead of violence.
There's also one last thing: while many courses have secret teleporters, Cool, Cool Mountain is one of the few places where it's actually vital. Two ledges at the ends of broken bridges, one at the peak and one at the base, link to each other, allowing Mario to get back to the top of the course. It's otherwise (almost) impossible to head back up due to the long slide area near the summit.
The Stars
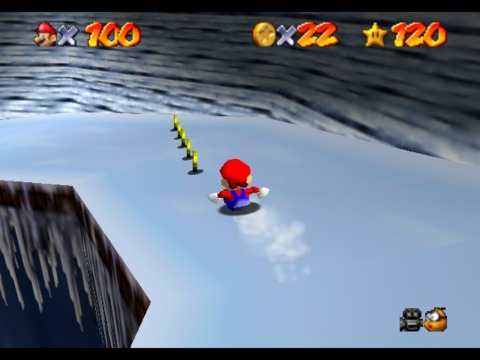
The first and third Stars are the slide-related Stars, already discussed above. This slide is far more precarious than Princess's Secret Slide but the shortcut (indicated by a line of coins) makes the first time through a lot easier. The Big Penguin won't appreciate any shortcuts though, so that race has to be done legit. The penguin race really drives the screws in by ensuring that the penguin doesn't have an even speed throughout: instead, the penguin will slow down after his initial headstart and then speed up during the last few difficult twists before the final stretch, during which the player can inch ahead come the finish line. The goal of this erratic rubberbanding is to knock off or otherwise psyche out the player as the penguin whizzes past and then intimidate them into keeping their distance with the final few twists rather than hit them at full speed while trying to maneuver around the big penguin, which they need to do to actually win. It's deliberately designed to mess with the player's risk vs reward mindset, making them think that perhaps taking a more submissive and conservative position will prevent them from falling to their death, when the reality is that going for broke is the only way to keep up and eventually take the penguin over.
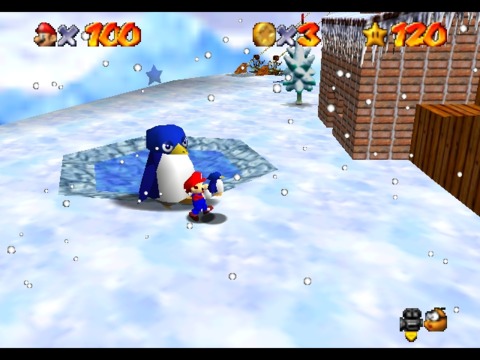
Li'l Penguin Lost is perhaps the one Star people remember most vividly from this stage, and possibly one of the most frustrating. It involves escorting a baby penguin from the top of the stage to its mother at the bottom. The only means to do this is by grabbing the penguin and carrying it with you; however Mario will drop the penguin whenever he gets hit or falls too far. After being dropped once, the baby penguin will actively try to avoid being picked up again, generally by moving in an opposite direction to Mario, which can often mean watching it happily waddle off the edge of the world as Mario works to recover from whatever malady caused him to drop Junior in the first place. As such, this particular Star has something of a notoriety, though it's once again the developers attempting to think outside of the box when it came to giving Mario uniquely 3D challenges. At no point in the Mario oeuvre was he ever required to babysit an ungrateful and loud baby - though, as many might recall, Mario was indeed that baby himself at one time. Maybe this Star is penance for being a little handful to all those poor Yoshis. There's quite a bit of comedy involved with this Star as well, such as the mother penguin rudely insisting that the impossibly ugly baby penguin that Mario can find nearby couldn't possibly be hers, despite the fact that the two babies are identical and this one apparently has no mother or reason to exist other than as a red herring. The other factor is how the mother penguin will really not appreciate it, angry eyes and all, if Mario picks up her infant and runs off with her, though the mother quickly gives up once Mario gets far enough away. At this point, as the Star has already been summoned by the temporarily grateful mother and can be collected whenever the player wishes, the player is now free to drop the baby penguin off the nearest cliff. It's something I can never resist doing every time I play this game anew. Don't even tell me that the little flapper doesn't deserve it.
The fourth Star is the standard red coin rush and the player is back once again to hunting every corner of the stage. This is where the secret teleporter comes in useful, as one coin requires a massive detour down a cliff-face which thus skips a few others. The game starts getting into the habit of hiding red coins in the level geometry, tricking players with perspective shifts. For instance, there's a red coin around the bottom of the course that can't be seen unless the player shifts the camera to follow a wall to its terminal point, otherwise the coin remains just out of sight. It's a mean trick to pull on players not yet used to the camera controls (which remains one of the few mechanical aspects neither this game nor any that followed in the 3D platformer genre could completely get right).
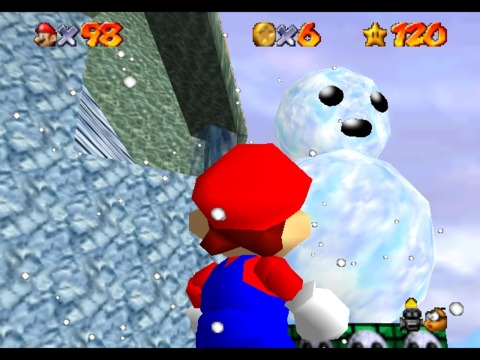
The fifth Star, Snowman Loses His Head, is another that relies on a lot of invisible triggers. Specifically, the hint asks that the player guide the rolling snowball to where a disembodied snowman head sits on a podium. It's possible the player has passed the head multiple times while hunting for other Stars, though the "body" doesn't actually show up on its plinth until this Star hint is selected. This is a combination of a race and a rolling ball trap, and the key instruction that many miss (through no fault of their own) is to guide the snowball body to its destination. This means getting ahead of it, and then taking a route to the head that the body can follow. Skipping any part of the body ball's route, such as dropping down from above or neglecting to slide up to the head's plinth, will cause the body ball to continue rolling past and off the world. It's an interesting experiment, tasking the player with creating a sort of invisible breadcrumb trail to the correct location, though I'm sure it has more to do with passing through a handful of "trigger zones" that need activating in-sequence before the Star can be acquired.
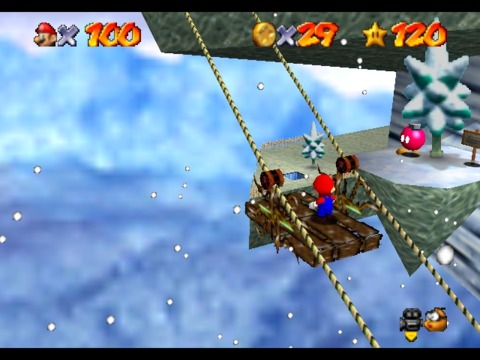
The sixth and final Star is a little on the obtuse side, because while it tells the player that "wall jumps will work", it doesn't deign to tell the player where these wall jumps must be performed. Indeed, there's been no location yet that the player will have found incidentally that would allow for a lot of wall jumps. This actually requires that the player find the Pink Bob-Omb (who is unhelpfully on a tiny island that a lift passes by), activate the cannon on the base of the mountain and once again fire across a chasm to a single tree that Mario can grab onto. Once over there, the wall jump aspect becomes more obvious, though it still requires a bit of effort to make the last wall jump as it requires a triple-jump to reach. It's possible that this is another Star the player will discover before they receive the hint, especially if they're getting desperate in their red coin search, but it's also one of those cases where most players probably felt like they were forced to look up a guide to tell them where to go next.
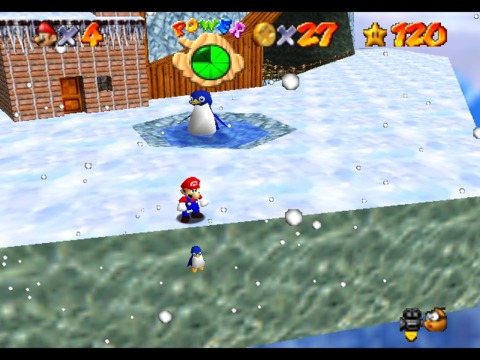
100-Coin Challenge: The only real danger here is falling off the course. Just going down the slide will net anywhere between 50-80 coins depending on how thorough the player is, and then it's simply a matter of finding the rest outside (or warping back to the summit and going back down the slide for the remainder). Oddly, the blue coin block is both tricky to reach and only provides ten coins, so it's far less essential here than it is elsewhere. Clearly, the developers knew that they didn't have to do much to make this goal attainable. It's curious how a "difficult" course might not always mean a difficult 100-Coin Challenge, once again reaffirming my belief that these challenges were afterthoughts, albeit the sort of afterthought that still had plenty of development time to be polished to a satisfactory sheen.
Big Boo's Haunt
The Course
So, this place. The player has already encountered a few situations where they might feel like the solution was too obfuscated, and given the reputation Boo Houses had back in Super Mario World, they can expect a whole lot more of it here. Honestly, though, most of the Big Boo's Haunt Star hints are fairly forthright in their transparency (opaque Boo jokes withstanding). The biggest puzzle to solve is actually getting there. It requires that the player has found twelve Stars (though they don't need to have passed the first Bowser Road course) and traveled into the garden area at the back of the castle. Here, a group of Boos menacingly hover around the fountain like a bunch of delinquent teens at the mall, but it's only a fairly large one near the back that has any significance. By defeating this Boo - Boos can be killed in this game, sort of, and it requires exploiting their behavior and slow movement - the player will gain access to the course via a tiny caged model that Mario inexplicably shrinks down to enter.
Big Boo's Haunt might as well be a Resident Evil mansion. There's a few extraneous structures and creatures, as well as a cellar that expands beyond the manse's foundations, but most of the course's Stars can be found within the building itself. It's full of traps, secrets and at least one area that won't be accessible unless the player does something circuitous and nonsensical to get past it. The Stars are wisely configured in a way that the player needs to gradually learn more about the mansion to find each subsequent one, and each is on the same or higher floor than the last. The sole exception is the roulette wheel-like merry-go-round in the basement, which feels more like an Oogie Boogie reference. For whatever reason, future appearances of Boos in Mario games tend to involve casino/roulette/gambling allusions. Actually, the casino in Ni no Kuni was filled with dead people too. Is Japan making fun of elderly slot jockeys? Don't bite the hand that feeds you pachinko balls, guys.
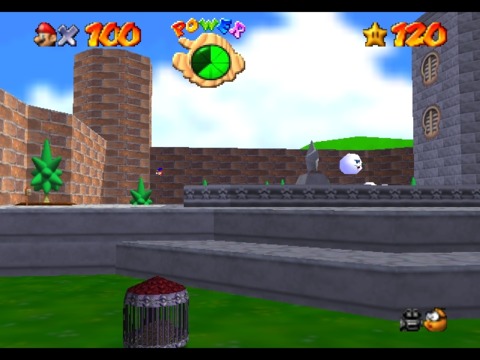
Core to reaching this stage and acquiring its first Star is learning how to fight Boos. Series veterans know that Boos are notoriously shy and will hide by turning non-corporeal when viewed directly, but will continue to stalk Mario as soon as his back is turned. The player simply needs to take advantage of the camera perspective and Mario's acrobatics to get behind the Boo without looking directly at it and then sock it. Jumping on a Boo while it's solid won't harm it, but it will be stunned for a brief moment that the player can capitalize on. The other core enemies include giant floating eyes, which are defeated in the same "runaround" way as the snowmen in the previous course, and a spider with an unusually patterned orb-like body that looks like something right out of a 3D Studio Max assets folder.
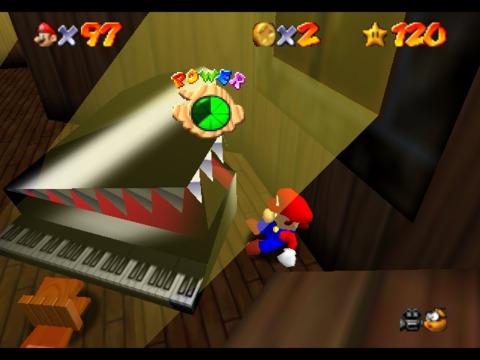
However, the centerpiece of this course is the wonderfully constructed jump scare in the first room on the left of the ground floor. All this room contains is some wood panel floors and walls, a few beams of light from outside and a piano sitting in the corner. The piano will come alive and try to eat Mario should he get close, and if the sudden movement doesn't jar players, the cacophony of noise it makes as it slams its toothy lid down and hobbles around will. There's a few other "poltergeist" items too, like flung chairs and demonic books, but the piano is what burns itself ino memory.
The Stars
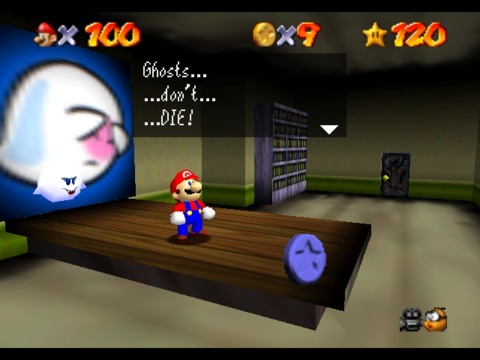
The first Star requires that the player explore the entirety of the first floor of the mansion, defeating Boos in many of its rooms. Ominously, the Boos mock Mario as he kills each one, malevolently asserting that "Ghosts... don't... DIE!". This, in addition to the general creepy atmosphere and music, is a great introduction to the course. Big Boo will make an appearance in the mansion lobby once all his minions are dealt with, and is really just a Boo that needs knocking around a few extra times. He'll speed up once he gets hit, as if to trip up players who are trying to get all three hits in quickly, but a speedy player can still jab combo the spherical specter into the hereafter.
The Merry-Go-Round Star is in the basement, and makes its presence known by changing the chilling ambient track to a jovial carnival tune, which of course is equally terrifying for different reasons. It's no coincidence that this circus area is in the sewer-like basement - the Boos all float down here, after all. Like the previous Star, Mario is once again pummeling a handful of Boos and then a singular Big Boo before a Star appears. The difference is that the carousel is constantly in motion and every now and again the wall spits out plumes of flame. It's sort of a remix of the first Star, with less hunting around and trickier combat. The best part is that you never have to go into the basement again, unless you fall down there (there aren't a whole lot of coins).
Collecting the first Star makes a minute but important change to the level, raising a staircase that gives Mario access to the second floor of the mansion. These floors are more engineered towards the red coin Star, but there's one special case here where the player must solve a puzzle in a library, complete with books whizzing left and right Ghostbusters-style. It's another case of hitting things in order or getting punished by electricity, though fortunately there's only three items to worry about. Given there's only six possible permutations and eight wedges on Mario's health bar, it's not a particularly fatal game of Russian roulette.
The red coins are where things start to get interesting. All eight are found on the ground and first floor (or first and second for the Americans) and most involve tripping Boo-by traps like the shifting coffins and triggering that irascible piano (I don't know whether to make a "Cho(m)pin" or a "he'll Schu you up and Bert you out" joke here. "His Bach is worse than his bite"? I'll get back to you all on this.) It's a fun one, and relatively short given the minimal amount of ground to cover.
Big Boo's Balcony is a rare Star that presents its true challenge after the ostensibly difficult part is over. The player simply needs to a find their way to the top floor, which actually requires a tricky somersault and wall jump to reach, and then fight Big Boo on a small, enclosed balcony. This balcony is visible from the start point of the level, so it generates quite the mystery prior to this Star hint. Upon defeating the Big Boo, the Star relocates to the building's roof, which is another very tricky long jump and balancing act. The camera stays far too zoomed out, so some alternative camera control is recommended here to stay on the parts of the roof that won't slide Mario off to the distant ground.
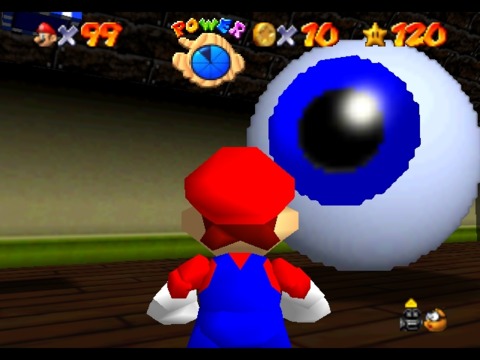
The secret room the hint for the sixth Star refers to is one hidden behind a Boo portrait on the top floor. Not only do you need the Vanish Cap to get past it, but the nearest Vanish Cap is a floor down and in the lobby. The player might need to practice with the jump needed to get them to the third floor because they won't have much time after grabbing the cap. Of course, it's equally likely that the player has yet to find this cap, and thus Big Boo's Haunt completes the trilogy of courses in the initial area with Stars that are inaccessible without the right caps (along with Bob-Omb's Battlefield and its Flying Cap Star, and Jolly Roger Bay with its Metal Cap Star). Better find those cap switches, bucko.
100-Coin Challenge: Given that every enemy in this stage (excepting the spiders) provides Mario with five coins, it doesn't take long to gather the required amount. The blue coin block on the third floor is another twenty, and the player's already familiar with where the eight red coins are. This brings up the total to a very reasonable ~125 coins.
Bowser Road 1: Bowser in the Dark World
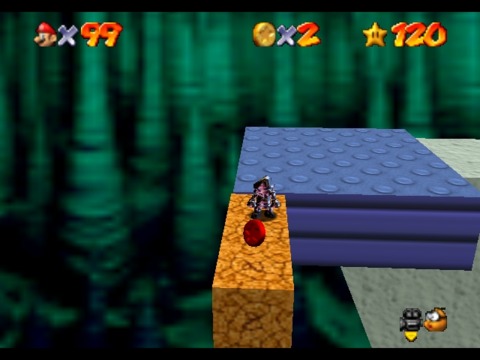
Though they are among the most challenging areas in the game, and deliberately so, the three Bowser Road stages are my favorites because they more than anything else embody this ongoing theme of "throw it against the wall and see what sticks" approach to game design. While many set-pieces of the Bowser Road stages will appear in the game's courses, a number of elements are unique to Bowser Road and because of this it feels like a repository of every crackpot idea for a platforming sequence or puzzle that the developers had that they couldn't fit in elsewhere. Essentially a linear obstacle course to the pipe where Bowser awaits, there's also a number of red coins scattered around along the way, and a few are better hidden than they have been so far. For instance, the second red coin requires the same timed block switch as the first, but it's easy to assume that the switch is meant for that initial red coin and that red coin alone. The second requires a quick run back to the start of the area while the switch is active and is quite easy to miss as a result.
As for the fight itself, we're all pretty familiar with the "so long-a Bowser" (or your preferred interpretation) routine. I feel like the fact that it's almost all entirely based on timing, at least when it comes down to that final throw, is a (possibly incidental) callback to Bowser's first appearances in Super Mario Bros. where the player simply had to pick their moment to run past him. The control stick gets a good work out with that spinning motion at any rate, and you need sterling camera control in addition to some evasive skills to reach the tail in the first place. A boss fight should challenge you in multiple ways, after all, though they sure don't vary it up much.
I should also note what a neat touch it is to have a Princess portrait morph into a Bowser portrait the closer you get to it (which has to have some deleterious effect to Mario's libido) until it's completely Bowser and the floor opens up beneath your feet to complete the "trap". Each of the Bowser Roads has a fun little gimmick like this.
(Also, I just said it earlier without realizing the extent of what it might mean, but how perfect is it to refer to the core stages (the fifteen stages with seven Stars) as "main courses" when there's a dessert waiting for Mario at the end?)
Anyway, I think that ought to suffice for now. When we next pick this up, we'll look at the first two basement courses (that would be the maze one and the lava one) and a few of the secrets that await Mario beneath the castle (including both of the remaining secret zones with cap switches!). See you then.
Log in to comment