Film and 40s: Ducking (Sidechaining) commentary w. Adobe Audition

Avatar image for buschdeluxe
buschdeluxe

24

Forum Posts

0

Wiki Points

0

Followers

Reviews: 0

User Lists: 0

#1  Edited By buschdeluxe

Here's a tip on getting the movie audio track to dip in volume whenever commentary is going on. IMO this especially important for the F&F movies because of the crazy loud engine noises. The software in use is Adobe Audition and MKVToolNix. Also check @renegadedoppelganger post here for alternative method (though no audio ducking there).

-----------------

Prerequisite:

Rip of the movie

GB Film & 40s commentary track of said movie

MKVToolNix

Adobe Audition (AA)

-----------------

Steps
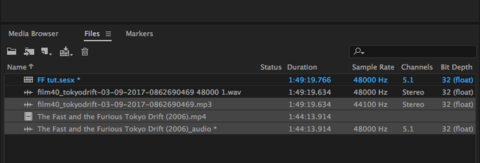
1. Open AA and import the movie and GB commentary track

2. Create a "Multitrack" session. Name the session and set the session folder location. Sample rate: 48000 Hz. Bit depth: 32 (float). Master: 5.1

No Caption Provided

3. Select the movie, the movie audio and the commentary track and drag it onto the editor (import as separate tracks)

No Caption Provided
4. Line up the commentary track with the movie audio by referencing what ever the GB crew does for timing instructions. Basically you want to find the "3-2-1" in the commentary audio and cut away the intro talk by dragging the in-point of the audio waveform. Then you can adjust waveform on the timeline.

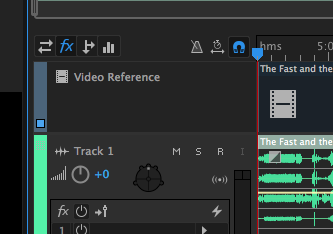
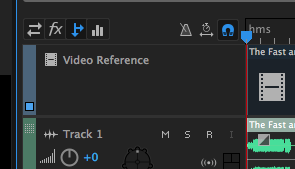
5. Click the "fx" button located in the top-left of the editor

No Caption Provided

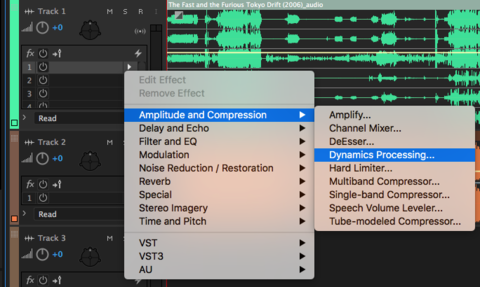
6. Click arrow on the first entry in the effects rack and select "Amplitude and Compression">"Dynamics Processing"

No Caption Provided

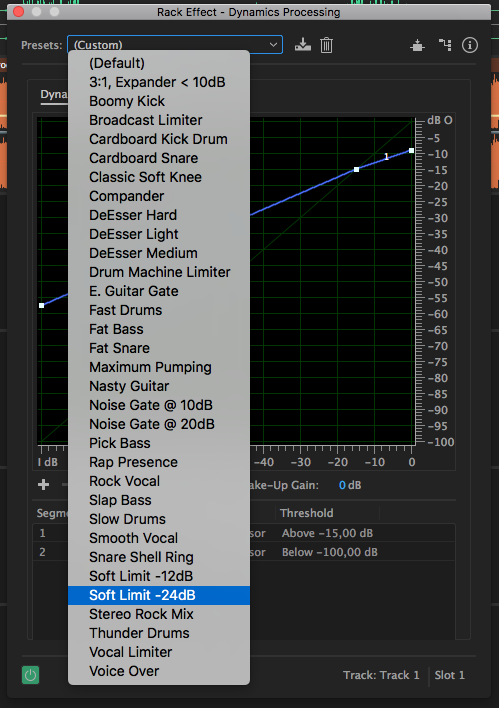
7. In the "presets" drop-down select "Soft Llimit -24 dB"

No Caption Provided

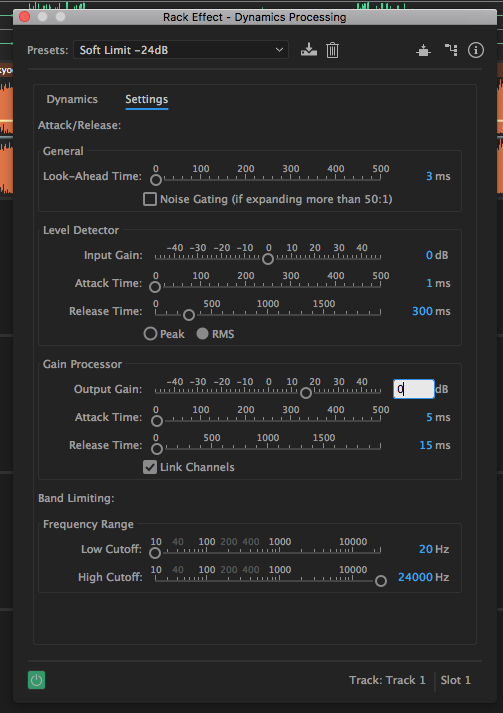
8. Click the "settings" tab and turn down the "Output Gain" from 16 (default) to 0. Close the "Rack Effect" window

No Caption Provided

9. Click the "Sends" button located in the top-left of the editor to the right of the the "fx" button.

No Caption Provided

10. On the commentary audio track click "S1: None">"Side-Chain">"Create">"Dynamics Processing"

No Caption Provided

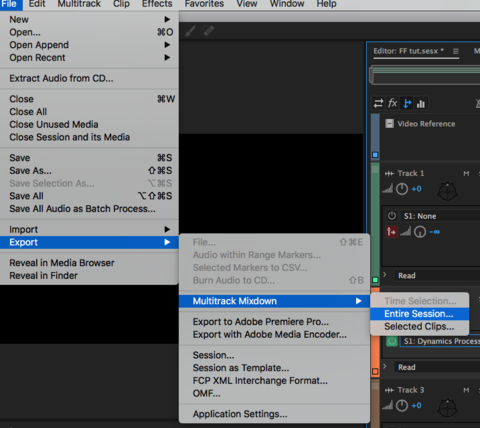
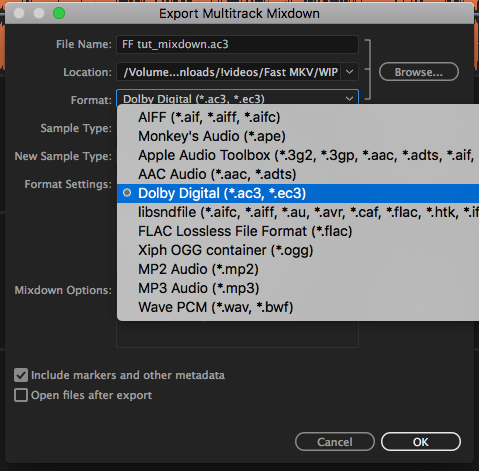
11. Select "File">"Export">"Multitrack Mixdown">"Entire Session". Name the file. Set the location and choose a format (Dolby Digital works for me). Press "OK". Now grab a brew a wait a around 5 minutes (depending on the fastness of your computer) for AA to process the file.

No Caption Provided
No Caption Provided

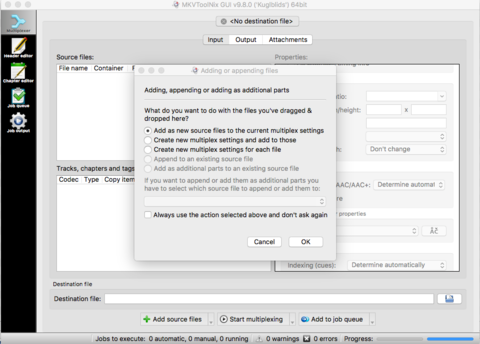
12. Open MKVToolNix and add the movie and the audio track the we created (either via "Add source files" or drag'n'drop the files into the GUI). Choose the option "Add as new source files to the current multiplex settings"

No Caption Provided

13. Set destination file and click "Start multiplexing". Congrats you're done! Now you can open the file in a player of your own choosing and select the commentary track.

I'm not an audio engineer any stretch of the imagination but don't hesitate ask if you have any questions relating to the guide.

Avatar image for meekodraf
meekodraf

25

Forum Posts

0

Wiki Points

0

Followers

Reviews: 0

User Lists: 0

Thanks for the guide! I'm having a bit of trouble figuring out where to tell the individual files where to begin. I seem to be dragging too far or too little. Would using the start/end selection/view work for this?

Avatar image for oursin_360
OurSin_360

6675

Forum Posts

0

Wiki Points

0

Followers

Reviews: 0

User Lists: 0

Nice, i never would have thought to use it outside of kick and sub bass.

Avatar image for shutuplegs76
ShutUpLegs76

2

Forum Posts

0

Wiki Points

0

Followers

Reviews: 0

User Lists: 0

This is awesome and pretty easy to do! Thanks so much!

Avatar image for theuprightman
theuprightman

350

Forum Posts

55

Wiki Points

0

Followers

Reviews: 0

User Lists: 0

Thank You

Avatar image for joshrholloway
joshrholloway

84

Forum Posts

33

Wiki Points

0

Followers

Reviews: 0

User Lists: 4

I was searching Google for 'sidechain compression commentary' to do this exact thing to my own copies of Film & 40s and found this thread. :P

I found that everything personally sounded better to me if I started with the -24dB preset, then manually adjusted the right part of the curve down to about -40, then on the settings screen changed the release time to 1000ms.

Avatar image for buschdeluxe
buschdeluxe

24

Forum Posts

0

Wiki Points

0

Followers

Reviews: 0

User Lists: 0

#7  Edited By buschdeluxe

Oh fudge - i completely forgot about this post. Great that ya'll found it useful! @meekodraf I don't think I follow your question, but I do the syncing manually. It's easiest to do when when there's overlapping sound from the two audio sources. @joshrholloway thanks for the tweak tip. I'll try it out next time.