The Quest For The Worst Adventure Game Puzzles - The Legend of Kyrandia: Book One [Part 1]
By ZombiePie 10 Comments
Preamble
If you enjoy this blog and would like to read my other adventure game retrospectives, here's a list of my previous episodes of this series:
- Episode 1: The Dig
- Episode 2: Atlantis: The Lost Tales
- Episode 3: Loom
- Episode 4: Drowned God
- Episode 5a: Indiana Jones and the Fate of Atlantis Part 1 & Episode 5b: Indiana Jones and the Fate of Atlantis - Part 2
- Episode 6: The Journeyman Project: Pegasus Prime
- Episode 7a: The Journeyman Project 2: Buried in Time (Part 1) & Episode 7b: The Journeyman Project 2: Buried in Time (Part 2)
- Episode 8a: The Journeyman Project 3: Legacy of Time (Part 1) & Episode 8B: The Journeyman Project 3: Legacy of Time (Part 2)
After hitting some writer's block, I decided to treat myself to a good time. The Kyrandia Series has always been an interesting middle ground between the two dominant classical adventure game schools of thought. The team at Westwood Studios, Inc. that worked on the first two Kyrandia games pulled the best ideas and concepts of LucasArts and Sierra On-Line while also putting their spin on things. While Westwood Studios has the reputation of being an RTS powerhouse, most forget how diverse their video game portfolio was before the Command and Conquer series took off. The studio started out with a strategic partnership with SSI and Epyx, porting AD&D campaigns and properties to 8 and 16-bit home computers. Then Westwood had their first proper hit with Eye of the Beholder (1991), and when Virgin Interactive bought them, they started putting their hands in every PC gaming cookie jar.
When EA bought Westwood, independent estimates claimed that they alone represented 5% to 7% of all PC game sales. Imagine every person in the world spending $20 on Steam and knowing $1 of that was going to one developer. It's simply impossible to fathom these days, but it highlights how dominant a player Westwood was in the PC gaming arena. They did everything. Hence, you shouldn't be that surprised to hear they made a moderately successful adventure game series with The Legend of Kyrandia franchise. I will go to my grave saying that I think the second game in the series is on par with the peak works of LucasArts and Sierra and deserves far more respect from defenders of both of those studios when talking about the highlights of this era of adventure games. However, this time, we are talking about the first game, The Legend of Kyrandia: Book One.

In this game, you can tell Westwood was still trying to figure out how to take the core mechanics of the adventure game genre and streamline them to make them more appealing to the general audience. The first sign of this streamlining comes in the absence of any verb parsers or SCUMM Engine equivalent. In the Legend of Kyrandia games, you click on objects with your mouse cursor and place them into inventory slots without worrying about matching verbs to those objects. When you want to combine two items, you again rely on a limited number of mouse clicks. You can even de-merge two things by double clicking, which is incredibly seamless. None of that should suggest the click-based system in the first Kyrandia game is perfect. The game only provides ten inventory slots, which is not enough in such an item-focused game. Often, I had to use random screens or levels to "dump" items I knew I needed for future puzzles but didn't have any space for them. Likewise, the first game in the series lacks item-burning and a key-item mechanic that the next two games mercifully do have. In Book One, you must remember to include necessary items on Brandon when transitioning from one act or environment to the next. Furthermore, the game doesn't remove useless things you will no longer need. Nonetheless, neither of these quibbles prevent the game from being a fun time, except for maybe ONE LEVEL we will discuss shortly. So, without further ado, let's review the first half of the game and its many puzzles!
Ratings Explained: I'm using a continuum ranging from 1 to 10. Puzzles ranging from one to four are accessible sequences or set pieces that can be solved without guides or hints, regardless of your puzzle game expertise. Puzzles ranked between five and six are ones that only intermediate puzzle game players can solve, but beginners can solve in-game through clues, hints, or significant trial-and-error. From seven and above, we get into puzzles that most players cannot solve without consulting outside resources. Also in this category are puzzles that have major accessibility issues.
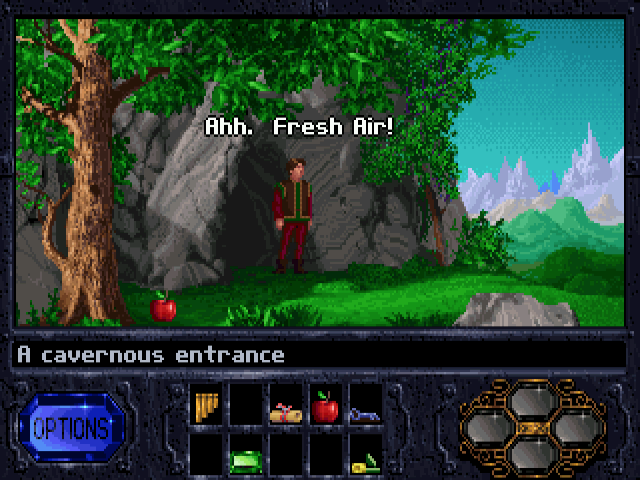
Brandon's Forest

Exploring Brandon's Home - [Rating: 2/10] - After the opening cinematic introducing the game's antagonist, Malcolm the jester, you eventually take control of the game's protagonist, Brandon. Brandon enters his home and discovers his grandfather has been turned to stone by some evil hex. After locating a note on a nearby desk, Brandon struggles to read it, believing that a magical seal prevents its contents from being read. However, before he gets to that, Brandon will need to search his abode for any valuable items that may assist him in his journey. Unless you enjoy needing to backtrack when running into assumed dead-ends of puzzles, you will need to find a garnet, saw, note, and apple. Some of these items, like the saw, are harder to find than others.
I usually grouse about item collecting in these early adventure games. They feel like glorified pixel hunts as if they are hidden object games. Nonetheless, Legend of Kyrandia gets a pass from me for one specific quality of life design decision. Unlike LucasArts or Sierra games, where you will need to work with a verb parser or the SCUMM engine, in Kyrandia, you click on things once and drag them into your inventory without any added steps. The seamlessness of this process means that when Kyranida presents an environmental puzzle, you can more quickly deduce solutions because you do not need to fiddle around with dozens of permutations of your desired action. Your early folly in Brandon's treehouse is a fun tutorial of Kyrandia's more freeform structure and gameplay. For that reason, I think it's a great way to introduce its mechanics, especially to those more familiar with SCUMM engine games. For that reason, I have to give it some props.
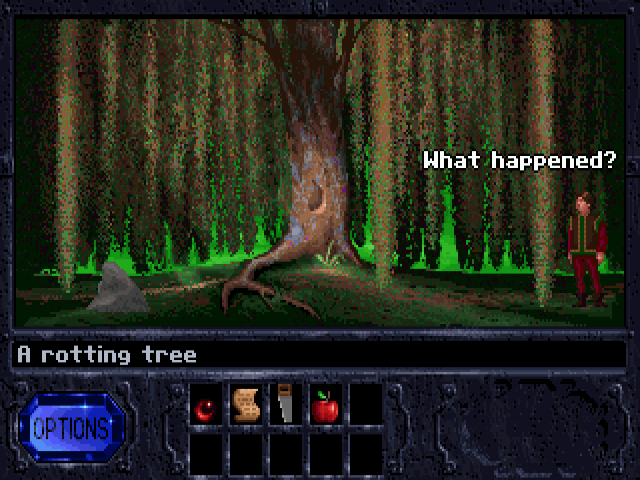
Helping The Rotting Tree - [Rating: 2/10] - With all the starting items needed to make Brandon's upcoming adventure marginally easier, it's time to exit his arboreal abode. After leaving the starting room, step on a tree branch and then walk right from the tree twice to encounter a grove of trees crying over Malcolm's recent flurry of destruction. As you approach a pool of water, click on it to collect a teardrop from one of the weeping willows. Next, you will need to move left until you find a tree that was a recent victim of Malcolm's rage. Apply the teardrop to the tree to revive it, which then initiates a new sequence involving Merith. Overall, I found this puzzle to be another friendly tutorial on how differently the rules of Kyrandia function in comparison to its then contemporaries. It also does a decent enough job at world-building, and if you decide to explore optional screens while trying to complete this puzzle, you'll get some fun hints about what to expect in the future.
The trick here is to mention that Kyrandia is an open-world adventure game with three distinct acts. The first act takes place in the starting hub world of Kyrandia, the second involves the other side of Kyrandia when Zanthia rescues Brandon, and the final is when you enter Malcolm's mansion. Each of these environments has dead ends and interstitial screens that exist for no other purpose but to create a sense that the worlds you are exploring are more extensive than they are on paper. The downside is that exploring the world can result in you losing sight of what your objective might be or what essential items you need to acquire. In this case, moving left from the treehouse leads to dozens of weird subplots that might lead you down paths that are red herrings. There's no denying this downside, but the format of Kyrandia is also one of its main selling points, with its breezy structure leading to a much less regimented pace you would find in any LucasArts title at the time.
Chasing Merith & Picking Up The Peridot Gemstone - [Rating: 2/10] - After helping the dying tree, a young boy named Merith appears and challenges Brandon to take a marble from them. While Brandon seems annoyed at Merith's command, you need the marble regardless. You chase him for a few screens until you watch a leaf fall from a tree. The leaf turns into peridot, and it is safe to assume the game wants you to nab this gemstone. After picking this up, continue until you find Merith attempting to hide behind a tree. Sneak up on him, and upon taking him by surprise, pick up the marble he drops. It takes a little longer than I'd like, but as long as you remember to pick up the peridot and carefully evade Merith on the final screen, it's not too difficult. If you keep moving right, you'll find the solution. This sequence is more cinematic-based than a full-on puzzle, but it introduces a handful of critical locations and backdrops you'll return to later in the game.

Fixing The Forest Altar - [Rating: 1/10] - After acquiring Merith's marble, he mentions he picked it up at a nearby altar. Upon moving right, you'll find the altar and notice Merith's vandalism has rendered it inert. To fix it, place the marble in the missing slot on the altar to repair it. Before you leave, remember to pick a rose from a nearby bush. That's all there is to this puzzle. Not everything in this feature is going to be an eighteen-step process.
Meeting Your Sister Brynn And Making A Silver Rose - [Rating: 3/10] - With the altar repaired, it is time to pay Brandon's sister, Brynn, a visit at the local temple. To do that, move Left, Down, Left, Left, and then Up, and upon entering the temple, show her Brandon's grandfather's note, and she will be able to read it aloud. To Brandon's surprise, he learns he is the heir apparent to the throne of Kyrandia and is capable of performing magic. To assist him in starting his journey, Brynn asks Brandon to fetch a "Lavender Rose." If you forgot to pick one up from the altar, they are there, and when you give her a rose, she transforms it into a "Silver Rose." She states that Brandon will unlock his first magical ability upon activating the Silver Rose on the forest altar.

The next part of the game is a far worse example, but it is around here when Legend of Kyrandia's open-world format will either make or break your impressions of it. The temple is not that far from the altar, but the lack of signposting and the game's many varying pathways and interstitial screens make navigating the game's world a chore. Even when you know where you need to go, you need to cross upwards of ten to twenty screens, and when you need to move back and forth between two locations, which is the case here, I can only imagine some people becoming frustrated quickly. This specific sequence is not an absolute ball-buster but, instead, annoying and fiddly.
Unlocking The Magical Amulet - [Rating: 3/10] - After your run-in with Brynn, the world of Kyrandia will begin spawning gemstones on random screens. When you encounter these stones, you must pick them up and place them in your inventory or on an easy-to-locate screen. Nonetheless, you will need to return to the forest altar from the temple. To highlight my slight annoyance at the game's reliance on back-and-forth mission design, I'll mention the fastest route is Down, Right, Right, Right, Right, Right, Up, and then Right. Trust me; it will only get more convoluted as the game progresses. When you approach the forest altar, Brandon places the Silver Rose there and gains the amulet Brynn mentioned earlier, but it does not have any of the magical abilities she said. Next, you backtrack to the temple, likely repeating the same steps from before, only to discover that Brynn has been kidnapped and cannot assist in teaching Brandon the magic he will need to succeed in his adventure. I'm bumping this puzzle up a few notches above the tutorial puzzles, not because it is more challenging but because it involves a ridiculous amount of aimless wandering. There's no real reason for the locations to be this far away from one another other than the designers wanted you to get lost and extend the game's playtime. It's a padding technique and a frustrating one at that.

Helping Herman Build A Bridge - [Rating: 3/10] - With Brynn out of the picture, for now, it's time to unlock the second half of the starting continent of Kyrandia. To start that quest, you need to move Down, Right, Right, Right, Right, Right, Down, Down, and then Left. Inside a cave, you'll find a hapless carpenter attempting to repair a broken bridge but lacking a saw. Hopefully, you remembered to pick up the saw at Brandon's house because it is a relatively long journey back from the cave. When you hand the saw to the carpenter named Herman, he moves to the right and out of the cave. When you follow him, you watch him sawing down a tree. To move the story further, you'll need to walk up to spawn him back in the cave with the bridge fully repaired.
I first have to mention how directionless the game becomes when you discover Brynn is missing. Brandon muses that he likely will need to find someone else to help him on his journey, but that's all you get. There are seventeen screens in this starting hub world, and Herman occupies one tucked away in a corner you likely have never seen. Likewise, knowing how to trigger things and repair the bridge is slightly tricky but nothing extraordinary. The final monkey wrench has to be the saw, which is obscured enough in Brandon's home that it is easy to miss in your first playthrough if you are not careful. I can't get too angry, considering the small scope of Kyrandia the game locks you into at this point. Nonetheless, wandering around in circles is never a great feeling in any video game, let alone an adventure game.
The Timbermist Woods
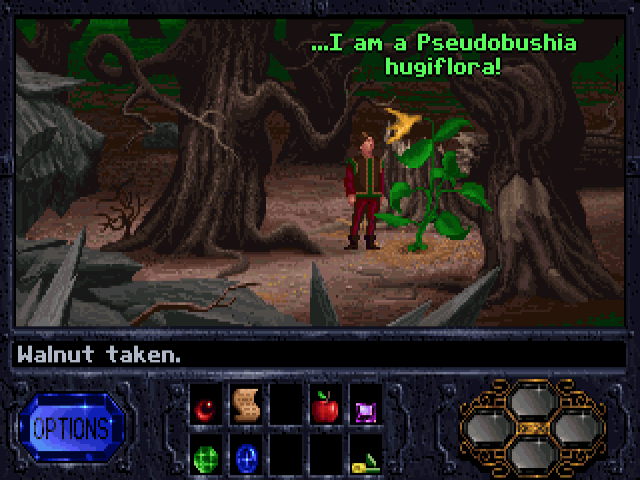
Restoring The Glade - [Rating: 5/10] - After crossing the newly repaired bridge, Brandon finds himself at the "Timbermist Woods." Brandon exclaims he wishes to confront Malcolm but first runs into the wizard Darm and his female dragon companion. After an extensive conversation with both, Darm shares that he can help Brandon but requires a quill. You then move Down, Right, Left, Left, Left, Down, Right, Right, Right, Right, Down, Down, and finally Left. By the way, the second part of the forest has A LOT of walking! Along the way, you must pick up a walnut, acorn, pinecone, and yellow tulip. At the end of the journey, you end up in a dead grove, but Brandon identifies a hole where he suspects he could grow a plant if he had a seed. As you might imagine, you plant the tree nuts into the hole, and after some rumbling, a massive yellow flower erupts from the ground and teaches Brandon his first magical spell, which allows him to heal himself and those around him.
I will bump the score for this puzzle a few notches because Darm's mission provides a bit of a red herring. When you first meet him and his dragon, they suggest that helping him get his quill should be your priority, but that is not the case. A random NPC in one of the interstitial levels tells you, "In order to harvest, you must sow," which is a clever enough hint that you cannot immediately gather a feather from a nearby songbird. However, the clearing is so far from where you meet Darm and eventually collect the feather for the quill that I cannot help but wonder if the game would have been better off if the environment here was smaller. Yet again, the hardest part of the puzzle is not getting lost or losing your bearings. The good news this time is that there are more monuments, and they can serve as your mental compass markers. Unfortunately, the different tree nuts have the same monochromatic brown texture and can be incredibly difficult to find if you don't know what you are looking for in the game. We still have a few more puzzles that are miles above this one, but I thought this was a step up from what you have encountered in the game up to this point.
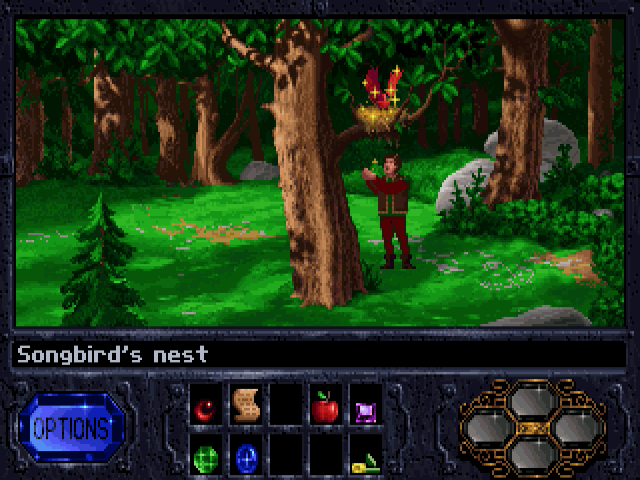
Getting A Quill For Darm - [Rating: 2/10] - Now that Brandon knows healing magic, he needs to locate an injured songbird north from the dead grove. When he finds this bird, the player needs to click the yellow portion of the amulet and then the target, in this case, the bird, to heal them. After performing this feat, the bird flies away but not before dropping a feather Brandon can pick up and then present to Dram as a quill. The wizard uses the feather to write on a scroll, which you later learn is a Frost Scroll, and his dragon companion lectures about gemstones that have been littering the world of Kyrandia recently. There's nothing too complicated here, though I feel it is worth mentioning that the amulet is fiddly and if you misclick your spell, you'll have to wait a bit because it has a non-insignificant cooldown. Otherwise, Darm and the dragon provide some fun world-building.

Getting Random Gemstones & The Sunstone - [Rating: 6/10] - We are now truly adventure gaming! There are twelve gemstones in Legend of Kyrandia: Book One, and the vast majority have randomized placements strew all across the two halves of the starting forest. Except for rubies and the Sunstone, you need to scan every possible screen and environment you have encountered up to this point and see if it has a gemstone. There are two of every type, and getting them is a colossal pain in the ass. During the introduction, I mentioned how much I'm not too fond of inventory management in this game, and this puzzle is where my distaste takes complete form. You only have ten inventory slots, and that's not even enough to hold one of every gemstone type. As such, you will need to place most of your gemstones on the ground next to the shrine where you will be using them. However, the game also has a hard cap on how many items you can have in a single environment! As such, it's a complete NIGHTMARE collecting all the needed gemstones and knowing where to put them!
The ruby gemstone and Sunstone deserve a separate explanation. To get rubies, you'll need to find a tree north of an oak grove that grows them. However, when Brandon attempts to pick one of the stones, a viper bites and poisons him. You can still grab the stone, but you will also need to use his healing magic or otherwise risk him dying. The cooldown on the spell makes getting the recommended two of every stone type grueling. The Sunstone is also tricky and requires some environmental detective work. You'll need to find a babbling brook and search it to find the Sunstone. The creek is tucked away in the furthest corner of the map, and there's nothing there to suggest you need to find a precious mission-critical gemstone there. Getting rubies and the Sunstone is NOT fun, but the real kicker here is getting the other gemstones. I spent twenty minutes wandering around every observable part of the starting hub world, hoping to find stones that I did not understand how their spawn rate worked. Sometimes I had four copies of a rock, and other times I only had two. It's not necessarily a tricky proposition, but it is time-consuming, and the game doesn't give you any "freebies" or hints about how best to go about this part.
The Birthstone Quest - [Rating: 7/10] - Holy shit, this game ramps up its difficulty out of nowhere! In the second half of the forest is an ornate marble altar, and while there, Brandon must place four birthstones in the correct order. However, Brandon has no idea what his birthstones are, and everyone in the world is none the wiser. The good news is that the Sunstone always occupies the first slot. The unfortunate news is that placing a gemstone in the wrong position causes the altar to destroy it. The implication is that you could burn all your copies of a single gem on the first two empty slots only to find out it was needed in the final one. In that case, you would need to return to wandering around in the forest, hoping to locate another one. That is why I strongly advise you to save scum if you decide to play this game.
I cannot emphasize enough how the vast majority of the stones have randomized spawn locations entirely unknown to the player. To have their use boil down to a luck-based math problem is the ultimate cherry on top of a shit sundae. However, as I said before, this puzzle is not impossible. It's just tedious bullshit made more problematic because of the game's enormous sense of scale and limited inventory system. In the game's defense, I will say that it is "top-heavy" regarding its difficulty curve. There is an odd spike during its mid-point, and if you get past this and one more puzzle, which we will discuss, do not worry, my sweet summer child, then getting to the end is no problem.
The Labyrinth
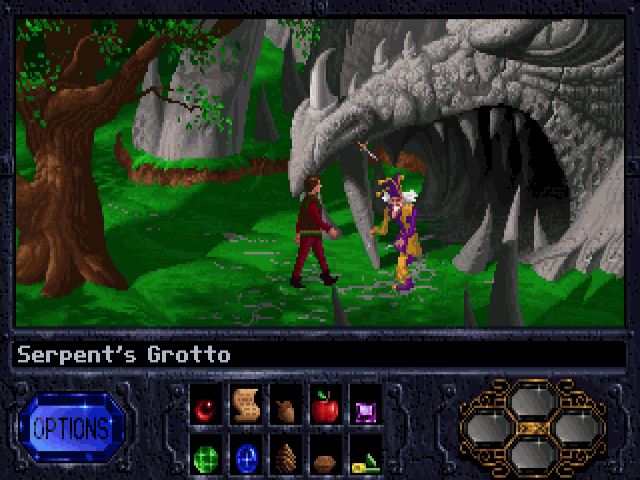
Meeting Malcolm & Entering The Cave - [Rating: 4/10] - With the gemstones out of the way, at least temporarily, it's time for Brandon to give Malcolm a piece of his mind. From the marble altar, move Right, Right, Down, Down, Down, Right, and Right to reach the entrance of a cave that features a dragon façade. When Brandon attempts to enter this cave, Malcolm appears and pushes him backward. After a bit of back and forth, Malcolm throws a knife at Brandon but misses. You must click this knife as soon as possible to throw it back. Otherwise, Malcolm casts a spell that results in an immediate game over. I initially thought I had to move closer to the knife before clicking it, but I discovered that it is considered an incorrect input, and the game will only allow you to click the blade during this sequence. Any button click not in the knife's hitbox causes Malcolm to murder Brandon.
The second part of this puzzle is significantly easier. When you impress Malcolm with your knife-throwing skills, he departs but not before he seals the cave's entrance with a wall of ice. To break down this wall like you're Ronald Reagan, click the flute you got from the marble altar, and it will destroy the barrier. I know I have already groused about the game's lack of an inventory "burning" mechanic, but sequences like these are exponentially more challenging because of their absence. Let's say you did NOT pick up the flute because you already have an inventory filled to the brim with gemstones, roses, rocks, and other random bullshit. Plenty of previous inventory items make sense when destroying a wall of ice. If you have been relying on plopping your shit on the ground of a specific screen or two, getting what you think you need to use on a puzzle that requires a particular item can result in needless back-and-forth trips. Again, it's an annoyance that had an easy solution that other contemporaries utilized to avoid this exact feeling of frustration. Otherwise, this is one of the few tasks associated with the cave I do not actively hate.
The Labyrinth Part 1 - [Rating: 10/10] - HOLY SHIT! I remember hating this puzzle when I first played this game, and still, I'm not too fond of it, even with age. First, starting the labyrinth level with a specific assortment of items is essential. The game does not tell you this information and is happy to make you trace your steps back out of the dungeon to run around the forest, picking up random stuff it demands you to have in your possession to progress the story. These items are a flute, frost scroll, apple, rose, tulip, sapphire, ruby, and topaz. The flute and frost scrolls are important story items, and their necessity is understandable. However, the tulip and rose are pickups dating back to the game's first hour, and there's no rhyme or reason why the game wants those three specific gemstones instead of the other ones. Nonetheless, you move from the starting mineral pool until Brandon triggers a pressure plate that traps him in the dungeon. If he wishes to get out, he will need five rocks to flip a counterweight.
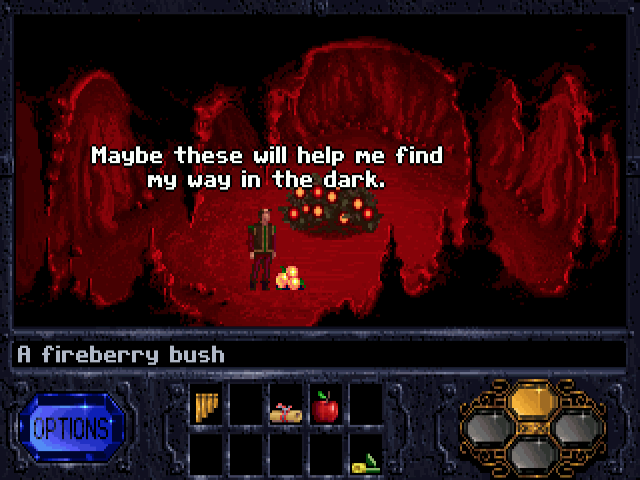
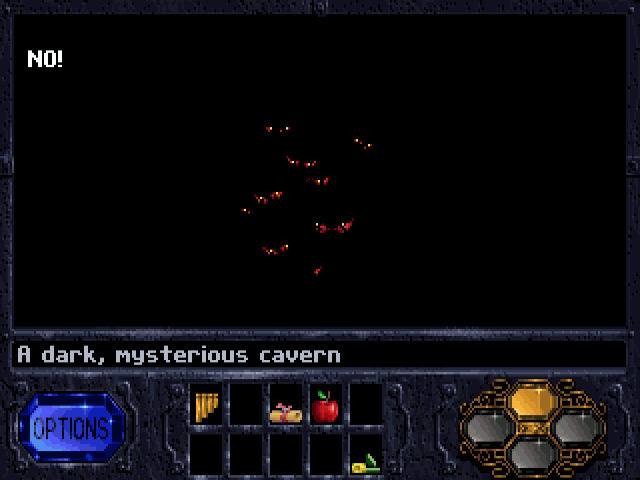
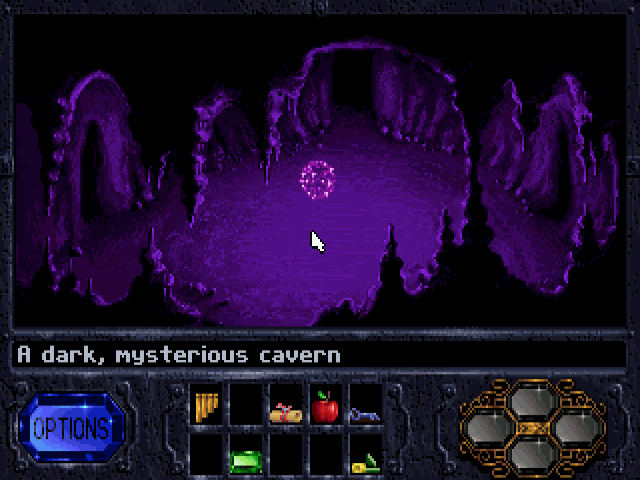
There are some tricky puzzles in Legend of Kryandia. The gemstone quest can be frustrating if you don't save scum and the final mansion sequence has some shitty parts as well. But none of that, no, none of that compares to the labyrinth. In what I can only call the worst part of the game, you must navigate an endless zig-zagging dungeon with the same three to four repeating room designs until you pick up a handful of MacGuffins. First, remembering to pick up the fireberries and knowing how to use them is critical unless you enjoy seeing Brandon eaten by a Grue. However, the berries explode in your inventory after Brandon navigates three screens, and if you are caught in an unilluminated room for too long, a monster will eat him. The complete lack of signposting or signaling from the game as to whether or not you are going in the right direction is gut-wrenching. Dozens of dead-ends can result in an immediate "game over" if you are not following a guide and the game stacks the deck against you in other regards. Remember those plot-critical trinkets I mentioned a while ago? They are found in "special" rooms like the "Pantheon Of Moonlight" or "Cavern Of Emeralds," but there's no indication in-game if you have collected the needed items from those rooms to continue your journey.
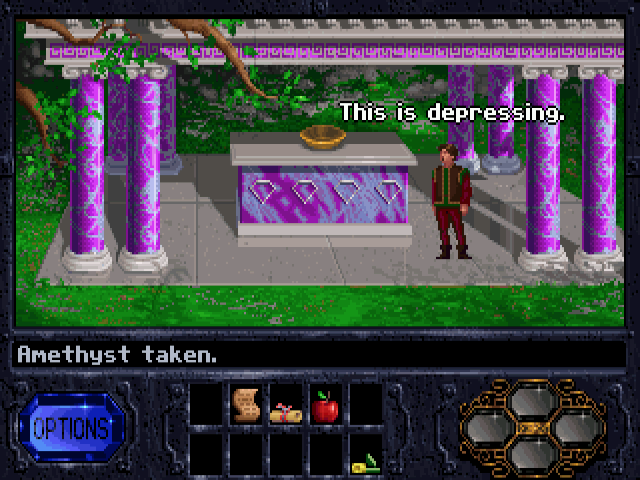
However, the breadth and scope of the labyrinth make it an all-time worst puzzle I have ever played. To give you an idea of what I am talking about, after finishing the game, I looked up the most efficient way to navigate it and was shocked to discover my blind playthrough was only ten or so steps away from it. For example, to get to the "Pantheon Of Moonlight," you will need to move Right, Up, Right, Down, Down, Down, Right, Right, Down, Left, Up, Left, Up, Right, Up, Up, Right, Up, Left, Up, Right, Right, Down, and Right. That's right, the most efficient way to get to the pantheon AND cover rooms with fireberries, so you do not die requires TWENTY FOUR STEPS! But that's only the first part of the sequence! After Brandon learns about the woes of the Will-O-Wisps, he has to find the "Cavern of Emeralds." To get there from the pantheon, he must move Right, Down, Right, Right, Right, Right, Right, Right, Up, Down, Left, Left, and Down. I forgot to mention how critical it is to empty your inventory before you trek deeper into the caves because you have a LOT of shit to pick up! You have up to three berries at all times in your pockets, eventually five rocks, a gold coin, and two emeralds. But we are only HALFWAY DONE with the labyrinth! From the Cavern of Emeralds, we need to get to the Cavern Of Twilight to pick up a gold coin that is nigh impossible to see. The best route to get there is Down, Left, Up, Left, Left, Down, Down, Right, Right, Down, Left, Left, and finally Left. When you pick up the gold coin, the game expects you to find your way back to the entrance!

Fuck this entire level! I have previously ranked labyrinth sequences in classic adventure games reasonably high on my scale. The final dungeon sequence in Indiana Jones and the Fate of Atlantis immediately comes to mind but Drowned God and Atlantis: The Lost Tales also features some heinous last levels that are Greek-inspired mazes. This specific labyrinth sequence might be the worst of the batch because it comes out of nowhere and, unlike the other examples, isn't the culmination of a massive thematic climax. Legend of Kyrandia: Book One still has two more acts to go, and it provides a difficulty spike during its mid-point. It's a long slog where players can loop around in circles and not even know it. Even with the fireberries marking your path, there are times when you need to retrace your steps, and that is nigh impossible to do if you don't have a map or guide on standby unless you have no qualms with spending hours of your time looking at the same three to four dungeon screens. I'LL TELL YOU; IT'S NOT A GREAT TIME!
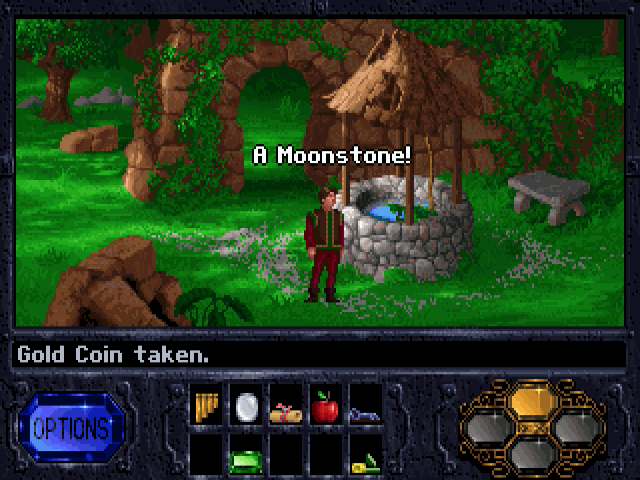
Using The Ancient Well - [Rating: 2/10] - When you wrap back to the cave entrance, you should have five heavy rocks. After selecting these rocks, aim them at a hanging dish and end up with four triggering the gate out of the dungeon. If you met with the Will-O-Wisps, you might recall they need a Moonstone before they teach Brandon a new magical ability. To get this stone, exit the grotto and move two screens left. Then move up twice and locate the "Ancient Well." The Moonstone is at the bottom of the well, but climbing down the well is not an option. To obtain the stone, take the gold coin from the Cavern Of Twilight and toss it into the well to trigger a geyser that shoots the Moonstone next to Brandon. The only tricky part of this puzzle is knowing to go to the well in the first place. Everything else is cake. The only part of this sequence I truly disliked was the growing existential dread of knowing I would need to return to the labyrinth to complete one last trek inside.
The Labyrinth Part 1 - [Rating: 7/10] - The good news is that your second rodeo in the cave system is far easier than the first. For one thing, there are far fewer items for you to pick up, and the sequencing is much shorter. Your first task is to return to the Pantheon Of Moonlight, and I will not repeat the steps to get there because they are the same, and if you used the berries during your first journey, you don't need to worry about that step during this bit. When you hand over the Moonstone to the Will-O-Wisps, they teach Brandon how to levitate, which he can put to good use by getting over to the other side of a chasm in the dungeon. To get there, walk Left, Left, Down, Down, Down, Down, Down, Right, Right, Right, Right, Right, Right, Up, Right, Down, and Right. Brandon will now find himself next to a volcanic flow that he can only cross if he applies the Frost Scroll from earlier on himself. Initially, I thought you had to use the scroll on the lava, and I was confused when I watched Brandon die in a flurry of fire and flames.
After Brandon crosses the lava flow, he and you are in the cave's home stretch but don't forget to pick up the Iron Key one screen above before you move left. After exiting the volcano, you need to smash another series of directional inputs. Eventually, you will find the chasm I mentioned earlier. Use the amulet and the levitation spell to get to the other side. When Brandon mercifully exits the cave, a tree branch unceremoniously smacks him on the head, and when he wakes up, he discovers he is in Zanthia's laboratory. As I said earlier, this trek in the caves is much easier than the first one, but it is by no means a fun experience. The most efficient paths you can take are still fifteen to twenty inputs long, and getting lost is still a bitch. The rooms in the cave are still monotonous enough that you can never get your bearings down, and again, there are still those monsters that will wreck you if you don't take the time to put down the berries on the ground.