Something went wrong. Try again later

bushpusherr

This user has not updated recently.

1080 2 16 13
Forum Posts Wiki Points Following Followers

I built the murder slingshot

(*Full disclosure: this blog will discuss elements that I built for the purposes of my twitch stream. I don't want this to come off as though I'm sneakily trying to self promote because I really just want to geek out for a bit about what I built, so let's get this out of the way up front. Yes, of course it's cool if people check my stuff out if they feel it speaks to their interests, but no, that isn't the focus of this blog. Let's get into it!*)

For whatever reason, this Bombcast segment has lingered in back of my mind ever since I heard it in 2012.

In the last few months I finally began putting real work into an idea I had to combine my software development experience & education with my interests in video editing & production to develop a custom application for the purposes of making a fun stream to fool around with with my friends. At perhaps the exact moment I decided that I wanted to do something silly to visually represent people getting banned from my channel, this Bombcast clip sprinted to the front my mind and I didn't even consider doing anything else. I wanted to launch my enemies into the sun with a slingshot.

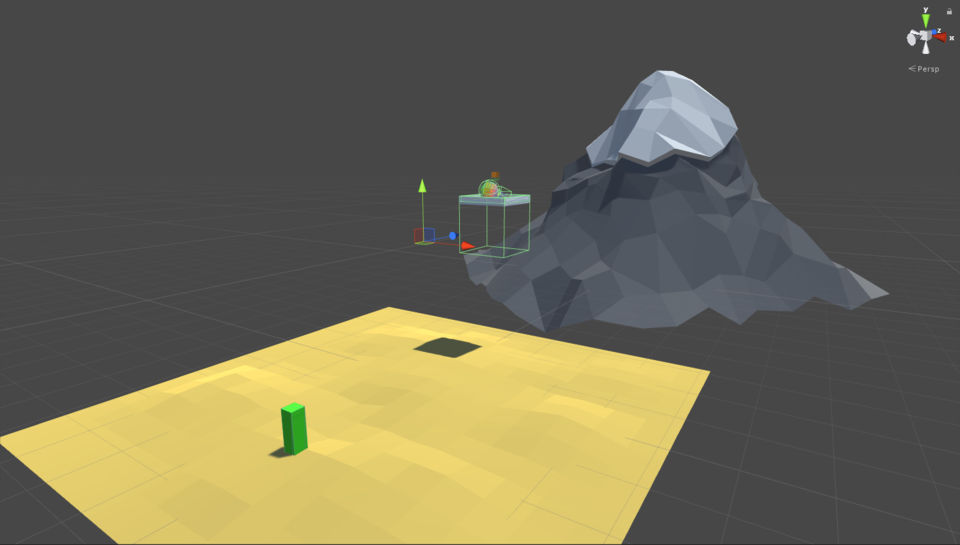
I immediately began experimenting (in Unity, where I developed all of this) with slingshot physics in a test environment where I launched a low-poly avatar into a mountain.
No Caption Provided
No Caption Provided
No Caption Provided

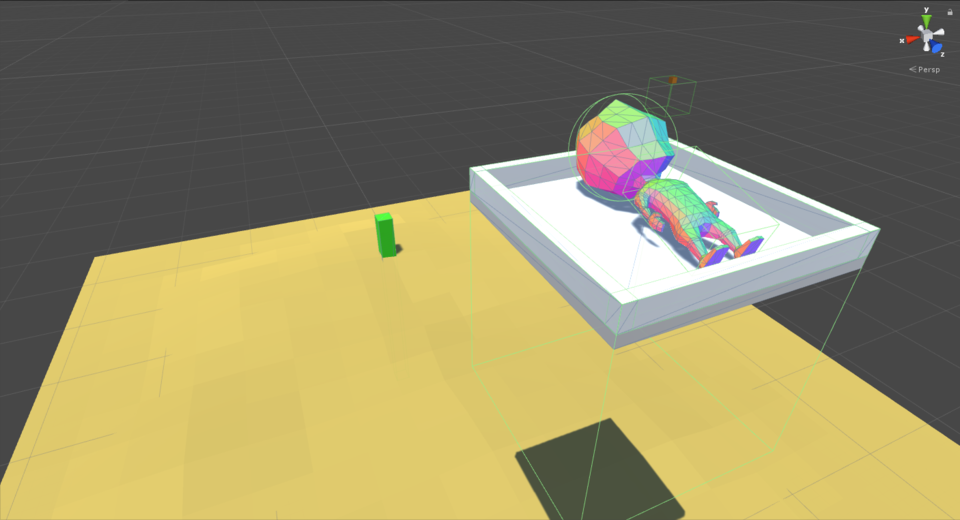
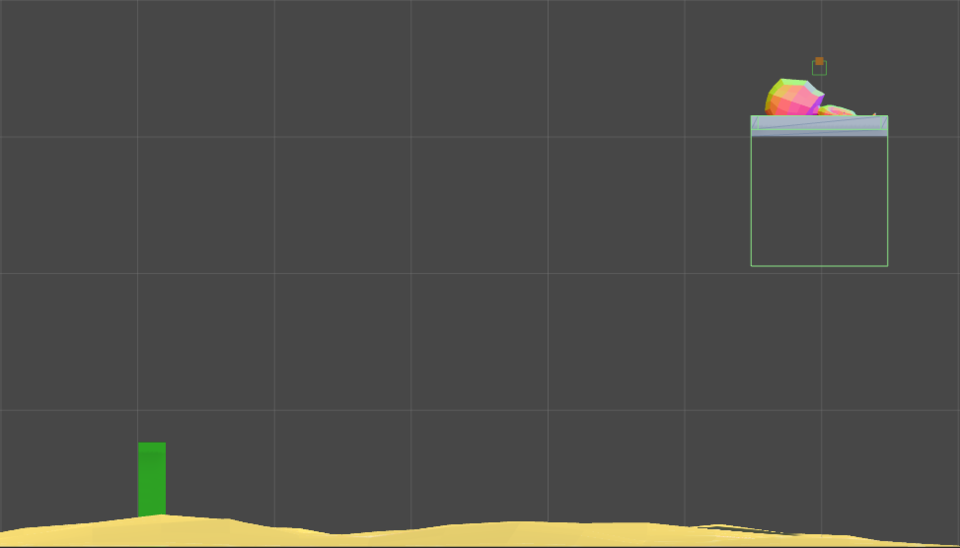
I eventually settled on a solution where an invisible anchor point in space (represented here by the brown cube) would be connected to the center of the launch chassis (the white "box" that our avatar resets in) with a single spring joint. The function of a spring joint is to continuously apply a specific amount of force to attempt to return the connected body back to it's original distance relative to the anchor it's connected to. So, in this case, our launch chassis will fight against gravity to stay about a half-meter below our invisible anchor point. If our spring force is stronger than gravity, the chassis will simply hang in the air (perhaps swaying slightly due to the position and mass of the avatar resting on the chassis).

Given this information, you have perhaps already deduced how the actual slingshot launch works. By disabling the physical components of these objects (disabling the gravitational pull, stopping the spring from applying it's force, etc), I can freely re-position ("pull back") the launch chassis towards the mounting point and leave it there until I'm ready to fire.
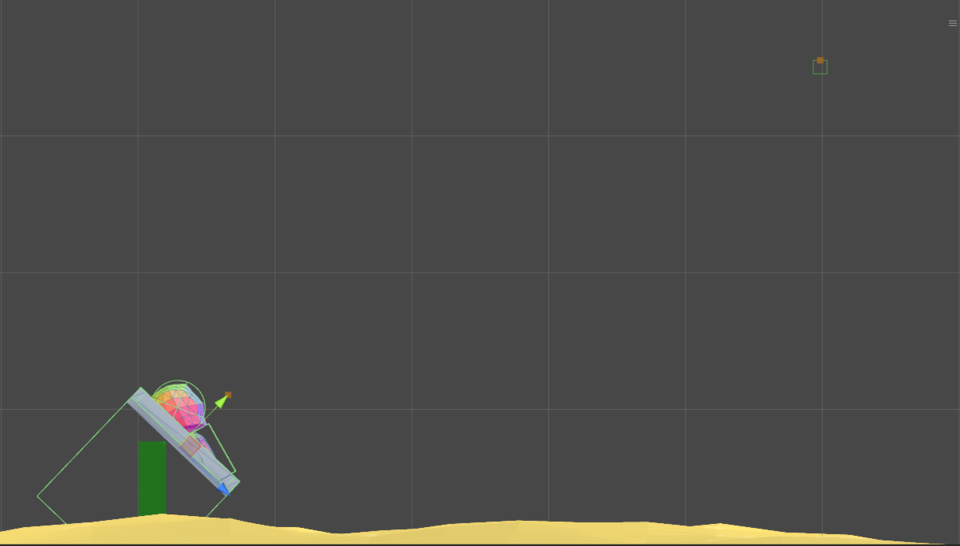
No Caption Provided

By simply re-enabling the physical components, the spring will intuitively pull the chassis towards the anchor point. The force applied will push the chassis through the anchor point and the momentum will carry it beyond. Once that occurs, the spring force will eventually counteract that forward momentum and begin pulling the chassis back again from the other direction. Up to this point, gravity and the upward force on the chassis were the only things keeping our avatar connected to our chassis as it thrust towards the anchor point. But without a spring to pull it back, our avatar is now free to keep it's forward momentum as the chassis below it reverses course.

You may have noticed the large, hollow, green outline of a cube beneath our chassis. This is a collision volume that only interacts with our avatar, and its size is such that it allows us to use higher spring forces to pull the chassis and have the avatar maintain it's position on top of it without clipping through the thin chassis floor. There is a lot more I could say about the update rates of physics calculations vs transform positions, the nature of rigid bodies, etc, to explain why this large collision volume is a solution here, but that's a bit more technical than I'd like to get.

Now that I had that part solved to my satisfaction, I started thinking about the aesthetics of the sun. Of course, a pretty specific image quickly came to mind. I'm guessing @vinny would have probably thought of the same scene. Can you name a more iconic star in video games than the one seen from the view of the Illusive Man's room in Mass Effect 2 & 3?

No Caption Provided

I'll show off where this inspiration eventually took me before getting into the details:
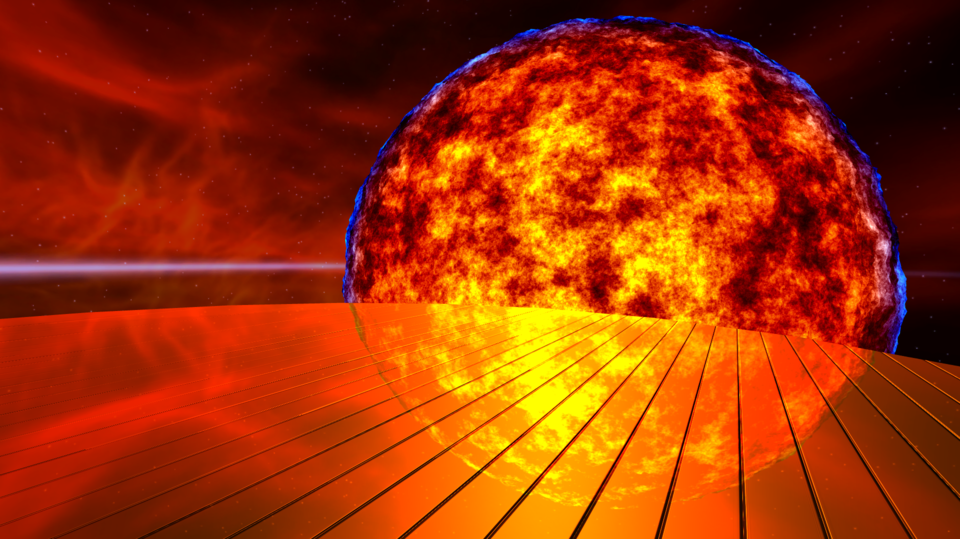
It animates as well, which you'll see a bit further down the page.

To get the simpler stuff out of the way up front: the background is a straight forward skybox, and the floor is the top of a large cylinder (default Unity model) that has a shaded mirror reflection script & material applied with a basic tiled normal map to achieve the grooves in the floor. The bright lighting on the floor isn't actually coming from the sun itself, it's simply a separate directional light shining onto it.

The real fun part here is the star, of course. I just used the Unity standard sphere model as the mesh, and everything else is done in a shader/material that I wrote. I'm fortunate enough to have a CS masters focusing on real-time graphics, so this part was especially exciting for me to work on. Here is a side by side difference of the final sun vs. standard sphere to show exactly how much the shader is changing:
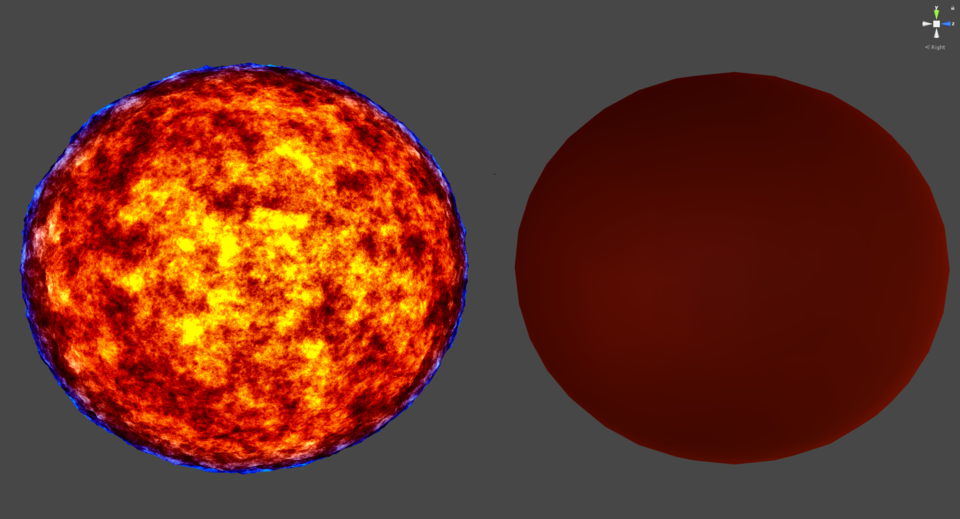
No Caption Provided

The primary tool at play here is the use of something called Perlin noise, which is a mathematical function developed by Ken Perlin that generates collections of random values that smoothly vary between 0 (black) and 1 (white). Multiple sets of these values can be generated with differing frequencies, wavelengths, and other modifications and then combined to create some really intricate noise. You can also modify one or more of these parameters by time to animate this noise. Here is what the sun would look like if I strictly output the value of my Perlin noise implementation and didn't colorize it:

No Caption Provided

This material is using 12 "layers" of random values, each with slightly different parameters, that combine to form this smoky appearance. You can adjust how much impact each of these layers has on the final product, as well. Here is what this would look like with using 1, 2, and 4 layers respectively:

No Caption Provided

I then took the output of this Perlin function and put it through a variety of power functions (squared/cubed/etc) with some other clamping & fine adjustments involved, and then multiplied those differing results by various colors. There is a *bit* more going on there, but again, probably too technical. If that colorization were applied to the previous image, we'd have this:
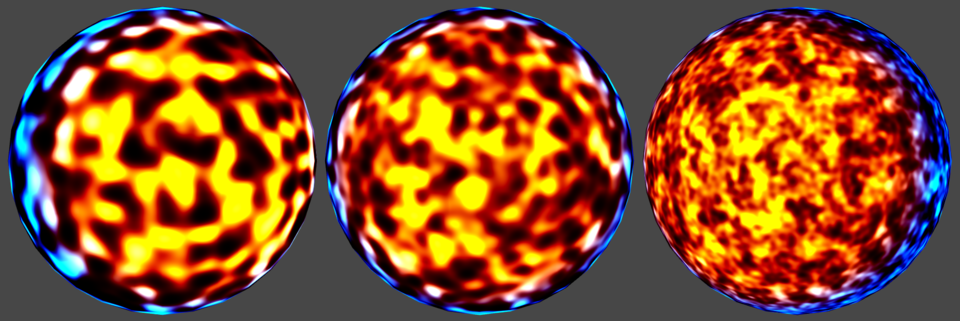
No Caption Provided

The last major component to this (which will really show through primarily in the animated version) is that I am also slightly displacing the vertices of the mesh by this noise value as well. Basically, I'm moving the vertices of the mesh a little bit closer or further away from the object's center based on the [0,1] output from the noise function. This effectively just makes the sphere bumpy/jagged. To show an extreme example to illustrate the concept, this is what a pretty high displacement intensity would look like with a single layer of noise:
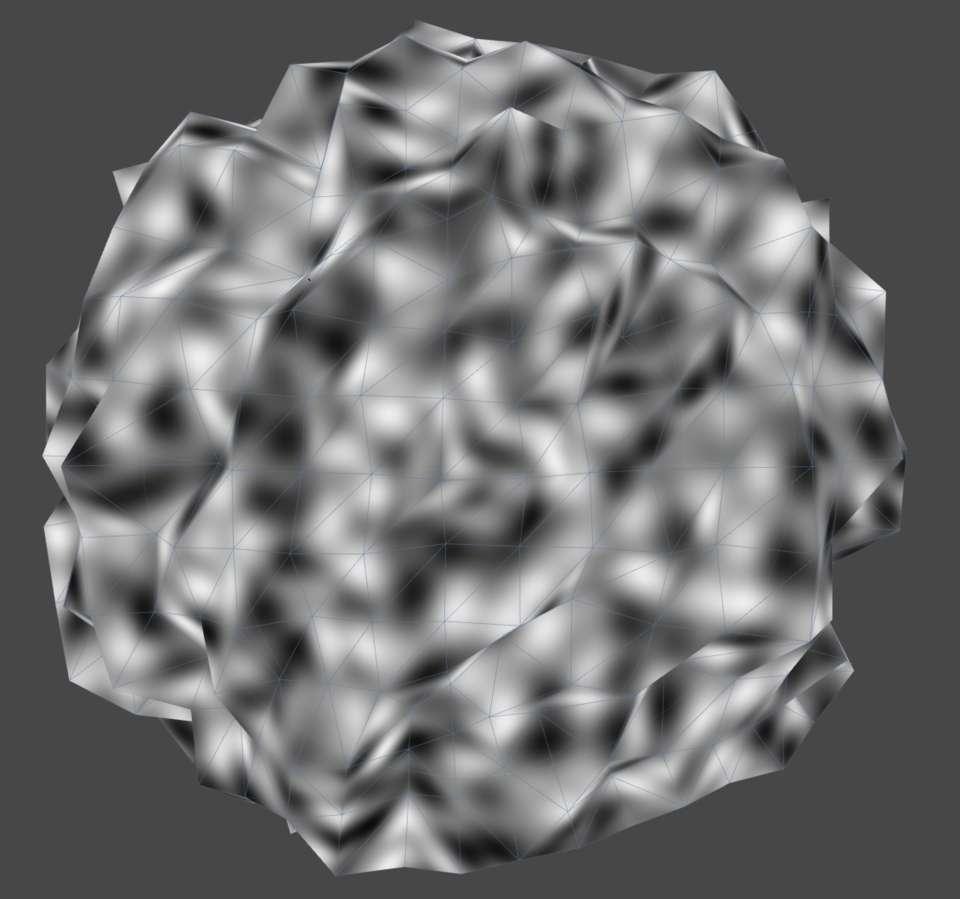
No Caption Provided

Another important characteristic of this displacement is that, even with our 12 layers of noise that I ended up with, we are still only displacing as many vertices as are actually there. Here is the same displacement but with the updated noise values:
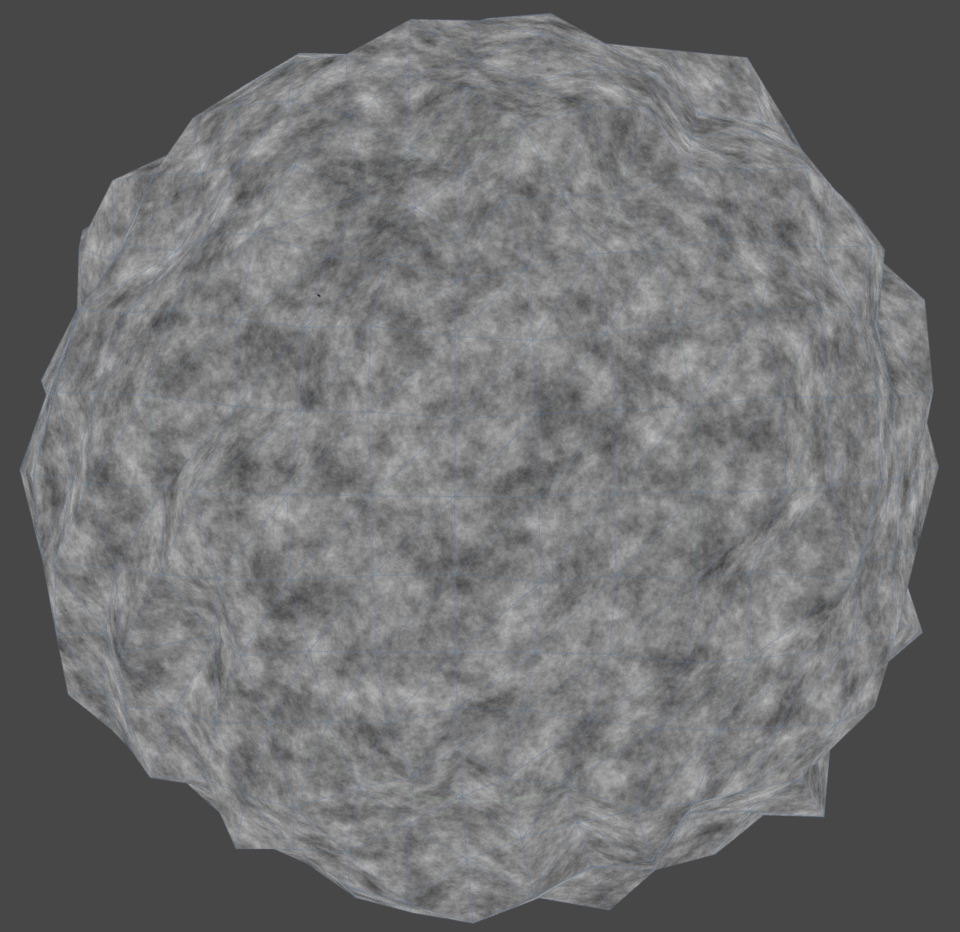
The bumps look slightly different because the time changed between screenshots, and the noise we are getting our displacement value from now has more details. Time is integrated for animation purposes.

The default Unity sphere is a pretty simple mesh without many vertices to work with. In order to get less of a jagged displacement, we can let the graphics card generate more vertices for us that get placed in between the existing ones in a process called tessellation. Here is what the wire frame of our properly displaced and tessellated sphere looks like compared to the starting model:
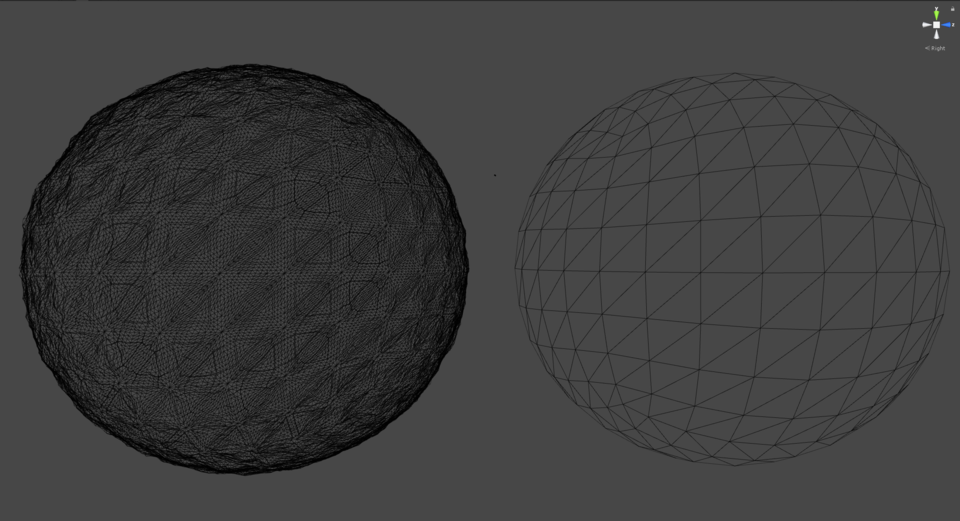
Now, the density of our model's vertices can appropriately utilize the fine details of our noise function to create much smoother displacement.

And with that, I think it is finally time to show you what this thing actually looks like in action. Unfortunately (but actually, fortunately?) I didn't have anyone behaving badly enough to warrant a ban during my first weekend with the stream for the Blackout beta, so I had to do some symbolic launches of people who were being jerks from within the game itself (people telling others to kill themselves, shouting racist/homophobic garbage, etc). My process was setup to integrate the name of the person being banned, but defaults to "Unknown" if that ban queue is empty. I already have improvements planned to let me add these names manually for such occasions, but I was too excited to talk about this to wait and get more video haha.

Wherever the power meter is stopped, as if this shit were Mario Golf, determines the force of the spring that pulls the launch chassis. I made sure to adjust it so that low-power shots were still pretty fun, lol. Given that I showed how the slingshot was implemented you probably already guessed, but the slingshot wires and posts they are connected to are all purely cosmetic.

Political opponents beware, the Gerstmann 2020 platform is ready for action.

17 Comments

Call of Duty Retrospective: Lines of Sight

I recently came to the realization that I've been playing the Call of Duty franchise for more than a decade. The inaugural PC release in 2003 was my first real exposure to both online gaming and first person shooters. It became a near obsession for me. At the risk of appearing conceited I'll say that I also became quite good at it. Across the duration of the United Offensive expansion pack and subsequent release of Call of Duty 2, I had gotten noticed by some low level teams and been introduced to the idea of gaming competitively and as part of a community. Before graduating high school and going off to college I'd eventually compete with a CAL-Invite team (major shoutout to anyone who competed in the Cyberathlete Amateur League haha) before esports became a real thing, and I gained a real and lasting impression of what it meant for a game to be balanced.

Call of Duty: Modern Warfare released my freshmen year of undergraduate, and throughout my education I played regularly all the way up to Modern Warfare 3 with close friends I had made. After skipping Black Ops 2 and Ghosts while I attended graduate school, I've come back to the jetpack age of Call of Duty and I wanted to spend some time sharing something very particular that I've been reflecting on.

Sniping. I've always favored snipers (or un-scoped bolt action rifles from the WW2 days). The risk of a glacial rate of fire, but the reward of an immediate kill for those with sufficient aim has always been my favorite trade-off of the different weapon classes on offer. Nurturing and relying on my ability to aim faster and more accurately than my opponents has come to define how I've developed as a player. It has also dictated how I've had to adapt and adjust my play as each new entry in the series began to stack the deck further against me. One example of this is how much less recoil all of the guns have than they used to, making weapon classes previously nonviable at range now completely efficient. There are a couple of other changes over time that I'd like to dive deeper on:

MAP LAYOUT

Here are a couple of maps from Call of Duty 2 (a number of which also appeared in CoD 1):

Notice how *open* these are. Even when buildings stand tall to obstruct your view, the streets that surround them are wide and mostly clear. Even with those obstructions, many times you can cleanly see from one end of the map to the other from one or more positions. On a number of maps (like Toujane, the desert map), the buildings that embody the form of the level also act as platforms you can walk on, furthering that concept of openness. Contrast these images to those from Modern Warfare 1:

As the power of the platforms running these games grew, so did the amount of detail being packed into these levels. While aesthetically this is to be expected and preferred, the gameplay implications are not insignificant. As these levels increase in density, the number of natural long distance sight lines begins to wane. In my quest to capitalize on my aiming prowess, I typically gravitated towards areas of the map where I had the greatest amount of visibility possible while still having at least some sense of cover (great visibility comes with great exposure, after all). The images in the above GIF represent some of the clearest positions/areas on these maps. The domain where my play style remained viable was beginning to shrink, but it was still manageable. Now, compare these images with shots from Modern Warfare 3 maps:

90 degree angles, massive obstructions, and overwhelming clutter. Some of these maps feel like someone ripped a page out of Hedgemaze Digest to use as a layout. Long distance sight lines are very few and far between on the maps in this game, and it forces snipers to either play very specific predictable locations, or go the way of the quick-scope and abandon what I love so much about sniping.

Invisible Walls

My favorite dynamic of snipers is the act of counter-sniping an opponent who is doing the same. There is definitely something satisfying about outplaying your opponents wielding close range weapons by positioning yourself smartly to kill from range, but the satisfaction is increased when you are challenging someone at distance who's weapon actually has the accuracy to rival yours. Many snipers in these games will play predictable or common locations, and my absolute favorite thing to do was to find creative and unexpected sight lines to catch them off guard in their nests. Here are some examples from CoD2 and MW1 in a short video:

Now, obviously I'm not endorsing glitches or exploits that let you jump out of the map or shoot through invisible walls or anything like that, but contrast this freedom of movement with the kind of thing you can expect from the more recent games:

Call of Duty began to feel very restrictive and claustrophobic for me. I'm happy and still do very well with assault rifles and sub machine guns, but it requires a significant adjustment from what I really loved most about these games.

But now, enter jet packs and wall running. At first, trying to snipe in this new era is extremely intimidating. The pace of the game is just *so* *much* *faster* than it used to be. It is really quite rare that I see someone else using a bolt action sniper in Black Ops 3 TDM games. And even though a lot of really odd obstacles still have invisible walls preventing me from mounting them, the new expanded movement capabilities have encouraged the level designers to open up the maps a bit more and create some open space. But MOST of all, using the jet pack combined with the wall running I can now soar above previously insurmountable obstacles, rending my long distance sight lines back from the obstinate designers. Some really incredible and creative things can be achieved.

If you'll forgive my self promotion, please allow me to demonstrate:

12 Comments

Graphics Blog: Fast Fourier Terrain Generation

I'm about to graduate from DigiPen with my masters in computer science, and most of my coursework has revolved around graphics. As my schooling comes to a close, I thought I might keep a blog here about different graphics projects I might be tinkering on in case anyone finds it interesting in some way. Who knows, maybe it will even spark someone's interest in learning more about graphics in games? That would be totally awesome!

Full disclosure: I tend to have as little an ego as possible when it comes to programming in general. I make no claims to being an expert, and totally welcome all comments or criticisms. Well, on to the meat of my first post with my most recent project:

Terrain Generation using the Fast Fourier Transform

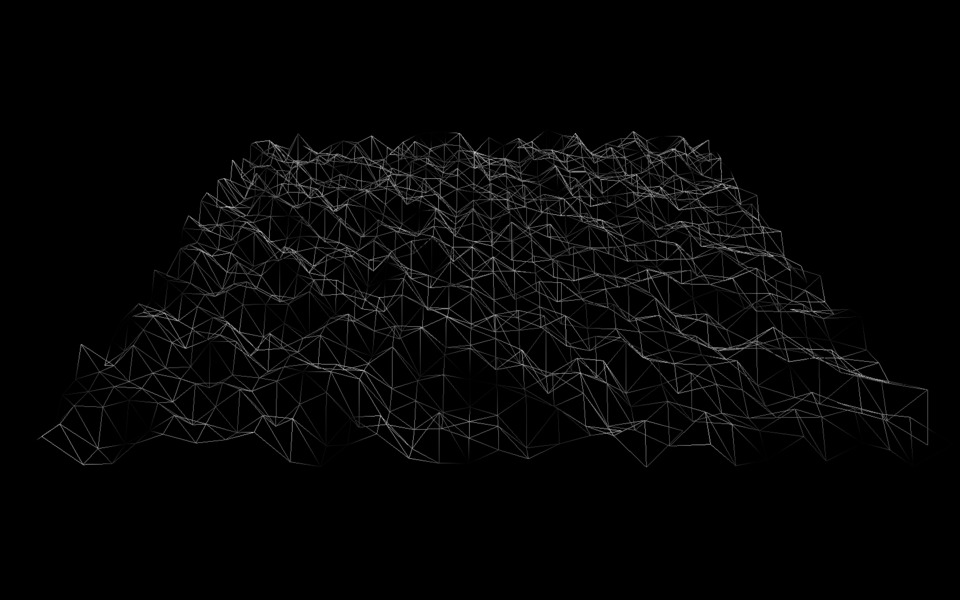
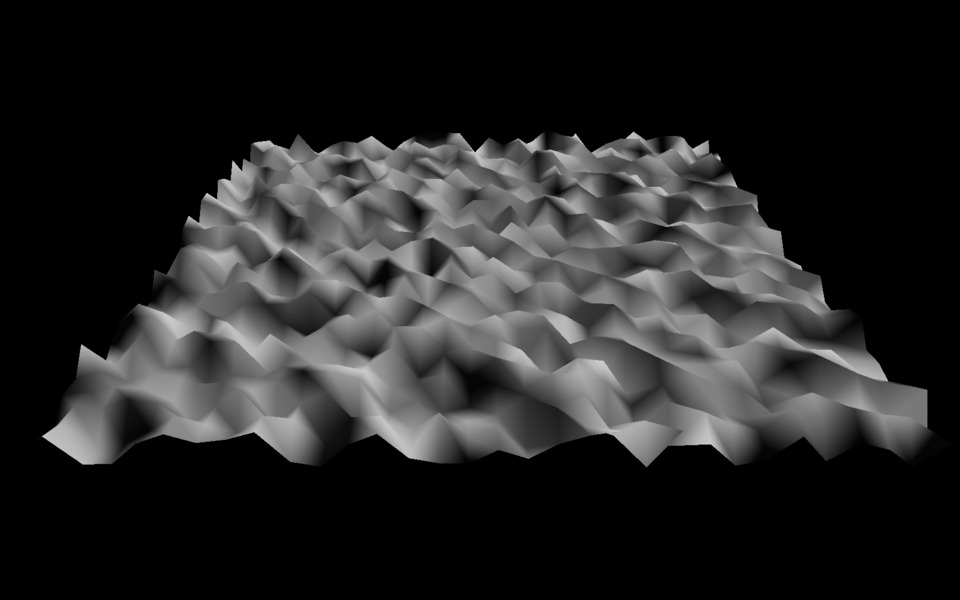
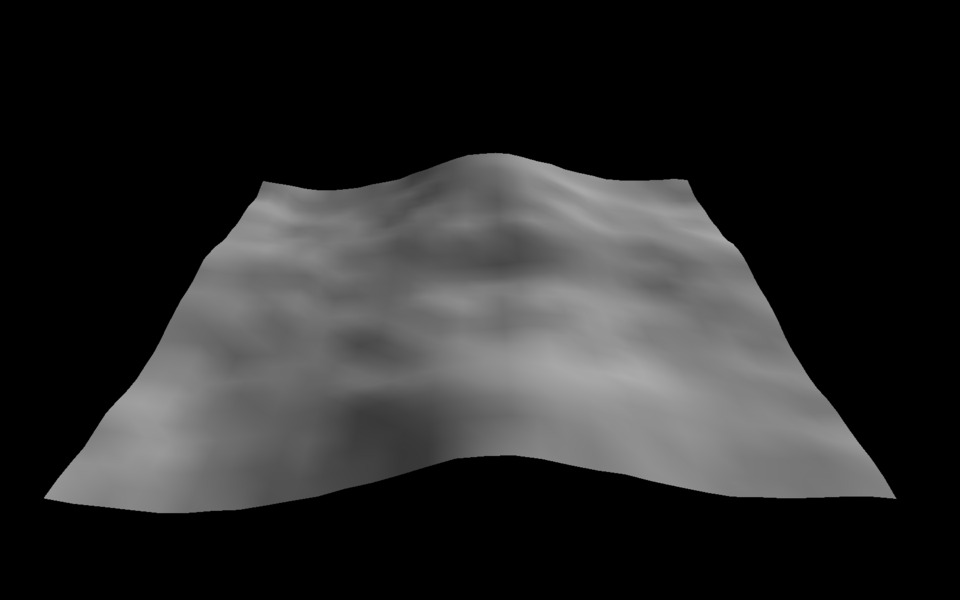
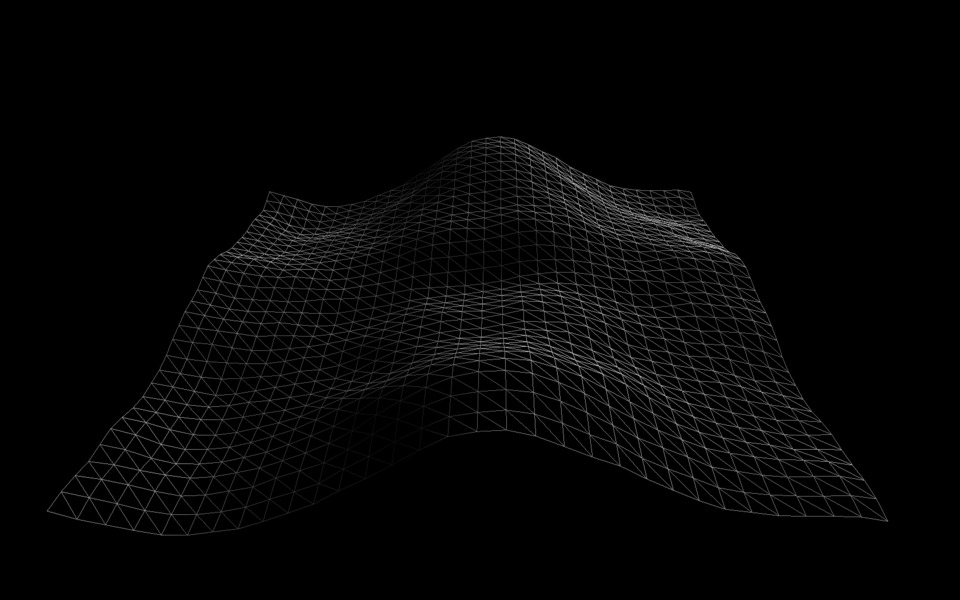
I begin by generating a grid with a dimension of base 2, and spreading it across an area of the same dimension (for now) so that each grid cell occupies a 1x1 area in world space. The height at each vertex is given a uniformly randomly generated number in the range [-1, 1]. Here are the resulting images for the randomly generated heights for a 32 x 32 sized grid plot, shown in both wireframe and shaded view. (All mesh shading shown throughout the blog is just a super basic Phong diffuse, with a single light source)

No Caption Provided
No Caption Provided

This is where the Fast Fourier Transform is applied. In super simple terms, the FFT is way of smoothing or filtering a set of data. It is often associated with signal processing to filter out certain frequencies in audio. Anyway, we apply the FFT to the 32 x 32 matrix of height data that we randomly generated before. We use the FFT on each row in our grid, followed by applying it to each column. What this has really done is just change the format our data is in...we could just apply the Inverse Fourier Transform to get our original data back, and nothing would have changed. So what we need to do is filter the complex values we have after applying the FFT.

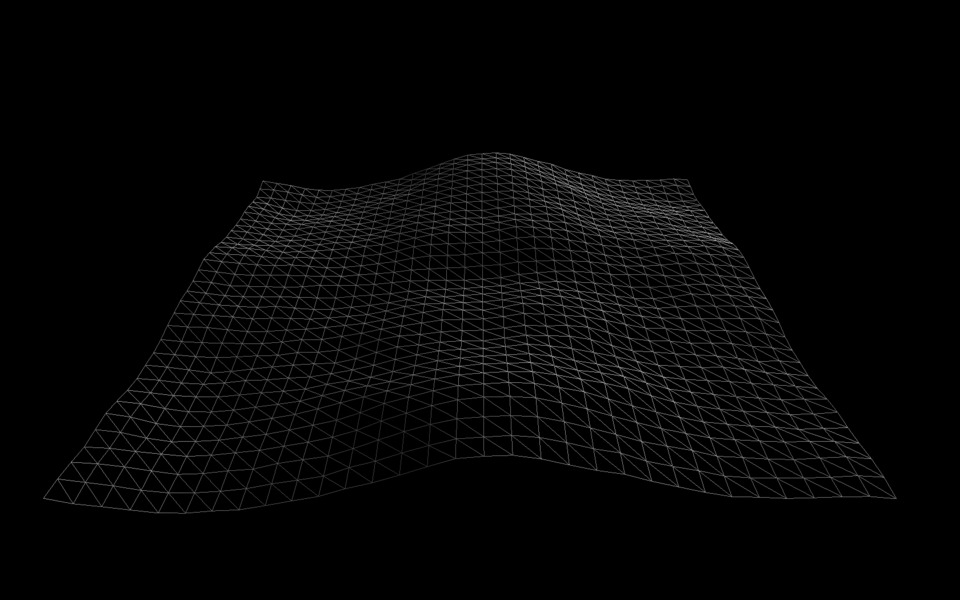
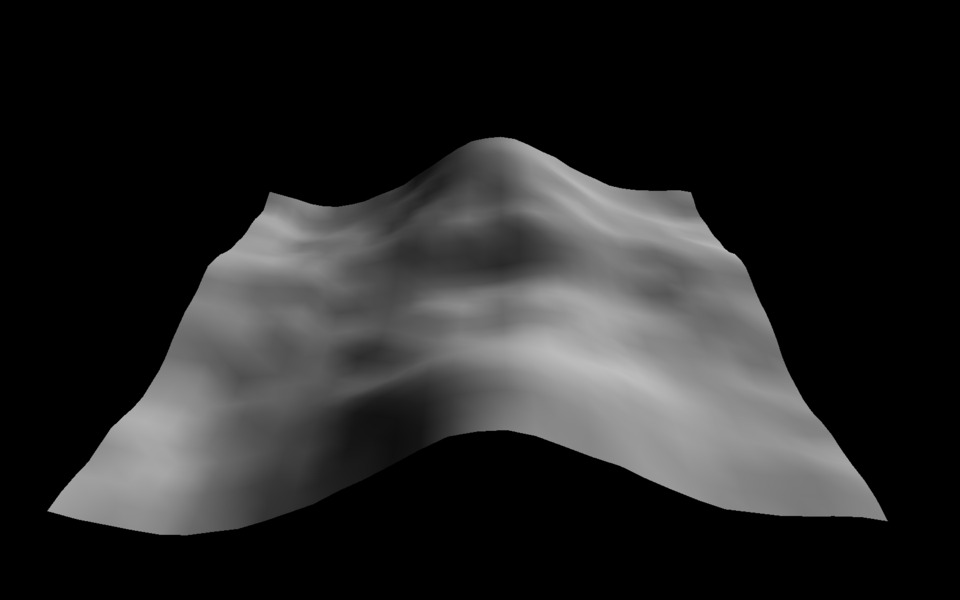
I used what's known as a "pink noise" filter. Again, to super simplify, this is going to take my totally "white noise" random data and filter it based on frequency, effectively smoothing it out. Then after applying the filter, we transform the data back to its original form by using the Inverse Fourier Transform (this time columns first, then rows). Here is the same set of random data from the images above, after the pink noise filter has been applied.

No Caption Provided
No Caption Provided

The pink noise equation has two factors that can be adjusted to change the scale of the output. Oversimplifying: an 'Alpha' and 'K' value control the macro/micro (respectively) scale of the outputs curvature. Here is another example of the same data we've been using this whole time, but with the 'Alpha' and 'K' values increased very slightly. This is also a good time to point out that because of the properties of the FFT and pink noise filter, that our resulting data becomes periodic (meaning that if you copied this terrain plot repeatedly and tiled it next to itself, the edges would align and create a single connected mesh).

No Caption Provided
No Caption Provided

This is all well and good, but there is only so much detail you can get with a working grid of 32 x 32. Time to pump things up a bit! By increasing the grid dimension to 512 x 512, and compressing the mesh into a world space area of 256 x 256, we'll start to get a lot more visual complexity. The first gif shows what adjusting the 'Alpha' and 'K' values of the pink noise filter looks like, and the second shows a lot of randomly generated terrain plots being generated in succession.

No Caption Provided
No Caption Provided

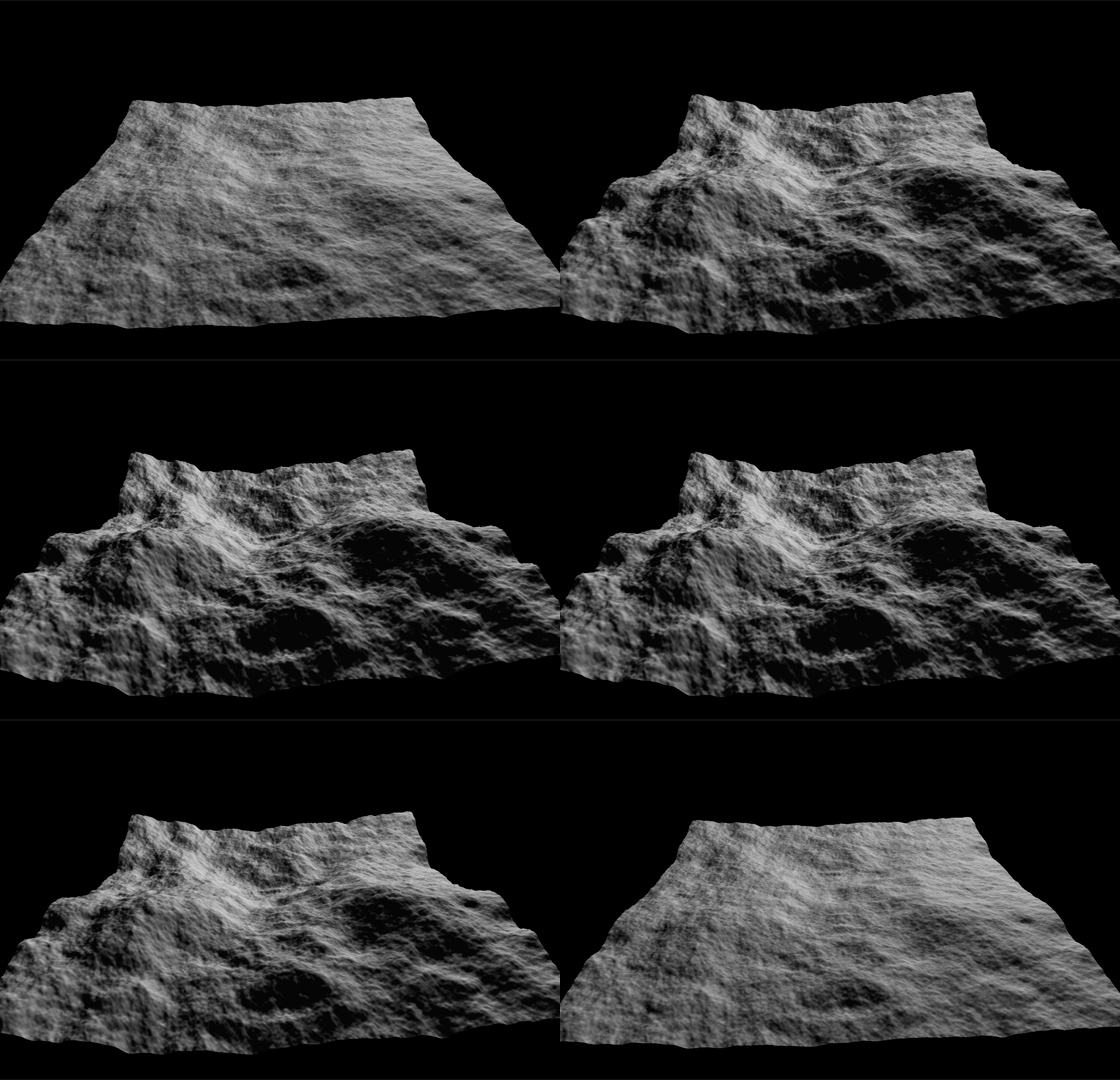
At 512 x 512, these terrain plots are still being generated practically instantly at the press of a button. However, we can go even further. Lets keep the actual surface area of our terrain plot to 256 x 256 in world space, but lets jack up the dimensions of the grid to 2048 x 2048. These take about 1.5 - 2.0 seconds to generate (including the vertex normals), but the explosion of detail is not insignificant.

No Caption Provided
No Caption Provided

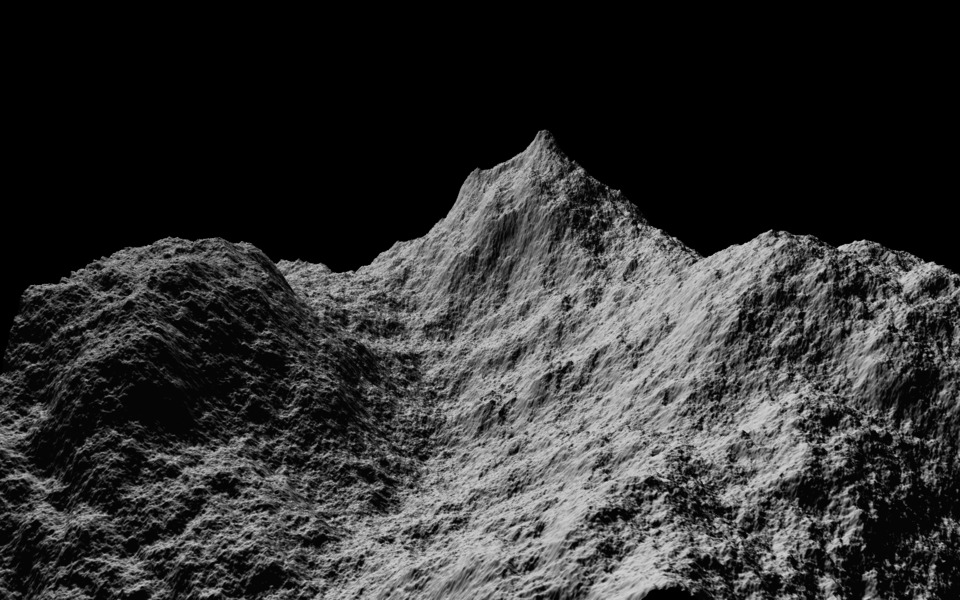
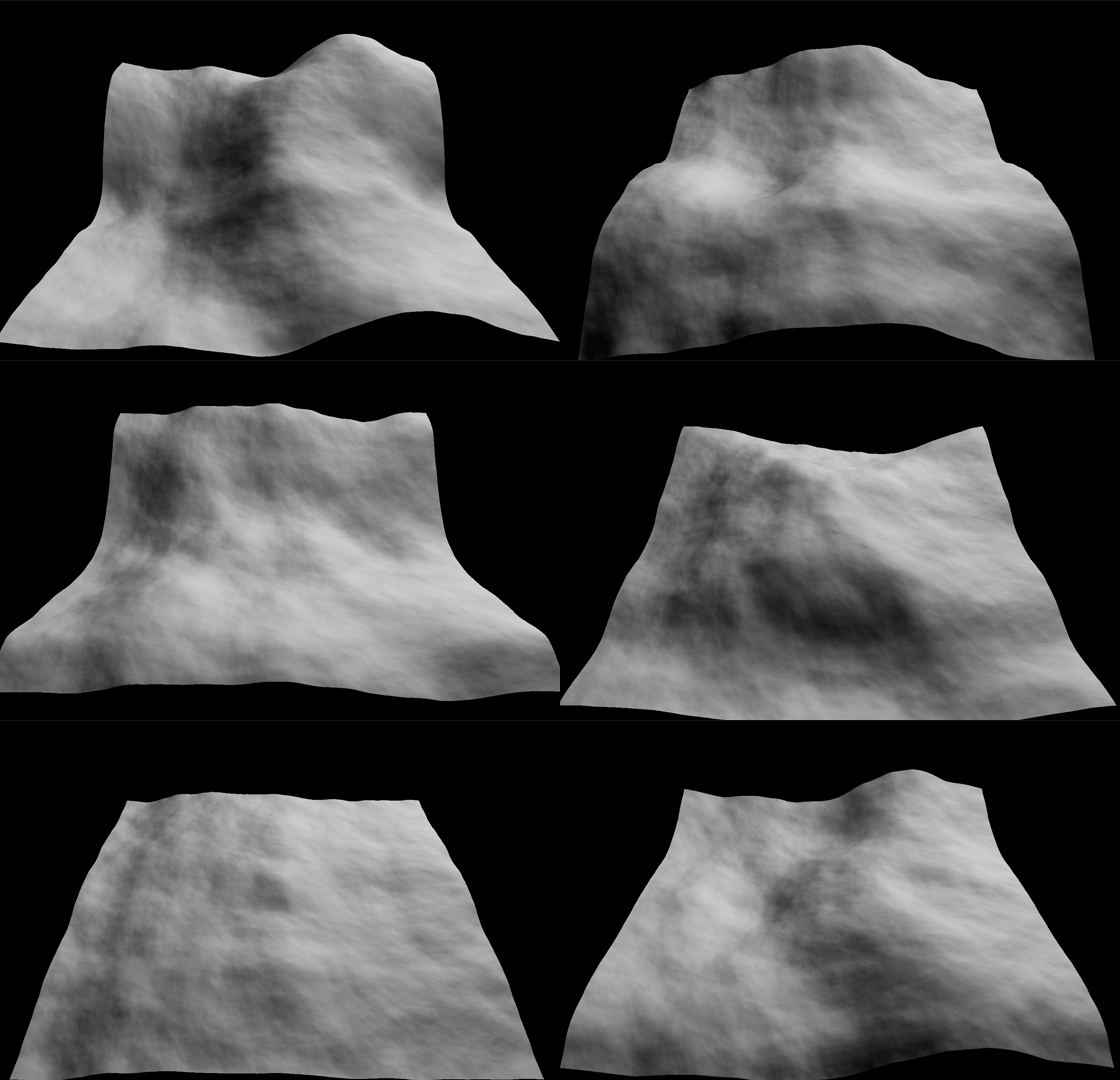
Man, all this came from a completely randomly generated set of heights, all in the range [-1, 1]!! Math is awesome! There are a still a few other interesting observations though. Remember how our 'K' value for our pink noise filter basically corresponds to the micro level control of the smoothness of the terrain. If I take 'K' to it's lower extreme, say 0.000000001, and pump 'Alpha' up to around 5.0 - 5.3 or so, we start to get a really smooth mesh that preserves the large crescendos. It almost starts to look like cloth that's been draped over something. The following gif shows a few iterations with these values.

No Caption Provided

Finally, here is a video of the generation of a 1024 x 1024 grid plot, still in a 256 x 256 world surface area. The terrain is colored according to the interpolated normal value for each vertex. You'll see how the terrain changes when adjusting the 'K' and 'Alpha' values of the pink noise for a given set of random data, and you'll see a number of new random plots generated in real time. (Any of the shakiness when the wireframe is turned on is due to my video compression, not a performance problem in the application)

4 Comments