Something went wrong. Try again later

DoubleCakes

I have updated recently.

49 0 0 1
Forum Posts Wiki Points Following Followers

Final Fantasy T-Edition Travelogue (Pt 14)

WARNING: This blog is SHAMELESS with its spoilers for the original Final Fantasy VI. Changes present in the T-Edition romhack are shown off and only the strategies for overcoming challenges have spoiler tags.

Forward

So I’m starting to burn out on this romhack.

No Caption Provided

Not a big deal. It happens. Despite being on the precipice of the final dungeon, I think a break is necessary. Before I get to that, I need to dish about the cool things happening in T-Edition!

Cultists’ Tower

Before heading off to the Cultists’ Tower, I did that scene where Gau re-meets his father in that house northwest of the Veldt. A T-Edition bonus is that afterwards the father gives the player some bait that ‘lures all monsters to the Veldt’. I’m assuming this means every encounter that can be unlocked to be fought on the Veldt is unlocked. Although, I don’t like the randomness of teaching Gau Rages through the Veldt, I’m glad there’s those nets in place to make sure all Rages are gettable.

No Caption Provided

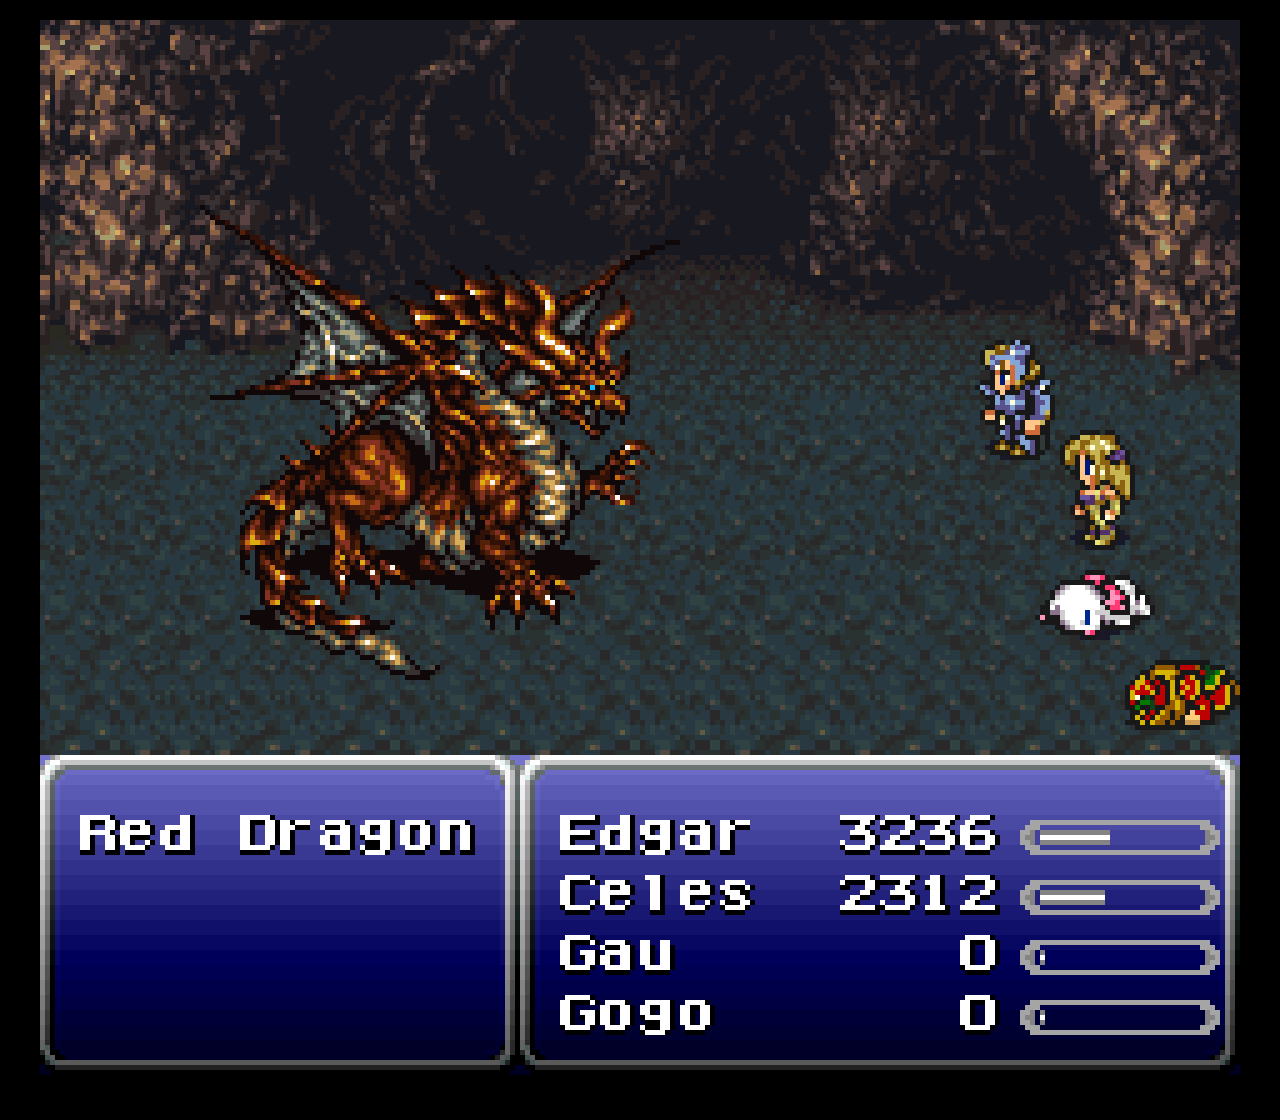
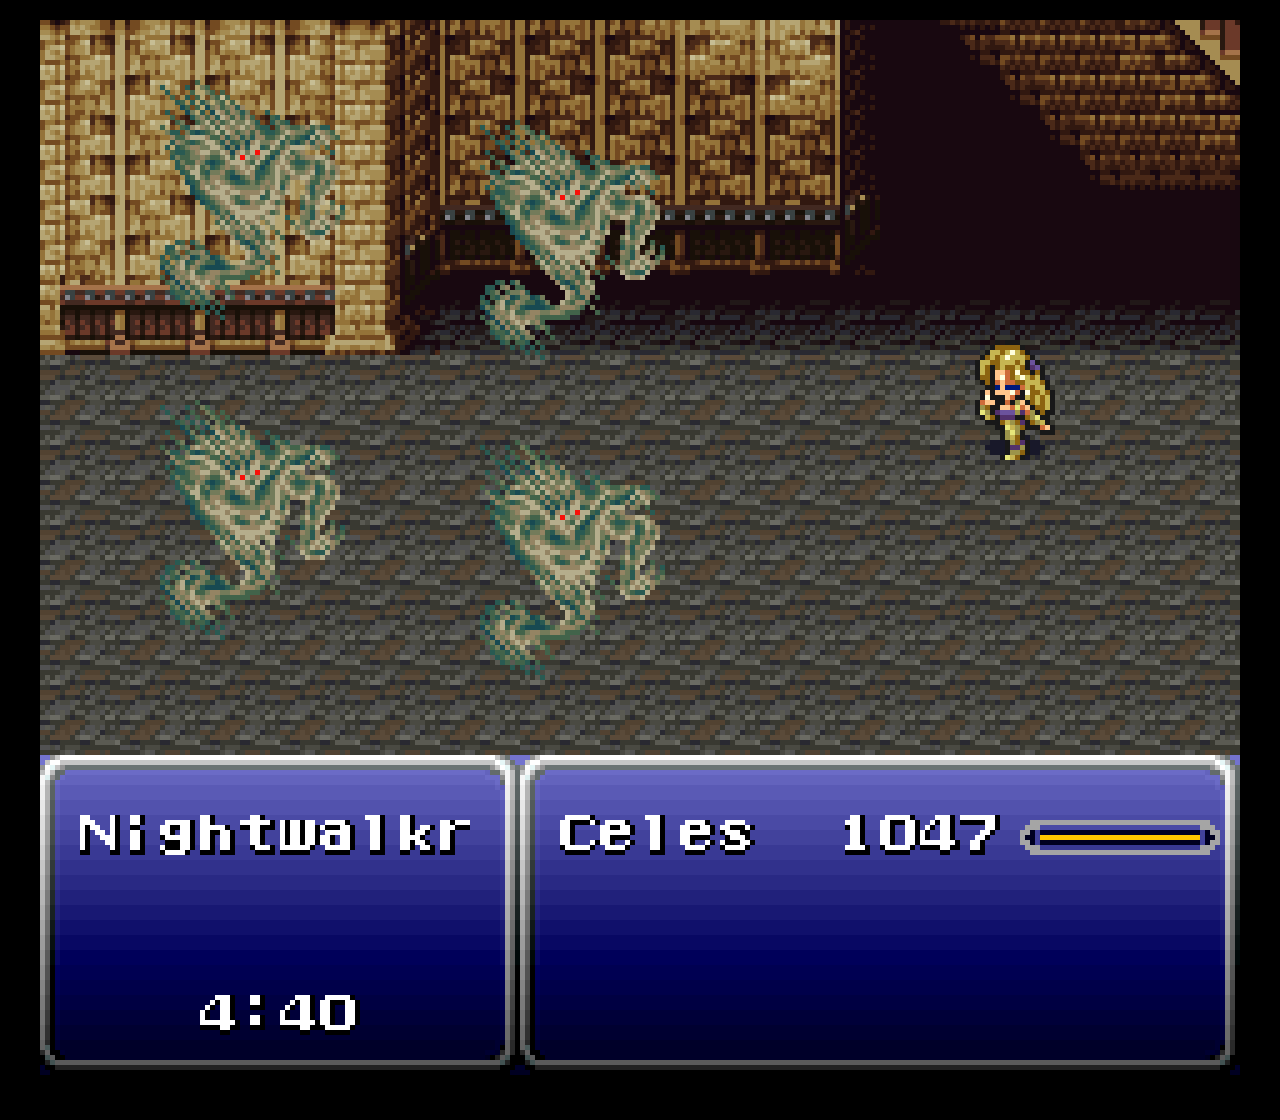
So the Cultists’ Tower functions the same way as it does in the original FF6. You can only use Magic and Items. Fight and special skills are sealed off inside. It’s daunting to take on the tower but I used my four best spellcasters– Terra, Celes, Strago, and Relm. Along the way there are treasures to collect and even the last Dragon to fight: the Holy Dragon.

The Holy Dragon’s tricks are easy to explain. It spams Holy, Saint Beam and is especially nasty when it uses Heartless Angel; a spell previously exclusive to the final fight with Kefka that reduces everyone’s HP to 1. This fight took a couple tries but I finished ‘em. After beating the eight dragons in the original FF6, you get the Bahamut esper but in T-Edition you are called upon by Bahamut and you will have to deal with him once you get back on your airship.

Of course, these guys have to follow me everywhere...

Cultists’ Tower wasn’t too bad encounter wise. It didn’t take long to figure out how to beat new types of enemies and overall I didn’t face too many encounters before getting to the top. Up top, the fight against the Magic Master is replaced with a cameo of Omniscient, a boss from Final Fantasy V. Like Magic Master, it switches its elemental weakness a lot and it can use a lot of powerful magic. Not a terribly nasty fight and the boss doesn’t finish it with a cast of Ultima.

Once you beat Omniscient, the curse of the tower is broken and everyone can use their abilities as normal. At the bottom of the tower you can get a quest to go back up the tower and deal with a dragon flying around, which is another cameo from FFV: the Shinryu. There’s a fight but all you have to do is feed it a dried meat and you win. The Shinryu offers to take you down the tower after and you get a relic as a prize.

Final Preparations

No Caption Provided

So with the final dungeon on the horizon, it was time to finish off anything to get stronger, including that encounter with Bahamut. On the ship, talk to Setzer in his lounge, and you can get a cutscene where Bahamut attacks the ship. The fight with Bahamut begins.

And what a terrible fight it is!

Everything that Bahamut throws at you is painful. While I was casting Flare with Strago and Terra, I was healing with Celes and Relm, but that was barely enough. As I dwindled Bahamut’s HP down to zero I was in for the shock that he has a second, much more aggressive form. I took a break from fighting the bugger.

No Caption Provided

Then I was reminded that there was another Esper I had yet obtained. In Maranda, after obtaining Leviathan, you can speak to a woman to trigger a fight with another Esper: Asura. This is a fight imported from FF4 and it just wasn’t that hard. After the fight I obtained Asura’s Magicite. Summoning her casts a random support spell, like in FF4, and she teaches Curaga and Torando, notably.

No Caption Provided

My attention turned to Alv and Livia, a monster-in-a-box fight back in Darill’s Tomb. Thing is, they don’t have that much HP. The issue is they attack frequently and they usually chain different abilities together. They are the definition of relentless but at that point I didn’t have much trouble and I got their prize; a relic that changes Relm’s Sketch ability to Bless which is a free MP ability for the whole party. It’s a little too weak to be useful, though.

I think I could have beaten that fight earlier in the game if I knew which attacks to emphasize. They don’t have a lot of HP and I think I could have got lucky with one of Gau’s Rages. Alas!

A Break

No Caption Provided

So I said I was taking a break. My time just before starting the final dungeon was 70+ hours. Yeesh! The average time for Final Fantasy VI vanilla is about 40 hours and I don’t think romhacks typically extend the length too much. Where a lot of that length comes from the struggle. Having to go in and out of dungeons, lose against a boss, take a break from one fight and move on to another– it adds up. That’s not a criticism, mind. There’s something about this romhack taking a familiar experience and making it very hostile and forcing the player to take everything slowly. Giving a game a sense of menace, including a game I’ve played two dozen times before, that’s cool. It’s a lot of time to sink into a game, and from what I gather a lot of other players have extended playtimes too, but for a game I love this much, I’m okay with that.

But maybe the 70 hour playtime is why I need a break. The difficult battles is probably a factor as well. I don’t want to burn out or grow to hate this romhack so I’m going to drop it for a little while and replenish my FF6’s juices.

1 Comments

Final Fantasy T-Edition Travelogue (Pt 13)

WARNING: This blog is SHAMELESS with its spoilers for the original Final Fantasy VI. Changes present in the T-Edition romhack are shown off and only the strategies for overcoming challenges have spoiler tags.

Four Crystals

One of the sidequests I had yet to complete was the Four Crystals quest added into T-Edition. This quest has you looking across the World of Ruin for four crystals so you can take their shards and go back to the Ancient Castle to unlock three legendary weapons for each shard. The Wind Crystal is located in Mt Zozo and while I tried to beat her and failed, I was due for a rematch.

An abundance of cash means I can now splurge on endgame consumables.

Also up on Mt Zozo was the Storm Dragon, one of the dragons I had yet to beat. This one is harder than the others on T-Edition, I think. It seems like a lot of these T-Edition versions of the eight dragons are based off of their upgraded forms in the Dragons’ Den in FF6 Advance. When Storm Dragon’s HP gets low it ‘cloaks itself in wind’ which gives it Haste and Image. That’s when the ass-kicking begins. The thing is so relentless my only strategy was to go for broke and keep up the attacks as party members start falling down and I only won by a slim margin, with one only character alive. Two dragons left.

Tiamat was similar in that her attacks are relentless and I didn’t feel like I was getting a lot of damage in but I kept up my healing, kept up the occasional attack and then I won. Wind shard acquired and I was happy to finally be done with Mt Zozo, as I think I had gone to Mt Zozo four times over the course of my World of Ruin journey.

I wanted to cash in that shard immediately so I went to the Ancient Castle and got three more legendaries. On the way out I fought Odin on whim and got the cheeky idea to use Fenrir– a summon whose ability is to make every berserk and fast. Odin is a fight where you are racing against the clock. If the fight goes on long enough he does Zantetsuken and kills your whole party. No telling if anyone can be immune to it. So I experimented with a full-on pummelfest and a team of berserk’d fighters managed to finish Odin before he could get in his fatal attack.

Nope- still not beating this fella.

Odin was mine and his Magicite teaches Meteo (similar to Meteo FFV) and Hastega (Haste on the whole party). There’s no Raiden Magicite in this T-Edition, at least not yet. When you go into the basement and check the statue of Odin’s human wife, you get Zantetsuken, the sword which has an innate chance to instant-KO an enemy.

More Crystals

I felt it was time to do something I was dreading: exploring the underwater cave through the Veldt Cave, the one with Deep Ones. Deep Ones are a kind of enemy that have devastating magic attacks and the ability to sap MP from my heroes. They are in pretty much every encounter in this additional dungeon that T-Edition added.

No Caption Provided

The dungeon isn’t too short before you get to the Crystal Room where the Water Crystal is but with Deep Ones lurking about you get careful about every step. You have to use Toad to get past a certain part but I immediately cured the status afterwards. There’s a new relic in Imp Token which transforms the wearer into an Imp, like a costume change. It nullifies one element and absorbs another, and it was useful before long. I found a blessing in Catoblepas– Deep Ones are susceptible to petrify so sometimes summoning Catoblepas kills all of them in a battle.

Kraken is waiting in the Crystal room. I had trouble with the fight and loaded a save state to reconfigure my party’s equipment. Realized Strago didn’t have any armour on. Kraken’s deadliest aspect is his frequent and damaging Tentacle attacks. Freakquency is another stressful facet of the battle. Freakquency halves the acting level of a character, zapping their strength considerably. There’s no healing that ailment, so it’s effectively a permanent debilitation on my hero party for the duration of the battle.

Even after winning, I had to walk out of the place. While I was privy to the Catoblepas strategy, it was still nerve-wracking with how easily a Deep One could show up and mess me up with some sort of magic-sapping attack. I would hate doing this even more without save states!

Phoenix Cave

With one crystal left, I decided to tackle it next. It was Marilith back in Phoenix Cave, a fight I had trouble before but maybe I could get the victory this time around. Also dwelling in Phoenix Cave was one of the last two Dragons: the Red Dragon.

No Caption Provided

Fire Dragon is based off of its second fight in FFVI Advance in that the fight is completely survival-based. You don’t hurt it– you can’t hurt it– you just have to survive its barrage of physical and magical attacks. There’s not a lot of time between heals to cast Blink and other buffs and it’ll Dispel them too. Towards the end it starts chaining Flare casts together but all you need is one person standing when he clocks out. One more Dragon to go. Hopefully not as hard as this one.

No Caption Provided

Marilith wasn’t too tough. I got the last Crystal shard and went back to Ancient Castle to get the last legendary weapons. Ancient Castle is done, as far as I can tell but Omega is still wandering around the cave to Ancient Castle. I’ve poked it a few times and it seems way too formidable for me to beat anytime soon. If the battle is anything like the battle from FFV, then it’s a matter of knowing exactly which skills to do as quickly as possible to reduce its HP to zero.

Other Stuff

I still hadn’t gotten Leviathan from Solitary Island’s beach. Although the fight is two-staged, it wasn’t too hard at this point. In its second stage it counters Lightning attacks with Lightning but that amounted to nothing. I got the Leviathan Magicite.

No Caption Provided

I wanted to finish up some of those pub quests. The one in Narshe with the night patrol seems overwhelming. You have to fight several squads of Tonberries and you have to do it in a time limit but the quest has multiple stages. With the twelve you’re given you have to beat all of the Tonberries and the next stage that has you walking through the mines as quickly as possible uses a new timer.

The second stage has you fight the Ice-versions of the bomb-type enemies but if you get a Level 3 Flare in, they go down pretty easily. You don’t need to fight these ones like Tonberries, you can just rush to the snowfield.

At the snowfield, you have to get through more squads of Tonberries to the back where the Donberry is waiting. The Donberry is the boss of the quest and despite some pretty gnarly magic attacks, he went down decently and I finally finished the quest!

There was another quest available at the Narshe pub: a new one called ‘Advanced Mimicry’. You have to answer 14 questions about Final Fantasy VI lore to earn the prize. I’ll admit I used save states. You can remember answers anyway. Your prize is a Gogo-exclusive Relic that turns all of his custom commands into the upgraded version; Celes’ Runic becomes Pray, Mog’s Dance becomes Animal. Honestly? I pretty well-fitting ultimate accessory.

Maybe that’s where I’ll cut it off. I never intended this to be such an in-depth multipart series but that’s the way the wind blew, I guess.

Start the Conversation

Final Fantasy T-Edition Travelogue (Pt 12)

WARNING: This blog is SHAMELESS with its spoilers for the original Final Fantasy VI. Changes present in the T-Edition romhack are shown off and only the strategies for overcoming challenges have spoiler tags.

Ebot’s Rock

No Caption Provided

My journey took me to Ebot’s Rock, a late-game dungeon in FF6. Its here where I bumped into Black Dragon– originally one of the eight dragons that you find in Kefka’s Tower; you find it in Ebot’s Cave in T-Edition. Didn’t pose much of a problem but Hidon at the end of the cave was another matter.

Hidon and his Erebus and Nyx minions are troublesome. His minions like to use status ailments and took two hits of Level 3 Flare to go down. Hidon is invincible until all his minions are dealt with. Once they’re gone he goes on a pretty aggressive offensive until he summons more friends and becomes impervious to damage again. Beating him took a couple cycles.

I had forgotten how exactly Strago learns Blue Magic but Hidon has a very valuable (and in vanilla FF6; missable) Blue Magic called Grand Trine. He killed Strago with it but at the end of battle Strago learned it so that’s cool.

No Caption Provided

Thus I was given a great magic. Grand Train, although expensive, damages all enemies– piercing their defenses. It also ‘cancels magic’ and I’m not sure what that means. Maybe it mutes enemies? Regardless, it would become a staple spell, something ‘overpowered’ and something to be abused, as I would start doing over the next little while of T-Edition. Nothing hit as hard as GrandTrain.

Zone Eater’s Innards

I went back to Zone Eater’s Innards to tie up some loose ends. Adamantoise, the bonus boss in a room new to T-Edition went down easily. Whenever these enemies use Quake, its ideal to have Float on as many people as possible but I Float’d some people and used Earth immune equipment for others since Adamantoise likes to use Gravity 50 which cancels Float and leaves them open to ground attacks again, like Quake.

No Caption Provided

Adamantoise didn’t have a lot of MP but I couldn’t Rasp it because it’s magic defense was too high. I took him out gradually using armour-piercing attacks and healing. Deeper into the Dungeon there was a monster-in-a-box fight with DeathRider, and this peep was annoying and I feel like I lucked out in that it didn’t cast Blaster and kill all my party members at once. It didn’t have a lot of HP so it was a matter of keeping my attacks up and reviving when I had to. The battle netted me a Black Robe which teaches Flare and it was a strange satisfaction that equipment was more likely to teach me new magic than Magicite. It was at this time I realized that learning abilities from equipment which Final Fantasy IX and Final Fantasy Tactics Advance would later refine– the concept got its start with learning abilities from equipment in Final Fantasy VI even if it was a tertiary mechanic back then.

Narshe

The Adamantite from the Adamantoise was given to the weapon shop owner in Narshe to make the Ragnarok sword. Nothing too special. In fact, one of the disadvantages of having so many different OP weapons is that many, you get them and then they don’t have much of a use. On the other hand, there are so many bosses in this game that optimizing a single fight with a specific weapon is plenty likely.

No Caption Provided

At this time I went up to the snowfield to fight the Ice Dragon and the trick is instead of one Ice Dragon, you fight 4 of them although you can’t see there’s four of them because their sprite is all in the same location. With Ice Dragon(s) liking to counter attacks, attacking them all as a group is a bad idea since sometimes they’d counter by Freezing your heroes– an obscure but pesky status effect, especially when they follow that up with Ice Sword which instantly KOs a frozen hero. All in all, though, I finished off another dragon.

I went back to get Terra and jumped into a rematch with Valigarmanda. Pretty sure that only Fire magic can hurt him inside his ice shell. That first stage of the fight wasn’t too bad and his second phase, while more chaotic is still very doable. I had Gau raging and casting useless Blizzaga spells so I had to wait for him to get KO’d then revive him to change his flight path. You get his Magicite which, like in vanilla, teaches the three third-tier elemental magics, although at a faster rate.

There were a couple great treasures down in the cave. The Cat Hood is a helm for a few of the female heroes and it’s double gil property meant I saw a lot of money from there on out. Pheasant Strip is a class accessory for Mog, something completely new for T-Edition. It changes his Dance command into Animal which summon a random ability– many being pretty good abilities like Snow Bunny, which heals everyone and gives them all Blink. For as unpleasant as Narshe had been for me up to that point, the cave below cliff (Umaro’s Cave) wasn’t too bad with its fights, save for a fight with three Tonberries in a treasure chest. Even the fight with Umaro himself was easy.

No Caption Provided

It had taken awhile, but I finally had all fourteen party members. Umaro is changed for T-Edition. He’s controllable and his special ability in Ice Storm. His fight sometimes turns into Rampage, which hurts everyone, or Body Slam. He also hits like a truck too with a raw physical power rating higher than anyone else. He doesn’t have any magic, normally, but he can equip Magicite for summon abilities. The hacker must have had to given him the Gogo magic mechanic so he has all of his allies’ spells but he can’t use them in battle, only outside. He doesn’t have a lot of MP to go around anyway.

No Caption Provided

After bringing Umaro and the Deathgaze Claw back to his home, he makes the Rage Ring, a special stat ring for Umaro. I was warned in the guide to do this after going to Owzer’s Mansion with the Deathgaze Claw because I could have missed out on the Floral Fallal I got from him. Perhaps most importantly, if you go to the Moogle Cave with Mog and Umaro, Molulu gives you Molulu’s Charm, an accessory for Mog that negates all random encounters. Perhaps very useful. We’ll see if I use it when I get to the Fanatics’ Tower.

Cyan’s Dream

T-Edition adds in some additional cutscenes that give more story and context to the Relm and Shadow connection. One of these additional scenes gives Shadow a wife and Relm a mother and I’m open-minded to a lot of canon-changes and artistic license, but I thought these new plot points were natural extensions of pre-established lore. You get a second Memento Ring here.

No Caption Provided

I held off on doing the Cyan’s dream sequence because it’s a series of dungeons with a few bosses (one extra in T-Edition), so I was nervous and perpetually felt underprepared. They weren’t too bad though. The Dream Stooges are turned into the Magus Sisters, like from FF4 and while that battle was annoying with Cindy healing her sisters with Araise, it was more annoying than anything.

At the end of the train chapter, T-Edition adds in a new boss– a fight against GhostTrain which is basically a suped up version of the Phantom Train from Act One in World of Balance. This whole sequence; you have to do it with three heroes but the final confrontation in the dream version of Doma Castle changes things. There are a couple cutscenes added to show Cyan with his family around Doma and then you are allowed in the throne room.

Cyan fights a few battles on his own, which was a little alarming since I hadn’t prepared Cyan with the best equipment although I didn’t have a lot of trouble with the trio of fights before the showdown with Wrexsoul. You fight Wrexsoul with all four characters. I assumed the trick to that fight is the same with vanilla FF6 in that you have to KO whoever Wrexsoul possesses and I don’t think that’s how it’s supposed to go but I killed Wrexsoul pretty quickly and finished that part of the game.

No Caption Provided

In FF6, you find the Alexander Magicite on the throne after Cyan’s dream is complete, but this time it’s Diabolos and this time there’s a fight with him beforehand. I couldn’t figure out how to beat him. He hurts himself (and the party) with his own Gravija but attacking him will get him to counter with White Wind, pretty much healing himself to max. I gave up on him for now.

At this point, I’m in full Acquirement Mode– collecting everything I can in preparation of the final dungeon: Kefka’s Tower. Is Kefka’s Tower the final challenge in T-Edition? No, but I’m expecting to at least get credits before I tackle some of T-Editions new optional stuff, like that floating continent dungeon. I have no idea how it’s going to go down but I am having a lot of fun.

Start the Conversation

Final Fantasy T-Edition Travelogue (Pt 11)

WARNING: This blog is SHAMELESS with its spoilers for the original Final Fantasy VI. Changes present in the T-Edition romhack are shown off and only the strategies for overcoming challenges have spoiler tags.

The Ancient Castle

Picking up where I left off, I went to the Ancient Cave next, the one underneath Figaro Castle. Right enemies we awful but I had gotten used to experimenting with status effects and after realizing Couerls are susceptible to Stop, those battles got a lot easier. On the other hand, a Couerl can open the fight with Blaster and take out a few party members if not the whole squad! And this is why I use save states.

No Caption Provided

Omega, a superboss originally from Final Fantasy V, is strutting around here and I teased a battle knowing full-well this guy was going to obliterate me. Just wanted to see what the carnage was like. Look at that, Omega did a single all-party spell and wiped my whole party. And this is why I use save states.

The enemies inside the Castle are even worse. They take awhile to destroy and they use stronger attacks more frequently. The Ward Bangle that’s supposed to cut down the encounter rate doesn’t seem to make a difference. Moving from one room to another inside the castle was like sneaking around corners.

There’s a few bosses in here. Odin, originally a Magicite you just have to pick up, becomes a fight when you check his petrified figure in the throne room. I banged my head against that fight a few times and couldn’t figure out an edge to the fight and gave up for the while.

No Caption Provided

Samurai Soul, the monster-in-a-box, put up a fight but went down without an exorbitant amount of trouble. Like in vanilla FF6, the prize for beating it is Offering (also called Master’s Scroll in other translations) which turns the regular Fight command into Barrage where a character attacks 4 times at random at half the strength. Already a good ability, but I got the idea of combining Offering with Dancing Dagger and the results were great! While the randomness can lead to healing an enemy, getting a couple elemental attacks in a row can lead to devastating damage.

There’s also the Blue Dragon down in the Ancient Castle. This guy hit so hard with his party attacks and I used up a lot of my Phoenix Downs but I held tight and beat my first Dragon. Seven more to go. The boss drops a very good headgear– the Lambent Helm which halves all elements and teaches Dispel.

T-Edition adds a new room behind the throne. In the back of the Ancient Castle is a room with 12 legendary weapons– inspired by Final Fantasy V. When I returned here later with the means to open it, I skimmed all the weapons and they seem pretty great with interesting abilities like the Masamune– a katana for Cyan with Auto-Haste, that increases the chances of Preemptive strikes and eliminates the chances of being Pincer’d or Back Attack’d.

No Caption Provided

After leaving the place I went back to Banon and then talked to a scholar in Figaro Castle to learn that across the world there are four elemental crystal hiding and if I obtained them, I would be able to unlock some of those legendary weapons. The hunt was on!

Grinding

Feeling underpowered for pretty every thing, I caved to my instincts and started grinding. I got the Cursed Shield from an old man in Narshe and the thing about that item is you have to fight 250ish battles to turn it into the excellent Hero Shield (which in vanilla FF6 absorbed all elements; in T-Edition it nullifies all of them instead). I fought these weak critters on the Solitary Island Celes wakes up on at the start of the World of Ruin to also grind out some spells. Lots of spells were learned and a Hero Shield was got’d.

Around this time I felt confident I could beat Deathgaze so I flew around with the emulator at max to provoke battles and while it does get very cowardly and Flee quicker as its life goes down, I vanquished it and was given its claw as a prize. Nothing I could do with that on its own but taking it to Owzer nets me a Floral Fallal– an accessory that teaches Curaga.

I decided it was time to introduce Sabin to Duncan but while in vanilla FF6 you bring Sabin to Duncan and you get his ultimate Blitz, in T-Edition you have to– you guessed it!– fight a battle. Vargas is still alive and you have to win a one-on-one battle to learn the technique. Vargas’ Burst Fist’ took Sabin out in one shot so I gave Sabin an accessory that gives him Protect and Shell at the beginning of battle. The Hero Shield took care of most kinds of damage so I kept healing my HP with Cura and Vargas eventually went down.

No Caption Provided

Although I had attempted to fight the Mist Dragon before, I tried again and beat it. The prize was a pretty good Magicite, one that taught Holy and Blink (a very useful buff that makes physical attacks miss completely).

I gave that South Figaro Cave sidequest a try again, and I still couldn’t beat it. Those Deep Ones at the end of cave are too hard with their powerful magic and tricky ailments. And also the fact that they can destroy your MP stores. After that I went exploring for those crystals I needed for the Legendary Weapons and the water one inside Veldt Cave leads to a new dungeon not found in vanilla FF6. Who to show up but those Deep Ones as random encounters? I noped out of there but nearby was the Gold Dragon and I was able to take that one down. Six dragons to go.

Another crystal is up in Mt Zozo. I forgot a chest and I never beat the Storm Dragon so I gave that one a shot but my magic was too limited with my party to deal with the fury Storm Dragon gave me, even if I had plenty of armour that protected against Wind. Tiamat is just past where Cyan has his little dwelling. Wasn’t able to beat that one either. I would have to come back when I had a party with more spells learned.

No Caption Provided

I did beat Lich in Darill’s Tomb and got myself the Earth crystal. I brought it back to Ancient Castle and go three Legendary Weapons for it. Being decked out for a fight against an Earth Boss, I went to the Opera House to see if I could beat the Earth Dragon. I defeated him but just barely. Towards the end of the fight, it gets very violent and starts doing some murderous attacks and I only had so much MP for Blink recasts.

I went to Phoenix Cave to find the fire crystal but its guardian, Marilith, proved too difficult. And I had come all this way too. Likewise, the Red Dragon near the end of the dungeon was a no-go, too. The monster-in-a-box fight I passed up earlier was a success though. Proserpine was pretty easy once I got past their trick: drain all their MP and they can’t heal. I likely would have been able to beat them the first time around.

Grinding and Final Thoughts For Now

After putting on a few levels, the Ancient Cave and Phoenix Cave were quite easier. Weirdly enough, level factors in a lot of damage formulae so even getting four or five levels boosts damage output a lot. It makes me confident that no matter what I will be able to surpass any challenge simply by grinding. I don’t want to resort to that because that can cheapen the experience, but it gets me thinking.

This is a cutscene that you can see after felling Deathgaze.

How much grinding needs to happen? I want to use all my characters relatively equally and that means experience has to go over a larger body of people. Leveling is slower and some characters are still learning basic spells. I was probably doomed to grind at least a little bit. It’s not too bad especially with a fast-forward feature on the emulator.

In terms of spell-learning, a lot more equipment in Final Fantasy VI T-Edition provide spells to learn and in this late-game, a lot of these spells are not on Magicite Espers, like learning learning Dispel from the Lambent Helm or learning Curaga from the Floral Fallal. It’s quite the twist and something I’ve never seen before in any romhack.

I’ll leave it there for now. I might burn out on T-Edition but I’m happy to keep playing for now. Til next blog, stay tuned!

Start the Conversation

Final Fantasy T-Edition Travelogue (Pt 10)

WARNING: This blog is SHAMELESS with its spoilers for the original Final Fantasy VI. Changes present in the T-Edition romhack are shown off and only the strategies for overcoming challenges have spoiler tags.

Forward

Okay, so this is where the game gets hard. More hard than ever before.

No Caption Provided

The most audacious element is the enemy encounters. It seems like now more than ever before, enemies are just killer. There have been a lot of battles where one or more party members are on the floor at the end of it, missing out on EXP and AP. Enemies hit harder, are far more likely to use instant-KO attacks, and are likely to counter attacks with devastating blows. It’s downright annoying, if I’m being honest.

Usually the enemies have a susceptibility to an ailment that tones down a lot of their bite, like Gorgimera being weak to Stop so as its HP gets low it doesn’t start spamming triptych weather attacks, or Coeurl being weak to stop so it doesn’t spam instant-KO attacks or counter with them.

It comes down to keeping track to what enemies are susceptible to what and what not to attack them with. You might even want to write down specifics about various enemies because your first trek through a dungeon will likely not be your last.

It’s frustrating but there is a delightful intensity in dungeon-crawling when random encounter can scorch your hiney like that. I might complain but this something I signed up for.

World

North of Narshe is a small cabin not present in vanilla FF6. Inside is Mr Clio, a helper person who keeps track of how many times various characters have used their unique class ability, like how many times Locke has used Steal and how many times Relm has used Sketch– to keep track of how close you are ‘til you get the achievement to show up in Narshe’s Achievement Hall.

No Caption Provided

I stopped by the Colosseum to see if I could take on any fight worth fighting and the answer was a hard No. Most fights creamed me but the twist with T-Edition is you can control the character you send in to fight. Can’t wait to actually win some battles! This is where you get Shadow again so I wagered the Nigiritsune and beat him in a fight to recruit him.

While I was there I talked to Ultros who is in debt and who I immediately offered to pay for. That was all my gil out the window. Don’t know if it was just a troll or something that’ll pay off.

Getting Companions

No Caption Provided

Owzer’s Mansion was next. I have always liked this strange interior dungeon. It’s cozy. I’d live in it. Anyway, the monster encounters weren’t too bad. There’s a Lamia enemy and I erroneously assumed the trick with that one is after you deplete its HP, you have to cure it to death, but truthfully you have to use curative abilities from the start. The boss Chadarnook had a lot of HP (and is not always open to attack), but it wasn’t too hard even, although it using Disease on my party members means I beat the thing just as my MP was running low. The cutscene afterwards warps you right back outside, though– you don’t even get an Esper.

Relm was back in my party so I went to go get Strago at Fanatics’ Tower. No T-Edition tricks with that one but I’ll have to come back to the Tower later. Next up was Gogo, and you get to them the same way you always have– getting wolfed down by a Zone Eater. The enemies in Zone Eater’s Cave are wild cards in that they might just whip weapons at you for massive damage but they were like that in vanilla FF6. Luck could mean you get through battles effortlessly or enemies could demolish your party with 3000 damage attacks.

T-Edition added a new room near the entrance of the Cave– one with a fight against the Adamantoise. I gave it a try but it creamed me so I guess I’ll save that one for later. Towards the back of the dungeon there’s another Monster-in-a-box optional fight with the Death Rider. Too hard. Too deathy. Save for later.

Narshe

No Caption Provided

After claiming Gogo I went to Narshe and that place has changed a lot. No longer do you fight enemies walking around the streets. If you go into the westernmost house, you find Banon and Arvis– alive and relatively well! T-Edition doesn’t vanish them from the story in World of Ruin. They tell you about various legends and magics across the world– in other words they hint at all the optional sidequests you can do to fight more bosses and get more loot.

At this point you can travel across the world to find refugees from Narshe and ask them to come home to repopulate the town and reopen their shops. There’s about seven around the entire world once you’ve done that, the Elder of Narshe gives you the Ragnarok Magicite. Does it teach Ultima like in the original game? No, just Teleport and Libra. It still has the summon ability that turns enemies into items and we’ll see if I can turn some enemies into awesome items.

Apparently the T-Edition readme that I got with the romhack had an error in that it said that if you miss getting the Carbuncle and Catoblepas magicite in World of Balance, you can get it later in World of Ruin. That is wrong, and since that error in the readme has been fixed. If you don’t talk to Arvis and Banon in WoB, you have to talk to some old men walking around Narshe. And if you don’t talk to them then, you miss out on the two Espers forever.

The dialogue got jumbled while I used the Lua script.

Unless you happen to cheat. So various emulators can use Lua scripting to provide extrajudicial code for rom files. One Lua script I found allows players to fight Carbuncle and Catoblepas as world map encounters and obtain their Magicites after. Being that they were bonus bosses meant for WoB, they weren’t hard and I beat them with fairly regular attacks. They don’t teach any super special skills but I do like to be a completionist.

Inside the Narshe Cave, where you find the frozen Esper at the beginning of the game, lay a Magicite. It is for the Esper Titan, who you have to fight to claim. It was a hard fight, but doable on more or less my first go. I took Terra up to the snowfields after and faced the frozen Esper at the cliff. Beating it’s first form is hard enough especially with how much it likes to use Rasp on my party, but it had a second form where its attacks get more aggressive and I couldn’t step to that. Maybe this fight is for later.

Phoenix Cave

Learning spells from Equipment continues to be useful and important.

So it was time for the what is arguably the biggest excursion yet in Final Fantasy VI: The Phoenix Cave. A little refresher: it’s a dungeon where you send in two parties to navigate through it, having one party step on one switch to open the way for the other, and then vice versa– until you have chained your way to the end of the cave and finish the dungeon. It’s decently tough in vanilla and the complexity of the dungeon makes the experience moreso intense.

The enemies are real monsters here. There’s a bomb enemy called the Pineapple which loves to counter any attack with a Self Destruct ability that will 100% KO a party member with the large amount of damage it does. At least I learned that they are open to Berserk and it nullifies their counterattacks.

The cave is long and while in vanilla FF6 there’s no boss battle, but there’s a boss battle in T-Edition, though! It’s pretty interesting– there are two stages to the boss fight. The first is against Triceras. Hits hard but isn’t terribly complicated of a fight. But then it’s revived by the Phoenix’s magic and becomes BurnTyrant. It has some nasty ailments and is completely healed in intervals by, again, Phoenix’s magic. The trick is to continually use Ice magic to freeze Phoenix’s power and pause the healing so you can whittle down the boss’ HP. It took me a little bit to realize that trick, though.

No Caption Provided

Finished Phoenix Cave, got Locke and the Phoenix Magicite, and it’s at this time I realize that the hack is very apprehensive in giving me armour and relics that have elemental damage resistances anything more than cutting effectiveness in half. While more relic have those kinds of properties compared to vanilla, equipment in general seldom have Immunity to elements and I’ve yet to see an Absorption. Early on vanilla FF6, you grab the GaiaGear and absorb Earth damage. That Absorption has been downgrade to Half Damage in T-Edition.

Will I ever obtain armour that allows me absorb elements like Ice and Fire? I sure hope so, but we’ll have to see in the future as I continue this wild journey across the World of Ruin. Stay tuned!

Start the Conversation

Is T-Edition the ULTIMATE Final Fantasy VI Romhack? (Pt 9)

WARNING: This blog is SHAMELESS with its spoilers for the original Final Fantasy VI. Changes present in the T-Edition romhack are shown off and only the strategies for overcoming challenges have spoiler tags.

The World of Ruin

Even with the world open to me with my new airship, I usually do Cyan’s part of the World of Ruin story right away. I did fly around a little bit and dip my toes into things, but I came back to Maranda to start the Mt Zozo chapter.

The world map music has been changed. The Falcon theme ‘Searching For Friends’ plays when you’re flying but instead of ‘Dark World’, the music becomes Noel’s Theme from Final Fantasy XIII-2 which is fitting but I don’t think it works terribly well. Maranda has a new theme in FF3’s ‘Town of Water’. These changes are impressive but I don’t like them much. The original themes are so perfect for the atmosphere and these new ones emotionally offkilter.

No Caption Provided

Anyway, inside Zozo I get a quest to head up the tower to where Ramuh is and up there is Dadaluma, now a doctor. He wants me to get inflicted with an ailment that’s not poison. I Toad’d Celes but that doesn’t count, I guess. There wasn’t an easy way to give me Blind so I had to return later. I forgot how to get rid of the rust on the door for a minute there before looking up you have to buy it off of a man wandering the streets. Years of playing romhacks has hurt my Final Fantasy VI memory, it seems.

Mt Zozo

Mt Zozo has the gimmick of having a lot of enemies with high evasion. You’d be surprised how many attacks actually factor in accuracy, including a number of Sabin’s Blitzes. The enemies have higher HP counts too, and hit hard. Glasya Lobolas was an enemy I didn’t like fighting because of its hard-hitting physical attacks. Casting Toad on it is effective but even then it still hits HARD.

One of the treasures in Mt Zozo is a new weapon: the Dancing Dagger. This has been a weapon in several Final Fantasys (notably V) and I don’t think it was in the original FF6 but this weapon is pretty special. I don’t know how they hacked it into the rom but the weapon has a chance to follow up an attack with an elemental attack, seemingly based off of Mog’s Dance ability. Celes started using it.

No Caption Provided

Traversing the mountain, Celes quickly used up a lot of MP so I got in the position of using Runic to heal MP and it feels good to use that ability in that way. I don’t think I did a lot of that playing the original FF6, nor any romhack.

For those who don’t remember, there are eight Dragons across the World of Ruin. You need to beat them all to unlock a high-level Esper Bahamut. One of those Dragons is in Mt Zozo. I tried fighting it but it’s physical attacks and wind abilities were too powerful. I gave it a handful of shots but I couldn’t find an edge in battle.

I found Cyan, had him join my party, then got out of there. I went back up to Dadaluma and got the idea that he was asking for the exact opposite of what he wanted. I gave someone Poison and put them in the front of the party and Dadaluma gave me some times as thanks. He then wanted someone to get Petrified and one of my heroes was just about to learn Break from a headgear item. FF6 T-Edition dials up the amount of equipment items that teach spells. It’s a nice change. Anyway Dadaluma gave me a Relic for showing him Petrify and I needed to bring him someone who was Blinded, but I couldn’t evoke that at the drop of a hat so I left.

South Figaro

I picked up Gau at the Veldt and return to South Figaro. Now that I had a full party or more, I tried that South Figaro cave mission again. The enemies inside were not too tough but one of them had the nasty trick of absorbing lots of MP from my heroes. I thought a group of fairies was the boss encounter to finish the mission but deeper in there was another enemy. They hit hard and quick, taking out many party members before I could get a command in. They didn’t have too much HP but I still felt like it was out of my reach to take them on right now.

No Caption Provided

There’s another quest at the pub that involves me going into the basement beneath South Figaro. It’s dark, and the enemy encounters take some work, but it seems doable. The goal is to find a missing girl. Frankly, if she’s down there in the dark with all them monsters she’s as good as dead.

I went down anywhere and instinctively went into the basement where you find the Relic at the beginning of the game. She was hiding in the corner but the mission continues as she wants the party to explore deeper in the Figaro basement. You get a record in the backroom and bring it to the bar to play for the patrons. Another Ribbon is the reward, which is perfectly grand.

Collecting

At this point I started to explore around some more. At Nikeah, you meet a dancer that climbs aboard your ship and allows you to switch costumes for your characters, if you have obtained additional costumes for someone. Edgar comes with a few. I found one for Sabin in Figaro Castle. Switching costumes switches stats so when I changed Sabin into a Royal Aide, he became more proficient in Magic.

I messed around the Veldt and fought a Nelapa again. I don’t think you are supposed to fight that boss on the Veldt. Oh well, I got a Brave Ring even if it didn’t give Gau a Rage.

No Caption Provided

At this point I went back to Mobliz to see if I could take on Humbaba with a new set of characters. Its magic is volatile and I died once again, but in my struggle I discovered a crucial weakness: Humbaba is susceptible to Sleep. After poisoning him, I focused only on Magic attacks to not wake him and when he awoke naturally, I put him back to Sleep. Easy. Terra rejoined my party. I checked around the world and noticed that shops had new inventory (I could buy Teleport Stones again) and that items were listed for cheaper prices.

Around this time I had my first encounter with Deathgaze, the fiendish boss you encounter while flying through the air. It’s not a boss you have to beat on first meeting, but with a few Instant-KO spells in its arsenal and a physical attack that can nearly one-shot some of my characters, sometimes the struggle is just surviving.

In the mountains to the northeast I discovered a new location that T-Edition added in– a tower similar to the Tower along Serpent Trench that you visit later. On top of its dais is a teleporter that warps you to a floating continent, maybe the same one from before. I was intrigued but the enemy encounters, which seem to be clones of Espers, were too hard, so I reloaded out.

Around the area is that batch of forest unofficially called Jurassic Park because you can fight two very hard dinosaur enemies there. I came across a Tyrannosaur there and utilized Rasp to sap all of its MP and then Vanish to make my party members invulnerable to its physical attacks, and beat it. Didn’t give me anything special but Gau did learn its Rage which uses Galaxy– which seems to be like Meteor from the original game, a non-elemental spell that hurts the enemy party. Gau learning Rages by fighting enemy encounters is a nice convenience bordering on overpowered, especially when you can go back to Solitary Island and fight a Land Ray in the desert near Cid’s cottage to get is Mighty Guard Rage.

Veldt Cave

No Caption Provided

At this point, I went back to Veldt cave and journeyed through. The objective is to locate Shadow inside. By the save point, here’s a switch that T-Edition added in and when I flipped it the sound of water rushing was heard. No idea what it did. Finding Shadow launches a fight with King Behemoth and thank god that the fight with it wasn’t too bad. The second fight isn’t an undead Behemoth though, but Queen Behemoth. Nothing too special.

After that, Shadow is brought to Thamasa before running off again. Back at Veldt Cave, the place where Shadow was is now the living space of the Gold Dragon. Originally in Kefka’s Tower, T-Edition moves it out of there. The fight was too hard, though, so I’ll have to come back later. Finding challenges that are viable to my strength level is a challenge in itself but I’m slowly clawing away at World of Ruin and finding my footing. We’ll see how far I can go next time. Stay tuned!

Start the Conversation

Is T-Edition the ULTIMATE Final Fantasy VI Romhack? (Pt 8)

Is T-Edition the ULTIMATE Final Fantasy VI Romhack? (Pt 8)

WARNING: This blog is SHAMELESS with its spoilers for the original Final Fantasy VI. Changes present in the T-Edition romhack are shown off and only the strategies for overcoming challenges have spoiler tags.

The World of Ruin and Cid Dying

So I’m at the beginning of the World of Ruin and there’s that scenario where you have to feed Cid fish to make him die/make him better, and this is a point of contention for me.

In the original game, it was very hard to make Cid better. Usually, what’s going to happen is you are going to make him worse and then he dies. T-Edition seemingly makes it hard to get him to die. Brave New World did something similar– he can’t die. He can only get better and he gives Celes a raft to sail across the ocean and look for her lost friends.

No Caption Provided

I don’t like this. The possibility or probability of Cid dying and Celes having that a moment of defeated despair is a very powerful moment in the game, but that might be my personal connection with the scene getting in the way of seeing it from another perspective. On the other hand, the fact that scene is taken outright in some romhacks feels like a betrayal and it’s weird how it’s not pushed back against by others.

Am I in the wrong here? Do people see it as too sadistic and harrowing? To people prefer the clean solution of Cid getting better?

Regardless, the raft is built and Celes sails across the sea to the ruined imperial continent.

Albrook and Tzen

You land near Albrook. There isn’t much to do but there are some subquests you can activate. No idea how to deal with them but I’ll come back to them later. Sabin is waiting up in Tzen so I went that way. Celes was given the Ward Bangle to cut the encounter rate and the Ribbon to prevent ailments in this game, vanilla or T-Edition, the World of Ruin is when a lot of enemies use devastating status ailments.

Inside Tzen is that timed scenario where you have to rescue the boy from the collapsing mansion. There is a scoprion enemy that is very resistant to magic so I equipped the AtmaWeapon and put Celes in the front. The AtmaWeapon, powered by how high the user’s HP is, could one-shot those scorpion enemies so it was a matter of keeping Celes’ HP high and getting rid of them quickly.

No Caption Provided

Everything else in the mansion went down quickly to a party-wide cast of Thundara, so I moved through this place quickly and got all the treasures. Sabin joined the party outside, and I went East to Mobliz.

Mobliz

A T-Edition change is that in the World of Ruin, all shops have their prices doubled, and I didn’t have a lot of gil coming off my nth ride through the Floating Continent so I was feel the bleakness of the World of Ruin. The path out to Mobliz is long, and Celes used up a lot of MP before we arrived.

That’s the town where we meet Terra by the way. Nothing is changed much, although the fight with Humbaba is tough. I don’t if T-Edition gave him more HP (or had him take more damage before he fled), but that battle took awhile since Sabin was busy doing his Meteor Strike while Celes healed. Humbaba uses a lot of physical attacks so when I summoned Golem in a panic, it paid off. Casting Shell on both members of the party was a good idea, too.

After battle you get the Fenrir magicite. T-Edition changes things a bit. It teaches Berserk and Comet but instead of the summon spell giving everyone the Image status, it instead Berserks all allies and speeds them up. It would be cool to find a use of that.

Nikeah

Nikeah also has some new sidequests available. Nothing that seemed to be anything I could do with. I followed the plot and followed Gerad to South Figaro. Now in Figaro there is a quest I can do. Very similar to the first T-Edition side quest you can try, the barkeep sends you to the Figaro Cave to fight a bunch of monsters. Unfortunately those monsters were too tough for Celes and Sabin, so I backed out.

This is also the time that I accidentally walked into the basement underneath South Figaro– the one Locke and Celes travel through at the beginning of the game– and found that it was dark (little light) and that there were new enemy encounters. Very interesting, but the encounters were too hard so I would have to return later.

I pushed into Figaro Cave. The Siegfried character is replaced by Lone Wolf in T-Edition, but that doesn’t lead to anything. Further into Figaro Castle and I got to the fight with the Tentacles. T-Edition, like in vanilla, these Tentacles can grab party members and hold them for awhile, disallowing them from doing anything. I think in vanilla there’s a limit to how many allies can be held at a given time. In this fight, there were a few times where all allies were being wrangled by the Tentacles.

No Caption Provided

T-Edition also throws in a second part of the fight where you fight DesertTrap, a last bit of boss before you can continue. This guy responds to most attacks with dual-casting Drain, taking HP from the allies and giving it to it. It also had another draining attack. It didn’t have a lot of HP but I wasn’t getting anywhere because it was still doing a lot of damage in a way I couldn’t keep up.

The trick is to cast an Ice spell because that disables its draining abilities for awhile. You still have to watch out for some of its attacks because they like to poison people, but the battle fell into place after that and I got Edgar back in my party!

Darill’s Tomb

You meet Setzer at the Kohlingen inn and embark into Darill’s Tomb. This place switches up the field, battle, and victory themes for ones taken from Final Fantasy X. I prefer the use of the original theme but alas.

This level quickly gets hard. Despite having a part of four, the enemies are tricky and strong. I have a special hatred for a particular encounter: a Cloudwrath and two Necromancrs. Between them, they have a zombie attack, an instant-death attack, they can poison the party and Bio the party (which includes the MP-draining Disease ailment). They counter many kinds of attacks. They are wretched.

I found a potential trick by using the Noiseblastr on them and confusing them but then they start to use Quake and X-Zone, the former hurts everyone in the room and the latter has potential to instant-death the entire party. Nasty!

No Caption Provided

Another nasty surprise was waiting for me in the basement. In vanilla FF6, the secret room in the basement has the Experience Egg, which I got after the Kefka battle. In T-Edition, it’s a monster-in-a-box fight against two very powerful opponents Alv and Vilia. With them nearly KOing party members with single attacks, and then attacking quickly, there was no way I could beat them. I took an L.

The strength of enemy encounters might have something to do with the breeziness of the dungeon’s boss fight. Dullahan wasn’t too hard. They come with an ally new to T-Edition, the Wisp. It didn’t seem to do much except Saint Beam which didn’t do too much damage. They could also cast Protect on Dullahan, though. The battle was pretty simple, though. After battle I got a Reincarnation, a new item to T-Edition. It’s something that should have been in the original– a revive item that heals all the target’s HP. Nice!

We got the Falcon and took to the skies. I was hyped. The whole (ruined) world was ready for me to explore and discover its secrets and challenges. Final Fantasy VI T-Edition had been pretty good so far, but I had feeling it would become great before long. That’s for another time. Now that we’re done the first act of World of Ruin, the game will get non-linear. But that’s for another time. Stay tuned!

Start the Conversation

Is T-Edition the ULTIMATE Final Fantasy VI Romhack? (Pt 7)

WARNING: This blog is SHAMELESS with its spoilers for the original Final Fantasy VI. Changes present in the T-Edition romhack are shown off and only the strategies for overcoming challenges have spoiler tags.

The Imperial Air Force

I was a little nervous about heading to the Floating Continent but I would have to be. I’m always anxious about heading into dungeons with no easy point of return. I could have spent some gil to get some more items before I flew out, though.

No Caption Provided

You choose a party of three and I chose Terra (a great spellcaster), Edgar (a pretty formidable fighter) and Cyan (a great fighter). There was no room for subpar party members or fighters that were situational to be useful across the Floating Continent’s unrelenting ordeals.

The first section is the fight against the Imperial Air Force. You have to fight seven or so encounters with these aerial mech enemies and then it’s the fight against Ultros and Typhon. Ultros wasn’t too hard and I maintained a high DPS but once Typhon entered the fight, I was struggling. Typhon has some powerful physical attacks that pretty one-hit my party members.

I had to redo this fight a few times and even after figuring out that Typhon was susceptible to Stop, the fight was still difficult. Ultros’ tentacles hurt and if Typhon shook off the Stop, they would start getting nasty with the chomps. Once Ultros was toast, the fight fell into place.

The follow-up boss Air Force was a little easier. The strategy isn’t much changed from vanilla– take out the Missile Bay and Laser Gun attachments to mitigate its arsenal. After you do that, though, the Air Force summons a ManaJammer (a Bit in the original game) but what T-Edition changes is the Air Force also makes a ReflectBit that looks like an enemy from Final Fantasy X.

No Caption Provided

Maybe those enemies are tricky and ManaJammer had enough defense to step to Cyan’s regular physical attacks, but I had a team of two fighters who both had armour-piercing abilities, so even if Terra wasn’t able to use any magic until they were both gone, Edgar and Cyan quickly took them out. Sometime in all this, Air Force started charging its special attack, indicated by countdown messages, but it didn’t have a lot of HP and I took it out quickly.

The Floating Continent

This is where you get Shadow and unfortunately I didn’t get him learning a lot of spells the time I had him, so he only had Thunder and that’s it. His skeans and thrown items would come in use, though.

The first battle was literally two Behemoths. They barraged the party with devastating attacks. My first fight on the continent, and I was using up all sorts of Phoenix Downs and X-Potions! I realized I had only a few Ethers and a dozen Phoenix Downs and I felt really unprepared. I pushed forward though and no enemy encounters were as rough as the Behemoths. The hack adds in Mindflayers though, which seemed immune to most of my whole-party attacks.

I was thorough to get all the treasures in the continent and had to backtrack a few times. There’s a monster-in-a-box fight with Gigantos and that guy was more brutal than the Behemoths around the place! Didn’t have a lot of HP though so the strategy was too roll with the punches and take ‘em quickly.

I was doing pretty good, surviving even, but that’s when things got bad.

Atma Weapon

The climax fight to Floating Continent is the fight with ancient weapon of unknowable power Atma Weapon. This is a standout fight in original FF6 but in T-Edition it’s much worse.

I had to reset the battle a few times. He has a decent physical attack and loves to spam Flare. There were characters that would die from one hit of Flare, especially Terra who had sub-1000 HP. Most of the time, Terra was delegated to Cura on the party and even that wasn’t enough. I always felt like I was falling behind the curve.

Edgar used Chainsaw and Cyan used Jagged Dance and they did decent damage and the battle wouldn’t have taken that along aside from the fact that party members died pretty frequently. I struggled to fight Atma but as the fight goes on, they charge up and then do the party-wide Flare Star which basically kills everyone, or close to it.

No Caption Provided

I backed out of the fight and left the Continent. I wasn’t sure what to do. I wandered a bit and even went to the Auction House to find some Magicite on sale. The rates of which items are sold in the Auction House in T-Edition are much higher than anything in the original and I had fork over most of my gil to get PuPu.

PuPu is a replacement for Zona Seeker in the original FF6. The summon ability casts Shell on the party, like Zona Seeker in the original, and you can learn Shell as an ability from PuPu, but the other spell you can learn is Bio which is dark-elemental in T-Edition and also causes Disease, which slowly drain MP so I got thinking, could I beat Atma Weapon by depleting its MP rate?

I bought some more Phoenix Downs and went back to the Continent. At least this time I didn’t have to refight the Air Force but I did have to retrek through the Continent, including hitting some switched again. Cyan learned Rasp on the way to the fight, but Terra did not learn Bio from PuPu so that wasn’t going to be part of the strategy.

Using PuPu’s summon ability to cast Shell on everyone allowed them to survive Atma’s Flare often enough. I was still forced to use Terra almost exclusively for healing so Cyan and Edgar handled casting Rasp over and over again. I wasn’t sure what would happen if I depleted Atma’s MP pool. Would they be able to use powerful moves anyway? The answer is no. They would die, and the battle was won.

Emperor Gestahl and Kefka

Shadow ditched you after the battle with Atma but when you got up to confront Gestahl and Kefka, Celes joins you. As an addition to T-Edition, you fight a battle against Kefka here!

No Caption Provided

He has powerful magic, and an MP pool you are likely not going to be able to deplete with Rasp and the like. Celes joins the battle but if you don’t have here equipped with things on the ship, she won’t be during the fight. Ugh!

I retreated (once again) and went back to the ship to equip Celes with some actual gear. The Atma Weapon boss drops the AtmaWeapon sword in T-Edition. In the original you find it in the Cave to the Sacred Realm. Don’t know if I’ll get any use of it anytime soon but it was Runic-active so I gave it to Celes. I figured the fight would factor in Runic somehow.

I had a lot of cash on me so I checked out the auction house some more to see if any other Magicite would show up. Shamefully, I had forgotten when the magicite appear in the Auction House but I assume they appear at the same time in T-Edition as they do in the original. Grabbing the Golem magicite cost 55000 gil, though.

It teaches Protect and Shell but the main gimmick is the summon ability which summons Golem to take damage for the heroes. I never used this much in the vanilla game, but in challenge runs and harder romhacks, Golem’s ability to take damage for heroes is unique and vital in some situations.

I was disappointed that I missed a couple magicites but at least I could nab a couple of the extra ones before moving on with the story. I was more prepared. Now, getting back to Kefka required me going through the Floating Continent (once again) but without Shadow as when he leaves after the Atma fight, he’s gone for good.

With Celes now equipped, I was ready to take on Kefka. That doesn’t mean he wasn’t hard, though. It’s very easy to get overwhelmed by his magic attacks and I died a number of times. He has this Comet attack that Celes normally can’t Runic and can hit two, three, or four times. His Trine attack was more of an inconvenience. It doesn’t hurt much but it does cause some ailments so I switched Terra’s relics around so she wouldn’t have to deal with Mute.

The winning strategy was to bring the PuPu summon into battle and use it so everyone has Shell. It halves restorative magic’s effectiveness (like Terra’s Cura) but I found the upsides greater than that downside. Cyan does his Bushido techniques, Edgar does Chainsaw, Terra heals, and Celes does Runic occasionally throwing in a Cure for good measure. Kefka goes down.

No Caption Provided

The Last Stretch

The last part of the World of Balance is running across the Floating Continent as it breaks apart– running to the airship. There’s a time limit so part of dealing with the high encounter rate is choosing attacks that don’t take a lot of animation time. Terra’s Fira nearly took the Naude enemies out in one-shot. I could feel that timer ticking down but I managed to grab the Elixir treasure and the final fight against Nelapa.

Nelapa takes up a small bit of time because it has to use Death Sentence on every hero but it went down in a single cast of Fira. Maybe I misremembered how hard it was because in other romhacks, they usually bolster this fight a little bit so that surprised me. Right past Nelapa is the ledge you can jump off of. There’s no waiting for Shadow, no chance to miss out on a party member. T-Edition erases the chance of leaving Shadow behind to die.

That’s the end of World of Balance! Already the romhack shows a lot of personality and creativity, while mixing things up. Apparently, things are only going to get more wilder from here, which is very exciting! Is T-Edition the ultimate Final Fantasy VI romhack? Yeah I think so! But we'll check out World of Ruin another time. Till then, stay tuned!

Start the Conversation

Is T-Edition the ULTIMATE Final Fantasy VI Romhack? (Pt 6)

NOTE: This blog contains many spoilers on the romhack Final Fantasy VI T-Edition! Some things are spoiled but by nature I have to show off a lot of cool content.

Forward

So we come in after the Blackjack has crashed on the western side of the Imperial continent, near Maranda. Although I wouldn’t have them for much longer, I switched up my party.

No Caption Provided

For the last little while, basically the Cave to the Sealed Gate chapter, I had been using Terra, Mog, Gau, and Setzer. They learned a bunch of spells and got very strong over the course of spelunking through the Cave of the Sealed Gate (twice). I forgot to mention, Setzer’s Slot ability is pretty viable. Most of the spells it casts are pretty devastating enemy party attacks. The ‘screw-up’ spell if you don’t get a match is Mysidian Rabbit which in the original game, is a very low-power all healing ability, but T-Edition (and other romhacks) buff the power of the healing and even make it cure a few basic ailments? Basically I was using Setzer’s Slot for most of his turns.

So I switched in Locke, Sabin, Edgar, and Cyan and they don’t gain experience while outside the party. They were about five levels younger than Terra and the gang and needed to do some catching up. They didn’t have many spells between them either but that’s when I really noticed how varied everyone’s magical viability. A lot of characters didn’t have a high Magic stat nor a lot of MP to use. That’s something that T-Edition changes up significantly and it’s notably weird. With learning magic from espers being such a big mechanic, it’s debuffed here to the point where I don’t see myself using magic for most characters, but we’ll see how I’m feeling later on in the game.

Vector and the Journey to Crescent Island

I didn’t get too many fights in before making it to Vector, which has been ravaged by the esper attack. There’s the confrontation of Emperor Gestahl and then the minigame where you have to run around the Imperial Base talking to as many imperial soldiers as you can. The only thing that T-Edition changes is the stats of the few enemies you have to fight so business as usual: I know the most optimal path to talk to everyone and I left the treasure chests laying around to collect later.

No Caption Provided

I don’t know if T-Edition switches up the rewards for leaving a good impression on Gestahl but being that T-Edition had some special quests in South Figaro, I definitely wanted to do well enough to get its imperial occupation revoked. The questions during the banquet function as usual. The fight during the break wasn’t bad. After the banquet, I think I got all the rewards unless T-Edition switched something. In addition to the three Empire-occupied places being unlocked, there’s a Charm Bangle in there, which cuts the encounter rate in half. I also got a Ribbon, which protects against all ailments. You were supposed to find one earlier in the game but T-Edition replaced that with a lesser ailment-prevention relic.

One of the rewards is the outpost to the east being unlocked, so I headed there. The plot forces you to use Locke and Terra so I had travel across the world map with two characters. I, uh, just ran from fights. The treasures in the eastern outpost were plentiful although I don’t think too different from what they were in vanilla but in a game as adversarial as this one, a relic that can prevent a couple ailments or one that prevents back attacks could go pretty far.

Back in Albrook, T-Edition changes the music from ‘Under Martial Law’ to a new imported track from Final Fantasy 4 Heroes Light called ‘Vulpes ~Day~’ which works pretty well. It’s a refreshing track that goes with the fact that Albrook is less hostile to the heroes being that they are working with the empire. Of course, there’s also a tension and distrust in the story that would make the original track go with the atmosphere.

Locke chats with General Leo at the Albrook docks.

The Locke and Celes confrontation at the inn is changed up a lot. When Locke exits the inn at night, Celes isn’t right at balcony for the cutscene to begin. T-Edition turns this into a small scenario where you walk around town and talk to Shadow and General Leo before returning to the inn. It’s pretty good! It’s not too long, adds a little bit of character for Locke, Shadow, and General Leo and the use of ‘Vulpes ~Night~’ is quite good. The dramatic confrontation between Celes and Locke still plays out with that great use of Celes’ theme and the story continues.

Crescent Island

In Thamasa, you get Strago and are forced into the Burning Mansion dungeon. It was manageable although some enemies liked to berserk some of my party members. Strago has a huge pool of MP but maybe the lowest HP rate yet. This became a problem at the boss of the dungeon: Mom Bomb (taken from Final Fantasy IV) in which her on-death spell is to explode and deal massive damage to all party members, more than Strago had. It killed me the first time but the second go I looked for a relic that protects against Fire and found only one. I gave it to Terra since she had the Seraph esper whose summoning spell was very potent.

Later on in the Espers’ Gathering Place, you have that mid-dungeon fight with Ultros. It’s harder, like all T-Edition fights, but the twist is Ultros goes into Gear Shift Mode and changes his elemental weakness while putting up a Protect spell. That’s the battle that Relm enters the fight and she joins your party with some magic pre-learned.

I’ve paid attention to the romhacking scene for FF6 and it’s pretty remarkable that someone hacked that in– a person joining the party with magic learned. Apparently it’s not easy to do that, unless it’s a glitch I invoked unwillingly. Her spell listing might have just been copied from someone like Sabin or Cyan.

No Caption Provided

I finished the cave and after the business back in Thamasa I had my airship back. At this point you can head to the Floating Continent to finish Act Three of this game but I was thinking I would try to complete some challenges before tackling the World of Balance’s final excursion.

Wandering

Unfortunately, in the process of waiting until I was strong enough to take on the Espers waiting in Narshe, I’ve waited too long. I cannot find Arvis or the Elder to challenge Catoblepas or Carbuncle. The TXT document that comes with the romhack reassures that you can fight them later, but that’s in World of Ruin. Whatever spells they had to offer, I would have to wait til I got them.

It makes me ponder on how necessary they would be in the coming dungeons. The fight up to the Floating Continent and the island itself are challenging enough in vanilla, let alone a romhack that buffs the challenge globally.

No Caption Provided

Whatever. I focused on what I could do. I got the treasures at Doma Castle although they were nothing special. All that I really had to do was the new bar quests at South Figaro. That and I still wanted to slay an Intangir, so I went that ways. This is when I found a cool romhack feature that’s in T-Edition and apparently in a few smaller hacks: Gau’s Rage list tell you which Rage does what.

So I get into a fight with an Intangir and the trick in vanilla is to use an instant-spell to take down this intimidating monster with loads of HP. I didn’t have any of those and I could get one of Gau’s Rages to proc with petrify, so I had to find another way of killing it. After some experimentation, I discovered Gravity attacks work and cut down his HP quickly.

That doesn't mean they work all the time. Usually they missed, and they seemed to always miss if the Intangir was invisible. Thus began a very long battle where I would Libra Intangir to make it visible, hit it with Gravity to take a chunk of its HP, get hit with a counterattack that would surely kill whoever got it, then it would go back invisible and sleep.

It’s at this point that I realized that T-Edition ups the maximum damage for attacks. Like a lot of Final Fantasys, 9999 is the normal ceiling for damage but I did 16000 damage with that first hit of Gravity.

No Caption Provided

Anyway, I finished the battle and got 20 AP, a portion so large it was not seen in vanilla FF6. Gau got the Intangir Rage ‘Comet’ which isn’t really good but I wanted to get the Rage now anyway. I was wondering if that Shadow Flare was a Blue Magic Strago could learn so I gave Intangir another fight. I had Gravity attacks only on a few people so I figured I would have to deal with using Relm’s magic and using my limited ethers to replenish her unsubstantial MP pool. Luckily Mog’s Cave-In attack off of one of his Dances is a very powerful Gravity attack, making this fight even breezier than the last. Strago couldn’t learn Shadow Flare but did get Step Damage, an attack Relm did when she used her Sketch ability.

Finally, I checked out that quest in South Figaro now that the town has been liberated. The bar offers a quest to investigate Mt Koltz for Imperial activity. This new scenario uses the chipper ‘Amber Valley’ theme from Final Fantasy Tactics Advance and the gimmick is that Mt Koltz now has these falling rocks that if you run into them, you reset at the start of the room, similar to a part later in Gogo’s cave. It’s not super groundbreaking but it’s neat. The time window for getting past some of these rocks is pretty tight, though.

The enemy encounters are recycled from the Magitek Facility which means that you might have to fight a Trapper– a turret enemy capable of the devastating LV Blue Magic spells that can kill party members pretty easily. At the end of the cave was a rematch with TunnelArmr and a few mechanical cohorts. Not too big of a problem and my reward for beating the cave was an Elixir and a Blood Lance.

There wasn’t anything left to do. The next step was the Floating Continent, and I was feeling the anxiety. Was it going to be too hard? One of the first times I played FF6, I got stuck a few times on the Continent, but I could strategize and plan ahead. That’s for next time, though. Next blog I will cover the climax to Act Three, the Floating Continent! Stay tuned!

Start the Conversation

Is T-Edition the ULTIMATE Final Fantasy VI Romhack? (Pt 5)

NOTE: This blog contains many spoilers on the romhack Final Fantasy VI T-Edition! Some things are spoiled but by nature I have to show off a lot of cool content.

Narshe and the Espers

After getting your airship, T-Edition takes off quite a bit (pun not intended)! There are new secrets to find and obtaining additional magicite is no easy task...

Moving into Act Three of Final Fantasy VI T-Edition, I jet right to Narshe to forward the plot and to pick up Mog. After the scene inside the Elder’s house, I talk to Arvis and the Elder and they got magicite but the Espers inside them require fights to get their magicite for the party. This turned out to be very difficult.

Catoblepas barrages the party with petrification and even after finding three relics that protect against it, the boss fight had more tricks up its hoof. It follows up by turning itself to stone (as a defensive measure) and healing. It also brings out physical attacks that deal twice the HP of most of my characters.

No Caption Provided

The other magicite fight in Narshe pits you against Carbuncle. Out of all the Esper fights I have to do at this part of the game to get new magicite, this one seems the most reasonable. Carbuncle has reflect on and reflects powerful spells back at the heroes, but it seems manageable. I switched up my party so all the new characters have no spells except for Terra.

The Lone Wolf/Mog escapade deeper into the Narshe mountains is unchanged although I had to wonder if choosing the Gold Hairpin over Mog was a smart decision in this version of FF6. Alas, I went with the moogle.

The two Esper fights in Narshe are something that T-Edition added but even in the original game, there’s that Magicite you can pick up in Tzen– Seraph. In this version, you have to fight the Esper though and they like to use Saint Beam which hurts like hell. The new Esper fights are going to require a lot more strategizing.

I only obtained five new Espers at the Magitech Facility, as opposed to the eight you get in the original. There’s Maduin, Phantom, and Unicorn and their spellsets have been changed greatly. No longer is Maduin a fount for three basic flavours of elemental magic. It seems like T-Edition makes most spell listing unique. There hasn’t been any repeat spells yet.

Traveling the World

No Caption Provided

I snuck Locke into the party and went to the Returner’s hideout in the mountains. Using his Toad spell, we got into that small hole we found earlier when the party first met Banon. The room inside was a copy of another room in the hideout but we found a bunch of new equipment including an item that protects against petrification.

Feeling underpowered and unprepared for any trials ahead, I took some time out to grind a little bit albeit on the Veldt so even if I got Gil and AP, my characters wouldn’t level up experiencewise. I mastered a couple spells for each character and then moved on to getting Mog all of his dances. The elusive one was Water Rondo which requires the player to fight enemies in the Serpent Trench and then go through the hassle of going all the way around the Eastern side of the world to get back to their airship.

In the original FF6, this Dance is missable once you get to the World of Ruin because there is no battle you can fight that has ‘Water’ as its 'dance element'. Still, I wanted the Dance as early as possible especially since the Water element is uncommon and having a mostly reliable Water attack could make or break some battles. Thankfully Nikeah has a chocobo stable so I didn’t need to skulk across the world map up until the Phantom Forest. And that forest goes by quick; you don’t have to redo the Phantom Train. Back on the Veldt I got my airship and went exploring some more.

No Caption Provided

After failing to defeat an Intangir, an uncommon enemy roaming the map’s northeastern island, I went back to Tzen to see if I could take on Seraph. Her Saint Beam hurts but could I keep up the healing? I bashed my head against the Seraph and learned a couple interesting things. Her attacks get tamer if you only fight her with two people but its hard to keep up with her Pray ability which heals her about 1000. She still used her Saint Beam and eventually I gave up and moved on with the plot.

Cave to the Sealed Gate

The Cave to the Sealed Gate is full of pretty fearsome monsters. Granted, I didn’t have the best party. Gau was in there and his best Rages weren’t particularly effective against the undead Fire-tinged enemies I’d face. Mog had his dances but it would take a minute before I’d realize enemies were weak or susceptible to water so they weren’t too effective for a little while.

A couple enemies in the cave have an instant death ability and a couple had a Zombie attack which the Zombie status is a special kind of death. The seizure ailment in the original FF6 did a miniscule amount of continuing damage like poison, but in T-Edition it’s been reworked so it slowly drains ones MP. A nasty trick if you ask me, especially since I don’t think there’s a way to cure it or prevent it. Bio has been reworked in T-Edition to inflict instead of poison.

No Caption Provided

I didn’t come in with a lot of status healers so as my item numbers got lower, I got more nervous. At least there’s a save point halfway through the cave and I think this was my first time using a tent. A little bit after that and I run into another encounter with Gilgamesh. Compared to the first two times I fought him, he wasn’t tough. Even with Enkidu being summoned halfway through the fight and healing Gilgamesh to full, it weren’t bad. I kept my HP up and stuck it to the end.

As I explored this cave, I kept an eye out for its many secrets. I’ve played this game a dozen times but I’m never confident that I have successfully found every secret in the Cave to the Sealed Gate. The instruction TXT file for T-Edition mentioned some sort of secret lying in the ground around the cave but I couldn’t find it. I got to the end, just before the Sealed Gate and hadn’t discovered any secret in the ground.

I used a Teleport Stone to warp outside and took off to town to get some supplies. I had gained a few levels in the cave so I wanted to give Seraph another shot, and that’s when I learned that Seraph was vulnerable to Stop, a spell that, well, completely stops the target for a while. After that the battle fell into place. Recover after Saint Beam, use powerful attacks, and reapply Stop when I have to. The reward is the Esper Seraph, which finally gives me Cura and also has the rare instances of containing spells on other espers, specifically Cure and Raise.

No Caption Provided

So I went back into the Cave to the Sealed Gate and remembered that down the big staircase there are treasures that can be picked up off the ground. An obscure secret, but one I should have recalled having played this game and having gotten these secrets a few times over playthroughs. T-Edition, however, adds in a dangerous encounter with the Gil Turtle, a new boss. There was no way I could beat that thing at the strength level I was at. The good news is that T-Edition apparently allows the player to return to the Cave to the Sealed Gate later in the game, something that was normally disallowed in the vanilla version. We check in later.

The rest of the cave goes normally. I was expecting for there to be some sort of twist in the encounter at the end of the cave (I’ve played a romhack that turns that scripted battle sequence into an actual boss fight) but nothing special happened. And that’s where we’ll leave it here. Next up, I’ll be continuing the plot through the chapters on the Imperial Continent and the Magic Continent. Stay tuned!

Start the Conversation
  • 14 results
  • 1
  • 2