
Building a PC in 2013
By JJWeatherman 29 Comments
Hey, guys! I built myself a new PC recently, and I'm loving it. I thought some of you may be interested in hearing about how my building process went, thus this blog was born.
Everything Plus the Case
| Part | Detail |
|---|---|
| Case | Corsair Carbide Series 500R |
| Motherboard | ASUS MAXIMUS VI HERO |
| CPU | Intel Core i5-4670K Haswell |
| GPU | EVGA SuperClocked w/ ACX Cooling GeForce GTX 770 |
| RAM | G.SKILL Sniper Series 8GB @ 1866 MHz |
| PSU | SeaSonic X Series X650 |
| Cooler | CORSAIR Hydro Series H100i |
| SSD | SAMSUNG 840 Series |
| HDD | SAMSUNG Spinpoint 1TB 7200 RPM |
As you can see, I decided to jump on the 2013 boat and bought Intel's brand new Haswell CPU as well as a freshly released GTX 770 graphics card. The Haswell decision probably wasn't the smartest, as I could have gotten an older Ivybridge chip to pair with a socket 1155 motherboard for a bit cheaper, but that's no fun.

The point was brought up to me on several occasions that by the time next generation consoles are released, the GTX 770's 2GB of VRAM could be inadequate. This is the most vital piece of any gaming build, so I considered this point pretty carefully. At the end of the day, I gambled that this factor wouldn't be too limiting. I'm only running one monitor at 1080p, so 2GB should suit me just fine. At least that's the hope. Limited stock of the 4GB cards also played a part. If I'd been able to find a 4GB EVGA 770, I may have spent the extra cash. But really, I think it'd have been a waste to do so.
I splurged a bit with the ASUS Maximus VI Hero motherboard. I really don't need all of the features that it provides; however, the biggest plus to the Maximus was the build quality. My goal here was to buy into something that was reliable first and foremost, and would provide me with options when it comes to future expandability. This motherboard, while a tad expensive, fits the bill.
Once I was able to wrap my mind around my chosen components' power draw, as well as the effects of overlocking, choosing the 650W SeaSonic power supply was fairly easy. RAM is almost always an easy buy, as you can't really go wrong sticking to a reliable brand and well-reviewed model. I did opt to bump up to 1866MHz RAM as opposed to the more standard 1600MHz, not that I'll ever notice a difference.
My SSD and hard drive are refugees from my last PC, so no Windows installing was done this time around, which was nice. A fresh install of Windows is always great, but the following setup and reconfiguration of everything ever is something I was glad to avoid.
Picking Up the Pieces (And Subsequently Placing Them Inside the Case)

This was just the second time I've built a computer—my first build occurring just over a year ago—so the nerves were still present as I was unpacking everything and preparing to throw it all together. I imagine those nerves are something that never completely go away, even for much more experienced builders; we dabble in an expensive hobby, after all.
With butterflies fluttering away in my stomach, I started to unbox and build. I laid out my motherboard, still in the cardboard sheath in which it was packaged. The first thing I did was drop in my CPU. This is a simple procedure, but one that's always super stressful. I didn't have any problems, though, as I lined up the notches and dropped it right into my 1150 socket. I swung the arm down, locked it into place, and let out a little sigh of relief. After that I popped in my RAM. I ran into a bit of trouble with selecting the proper DIMM slots. I consulted my motherboard's instructions, but information seemed to contradict. At the end of the day, I ended up slotting my RAM into the slots the manual suggested, but after examining my BIOS, it seems that my manual may have led me astray. Anyway, I'm getting ahead of myself. And everything RAM-related still worked fine despite any confusion, so I've yet to reconfigure it.
With the CPU and RAM all in place, it was time to seat the motherboard into my case. Now, normally you may place a stock cooler onto your CPU before screwing down the motherboard, but since I decided to go with a liquid cooler, I had to wait and install that after my motherboard was in place and secured. I ran into my second issue in the motherboard securing process. Turns out my case has three built-in standoffs along the top of the case, meaning I didn't need to install any of my own there. But instead of preinstalled metal standoffs, my case just had these strange raised plastic bubbles. Nowhere was this explicitly explained, but I eventually confirmed via the internet that these raised bubbles were indeed built-in standoffs. I installed the rest of the required standoffs and slid my motherboard in and lined it all up. The process of lining everything up and pushing the rear IO ports through the backplate was a bit of a challenge, and I actually ended up scratching the bottom of my motherboard's PCB a bit, as it was rubbing on a metal standoff or two as I struggled with it. Applying a bit of force, I eventually get everything settled and applied screws. The motherboard was set!
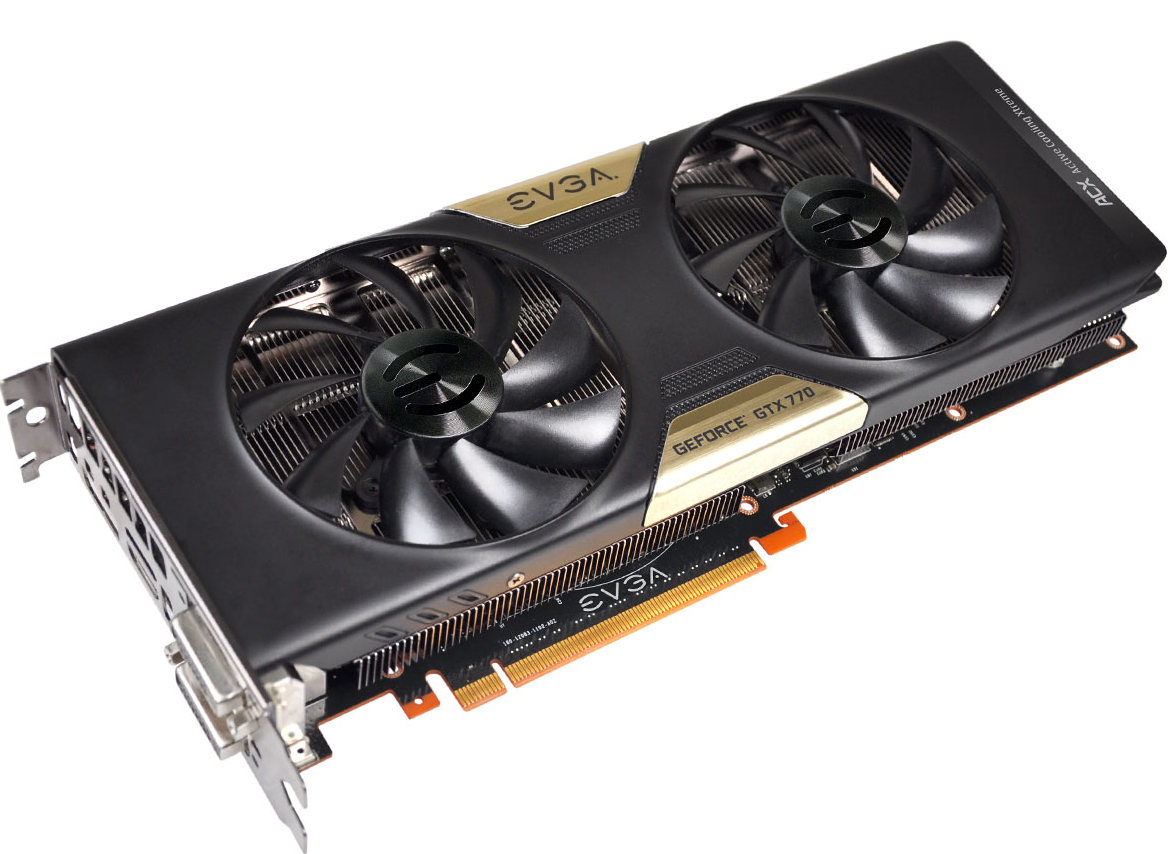
Next I installed my graphics card. Oh, my glorious GTX 770. I really love the look of this thing. It's black with gold trim, and if a computer graphics card can be classy, this is one of the classiest looking cards I've ever seen. The card popped into one of my PCIe slots very simply, and I screwed it down.

Next came the most interesting part of my whole build. I say interesting, but what I really mean is plodding and stressful. My biggest hurdle with this build by far was the installation of my liquid cooler. A key consideration to make when installing a liquid cooler with a radiator is whether you want a push, pull, or push/pull setup with your fans. Push meaning pushing air through the radiator, pull meaning pulling it through from the other side, and push/pull obviously being both simultaneously. Only having two fans, I couldn't run a push/pull without buying more, so I opted to push air through from the outside in. My case has a mounting point that's designed for radiators at the top of the case, so this wasn't too difficult to make work. What I did was I installed the radiator more on the inside of my case toward my motherboard, and installed my fans just above in a hidden compartment. The fans push cool air down through the radiator and into the case. This may not sound like the greatest idea to be pushing the heat from the radiator down into the case, but I have a rear exhaust fan sitting directly below the radiator, so in theory that should be catching all of that heat and blowing it right out the back. I have two more fans in the front of my case taking in air, as well as a large 200mm air intake fan on the side of my case. I've created a bit of a wind tunnel with all of the fans being intake other than the one at the back. I'm no expert when it comes to this stuff, but it seems to be working out nicely from what I've seen in my temperature monitoring.
But let's get back to the cooler installation, and my biggest issue of the build. The issue here came with mounting the pump to the CPU. In order to mount this thing, you need to install a special backplate that will allow the pump to be secured to the motherboard. This backplate attaches to the back of the motherboard and provides the screw points to mount the pump on the front. Thing is, the provided Intel backplate is apparently not fully compatible with all motherboards despite claims of the contrary. The mounting points that poke through the motherboard from behind are too long for some motherboards' PCB, resulting in a loose fit of the pump over the CPU, and thus ineffective cooling. I looked through a bunch of conversations online about this, and there seemed to be a fairly large group of people claiming that the looseness is intentional, and that the screw tightening process of installation should take up that slack. Well, just as many people seemed to believe otherwise, and that it was basically a huge fault in the design of the backplate. This mostly affects motherboards with thin PCB, and ASUS seems to make their boards thinner than most. Lucky me, I bought an ASUS board. So I was convinced that I had to find a way to make the backplate a tighter fit. There are a few online tutorials for fixing this involving rubber or metal washers. Basically what you want to do is space out the backplate against the motherboard a bit more so that the mounting points are flush with the front side of the motherboard as opposed to poking up several millimeters higher, as was the case with my situation. I eventually found a sheet of sticky rubber circles that I ended up using as makeshift washers. And hey, it worked. I couldn't get the fit just right; it ended up being a tad too tight in the end, but it was better than things not being held down tight enough. Crisis seemingly averted! After that nail-biting near-fiasco I was happy to finally get the pump seated over the CPU properly. It all seemed a bit ramshackle, and I definitely missed the simplicity of a stock Intel cooler, but I think it was worth the effort.

Things were pretty much smooth sailing from there. I threw in my solid state drive and traditional hard drive from my old machine, which was simple enough. Then I threw in my power supply and wired everything up, trying my best to keep my machine from becoming a snake pit of cables—I wasn't completely successful in that particular endeavor. Fans were hooked up, SATA cables were attached, and front panel pins were slid into their proper positions. Everything seemed in place.
I put the side panels back on, hooked it up to my monitor, mouse, and keyboard, and gave it a shot. And yes, I did put the side panels back on prior to testing the thing. I don't know why, but I enjoy having a bit of an arrogance when it comes to this. Like, "of course it'll work." I actually like to think it's more positive thinking than arrogance, but anyway. I'm happy to report that it did indeed work! My new machine was firing on all cylinders, and no problems to report. It booted right into Windows and I was off to the races. It went this way the first time I built a PC, too, which likely just means I'm very lucky.
Results!
I've been very happy with this upgrade thus far. I've been playing through the Witcher 2 lately, and this upgrade has helped tremendously with that. I went from a framerate of ~28-38 on medium settings to a solid 60 on ultra. Couldn't be happier. I can't wait to play Witcher 3 when that hits.
As far as my temperatures, things seem peachy. My CPU idles at around 30 degrees celsius, which seems about right. Under a 100% load stress test, it seems to peak around the low 60s, which seems totally reasonable. My graphics card never spins the fans up too much, which is great. Noise-wise, things are good, but overall could be better. I'm thinking of buying quieter fans for my radiator and other intakes, but for now I can certainly live with these noise levels.
And that's it! I'm tired of writing, and you're likely tired of reading. Just wanted to document a few things here for fun. Perhaps some of you will be able to benefit in your future builds from hearing about the issues I've had. In any case, thanks for reading. And thanks to anyone and everyone who contributed opinions on this build in earlier threads—it was very helpful.