MBF's Retraux-Spective: Donkey Kong 64 - Part 5
By MisterBananaFoam 1 Comments
After enduring one of the most abominably dull levels this side of 3D platformers, you would imagine the game has started to flatline at this point in terms of enjoyment. Then DK64 dumps several buckets of multicolored paint over your head and the fun appears to pick up again within Fungi Forest, the game's next level.
Notice how I said appears to pick up in that sentence. I'll elaborate later, but for now, let's summarize Fungi Forest at a quick glance.
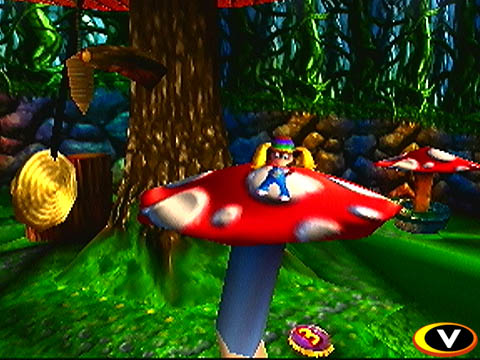
True to its name, Fungi Forest is a lush, floral habitat sprawling with gigantic mushroom spores that act just like climbable trees. At the entrance to the level is a giant cuckoo clock which allows you to change the level from day to night. And yes, much like Gloomy Galleon's water level switches, you're often required to trek back to this area to change the time of day so you can cause new events to happen and be able to access certain areas in the level. At least every area in this level has a Bananaport pad you can conveniently use that links back up directly to the cuckoo clock area, so you don't have to waste nearly as much time getting back as you did in Gloomy Galleon.
One challenge that I often end up doing first is Chunky's Mine Cart coaster, because screw you, it's Chunky Kong, dammit. Also, it's the first cart track you'll have seen in a while since the beginning of the game, since none of the other levels besides the first have one. This time around, however, the stakes are higher. Despite being a cheery forest beforehand, everything on this ride is out to get you, from explosive TNT barrels to massive biting dragon doors and steel gates that are activated by certain bells and require split-second timing to activate or avoid, depending on whether they open or close the gates. It's probably the most unpredictable of the three mine cart segments in the game, and you most likely will fail the first time you attempt it, but on the flipside it's also very fun to play.
Now then, if I recall correctly, there are about four different enclosed areas in this level besides the cuckoo clock hub. I guess I'll knock out the most boring one first.
Behold, ladies and gentlemen, the superb level design of Donkey Kong 64! Well, in all fairness, at least a couple things happen in this seemingly barren waste of space. You do get to turn giant and defend a giant apple fort from a horde of demonic tomatoes by elbow slamming them as Chunky Kong (I wish I was making that up). And then you have... uh... a giant deformed beanstalk......I think it speaks for itself. I think there's an ammunition upgrade here, too, but hell if I can remember anything else.
The next are we'll tackle is, thematically, a giant, towering mushroom building surrounded by a moat.
Inside the colossal decomposer is... well, not a whole lot. The picture basically details most of what you can find inside, it's just a large, spiraling climb littered with colored bananas and some blueprint cronies. I was pretty disappointed with this area because it had so much potential, with all the large space it takes up, but it ended up being devoid of anything interesting. The only unique areas that can be found on the mushroom are some stashed away minigames on the roof, and all they contain are puzzles that would make Reader Rabbit chortle.
Anyways, there's not much else to note about this area other than there's a few minigame barrels here and there (how did they manage to make something this big and vast so fricking boring?). You also get to visit Cranky, but instead of bestowing a new move for each Kong he gives everyone an upgraded Simian Slam (or Ground Pound, if you prefer layman's terms) so they can pound the blue switches. I would say that this is absolutely disgusting as far as game design goes, but by this point you're likely to have at least 50 coins for each Kong, so the expenses shouldn't be too large for you to handle.
Moving on, then. We have two major areas left to cover, and both of them have their own ups and downs. Let's focus on the lesser of two evils first - the mills.
This area is, in my humble opinion, the most enjoyable section of the level, probably because there's so much crap to do. It might be a bad sign if the mills, which are, like, 5 times smaller than the ginormous friggin' mushroom we saw earlier, contain many more areas to explore. Then again, there are about three or four buildings to explore, so it has kind of an unfair advantage.
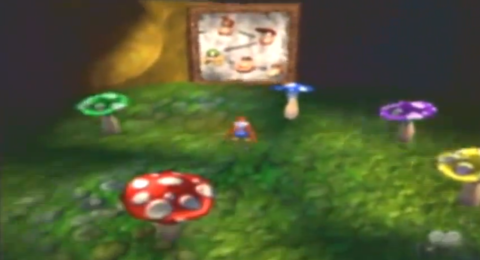
As you can see up there in the picture that I most certainly did not rip from a Donkey Kong wikia page, some of the areas are blocked off by steel bars and can only be accessed at night time. It's mostly just there to enforce the Retarded Padding Quota, but there are some areas that are blocked off that make hardly any sense whatsoever even by these standards, such as restricting access to Snide's hideout during the daytime by putting up a fence between two bushes. What the crap? Is your goddamn game not padded out enough yet, Rareware?
There are three buildings in this area. The one in the middle has somewhere near 3 or 4 entrances to different areas inside of it, while the other two can only be accessed through one entryway. I'd like to start with the building that can only be accessed by Diddy, or for those of you who don't know what I'm talking about, the building that's just barely poking out behind the corner of the main building you see in the picture above.
I chose to start with that one because I despise it to its core.
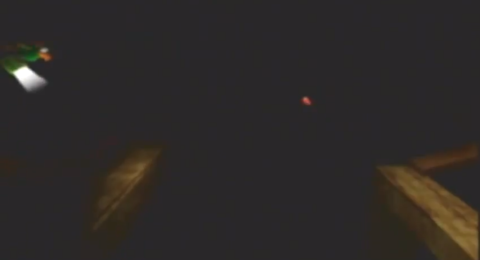
The front door to this place is barred up, so you have to use a spring pad to jump up and enter through the attic (which you can only enter at night. Great.). When you get inside, there's a Golden Banana on the very far side of the room. The problem is that you cannot see the pathway that you need to take in order to get over there because the attic is nearly pitch-black, so you have to activate a switch with Diddy's guitar so that Squawks comes down with a flashlight to help you see where you're supposed to go. His AI, however, is very slow with keeping up with you, and the platforms are pretty thin. Also, for some reason, even though this building clearly has a floor from the outside, the attic is looming over a bottomless pit that kills you instantly (what, was this place built over a miniature quarry or something?). All of these things combined formulate the perfect recipe for one of the only areas of the game that you're bound to die at least a couple times in.
The center building is where all the big stuff goes down. The first area you're likely to visit houses a crusher puzzle where you have to activate a conveyor belt as Donkey Kong by pulling switches, then heave a bunch of steel barrels onto the conveyor belt as Chunky and grind them up, which, for some unexplained reason, rewards you with a Golden Banana. At least the boulder-crusher puzzle from Banjo-Tooie made sense, since the Jiggy was stuck inside a gigantic stone and had a distinct outline, but these... these are just regular-ass barrels. Nothing special about them. How am I supposed to know that they warrant a plot coupon? Even a tiny Banana sticker or something would help, Rare, seriously.
Oh, and this is probably the only level in the game that hosts a boss fight proper outside of the pink pig and blue hippo area.
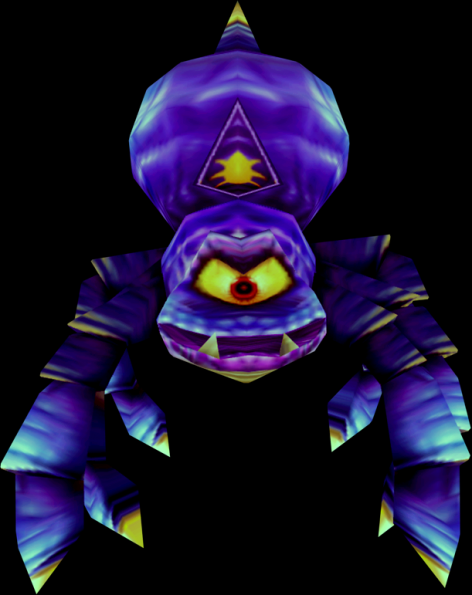
It would be a genuinely refreshing challenge... if it had actually felt like a boss fight. Instead of confronting this hulking, one-eyed arachnid mono a mono, however, it mostly just dangles from the ceiling and dozes off while its hatchlings come down to feast on you. They're fast and they die after two hits, and after you eliminate a wave of mini-spiders, the giant one opens his eye, which you proceed to shoot. You do this repeatedly until he shrinks and turns into a miniature spider himself, and then you kill it as easily as the others. So this boss fight was kind of a letdown, but at least they incorporated one into the level this time, so props for trying something different, I guess.
Aside from that, I don't think there's much else of note in the mill area. The other building is just an empty barn with a minigame barrel in it, so that just about covers everything. Oh, and you can at one point cause the water wheel to start working, but I think that's only useful for getting one specific Golden Banana. Hey, at least it works.
And now... ugh... we have to move on to the giant tree.
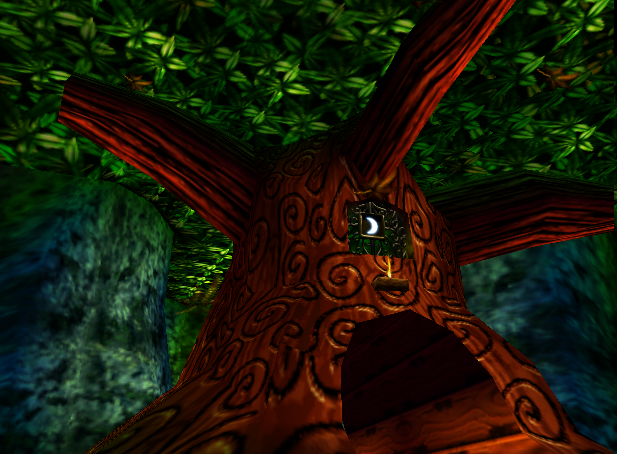
I don't have particularly fond memories of this area for two reasons. The first one is because there's a rather aggravating segment where you have to follow an owl through a set of rings while flying on Diddy's jetpack, which controls like butt. And it's only accessible at night, since owls are nocturnal (you see, that one actually made sense...).
But the biggest reason? That effing rabbit race. (see the photo on the right)

To elaborate, when you come into this area on the left, you'll notice a rabbit sleeping next to a finish line and a trombone switch, which you use to wake him up. Okay, it is kind of rude to be blaring a trombone in someone's ear while they're trying to sleep, but it doesn't make up for the pain and suffering that you'll have to endure in the future. This rabbit then decides he has nothing better to do than challenge you to a race. The first one is actually stupidly easy if you're good with cutting corners...
...but the second race will leave you in tears. Scratch that, it will leave you drowning in tears. You will shed so many teardrops that your room will become a life-size aquarium that you will sink and die in. At least you'd better hope that happens before you lose your sanity over the second rabbit race.
To be fair, the game does give you some leeway beforehand; it requires a move that you probably don't yet have unlocked, unless you already visited the next level (which is another contender for my least favorite level in this game, by the way) and talked to Cranky so you can learn the Handstand Sprint. But if you're gunning for 101% completion, you have to finish this race eventually, and it's just awful. The rabbit goes mach speed the second the race starts, and practically has a headstart over you at first because of you jumping into the sprint barrel. If he gets ahead of you, he will maintain the lead until the end unless you cut every corner like a maniac. It's just barely possible to win on most Nintendo 64 consoles...
...but mine was a different story. Mine lags during this part just a tiny bit, but the rabbit keeps going as fast as he would on a normal cartridge. This means that, yes, this race was essentially impossible for me to complete legitimately. Oh, I still got one-hundred percent, but you wanna know how I did it? You wanna know how I managed to beat the odds?
I killed a fat Kremling before the race started, and the orange grenade sprite that dropped from his dead body stopped the rabbit in its tracks while I sprinted to the finish line as fast as I could.
I swear, this was the only way I could overcome this challenge. So yeah, great. You know your game is top-notch when it requires you to actively exploit bugs in order to win the game.
Well, now that I've gotten that over with, let's talk about this level's proper boss. And, surprise surprise, it's... IT'S...
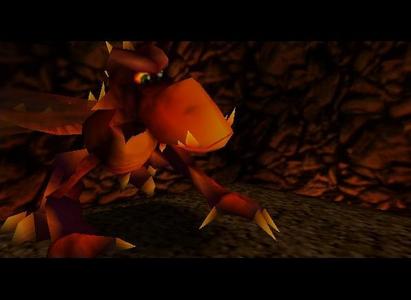
...the same damn boss from the second level. Alright. Amazing. Perfect.
Just. Friggin'. Grand.
Well, truth be told, he's not exactly the same boss. He has a few more tricks up his sleeve which actually makes him a considerable threat this time around. He retains his dumb fireball pattern from the first fight, but also manages to mix it up with a few ground shakes and a giant wall of fire that I SWEAR is just completely unavoidable. After throwing enough barrels at him, he gets mad, rises back out of the lava, and attempts to sink the platform into the magma with you on it. At this point, all you can do is jump into the Chunky Barrel that appears and mash the B-button endlessly in a vain hope that you'll hit him enough times before the lava engulfs you. I don't know the exact number of times you need to hit him, but it's a lot, and I also had to mix it up with some super punches, so I don't know if those deal extra damage at this point or not, but whatever the case, you better hope the game is merciful enough to let you win.
And there's Fungi Forest in the bag. I'd like to call this level a doppelganger level; it disguised itself as a fun, colorful breather level at first, but once you explored its interior it suddenly revealed its ugly side, especially with the dumb rabbit race and the tedious day-night mechanic. And it's already discomforting to know that the next level is even worse than this one, possible even Gloomy Galleon, but that's best saved for another time, I suppose.
This is MisterBananaFoam, signing off. Have a good night, guys.
