Backdrop
Descent takes place in the somewhat distant future of our solar system and other nearby systems. It follows the escapades the anonymous Material Defender, a gun-for-hire who until now had worked for the Post-Terran Mining Corporation, or PTMC. The Material Defender's original mission was to provide reconnaissance about a virus that infected a large number of bots in mines around the galaxy. And shoot said infected robots with lasers.
Descent 3 begins right where Descent 2 leaves off, with a flashback to the Material Defender finishing his last mission. He is plummeting unconsciously toward a star after a malfunction in his jump drive flung him across the galaxy. The tractor beam of a rebel organization picks him up and, after exchanging hateful comments about the PTMC and its management, the Material Defender is soon back in his ship blowing up robots. But this time, it's revenge. And personal.
Gameplay
Where Descent 2 expanded the content rather than concept behind its predecessor, Descent 3's objectives and outdoor world design radically diversify the game away from Descent's original formula.
The Formula
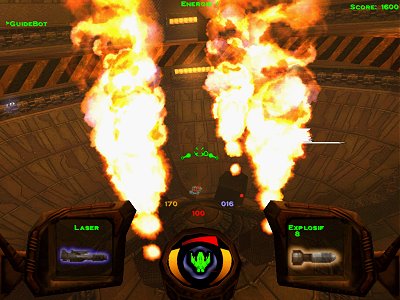 A fire trap guards the afterburner upgrade.
Descent 3's control scheme is identical to its predecessors, though the Pyro (MD's ship) is slightly less nimble than it was in previous titles. The ship can be controlled in all six of the spatial degrees of motion: thrust, yaw, pitch, banking, sliding, and elevation. The vehicles in the Descent universe, in some unexplained capacity, are unaffected by gravity and move around freely without hindrance. At the same time, arbitrary friction prevents the player from infinitely accelerating. Best not to think about it.
Saving the day mostly involves shooting one of Descent 3's twenty weapons at bad guys until they blow up. These weapons are separated into primary and secondary weapons. Primary weapons use energy, a resource stored on the ship and replenished by pickups in the world. When you run out of energy, you can't use any primary weapons except the Vauss cannon, the Mass Driver, and the Napalm Cannon which use their own special stores of ammunition. Secondary weapons are all finite and include explosive ordnance such as missiles. Generally, secondary weapons are more damaging than primary weapons as a balance for their scarcity.
The Pyro starts with a level 1 Laser Cannon and a slew of dumbfire concussion missiles. As you fly around, you will find other weapons and upgrades as pickups floating around in space. Flying over these pickups gives you their power. Armaments stay with you between missions, but you must recollect power-ups if you die mid-mission.
Enemies in the Descent universe are virally infected robots bent on attacking anything that isn't infected like them. Their forms and weapons are diverse, but primitive information on each of them is made available during the single player campaign in briefing. Health is represented by shields, a number ranging from 200 to 0. When your shields hit zero, your ship explodes and every weapon and upgrade your ship contained flies out of it. Don't let this happen.
Evolution
Descent 3 differs from its predecessors in a number of important ways. Many of the more relevant alterations are listed below.
- The Pyro-GL is no longer the only usable vessel. The Phoenix and the Magnum can be used upon their discovery in singleplay and at any time in multiplay. The Phoenix is a faster but lesser-armed ship where the Magnum is a lumbering but better-armed ship. Differences in armament level affect the power of shots fired from guns, storage capacity, and shield strength of the ship.
- The blow-up-the-reactor-then-scram objective set has been replaced by mission-dependent objectives. Shooting bad guys is always a good idea, but missions now involve a variety of tasks and goals. Missions also tend to be longer as a result of the more expanded (non-cave) environments.
- The lives system has been removed. The penalty for dying is now only lost time and lost upgrades (still reclaimable from the ruins of the destroyed ship) instead of a potential game over.
- A number of weapons were switched out. Check below for the full roster.
Primary Weapons
These are the staple weapons used in all engagements. There are 10 grouped in pairs but, unlike Descent 2, the second weapon in each group is not always superior to the first. Every ship can carry every weapon simultaneously--you need not pick favorites. Unless noted, these weapons require energy to operate.
Slot 1
- Laser Cannon - The starter gun. The Laser Cannon fires two bolts of energy in a straight line. It has a moderate rate of fire, consumes less energy than most weapons, and can be upgraded to fire four lasers per shot instead.
- Super Laser Cannon - The only primary weapon that outclasses its buddy, the Super Laser is just a more powerful laser.
Slot 2
- Vauss Cannon - A non-energy machine gun. It uses a unique ammo store and is notable for having almost zero projectile travel time, making it very effective against fast-moving targets.
- Mass Driver - A sniper rifle of sorts. The Mass Driver does great damage and can be fired while zooming in by holding down the fire button; the projectile is fired upon release. It uses a unique store and is the only weapon whose projectile has no travel time.
Slot 3
- Microwave Gun - A super-fast firing pulse weapon. The Microwave Gun does little damage per shot but compensates with a very rate of fire and a "frazzling" effect that disrupts the vision of its target.
- Napalm Launcher - A flamethrower. The Napalm Launcher uses a unique ammo store to spew a line of flame that can ignite targets, who then gradually take damage until the flames die out or are extinguished. The direct fire blast is much more powerful than this aftereffect.
Slot 4
- Plasma Cannon - The old favorite. The Plasma Cannon is more energy-intensive to fire than the Laser Cannon, but its rate of fire, projectile speed, and damage all benefit from the investment. If any weapon can claim universal applicability, the Plasma Cannon is probably it.
- EMD Gun - The homing gun. In exchange for serious power draw and underwhelming damage, the EMD Gun's snowflake-looking projectiles weakly home in on enemies. This is the go-to weapon for engaging small, hard-to-hit targets.
Slot 5
- Fusion Cannon - The charge-up weapon. The unmodified blast from the Fusion Cannon is two large purple power blobs that eat 3 energy points, knock you backward with recoil, and pass through targets while destroying them. If more firepower is needed, the Fusion Cannon can be charged up by holding down the fire button to greatly increase its damage. During this time your ship will shake around and if you hold it too long you will start losing shields. The Descent 3 Fusion Cannon, contrary to its ancestors, uses no more energy when charging.
- Omega Cannon - The vampire gun. The Omega Cannon has a short range and a ludicrous energy drain, but it packs a serious punch and steals shielding for you.
Secondary Weapons
- Secondary Weapons are the ammo and the weapon themselves. When you run out of a missile type you must pick up more to keep using them, as opposed to the primary guns that stay with you even when you can't fire them. The secondary weapons are grouped exactly like the primary weapons.
Slot 1
- Concussion Missile - The dummy. Having no homing or special abilities and being extremely plentiful, Concussions are a throwaway option that can provide an extra kick against tougher enemies that don't move around too much.
- Frag Missile - The grenade. The Frag Missile is an unpredictable weapon best used for long-range encounters or rapid room clearance. Upon impact with a wall, the Frag Missile releases dozens of bits of metal that bounce around the room, killing most weaker enemies without trouble. The Frag Missile can be fired directly at opponents, but its effect is greatly diminished when used this way.
Slot 2
- Homing Missile - A homing concussion missile. Homing missiles are the second most plentiful item in the game behind Concussion missiles. They do lackluster damage for a missile, but their potent homing capabilities make them great for chasing down fast enemies.
- Guided Missile - Fly-by-wire munitions. When a Guided Missile is fired, the player's controls switch from moving the ship to directing the missile until it hits something or goes out of range. Control over the missile, while not nearly as capable as the Pyro, is still good enough to guide it around corners and through passage ways without too much effort.
Slot 3
- Impact Mortar - A bomb. These non-self-propelled packages of joy are launched out the front of your ship where they will drift and bounce for about 3 seconds before letting loose a massive shockwave. Impact Mortars can be dangerous, as they don't travel far from their launcher before exploding, will explode on contact with an enemy vessel, and do huge damage even near the edge of the explosion.
- Napalm Rocket - When the Napalm Rocket hits a surface, it forms a cloud of napalm that falls to the ground slowly. Being hit by this napalm has effects identical to that of the Napalm Launcher. The rocket does not home, making it a poor choice for direct fire situations.
Slot 4
- Smart Missile - A fire-and-forget system. The smart missile is a two-stage bomb that begins as a slow-moving rocket. Once the rocket hits a ship or other object, it fires a bunch a Plasma Cannon-esque blobs in the direction of nearby enemies. Smart missiles are great for checking corners for enemies and can be used in relatively tight spaces without hazard.
- Cyclone Missile - An alternate fire-and-forget system. The Cyclone is also a two-stage bomb like the Smart Missile, but it differs in two critical ways. First, the Cyclone explodes and releases it warheads in mid-flight rather than on impact; in fact, if a Cyclone hits a wall before exploding, it doesn't do anything. Second, the Cyclone lets loose a swarm of smaller missiles that home in on targets rather than relying on an initial trajectory like the Smart Missile blobs. The Cyclone is best used outside or in similarly expansive areas, as the second-stage missiles could veer into nearby walls before they can lock on to a target.
Slot 5
- Mega Missile - The big one. Mega missiles do 300 damage to targets they hit. For the record, that's 100 more points than you can possibly have in shielding. The blast they generate on impact is also likely to kill any opponent nearby. Even better the Mega Missile has decent homing capabilities, though the missile moves so slowly that you can dodge it if you see it coming.
- Blackshark Missile - Crowd-control to the extreme. The Blackshark does almost no damage on impact. Instead, it creates a gravity well at the point of impact that sucks every object and ship in a large radius into it. After about 4 seconds of gathering and mashing together various items and victims, it explodes. The Blackshark does not guarantee a kill on a well-shielded player but it is the best weapon available for any other target. Just don't get caught in its pull yourself.
Digital Distribution
Descent 3 (and its expansion) has been re-released courtesy of Good Old Games (or GOG.com) for $5.99
- Full compatability & support for Windows XP, Vista, and 7 for both 32 and 64-bit.
Additional free downloads from GOG purchase:
- Manual in PDF form
- Hi-Res Wallpaper
- Reference Card
- In-Game Soundtrack
- Original Soundtrack
- Training Video
System Requirements:
Minimum System Requirements:
- Processor: Intel Pentium 200MHz
- Operating System: Windows 95/98 with DirectX 6.1 or NT with Service pack 3
- RAM: 32MB
- Graphics Card: A graphics card that is Direct3D, 3D FX Glide, or OpenGL compatible with 4MB of memory
- Optical Drive: 4X CD-ROM
- Hard Disk Install Requirement: 210MB
- Sound Card: DirectX 6 certified sound card
Recommended System Requirements:
- Processor: Intel Pentium II 300MHz
- RAM: 64MB
- Hard Disk Install Requirement: 980MB
Log in to comment