Tutorial :: How to create assets for a next-gen game :: Intro

Avatar image for warxsnake
warxsnake

2720

Forum Posts

33

Wiki Points

0

Followers

Reviews: 0

User Lists: 3

Edited By warxsnake

Sup
 
I will be making a series of tutorials about creating visual assets for "next-gen" games, both as a way to help aspiring game artists in the GB community, and as a measure for me to get off my lazy gaming ass and work more at home. At first I had written out paragraphs of how stuff like normals maps and ambient occlusion works, why we use them, etc, but it got waaaay too long, and I'm not good at explaining so.. I deleted that shit. What I will do is skip the history lessons of how normal maps came into play in the gaming industry and just show you how this shit works.

So basically, there are many ways to make objects for next gen games these days, and the way you do it depends on what you are doing. To keep it short, basically, the workflow is you want to make a high res version of whatever the fuck you are doing, and "bake" information from that high res onto a game-friendly low res version of the same object, whether its a weapon, prop, character, whatever. Now there are different ways of doing that, even... 
So if you are doing something organic, you want to first create a high res model in zbrush since zbrush is the shit for anything organic.... and if you want to do something mechanical, you can use any of the "classic" modeling applications like 3dsmax, maya, xsi, silo, which are powerful to create, yes, mechanical stuff. Nothing is stopping you from creating mechanical stuff in zbrush, it just depends on your skill and whether you want to fuck with 3D brushes instead of verteces to create mechanical stuff. The same thing goes for creating organic shit in 3dsmax or classic modeling apps... why the fuck would you want to when zbrush is pretty powerful for that shit.
 
So surprise! I will fucking show you how to make both mechanical and organic in-game assets using the programs I mentioned above and the workflow that most game artists use today, which is to... again...... create a damn High Res, create a Low Res, and import all sorts of data from the high onto your game-ready low res. 
 Information that can be taken from a high res and applied to the low res model:

  • Diffuse map (if you used zbrush polypaint, basically you are painting over millions of polygons which gives you a diffuse that you then export to the low res model)
  • Specular map
  • Ambient Occlusion
  • Normal Map
  • Cavity Map
Normal maps and Ambient Occlusion maps are the two main pieces of information from a high res. 
Normal map is basically a 2D image with lighting information applied to a 3D model to make it look awesome-sauce. All those tiny effing details you see on Marcus Fenix's cod piece is thanks to normal maps. All those details were painstakingly sculpted and modeled and then transfered to the in-game model thanks to Mr Normal. 
Ambient Occlusion is basically shadow detail taken from.... goddamnit... the high res.. and transferred to the low res. So fuck, its basically the same thing, but for shadows, right? yes correct.  
 
Now for the programs you need (or the programs that I use, you dont need to use exactly the same, you can use other shit if you are more accustomed to it, whatever)
  • 3dsmax 8,9,2008,2009,2010 (holy version clusterfuck batman, btw 2010 is the worst sack of shit ive ever used, use 2008 or 2009)
  • Zbrush 3.1 (this program is just magical, i cream my pants every time I think about it)
  • Photoshop CS3 (everybody knows photoshop rite? if you dont, ask 4chan)
  • xnormal (middle-man program, used for exporting all sorts of normal maps and ambientz from high res to low res, its the shit, use it and learn it, grasshoppah) 
  • Crazybump (pretty CRAZY program.... lul... no but anyway, its good for creating normal maps from everyday textures like mom used to make, its more useful for environment textures, you dont need it for assets)
 
Useful Zbrush Plugins (Free!)
  • Decimation Master (like holy shit, take a 6million polygon model and reduce it to 2,000 polygons without losing shape/silhouette, yet another magical program)
  • Subtool Master (merge, mirror, copy, and generally fuck with subtools in zbrush)
 
    
 So now I'm gonna need some time to set up vids and actually make assets for you guys and I will update the thread. While waiting here's some shwag 
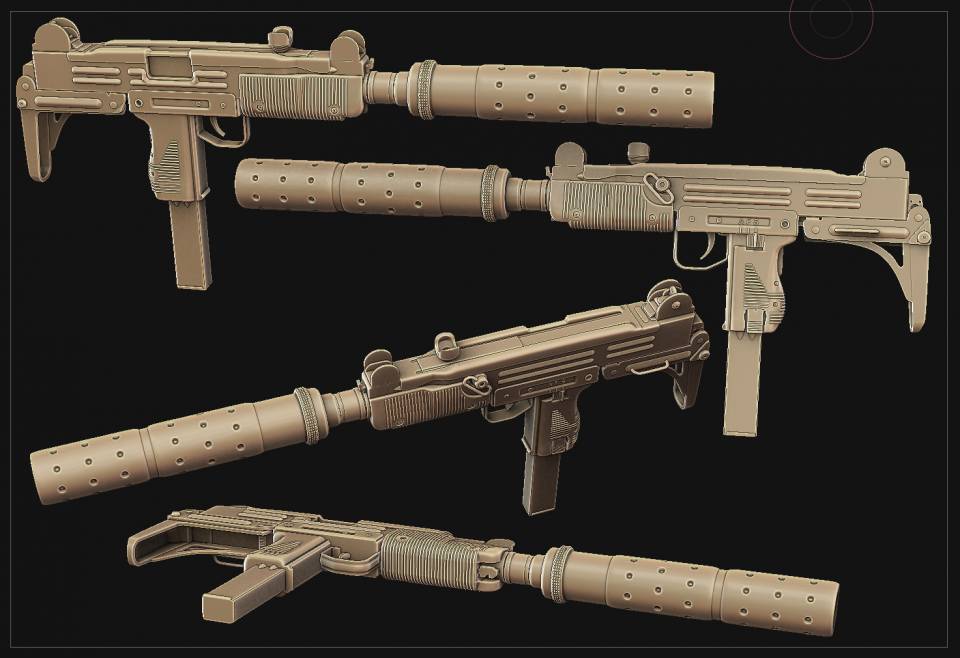
 

Simple High Resolution Uzi model. Its simple because its made for a 12
Simple High Resolution Uzi model. Its simple because its made for a 12" statue so you dont require too much micro detail


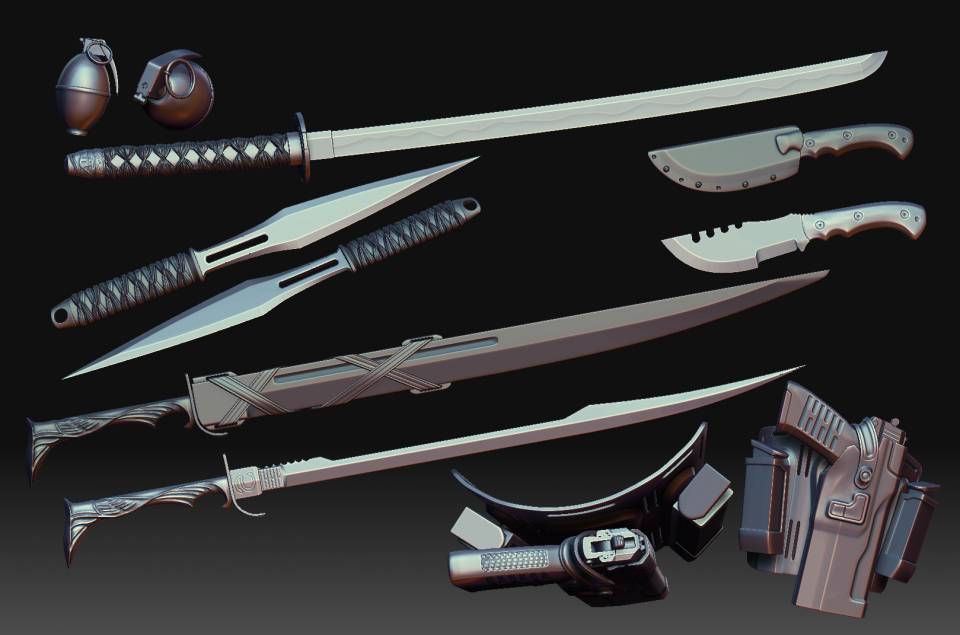
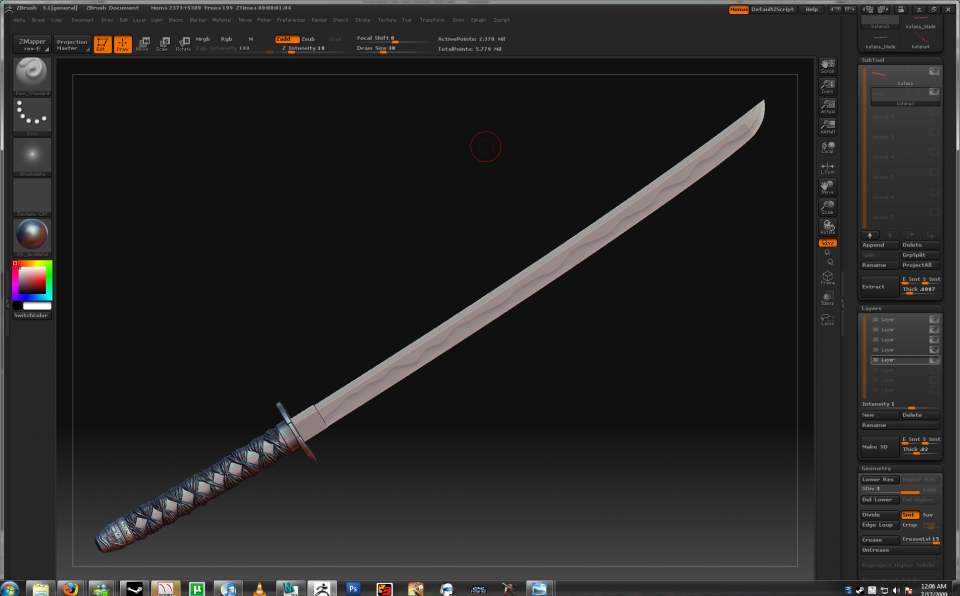
zbrush 3.1 interface.. and a daikatana


example of a mechanical object made in 3dsmax

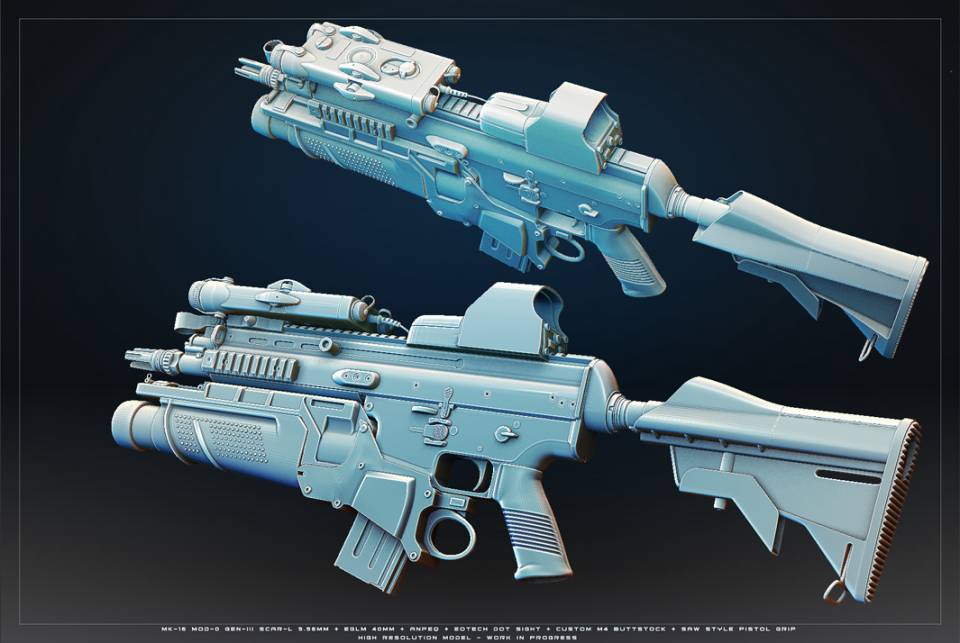
weapons and accessories for a SideShow Toys product

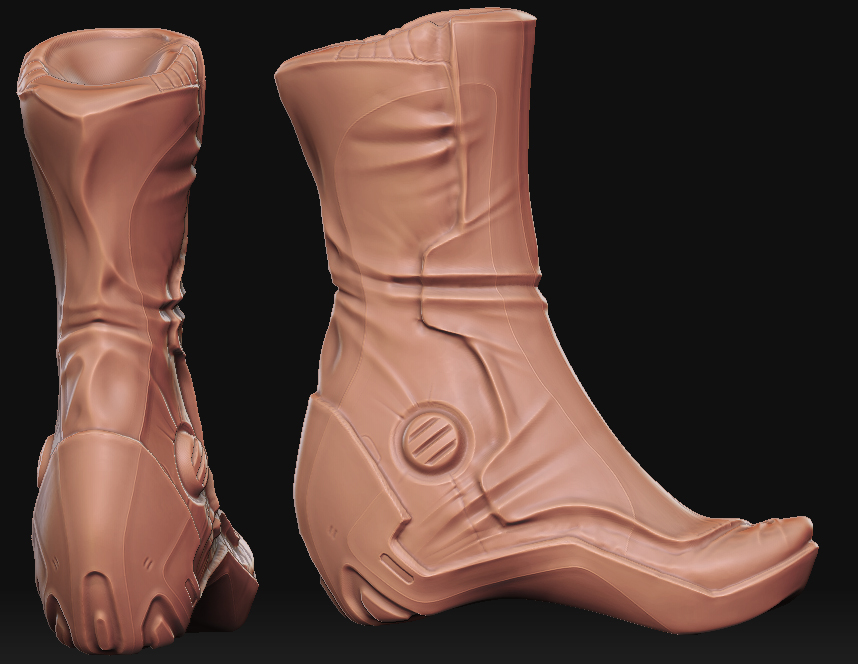
space hooker boots, example of an organic model sculpted in zbrush
Avatar image for warxsnake
warxsnake

2720

Forum Posts

33

Wiki Points

0

Followers

Reviews: 0

User Lists: 3

#1  Edited By warxsnake

Sup
 
I will be making a series of tutorials about creating visual assets for "next-gen" games, both as a way to help aspiring game artists in the GB community, and as a measure for me to get off my lazy gaming ass and work more at home. At first I had written out paragraphs of how stuff like normals maps and ambient occlusion works, why we use them, etc, but it got waaaay too long, and I'm not good at explaining so.. I deleted that shit. What I will do is skip the history lessons of how normal maps came into play in the gaming industry and just show you how this shit works.

So basically, there are many ways to make objects for next gen games these days, and the way you do it depends on what you are doing. To keep it short, basically, the workflow is you want to make a high res version of whatever the fuck you are doing, and "bake" information from that high res onto a game-friendly low res version of the same object, whether its a weapon, prop, character, whatever. Now there are different ways of doing that, even... 
So if you are doing something organic, you want to first create a high res model in zbrush since zbrush is the shit for anything organic.... and if you want to do something mechanical, you can use any of the "classic" modeling applications like 3dsmax, maya, xsi, silo, which are powerful to create, yes, mechanical stuff. Nothing is stopping you from creating mechanical stuff in zbrush, it just depends on your skill and whether you want to fuck with 3D brushes instead of verteces to create mechanical stuff. The same thing goes for creating organic shit in 3dsmax or classic modeling apps... why the fuck would you want to when zbrush is pretty powerful for that shit.
 
So surprise! I will fucking show you how to make both mechanical and organic in-game assets using the programs I mentioned above and the workflow that most game artists use today, which is to... again...... create a damn High Res, create a Low Res, and import all sorts of data from the high onto your game-ready low res. 
 Information that can be taken from a high res and applied to the low res model:

  • Diffuse map (if you used zbrush polypaint, basically you are painting over millions of polygons which gives you a diffuse that you then export to the low res model)
  • Specular map
  • Ambient Occlusion
  • Normal Map
  • Cavity Map
Normal maps and Ambient Occlusion maps are the two main pieces of information from a high res. 
Normal map is basically a 2D image with lighting information applied to a 3D model to make it look awesome-sauce. All those tiny effing details you see on Marcus Fenix's cod piece is thanks to normal maps. All those details were painstakingly sculpted and modeled and then transfered to the in-game model thanks to Mr Normal. 
Ambient Occlusion is basically shadow detail taken from.... goddamnit... the high res.. and transferred to the low res. So fuck, its basically the same thing, but for shadows, right? yes correct.  
 
Now for the programs you need (or the programs that I use, you dont need to use exactly the same, you can use other shit if you are more accustomed to it, whatever)
  • 3dsmax 8,9,2008,2009,2010 (holy version clusterfuck batman, btw 2010 is the worst sack of shit ive ever used, use 2008 or 2009)
  • Zbrush 3.1 (this program is just magical, i cream my pants every time I think about it)
  • Photoshop CS3 (everybody knows photoshop rite? if you dont, ask 4chan)
  • xnormal (middle-man program, used for exporting all sorts of normal maps and ambientz from high res to low res, its the shit, use it and learn it, grasshoppah) 
  • Crazybump (pretty CRAZY program.... lul... no but anyway, its good for creating normal maps from everyday textures like mom used to make, its more useful for environment textures, you dont need it for assets)
 
Useful Zbrush Plugins (Free!)
  • Decimation Master (like holy shit, take a 6million polygon model and reduce it to 2,000 polygons without losing shape/silhouette, yet another magical program)
  • Subtool Master (merge, mirror, copy, and generally fuck with subtools in zbrush)
 
    
 So now I'm gonna need some time to set up vids and actually make assets for you guys and I will update the thread. While waiting here's some shwag 
 

Simple High Resolution Uzi model. Its simple because its made for a 12
Simple High Resolution Uzi model. Its simple because its made for a 12" statue so you dont require too much micro detail


zbrush 3.1 interface.. and a daikatana


example of a mechanical object made in 3dsmax

weapons and accessories for a SideShow Toys product

space hooker boots, example of an organic model sculpted in zbrush
Avatar image for pandasaurus
Pandasaurus

117

Forum Posts

5

Wiki Points

0

Followers

Reviews: 0

User Lists: 1

#2  Edited By Pandasaurus

dude! very impressive!

Avatar image for warxsnake
warxsnake

2720

Forum Posts

33

Wiki Points

0

Followers

Reviews: 0

User Lists: 3

#3  Edited By warxsnake
Avatar image for mikemcn
mikemcn

8642

Forum Posts

4863

Wiki Points

0

Followers

Reviews: 2

User Lists: 8

#4  Edited By mikemcn

Does this mean i can make my Call of Duty velociraptor mod......... in space?
Avatar image for warxsnake
warxsnake

2720

Forum Posts

33

Wiki Points

0

Followers

Reviews: 0

User Lists: 3

#5  Edited By warxsnake

totally

Avatar image for diamond
Diamond

8678

Forum Posts

533

Wiki Points

0

Followers

Reviews: 0

User Lists: 4

#6  Edited By Diamond

Good post.
 
A better way to describe ambient occlusion might be to say it takes into account the natural bounces of light, how a nook in the corner of a room is darker.  Personally I've never noticed that applied in model data and never did that myself, but I can understand how it might work.  A bit like a lightmap right?
 
edit - you store the AO in the diffuse layer or what?

Avatar image for torus
torus

1106

Forum Posts

6

Wiki Points

0

Followers

Reviews: 1

User Lists: 0

#7  Edited By torus

 @Diamond:   

Ambient occlusion is usually baked into the diffuse, yes. Many texture artists start with AO when building their diffuse.

Avatar image for warxsnake
warxsnake

2720

Forum Posts

33

Wiki Points

0

Followers

Reviews: 0

User Lists: 3

#8  Edited By warxsnake
@Diamond said:
" Good post.  A better way to describe ambient occlusion might be to say it takes into account the natural bounces of light, how a nook in the corner of a room is darker.  Personally I've never noticed that applied in model data and never did that myself, but I can understand how it might work.  A bit like a lightmap right?  edit - you store the AO in the diffuse layer or what? "
It depends on the engine, and what you are trying to apply AO to.  

Basically, if you are trying to add AO to a tiling textured object, like a caribbean dock with lots of wooden planks, you want there to be AO on the dock where planks overlap, etc, but you can't put the AO on a tiling texture because your shadow will tile everywhere along with the wood texture. So what you do is create a second UV channel which is basically a second unwrap. In the second unwrap, you make sure the entire dock is unwrapped into the texture box with no overlapping geometry, and this will serve as the unwrap for your AO/lightmap. You render the AO and apply it to the second UV channel and now your dock has two channels, one for tiling wood texture and the other for the AO. 
 
Some shaders on some engines allow you to add AO as a seperate and tweakable channel independent of the diffuse within a single ID.
 
For non-tiling textured objects like weapons, characters, small props, you simply bake the AO onto the diffuse via Photoshop layer-> Multiply
Avatar image for pufferfiz
PufferFiz

1501

Forum Posts

3667

Wiki Points

0

Followers

Reviews: 4

User Lists: 6

#9  Edited By PufferFiz

wow great video, now I hope you do finish it so I can see what happens next

Avatar image for torus
torus

1106

Forum Posts

6

Wiki Points

0

Followers

Reviews: 1

User Lists: 0

#10  Edited By torus
@warxsnake: That's fairly engine-specific. Some engines do not require you to create a second UV channel (mine, for example, does not support it >_>... you and your fancy new engines), and instead build a texture atlas for the lightmap.
Avatar image for dr_feelgood38
Dr_Feelgood38

1582

Forum Posts

780

Wiki Points

0

Followers

Reviews: 4

User Lists: 1

#11  Edited By Dr_Feelgood38

That's an awesome tutorial, man. I'm not all too into modeling or anything like that (concept art would be pretty cool, though) but I do know that if more people taught like you, the world would be a much better place.

Avatar image for diamond
Diamond

8678

Forum Posts

533

Wiki Points

0

Followers

Reviews: 0

User Lists: 4

#12  Edited By Diamond
@warxsnake said:
It depends on the engine, and what you are trying to apply AO to.   Basically, if you are trying to add AO to a tiling textured object, like a caribbean dock with lots of wooden planks, you want there to be AO on the dock where planks overlap, etc, but you can't put the AO on a tiling texture because your shadow will tile everywhere along with the wood texture. So what you do is create a second UV channel which is basically a second unwrap. In the second unwrap, you make sure the entire dock is unwrapped into the texture box with no overlapping geometry, and this will serve as the unwrap for your AO/lightmap. You render the AO and apply it to the second UV channel and now your dock has two channels, one for tiling wood texture and the other for the AO.   Some shaders on some engines allow you to add AO as a seperate and tweakable channel independent of the diffuse within a single ID.  For non-tiling textured objects like weapons, characters, small props, you simply bake the AO onto the diffuse via Photoshop layer-> Multiply "
I see, I was unaware of the application of AO in the case of things like characters and weapons, but I do notice it applied to environments, as you say.
 
@torus said:
@Diamond:   Ambient occlusion is usually baked into the diffuse, yes. Many texture artists start with AO when building their diffuse.
That makes sense to me because that's how I always imagined it being worked into stuff like gun models anyways.


I haven't done much modeling myself, I can understand the techniques in an abstracted way, but I'm absolutely horrible at the art side.  There's one technical aspect I still don't understand well in the sense of modern graphics and that's the specular layer.  Does the specular layer basically define a set of variables such as the diffusion and intensity of specular highlights on any particular part or 'texel' of a surface, or am I off base?  I just remember when a whole object would be lit with a specular highlight or not, but I can see why that'd be far from optimal in many cases.
Avatar image for warxsnake
warxsnake

2720

Forum Posts

33

Wiki Points

0

Followers

Reviews: 0

User Lists: 3

#13  Edited By warxsnake
@Diamond said:

" @warxsnake said:

It depends on the engine, and what you are trying to apply AO to.   Basically, if you are trying to add AO to a tiling textured object, like a caribbean dock with lots of wooden planks, you want there to be AO on the dock where planks overlap, etc, but you can't put the AO on a tiling texture because your shadow will tile everywhere along with the wood texture. So what you do is create a second UV channel which is basically a second unwrap. In the second unwrap, you make sure the entire dock is unwrapped into the texture box with no overlapping geometry, and this will serve as the unwrap for your AO/lightmap. You render the AO and apply it to the second UV channel and now your dock has two channels, one for tiling wood texture and the other for the AO.   Some shaders on some engines allow you to add AO as a seperate and tweakable channel independent of the diffuse within a single ID.  For non-tiling textured objects like weapons, characters, small props, you simply bake the AO onto the diffuse via Photoshop layer-> Multiply "

I see, I was unaware of the application of AO in the case of things like characters and weapons, but I do notice it applied to environments, as you say.
 

@torus

said:

@Diamond:   Ambient occlusion is usually baked into the diffuse, yes. Many texture artists start with AO when building their diffuse.

That makes sense to me because that's how I always imagined it being worked into stuff like gun models anyways.    I haven't done much modeling myself, I can understand the techniques in an abstracted way, but I'm absolutely horrible at the art side.  There's one technical aspect I still don't understand well in the sense of modern graphics and that's the specular layer.  Does the specular layer basically define a set of variables such as the diffusion and intensity of specular highlights on any particular part or 'texel' of a surface, or am I off base?  I just remember when a whole object would be lit with a specular highlight or not, but I can see why that'd be far from optimal in many cases. "
A specular map is basically a "mask" that determines where and how intensely an object reacts to light. Specular maps for games do two things. They "mask" the object and tell it where to apply highlights (Specular level in 3dmax) and they tell the engine what color to have the object shine with (Specular color in 3dmax). In the tutorials ill post later on I'll show what goes into making a spec map. 
 
edit: oh yeah, spec maps are pixel based, not vertex based, so you can create all sorts of detailed spec maps to get shininess exactly where you want it on a model
Avatar image for torus
torus

1106

Forum Posts

6

Wiki Points

0

Followers

Reviews: 1

User Lists: 0

#14  Edited By torus
@warxsnake: 
 
What do you dislike about 3ds Max 2010?
Avatar image for warxsnake
warxsnake

2720

Forum Posts

33

Wiki Points

0

Followers

Reviews: 0

User Lists: 3

#15  Edited By warxsnake
@torus said:
" @warxsnake:  What do you dislike about 3ds Max 2010? "
Well I've always hated max for their small incremental yearly version updates, and everytime you update max it's not compatible with the older ones and fuck saving OBJs of complex scenes.( its a pain at work where some people use old max, some new, etc)
 
I really really hate 2010 because all it adds is that big fat "noob-bar" with all the useless shortcuts on it, all the icons are crap and hard to distinguish, the viewport lags and corrupts, doesnt update for no reason, and apart from real time SSAO and shadowing, nothing is different. i dont know, i havent spent much time with it but my early impression is that it blows mass chunks.
Avatar image for diamond
Diamond

8678

Forum Posts

533

Wiki Points

0

Followers

Reviews: 0

User Lists: 4

#16  Edited By Diamond
@warxsnake said:
A specular map is basically a "mask" that determines where and how intensely an object reacts to light. Specular maps for games do two things. They "mask" the object and tell it where to apply highlights (Specular level in 3dmax) and they tell the engine what color to have the object shine with (Specular color in 3dmax). In the tutorials ill post later on I'll show what goes into making a spec map.   edit: oh yeah, spec maps are pixel based, not vertex based, so you can create all sorts of detailed spec maps to get shininess exactly where you want it on a model "
I see, thank you, that clears up my understanding.  When I saw specular maps represented in 3D technical videos, they weren't just black and white (which is what I expected out of the 'mask' part), and that's what confused me.