3D Maya Model- Sackboy- FINISHED!
By Choi 35 Comments
Hi everyone!
Finally, with so much going on, I managed to finish the Sackboy model. I'll probably add some normal and bump maps and other stuff once I learn about them =)
Without further ado- here's my baby:
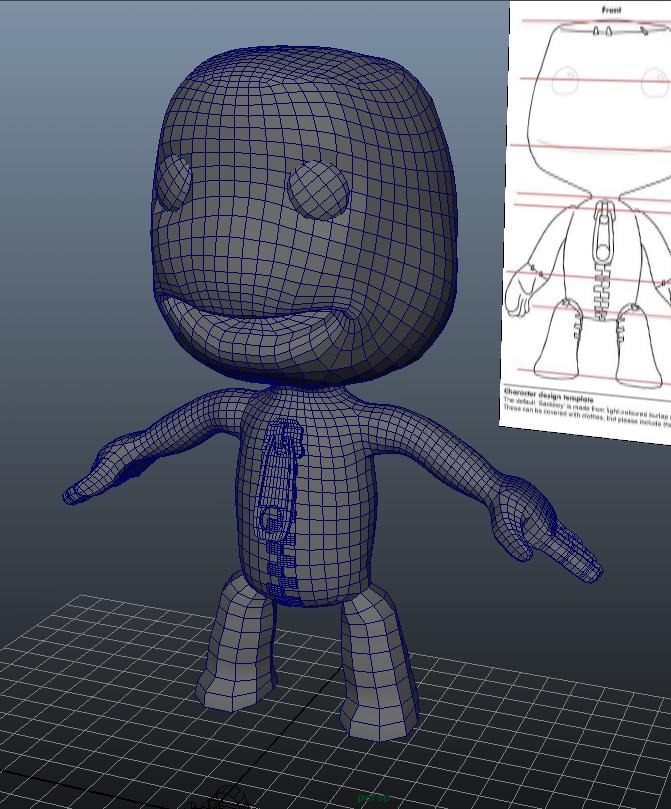
Since my last blog, a lot of things have happened. I quit my job, I'm fixing some PCs here and there to bring some money in and I'm looking for a new job.
I didn't have much time to study and work on this tho, so sorry for waiting so long.
With that being said, let us dissect the process of making this stunning, beautiful and breath taking peace of art =)
The Zipper
The easiest to make and most realistic part of the model.
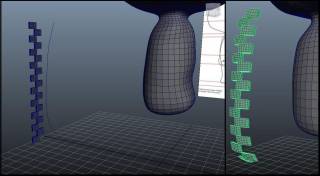
The teeth were the trickiest part. I ended up messing around with the wire deformation tool. It looks a little something like this:
The curve you see in the image is a traced 3d curve drawn on the sackboys chest. With the wire tool, I wrapped the teeth to the curve like a cloth. I think it ended up pretty good.
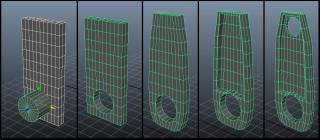
The zipper proper was really fun to do, just to see how you can make cool stuff with the basic of tools. Only poly primitives, boolean operations and extrude were used.
Hands
Unlike the zipper, hands were NOT a fun thing to do! I lost about 3 days (about 15 h) over thinking, complicating and going back and forth between Zbrush and Maya to get the right topology.
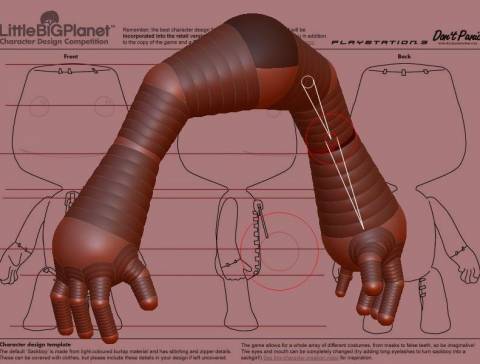

The catch is, the base I used is made out of (Z) spheres. BAD IDEA! It looks pretty good and clean looking it in Zbrush (left image), but the topology (especially the palm part) is F-ed up! (right image)
I tried it about 4 times and saw I needed to take another approach.
In the end, I did it from the ground up in Maya with the simplest of tools as basic as possible. Only primitives and extrudes, just like the zipper. After I divided the polys to get a better resolution of the hand, and stitched it to the body, it looked great.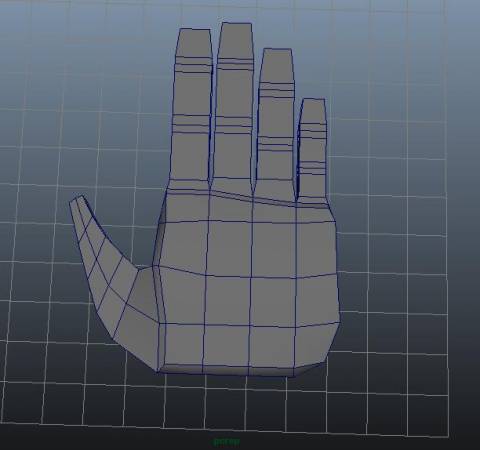
The final part was stitching the arms and legs to the body which was surprisingly easy and painless.
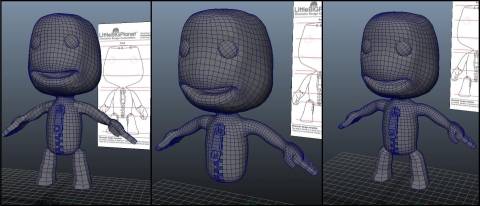
Ok guys, let me know what you think. I'm really eager to start rigging it and animating, but I'm aware it still needs details like stitches and bump/normal maps to make him textured like a sack.
Comments and advices on:
- which direction this blog should go in (what to change, format, more picture, less pictures, more video etc.)
- what would you like to see me do next (in this case rigging and animating or detailing and texturing)
- tips and tricks from you guys who do this better then me
Thanks for reading,
Peace!
P.S. you can check the 360 angle video playblast on my youtube channel here. (go give thumb up bitches!)
