Mario Nerd Z: A Super Mario 64 Randomizer
By Mento 0 Comments
Hey there, I'm still on my randomizer business. The latest one I felt like playing is a Super Mario 64 Randomizer, created by Andre Meyer. I don't know if it's the official one used by speedrunners, but it has all the features anyone could want from a Super Mario 64 jumbled up free-for-all: all the painting entrances, in-level object and enemy placements, where you spawn into the level, and even dialogue boxes and Mario's color palette can be shuffled and redistributed.
This creates a lot of unique problems in addition to making certain tasks easier, depending on where things end up. An example of this would be a Star that requires you to jump through a lot of hoops to reach, which has instead been conveniently relocated to five feet from your starting point (provided the world of Mario has equivalent dimensions to our own, which I'm not entirely certain is true). Collecting the 100 coins necessary for each course's secret coin Star is a bit more of an ask in most cases: coins are scattered haphazardly around the course, not in the natural lines and rings you'd expect. Some are often straight up unreachable. The secret cap zones that unlock caps for wider use have also been dispersed around the castle, so there's no guarantees you'll find one early, and ditto for the Bowser courses which provide much needed keys to open up other areas of the castle (unless you feel like glitching past them, of course).
This particular randomizer hasn't implemented a system where every Star-milestone door has a random target to hit - the doors in the lobby have either one- or three-Star minimum requirements, but could theoretically be much higher - but that's more the concern of the speedrunner. Since I tend to empty a stage of Stars the first time I encounter it, provided they don't need specific caps to do so, I've been racking them up and blowing past most of these required totals without issue.
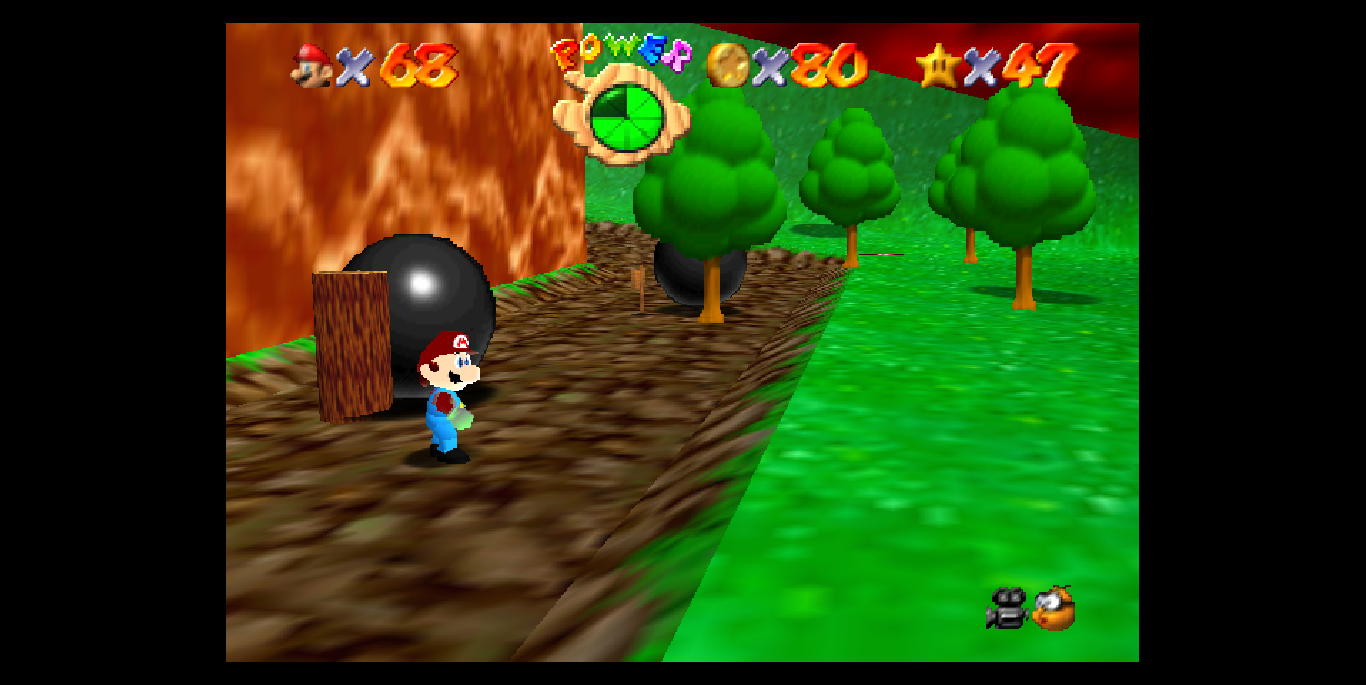
No big list of screenshots this time, since we're all familiar with the game and there's not a whole lot that's really striking about the new item placements. Instead, I've got a little series of anecdotes about how Bowser's been screwing with me on this latest procedurally-generated adventure.
First, a note on Star distribution:
In the Super Mario 64 randomizer community, there's much hullabaloo about the difference between "free standing" Stars and "fixed" Stars. The former are those Stars that are just hanging out in the level geometry, usually at the top of a structure or the end of platforming challenges: these get their locations shuffled, so they're usually (but not always) in more accessible locations. This also applies to Stars hiding in question mark blocks, since all the blocks got redistricted also. The fixed ones are those you earn from boss fights or by activating something and only appear once the task is complete, so they're always found in their usual locations.
Also, another thing to note is that items only get relocated within their "zone." If there's a transition between one area and the rest of the level, only the items (coins, Stars, etc.) within that zone are reorganized, with no cross-pollination with the outside. An example would be the secret slide in Tall Tall Mountain: that place has all its coins relocated, but since it didn't have any Stars to begin with there aren't any to be found in there.
(NB: It might help to have a moderate-to-high level of familiarity with Super Mario 64, its locales, and their Star goals to follow all this.)
The Newly Puréed Peach's Castle
- The very first accessible zone - the room which normally leads to Bob-omb Battlefield - instead leads to Bowser in the Fire Sea, the second of the three Bowser boss zones. This stage can have some unpredictable red coin placements if you're going for the secret Star here, as many of the lava "pools" underneath the platforms have a raised border "lip" that red coins can spawn on. From what I can tell, the randomizer isn't supposed to spawn objects over pits or hazardous terrain like lava, but it can occasionally happen regardless: I had one red coin just hovering over lava that I had to damage boost to reach. Honestly, this could've been a lot worse as an opening stage, because even if I couldn't get that red coin Star (and I need at least one Star to unlock two more rooms in the Lobby: the entrance to Whomp's Fortress and the Peach's Secret Slide levels) the key I'd earn from Bowser gets me onto the next floor, where all the painting portals are out in the open.
- Though I have many options, I decide to stick to the ground floor for now. The Whomp's Fortress entrance leads to Dire Dire Docks, which is hardly my favorite level but not a particularly difficult one. A few of the Stars are easier to reach, since they don't require leaping between those poles in one of this area's more awkward challenges, but I did run into a few problems. The first is that a few of the coins are either missing or stuck in inaccessible areas: there's a huge gap in the wall where Bowser's sub was that sucks you in if you get close, so anything in that region can be a hazard to swim towards. As such, I've abandoned ever getting the 100 coins Star here, since the total coins on the level is something exceptionally tight, like 104. The other issue is the jetstream Star, where you have to pass through the rings: you can't get the Star without the Metal Cap, since the jetstream pushes you away, so that's out for now. Otherwise, it's five new Stars to add to my first, and that unlocks most of the rest of the ground floor (excepting the Bowser door, which requires eight).

- The Princess's Secret Slide warp instead takes me to Tick Tock Clock, which presents an interesting problem for randomizer devs to figure out: what to do with levels like Tick Tock Clock or Wet-Dry World where how you enter the portrait affects the world? Well, it seems they picked a default setting (it's fortunate that Tick Tock Clock was stuck on "3 o'clock," its slowest setting, since the others can create issues) for both. Tick Tock Clock was irksome because all the free standing Stars were relocated to close to the top of this vertical level, so I had to hop over all the same shifting blocks and conveyor belts several times to net them all. The last of the eight red coins - which in the core game can all be found around the same early part of the level - was right at the top too, where the Thwomp would normally be. I think in any competitive speedrun scenario, they would've skipped this version of Tick Tock Clock immediately.
- The Cool, Cool Mountain door (the first of the two 3-Star doors) led to Tiny-Huge Island, which I was in no mood to take on. It's easily my least liked world, given how perilous certain parts of it are, though I'm at least glad it starts you off in the "Tiny" island variant since it's easier to move around in.
- The Jolly Roger Bay door normally leads to two new levels: Jolly Roger Bay itself and the Secret Aquarium entrance. In the scrambled version, these portals now lead to Shifting Sand Land and Snowman's Land, respectively. I don't particularly like Shifting Sand Land due to the amount of instant-death quicksand traps, but on the whole the new randomized version doesn't make things that much harder to deal with, though I'm hesitant to start the four pillars Star (the one that leads to the boss fight) without the Wing Cap. Meanwhile, Snowman's Land immediately presents a problem which is then rendered moot. If you recall, there's a part in Snowman's Land where you have to sneak past the snowman's ice breath, which buffets you back down to the starting area sans your hat. To get past, you need to hide behind a nearby giant penguin: the giant penguin, however, has been relocated to somewhere near the Ice Bully's arena. Fortunately, there's nothing on the snowman's head you need to reach: the Star up there has been moved somewhere closer to the ground. In fact, the most awkward thing to deal with in the scrambled version of Snowman's Land is that aforementioned Ice Bully, who's been moved all the way over to where the green shell spawns behind the lake area: to get his Star, you have to keep kicking him gradually over to his arena, where he can be dunked into the water as per usual.
- The Bowser door lead to Princess's Secret Slide, which has two Stars up for grabs: the first is earned by reaching the end and hitting the question mark block down there, while the other spawns if you cross the finish line under a specific time. The second spawns at the end as usual, but the question mark block has been relocated to further up the slide, which means carefully hitting it on the way down and then sort of jump-hopping back up to it.
- At this point, the warp to the Wing Cap zone - found by standing on the sun pattern in the lobby and staring up into the light - was open, but instead lead to the Vanish Cap zone. The Vanish Cap zone is one of the hardest to get all the red coins on, because it starts you off on a long slide full of platforms that is difficult to scale back up. I was fortunate that all the red coins spawned at the bottom area, but then the Star itself spawned halfway up the slide. There's a technique to climb back up slides, but it's fairly precise and awkward to pull off. I think the Princess's Secret Slide and this area are the only two places where I'll need to use it, thankfully.
- While I cannot access the basement, since the first Bowser zone has yet to reveal itself, I can at least pop over to where the Boos hang out and see what's been changed there. The Boo Carousel warp instead leads to Tall, Tall Mountain, which means I've accessed almost the entire back-half of the game in these first few rooms. Tall, Tall Mountain's slide level was a nightmare to get the requisite number of coins on (I usually go for around 40 at least) for the 100 coin Star for the level, but beyond that most of the course has free-standing Stars, and they were all now within easy reach (an exception was the "Blast to the Lonely Mushroom" Star, which spawned in pretty much the usual place). You also need to climb the mountain to the very top at least once for the "Mystery of the Monkey Cage" Star, which doesn't get randomized. The red coins took a while to find too; I'm just glad none of them spawned in the slide area.

- Heading to the first floor, the Wet-Dry World painting led to the secret "Wing Mario Over the Rainbow" area, which was of course impossible without the Wing Cap. The Tall, Tall Mountain portrait instead led to the true Wet-Dry World, which always started me off at the same level of water (about twenty feet deep). It's not that hard to navigate Wet-Dry World, even with all those launcher enemies relocated: there's enough water-level shifting diamonds to get you to your desired depth. I only had to pop over to the underwater town area once for the red coins (they don't leave that area), since everything else was in the main area. One issue: this randomizer doesn't relocate the "secrets" of the various "Find Five Secrets" Stars, so I had to recall where they all were. Some are behind big obvious blocks you need to push, which were still in their usual spots, but others required hitting question mark blocks: the blocks themselves had moved, but the secrets were still in their original locations. Just meant feeling around the empty air a bit, is all.
- The door to Tiny-Huge Island instead led to, finally, Bob-omb Battlefield, the first level. I also found my first "Star Toad" here as well: the Toads were redistributed around, but I believe still inhabit the floors you find them in. The game has three Toads that give you Stars: one on the first floor, one on the top floor, and one in the basement. The two portraits in the Tiny-Huge Island room both led to Bob-omb Battlefield, and to the same spawn point: right in front of where the Chain Chomp once was, which instead was where King Bob-omb appeared. I was happy that I didn't have to climb all the way up the mountain to fight him, but then after defeating him the Star spawned up there anyway. Otherwise, plain sailing after the harder fare I've been dealing with, though the last Star will have to wait until after I find the Wing Cap (which is proving elusive...).
- The Snowman's Land portrait - the one in the mirror room - leads to Cool, Cool Mountain, which has some thematic consistency at least. I think the randomizer was a little too kind to me here: I spawned right next to the Mama Penguin, her baby a scant few yards away, along with five of the red coins I needed and the "Wall Kicks Will Work" Star. Felt a little cluttered around there, to be honest. The other three red coins were thankfully not over by the wall kick area, and there was nothing weird about the slide either (besides that half the coins were now deathtraps).

- Since I have the Stars for it now, I hit the top floor for three more courses. Tick Tock Clock's old portal leads to Bowser in the Dark World, the first Bowser boss zone, so now I have the basement levels accessible to me. The Rainbow Ride portal takes me instead to the Secret Aquarium, for another easy bonus Star. The Wing Over the Rainbow bonus area takes me to Hazy Maze Cave, which seems to be the only full level up here. I figured I'd be all turned around in Hazy Maze Cave, since it isn't the easiest place to navigate even in the core game, but the randomizer decided to stick almost all the Stars in Dorrie's area; four of the free standing Stars are just lying at the bottom of his lake like collected sediment. One notable thing about Hazy Maze Cave for randomizers is that it has a level within a level: the Metal Cap zone is here, and has the potential to be a whole world which is annoying to reach because it means passing through Hazy Maze Cave each time. I was lucky, in that it was the Wing Cap zone instead: while I wasn't going to entertain the notion of trying to get all the randomly placed floating red coins here, I was grateful to have unlocked the cap for other locations.
- Running around to grab some of the Wing Cap Stars I'd left behind, I ran into trouble with Shifting Sands Land: entering the pyramid via the top (after climbing all four pillars) still spawns you in a random spot inside, so you have to carefully jump backwards off the chequered platform in the middle of the area and then into the gap to reach the boss. Bob-omb Battlefield was way more straightforward, though considering the Pink Bob-omb was on the island that needed a cannon to easily reach, it took some time to get up there.
- Time to head to the basement, then. First I gotta drain the moat (not a euphemism) to find... the Metal Cap zone! I guess this randomizer hack just switches the three Cap zones around (either that or it was some weird coincidence).
- Down in the basement, Big Boo's Haunt has replaced Lethal Lava Land, which has moved about ten yards away and is now where Shifting Sand Land was. The Hazy Maze Cave pool brings us to Jolly Roger Bay instead, which could've been worse. That left the blue portal to Dire Dire Docks and the hole to Bowser in the Fire Sea to be the entrances to the final two major levels: Rainbow Ride and Whomp's Fortress.
- Big Boo's Haunt was easily the weirdest: almost everything had been moved outside, including seven of the red coins (the last was in the attic, annoyingly), the haunted piano, the possessed books, the Star that's usually behind the bookcase puzzle, and the Big Eye. You'd think that would make the Big Eye Star easier, except it still spawns in that little enclosed room and there's no way to hold onto the Vanish Cap long enough to reach it (both Vanish Cap blocks are outside also). The Big Boo that hangs around on top of the mansion was now just outside the carousel area, next to a big pool which made it harder to fight him but easier to regenerate HP after getting hit.
After grabbing a few Big Boo's Haunt Stars, I noticed it'd been a few hours and I found I had the requisite 80 Stars for the end-game, so I just went ahead and finished it. (The last Bowser level, incidentally, is always behind the 80 Stars infinite staircase: completing it immediately finishes the game, so it doesn't get redistributed along with everything else.) There wasn't any point hanging around for the full 120 Stars since a few were clearly impossible to get.

Outro
I don't believe I'll be taking up Super Mario 64 Randomizer speedrunning any time soon but, like the best randomizers, it did throw into question my mastery of the game and forced me to think on my feet for some of the more elusive Star and coin placements. I think the game's probably a little too open to cause the kind of suspenseful bottlenecks that a Zelda or Metroid randomizer might generate - a lot hinges on having the right item at the right place in those franchises - but it did take a while to open up the basement and that meant settling for a lot of stages I would've been happy to skip in a casual playthrough (Tall Tall Mountain, Tick Tock Clock, Shifting Sand Land...). I also didn't adopt the proper speedrunner strategy, which is to poke your head into a level just long enough to take account of all the easily attainable free standing Stars and leave the more troublesome ones in the dust.
Ultimately, I still don't have the mindset for speedrunning - Super Mario 64 and A Link to the Past are two games I could happily play dozens of times each, but never in a row without at least a few months in-between as a buffer - but I'm still into trying out every randomizer the ROM hacking community decides to make, especially if they have rules that almost completely changes the way I approached the original game. My next port of call is the Dark Souls Remastered item randomizer: I just need to get my hands on a PC that can run it without issue. You'd think that would be a low bar to pass, but...