Overview
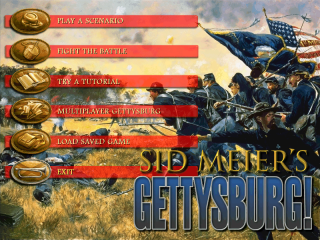 The Union version of Gettysburg!'s main menu
Released in late 1997, Sid Meier's Gettysburg! was the first official release from Firaxis Games, the development company founded by Sid Meier, Brian Reynolds, and Jeff Briggs after departing from MicroProse in 1996. It is a tactical strategy game set during the American Civil War which combines elements of traditional real-time strategy games with those more commonly associated with the wargame genre. In terms of setting, Gettysburg! restricts itself in focus to the Battle of Gettysburg , the engagement largely considered to be the turning point of the Civil War and the event responsible for more casualties than any other single battle to take place during this conflict. Gameplay evolves in real-time while simultaneously attempting to realistically simulate troop formations and the effects of stress, terrain, and many other factors on the outcome of a constantly-unfolding battle. Despite its ambitions of factual authenticity, though, Firaxis also endeavored to make the game as intuitive to play as possible, a fact that is evidenced by its fairly straightforward user interface, which was designed to be used almost entirely through the mouse, with very limited necessity for hotkeys.
Firaxis' first effort was critically well-received upon its release in spite of the high expectations which naturally came along with the attached Sid Meier name. It was successful enough financially (selling more than 200,000 copies according to Firaxis) to warrant a stand-alone sequel, Sid Meier's Antietam!, which was developed by BreakAway Games and released later in 1999. Like its predecessor, Antietam! focuses on a single battle in the war, the Battle of Antietam, often cited as the bloodiest one-day battle in the history of the United States. The two games would also be repackaged and rereleased together the following year as the Sid Meier's Civil War Collection, which contained an additional campaign based on the Battle of South Mountain.
Gameplay
Gettysburg! utilizes a simple mouse-driven interface with click-and-drag commands intended to be very user-friendly. Regiments can be moved by simply dragging a movement arrow from the selected regiment to the desired destination, and moving an entire brigade only requires that the brigade commander be moved and assigned a formation for his men to follow. Since most unit types will fire automatically when an opponent comes within range, a heavy emphasis is placed upon making the correct tactical decisions needed to ensure that one's own men will have an edge. This mostly entails outmaneuvering one's opponent through flanking, exploitation of formational weaknesses, intelligent use of terrain, or some combination of all three. Players will seldom have a noticeable numerical advantage (and may even be at a disadvantage at times), so a solid grasp of military strategy is the only consistent way to prevail across all engagements.
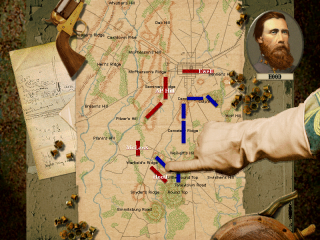 Many scenarios begin with atmospheric briefings outlining the mission to come.
When starting, players can choose either to reenact the entirety of the three-day Battle of Gettysburg, or choose from one of more than twenty individual scenarios, though in either case, gameplay is broken up into single engagements which last a relatively short amount of time. Missions are timed, and generally involve either taking or holding a specified point (or points) on the map under varying circumstances. Objective points can change hands several times during a single session, though only the faction holding that ground at the end of the scenario's allotted time will be awarded Victory Points (additional time may be given if the site remains contested at the mission's normal endpoint). Both the campaign and all individual scenarios can be played from either the Union or the Confederate side, and players can face off against a customizable A.I. opponent or a human one via multiplayer.
While Gettysburg! strives to present its source material with a degree of realism and authenticity, it is worth noting that a large number of the situations it presents are speculative or entirely fictional. Depending on the player's performance during the campaign, its course may bear little resemblance to the actual outcome of the Battle of Gettysburg, and other individual "what if" scenarios such as the involvement of Stonewall Jackson in the first day of fighting are included specifically with multiplayer purposes, pure entertainment value, or both in mind. Other concessions are made whenever gameplay demands supersede those of realism. Game speed can be varied, for instance, orders can be given while the game is paused, and a further random battle option generates custom scenarios for the player which have no real historical basis.
Morale
 A Confederate morale bar showing (from left to right) bonuses for experience, side and rear support, cover, and command
Next to formation and placing, morale is perhaps the most important factor to consider when sending a unit into battle. All firefight situations cause a regiment some degree of stress, and the total amount it can sustain without breaking depends on several factors, some of which can change dynamically. Ensuring that troops are adequately protected against severe stress and fatigue is critical across all scenarios, as failure to do so may result in the premature crumbling of a major defensive position (causing further distress to units nearby) or a routed charge attempt, among many other potentialities. Morale is represented on a per-unit basis, with each regiment or battery possessing a morale bar composed of a varying number of blocks depending on the number of morale modifiers that currently affect them. As men accumulate stress, this bar will begin to turn red, with more extreme stresses such as flanking fire and damage from multiple sources causing a greater degree of stress over a shorter period. A dramatic increase in stress or a great accumulation of it over time may cause a unit to retreat or route, meaning that it will attempt to flee battle at all costs. Even without routing, poor morale can have other undesirable consequences, as men in high-stress situations are far less likely to be able to fire and reload their weapons rapidly, which leads to a dramatic reduction in their battle effectiveness. Furthermore, if a stressed regiment has difficulty retreating, it may simply choose to lay down its weapons and surrender to the enemy, taking it out of the fight entirely.
Morale Modifiers
- Experience: The base number of morale blocks a unit has is determined by its experience level: two for green, three for trained, four for veteran, and five for crack.
- Support: Each regiment can have up to three morale blocks for support, depending on whether there are regiments to the left, right, and rear of their position.
- Cover: Units positioned on terrain with protective elements (such as trees or rocks) will receive an additional block on their morale bar to reflect this.
- Command: An additional morale block appears whenever a superior officer is nearby, denoting the increase in confidence that their presence provides.
- Entrenchment: If left stationary long enough, men begin to entrench themselves, constructing cover which is represented by up to three blocks on the morale bar.
Terrain
Wooded areas provide cover while impeding troop movement.Much like morale, terrain has a constant effect on battles as they progress, and it is in the player's best interest to exploit beneficial terrain properties. The status bar for selected regiments will always show the type of terrain said unit currently inhabits, and additional bonuses granted by terrain appear in the morale bar when applicable. For the most part, special terrain properties are fairly common-sense. Wooded and rocky areas provide additional cover for soldiers, roads will boost movement speed, and wheat fields provide concealment (though no actual protection). Learning to recognize key features in the environment early on is a skill which will pay dividends in many scenarios, as it can often allow for maneuvers which would be difficult if not impossible to pull off otherwise. Flanking tactics, for example, are always easier when one has terrain to utilize which naturally obstructs visibility.
Elevation is one of the most important terrain aspects for players to be aware of. Positioning oneself on high ground is advantageous for a variety of reasons, and the opportunity to do so should rarely be passed up. Hills and ridges allow units to see over terrain features which they would otherwise be unable to, and also places advancing regiments in even greater peril. Aside from the obvious visibility disadvantage, soldiers storming a hill are likely to tire more quickly from the effort, and may also be significantly drained psychologically by the process of fighting an uphill battle.
Terrain Types
- Woods: Heavily wooded areas provide both protection and concealment from enemies, but also result in movement penalties.
- Orchard: Orchards grant less cover and protection than wooded areas, though they also do not inflict movement penalties.
- Rocky Ground: While rocky ground functions like woods in terms of protection and movement penalties, it will not conceal troop positions.
- Boulders: Even greater protection is afforded by boulders than either wooded or rocky areas, though regiments are easily visible within it.
- Open Field: Troops positioned in open fields are clearly visible and unshielded from enemy weaponry, and thus quite vulnerable.
- Cultivated Field: Certain crop fields, specifically wheat, can hide a regiment, though they do not protect them once the fighting starts.
- Road: Roads (and pikes) offer speed bonuses to any troops moving along them, even when the road passes through rough terrain.
- Trail: While similar to roads, trails do not give movement bonuses, though men in Road formation will still seek to use them.
- Marsh: Being positioned in marshland does not affect combat proficiency, but slows one's rate of movement considerably.
- Town: Moving through town slows movement unless a unit is in Column formation, and also provides a degrees of cover.
Regiment Commands
A regiment may consist of upwards of several hundred infantrymen or cavalry, though it may also represent as little as one hundred. Individual engagements may feature up to twelve regiments per side, engendering thousands of men. Players can choose formation and positioning of each regiment, though when it comes to firing men will automatically choose their targets based on their current situation. While there are two types of regiments, the main difference in gameplay terms is that cavalrymen, when formed into columns, have access to horses for faster travel, whereas infantry do not. Otherwise, the behavior of the two is somewhat hard to distinguish, as the commands available to both are identical. In addition to the command buttons present, regiments can also be ordered to move without stopping or without changing their facing through the 'G' and 'O' keys respectively.
| Line | Line FormationThe Line formation is the default combat configuration for infantry regiments, and is designed to allow the optimal amount of firepower by arranging troops into two tightly packed rows. A stationary regiment in this formation will automatically fire at any targets within range, and furthermore can be very hard to break if properly supported. Movement while in Line formation is excruciatingly slow, however, and thus should not be used to move a regiment long distances. |
| Column | Column FormationThe Column is primarily intended for expedient troop movement, with men positioned in two orderly single file columns. Troops within a Column can move very quickly when compared to those in combat stances, however this comes at the direct expense of battle readiness. Men attacked while in a Column will take significant casualties before they can retaliate, as they must first rearrange themselves into a more appropriate formation before returning fire. |
| Skirmish | Skirmish FormationSkirmish formation is essentially a Line formation in which men are space much farther apart. The main advantage of such a configuration is increased speed and a reduction in casualties. As a result of the wide spacing, it does not hold up as well as a Line against strong assaults. Skirmishers are excellent for impeding incoming troops or harassing an artillery position, though they are not ideally suited to hold a fixed position against an enemy advance. |
| Wheel | WheelThe Wheel command allows players to easily readjust the facing of the selected regiment. Unlike most command buttons, the Wheel button is not a single command, but rather three distinct commands in one. Left-clicking the upper left arrow orders the selected regiment to wheel left, while clicking the upper right arrow issues a wheel right command. The arrow centrally located below these two arrows directs a regiment to do an about face, which is a quick 180° turn. |
| Attach | AttachAny formation command given to an individual regiment while attached to a brigade will automatically detach said regiment from its brigade commander, meaning that it will no longer respond to orders issued by their commander. If at any time the player wishes to reattach this regiment to its brigade commander so that it will once again follow higher-level orders, this can be done simply by clicking the Attach button. |
| Hold | HoldThe Hold order exhorts the selected regiment to hold its current position no matter the cost. The morale of a regiment in hold position will degrade more slowly, though it will also stand its ground even when it is not in the best interests of its men, leading to much higher casualties in many cases. Given that the Hold command is seen as a fairly severe measure, it can only be given to a stationary regiment that is fairly close to its commanding officer. |
| Double Quick | Double QuickA regiment that is issued the Double Quick order will attempt to complete its current task as quickly as possible, whether it be a movement order, formation change, or a simple wheel. While it can often be necessary to take advantage of Double Quick in order to react more expediently to unexpected battle developments, chase down fleeing troops, or the like, regiments will be fatigued by these actions, which is reflected in-game as battle stress. |
| Advance | AdvanceTroops ordered to advance will march in an orderly fashion two hundred yards forward based on their current facing. Like all movement commands, the regiment's destination is indicated in the game world by a red or blue rectangle (depending on the side), with an arrow showing its facing upon reaching it. Wheel commands can be issued in the middle of a movement, causing the regiment to reposition itself once it has reached the targeted area. |
| Charge! | Charge!In combat situations, issuing the Charge! order forces a regiment to storm headlong into an enemy formation with the specific intent of making their opponents break ranks. Charging troops will not return fire until they are face-to-face with their enemy, and typically sustain significant stress (not to mention casualties) as a result. A Charge! will continue until either the attacking or defending regiment has been routed or forced to cede their ground. |
| Fall Back | Fall BackOften an alternative to a full retreat, issuing a Fall Back order causes a regiment to slowly move backwards without ceasing fire. Men may decide to start falling back on their own if their morale levels drop too low, though there are also situations where it may be prudent to fall back voluntarily, such as in a scenario where doing so might relocate a formation to a more easily defensible position, like a wooded area, for example. |
| Retreat | RetreatThe player reserves the option at any time to manually recall a regiment through the Retreat command, instructing them to drop their current action and flee as far from battle as they can, maintaining some semblance of order during the process if at all possible. In certain cases, such as when a regiment is clearly at a disadvantage, it may be the best course of action to turn tail and run, though exposing one's backside to the enemy always caries with it a certain amount of risk. |
| Halt | HaltIssuing a Halt command, simply put, orders any moving regiment to come to a complete stop immediately without completing their previously assigned movement order. With the rapidly shifting nature of battle, halting one's men is sometimes the quickest way to prevent a regiment from blundering into a dangerous situation. If the halted group had prior directives to change formation upon reaching their destination, they will do so once halted. |
| Volley | VolleyUnder normal circumstances, soldiers in a regiment will fire whenever they have a valid target, pausing only to reload. The Volley command directs stationary troops to instead hold fire until all men within the regiment have a clear shot, thus firing in unison. This is particularly devastating when an enemy formation is not aware of their presence, or when a regiment is facing down a charge, where it allows a concentrated amount of gunfire to be directed at close-range targets. |
Brigade Commands
Brigade commanders are unique in that they do not actively partake in battle. Their main duty is to coordinate multiple regiments and ensure that they are properly prepared when the fighting starts. They also act as a source of inspiration for their men, providing morale bonuses to any regiments nearby or helping to rally broken formations. As well, certain commands can only be issued in the presence of a commander (typically more extreme ones). A second type of commander also exists, which is known as the superior officer; this commander is not attached to any regiments, and thus cannot issue direct orders, but still provides morale bonuses, rallies troops, and enables regiment orders with a commanding officer requisite. Though there are no buttons assigned to them, Double Quick, Don't Stop, and Oblique orders can be issued at the brigade level through hotkeys.
| Battle Line | Battle LineWhen directed to form a Battle Line, all regiments within a brigade assume the Line formation, and these regiments then form a single, unbroken row with the brigade commander at its center. The Battle Line is meant to maximize the firepower of a brigade, giving all men within each regiment a clear shot at any advancing enemies while also providing significant defensive capability. A well-positioned Battle Line can be a daunting challenge to overcome. |
| Double Line | Double LineMen in the Double Line formation are first formed into Lines by regiment in the same manner that Battle Line dictates, however these regiments are then divided into front and rear ranks. This provides even greater defensive strength than a Battle Line, though a Double Line is considerably shorter, making it more susceptible to flanking, and men in the rear of the formation will often find themselves without a clear line of fire against an advancing enemy. |
| Skirmish | SkirmishThe Skirmish brigade command places all attached regiments into Skirmish formation, which are in turn organized into a single row. Brigades in Skirmish formation enjoy the same advantages and disadvantages that regiments do. Men can move more quickly and strike harder while in Skirmish lines, though they will also fold quickly against heavy resistance. It is best used in situations where enemies are not expecting a fight, or are otherwise unable to properly retaliate. |
| Maneuver | ManeuverA brigade in Maneuver formation is composed of several columns, and therefor is able to move at a very rapid clip. While columns are inherently ill-suited for combat, in Maneuver each column is placed side by side for the express purpose of allowing the brigade to quickly spread out into a Battle Line or other combat formation if the need should arise. Ideally, this will leave a brigade at less of a disadvantage should it be ambushed while moving. |
| Road | RoadThe Road formation is tailored for fast movement above all else. All regiments are formed into columns, one behind the other, which provides movement advantages on roads or clear terrain. While in this formation, men will actively search for pathways which will expedite their movement, though it should be noted that being attacked while in Road formation is tantamount to being caught with one's pants down, as the time it will take to transition to a proper battle stance is not insignificant. |
| Wheel | WheelThe brigade version of the Wheel command works in exactly the same fashion as its regiment-level counterpart, though in this case it wheels the entire brigade to the left, to the right, or 180°, depending upon which button is pressed. All Wheel commands can be issued either when the selected unit (or units) are stationary or in movement; in the case of moving targets, the destination marker for said unit will reflect the facing it will assume once it reaches its destination. |
| Attach | AttachThe brigade-level Attach command forces all detached regiments belonging to the selected brigade commander to reattach themselves to their superior officer. In situations where multiple regiments are detached from brigade command, this is usually a much easier way to attach them than selecting and attaching each regiment individually, though if the player desires only certain regiments to be attached, it should be done at the regiment level. |
| Advance | AdvanceUsing the Advance command while a brigade commander is selected moves all attached regiments two hundred yards forward based on their current facing. Naturally, this is most advantageous when a brigade is already grouped into a proper formation, as it allows the entire company to advance in unison in an orderly fashion, though it can be used in any situation, even when brigade regiments are scattered or otherwise disorganized. |
| Brigade Halt | Brigade HaltIf the brigade commander happens to be in motion, issuing a Halt order will cause him to come to a complete stop. From there, if the remainder of the brigade is still in motion, the player is able to issue a Brigade Halt, which forces all men under the commander's charge to stop as well. Any pending formation changes that may have been delayed until reaching a destination will be carried out immediately once a formation is halted. |
| Line of Sight | Line of SightBeing mounted on horses and equipped with binoculars as they are, brigade commanders have a much greater field of view than a normal infantryman. Though it has no direct gameplay ramifications, the Line of Sight button can be clicked at any time that players wish to see everything that currently lays within the selected commander's sight range. While in this mode, everything outside of the commander's vision will be tinted gray in order to specify it as such. |
| Rally | RallyInevitably, certain regiments will simply endure more stress than they can bear, and will stop following their given orders and break ranks. When this happens, they will gradually regain their composure while outside of combat situations, though being in the presence of a superior officer will shorten this process. Pressing the Rally button calls all routed regiments within a brigade to gather close to the brigade commander, helping to boost their morale. |
Artillery Commands
Long-range batteries function somewhat differently when compared to infantry and cavalry formations, as they must maintain their distance from the fray at all times in order to function properly. Though certain artillery fire can be more damaging to closer opponents, an enemy regiment can also capture these guns and turn them against their former allies quite easily if they are undefended. High ground is a paramount consideration when placing artillery units, as it improves the artillerymen's ability to see and thus fire upon advancing foes. As with infantry regiments, setting up opportunities for flanking or rear fire is also preferable when placing artillery pieces whenever circumstances allow.
| Unlimber | UnlimberOrdering artillerymen to unlimber forces them to prepare their guns for firing. A battery can only fire upon enemies once they have fully completed the unlimbering process, though it must also remain more or less stationary while in this state. Because of this, it is crucial to ensure that artillery is positioned well (ideally on high ground), as repositioning a battery once it has unlimbered is a time-consuming and potentially costly proposition. |
| Limber | LimberLimbering artillery guns prepares them for movement, and when completed the guns cannot be fired until unlimbered. Even when moving a battery, specifically issuing a Limber command is not always necessary, as a movement order given to an unlimbered artillery unit will automatically cause it to limber, move to the desired location, and then unlimber once more. In other words, the battery will return itself to the state it was in when the move order was issued. |
| Target Infantry | Target InfantryUnlike infantry or cavalry, artillery can be directed to fire at certain targets, which may take the form of focused fire on specific enemies or more general targeting guidelines. Target Infantry falls into the latter category, as it directs artillery to fire upon infantry first without specifying an individual target. If unlimbered, the battery will automatically search for nearby enemy infantry to fire upon, with preference given to more dangerous regiments. |
| Target Artillery | Target ArtilleryTarget Artillery forces the selected artillery unit to target enemy artillery, with preference given for those that are closer or more lethal than others. As with the Target Infantry command, this does not give fine targeting control, so in situations where a particularly troublesome artillery piece is harrying one's forces, it may be better to use the 'T' key to force the battery to fire only upon the player's specified target. |
| Auto Target | Auto TargetThe default targeting mode for artillerymen is Auto Target, which allows an unlimbered battery to fire upon whichever enemy infantry or artillery unit happens to be closest. While this can work well in many battles, particularly when the player's positioning is sound, it is never a bad idea to be on the lookout for specific regiments or batteries which might be particularly fruitful targets to be singled out by the big guns. |
| Line of Sight | Line of SightSimilarly to the brigade Line of Sight command, this button grays any area of the map which is not currently visible to the selected unit. Additionally, the artillery Line of Sight order shows brown areas which represent portions of the map that would be otherwise visible to the artillerymen if not obstructed by other regiments. This latter property is useful in keeping the battery's line of sight clear so that it will not have to stop attacking due to friendly fire concerns. |
| Fall Back | Fall BackAdvising artillery units to fall back instructs them to use the natural momentum of their gun's discharge to gradually move backward. This technique is known as 'retreating by recoil,' and is one of the only ways an unlimbered artillery piece can be moved while still leaving it in a position to fire upon the enemy. If enemies are gaining ground, it can be a good way to gain a few additional volleys before a full retreat is required. |
| Retreat | RetreatA retreating battery is very similar to retreating infantry. The first and most important priority of a retreating artillery unit is to put as much distance between itself and the enemy as possible. As with any Retreat order, if the battery was under fire at the time it was ordered to retreat, it will not respond to any other commands until it has successfully done so; otherwise, the Retreat order can be cancelled before it is completed. |
| Halt | HaltIf a previously issued movement order suddenly becomes untenable through the unexpected discovery of additional enemy regiments, or through other causes, batteries can be halted in the same way that brigades and regiments can. The battery will then immediately set about assuming the position it would have had it completed its original movement order, meaning that it will begin to unlimber at once if it was set to do so upon reaching its terminus. |
Victory Conditions
The Battle Report ScreenScoring in a given scenario in Gettysburg! is determined primarily by two factors: casualties and control of objective sites. The battle report that follows each mission assigns Victory Points (or VP) to each side based on the number of casualties inflicted and objective sites held at the end of the scenario. The latter of these are the major objectives in most scenarios, awarding a fixed VP value at the end of a scenario, though until then they may actively change hands throughout an engagement. Either side may contest control of an objective site simply by moving a formation into it; once either player establishes a dominant position within the objective site, its marker will change to either blue or red to reflect that is currently under Union or Confederate control respectively.
The additional VP awarded for casualties is directly tied to the number killed on each side. One VP is awarded for each infantryman killed, two are given for each cavalryman, and three points are amassed for each artilleryman. While casualties are considered a secondary source of Victory Points that are below objective sites, they are nevertheless important, as superior troop management may allow a player in some cases to still win a scenario in spite of a major objective loss if they clearly outmaneuvered their opponent. In addition to assessing overall performance, the battle report also gives more detailed information to the player, such as what their most effective brigades and units were, while also giving the option to watch a replay of the battle.
Reception
The reaction to Sid Meier's Gettysburg! was overwhelmingly positive, and the game commonly scored within the ninetieth percentile on review scales. Despite being Firaxis' first outing, most critics felt that the game was extremely polished and deserving of the Sid Meier name, and it was even a runner-up for "Best Wargame of 1997" in PC Gamer's annual awards proceedings. In particular, the game's melding of traditional wargaming mechanics with more mainstream RTS gameplay was seen as very successful, offering both tactical depth and sufficient fine-tune control of events as they unfold. Additionally, the game's interface drew positive remarks for being streamlined and very easy to grasp when compared to other games of its type.
Some elements of the game did draw criticism, however. A number of critics expressed concern that the simulation mechanics might be too simplified to appeal to entrenched wargaming fans, and the game's graphics, while generally praised, were noted as being sometimes problematic as well. This included criticism of terrain pop-in when scrolling and also claims that discerning the high ground through the game's engine was unnecessarily difficult. At the same time, most critics admitted that these complaints were relatively minor when examining the quality of the game as a whole, which was deemed more often than not to be quite satisfactory.
Log in to comment