Overview
Dragon Quest VIII: Journey of the Cursed King is a role-playing game developed by Level-5 and published by Square Enix, first released in 2004 for the PlayStation 2. It features character design from Akira Toriyama and was the first game in the series to use full three-dimensional graphics and features a fully detailed world to explore. The game follows a Hero and his party as they travel around the world trying to break the curse of a King and stop an evil force known as Rhapthorn. The game sold 3 million units in its first week of release in Japan, and went on to sell over 4 millions units worldwide.
The game was changed and enhanced for its English release. While the original Japanese version featured a MIDI soundtrack like previous entires, the English release used a fully orchestrated version of the game's soundtrack. In addition, voice acting was added, which was not in the original. The voices were performed by British actors to complement the game's medieval world, setting a trend for future English releases of Dragon Quest to have scripts that follow British grammar and slang.
Gameplay
Dragon Quest VIII features a beautifully constructed 3D environment for the player to explore, filled with many secrets, towns and side-quests. It also has a non-linear progression, unlike most 3D RPG that many see today. The turn-based battles and leveling up systems is very throw-back to old 2D RPG games from the early 90s, it's "Easy to control, but difficult to master."
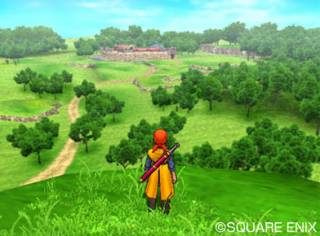 The beautifully constructed world of Dragon Quest VIII.
As mentioned, the game features a huge environment for the player to explore. Treasures chest are scattered throughout the world filled with some interesting, yet sometimes useless items. Churches are also scattered throughout the world of Dragon Quest VIII, used for saving the progress that was made in the game, healing the player's characters, and purchasing items. The environment also has a daytime, night time feature; when the player travels around the world in the day, he or she will encounter certain enemies with some fairly normal attack and defense strengths, but when night falls, different, much stronger enemies will appear. The game also has a casino that contains some mini-games for the player to participate in to win prizes such as rare and powerful weapons.
The battle system is very old-school. More technical elements like summons or more complex leveling up systems that are featured in other RPG games like the later Final Fantasy games aren't present. The battles are more catered to the old RPG games from the SNES era games; the player has the option to attack, magic, or certain abilities the can be accessed if a character has a certain weapon equip. The leveling up system is very old fashioned: Earn enough experience points and the character levels up, but the player can earn ability points that is used for certain attributes that a character has. For example, when a character earns a ability point, it can be use for the character's fisticuffs attributes, or "sex appeal" (one of Jessica's attributes). A variety of weapons are used in the game such as swords, scythes, axes, whips, bow and arrows, magic staffs, spears, boomerangs, and knifes.
 These enemies aren't so tough now, but later in the game, it's a whole other story.
The game's difficulty is probably the most notable thing about Dragon Quest VIII. The random battles that the player encounter can be very difficult (especially during night time), and they can be just as difficult as the boss fights in the game. The amount of experience points and money that is earned from battles in the game is not much, by the time the player reaches later areas it would be too difficult for the player's level - the experience points alone are not enough to get the characters' level strong enough to take on the later enemies. Weapons from shops can also be very expensive, and the money that is earned is not much, either. The only way for the player can get through the game is the use of an item known as " Alchemy Pot."
The Alchemy pot is used to mix items to create new ones such as weapons and healing items. This item is very useful to create powerful weapons that go for very high prices at weapon shops (It can also save the player a lot of money). Recipes for the mixed items are hidden throughout the game, and items such as gold are use for the Alchemy pot.
Characters
Protagonists
 The central protagonists of Dragon Quest VIII.
Hero - The central character, who was the sole survivor of the guard after a devastating attack on the castle by Dhoulmagus. He now travels with the King and his daughter trying to break the curse.
Yangus - A former bandit who teamed up with the Hero after having his life saved by him.
Jessica - The sole daughter of the Albert family, she joins the party after the death of her brother at the hands of Dhoulmagus, vowing to avenge his death.
Angelo - A member of the Templar knights and a troublemaker. He teams up with the party after he is exiled from the Abbey he was raised in.
Antagonists
Dhoulmagus - An evil jester who stole the Scepter of Trodain and was the first to succumb to Rhapthorn's influence and was the one who transformed Medea and Trode into their alternate forms.
Sir Leopold - A dog belonging to Dominico, who after picking up the scepter fell under Rhapthorns influence and continued the killing spree.
Rhapthorne - The Lord of Darkness who was sealed away generations ago, but now seeks to reawaken by killing the successors of the sages who stopped his reign of terror so long ago.
Marchello - The head of the Templars and later a tyrannous leader who attempted to use Rhapthorn's power to his advantage.
Supporting Characters
Trode - The former king of Trodain who has been turned into a monster and now seeks to lift his curse with the help of the Hero and his party.
Princess Medea - The Princess of Trodain was transformed into a horse and now leads a wagon with the hero's party. She later gains the ability to return to her former self for brief periods of time, where she confesses her love for the Hero.
Empyrea - A mystical bird who long ago aided in trapping away Rhapthorne and was stranded in the Dark World. She aids the party in their quest against Rhapthorn.
Red - A treasure seeker and former lover of Yangus. An expert thief, she can sneak around dungeons unnoticed.
Ishmahri - The keeper of Moonshadow Land. He helps the party a number of times by bringing forth memories into the real world.
Dominico - A powerful magician living in Arcadia, who plays into a generations-old scheme. He is ruthless and cruel, especially to his servant David.
Prince Charmles - An arrogant prince who wishes to marry Medea but lacks to the appropriate manners and is a disappointment in the eyes of his father.
Marta - An old woman who rescues the party after they are are caught in an avalanche. She grows herbs known as 'nook seeds' and is a descendant of one of the seven sages.
Marek - The son of Marta, who left her in order to use skills he learnt from her to help people in Orkutsk.
Cash & Carrie - A pair of siblings who are the potential heirs to a family fortune but both want it for themselves. With the help of the party, they manage to put aside their rivalry.
Differences between versions
Several major changes were made to the game when it was localized for Western audiences:
- When the Hero goes into maximum tension mode, his bandana flies off showing very Super Saiyan-like hair. It can be assumed this is a little easter egg for fans Akira Toriyama, as Square Enix USA used to run a poll related to the game asking fans if they had ever heard of Akira Toriyama and/or Dragon Ball Z.
- Voice acting was added for every major character except the silent hero.
- The old-school MIDI-style soundtrack was scrapped in favor of a fully orchestrated soundtrack.
- The biggest change would have to be the menu system. Where the original Japanese version had a fully text-based NES-style white-text-on-a-black-background menu system, the Western release got a luxurious icon-based menu system, very similar to those in other Level-5 games such as Dark Cloud 2 and Rogue Galaxy.
Nintendo 3DS Version
New Scenario
The new scenario revolves around the past of the jester Dhoulmagus, and the childhood of the game's protagonist.
New Dungeon + New Boss
A new dungeon with a brand new boss, Jahagaros--a gigantic demon with red tattoos all over his body--, appear in this version of the game.
New Ending
This version of the game will feature a new ending said to involve an angry King Clavius, a sad protagonist and surprising developments.
Post-Game Dungeon
After finishing the game, players will get access to "The Ultimate Trial," a post-game dungeon which hides mysterious purple treasure chests for players to find.
Soundtrack
Though the original Japanese release of the game featured a MIDI soundtrack like previous iterations of the franchise, the international versions feature fully orchestrated music. Koichi Sugiyama composed and conducted the music, as he has for every other Dragon Quest game. The soundtrack was performed by the Tokyo Metropolitan Symphony Orchestra, and was released in 2 CD form in December 2005.
Track Listing
Orchestra Soundtrack CoverName: Symphonic Suite Dragon Quest VIII Sora to Umi to Daichi to Norowareshi Himegimi
Total Length: 82:50
CD1:
- Overture
- Travelling With Wagon
- Peaceful Town ~ Quiet Village ~ Alchemy Pot
- Strange World ~ Marching Through the Fields
- Chatting
- Cold and Gloomy ~ In the Dungeon Depths
- Healing Power of the Psalms ~ Friar’s Determination
- Over the Sorrow ~ Hurry! We Are in Danger
- Mysterious Tower
- Reminiscence ~ Go Topo Go!!
- War Cry ~ Defeat the Enemy
CD2:
- Remembrances...
- Majestic Castle ~ Gavotte de Château ~ Majestic Castle
- Poet’s World
- Memories of an Ancient Ocean
- Stalked by Fear
- Ruins of Darkness
- Sanctuary
- Heavenly Flight
- Nearing Our Destiny
- Dhoulmagus ~ Great Battle in the Vast Sky
- Sky, Ocean and Earth
Plot
The transformed King TrodeThe story of Dragon Quest VIII begins in a forest in the kingdom of Trodain. Being a former guard, the Hero is traveling with a band of companions, a criminal bandit named Yangus, King Trode, and her daughter, Medea. King Trode and Medea have been cursed and transformed into a monster and horse, respectively, and their castle is in ruins. They are on the trail of an evil magician named Dhoulmagus. With the sun going down, they decide they must find a place to stay for the night, settling on the nearby town of Farebury. It is here that they are looking for a Master Rylus, the person who taught Dhoulmagus his magic. They are hopeful that he can transform Trode and Medea into their former selves. Asking around town for his whereabouts, they discover from a disgraced fortune-teller that he has been murdered by none other than Dhoulmagus. They decide to leave the town with no leads, but King Trode is attacked after being mistaken for a monster as they are doing so. Fleeing the town, they conclude that Trode can never enter towns again, forcing him to sleep in a wagon from then onwards. Just as they are leaving, they are approached by a young girl who is the fortune-teller's daughter. She tells them that he was once a great magician and pleads with them to find his crystal ball so he may return to his former glory. She tells them that the crystal ball's location is to the south, in the waterfall cave. The party travel to the cave, where they fight their way to the bottom of the cave, and they find the ball. Upon taking it, they are attacked by Geyzer, a monster who has suffered brain damage due to the ball striking him on the head long ago. When they bring the crystal ball back to the fortune-teller, he tells them he does not want it back and plans to throw it back into the waterfall. His daughter pleads with him telling him that he knows why he threw it away in the first place, that he knew of her parents' death but was unable to stop it, stating that she still loves him. With this revelation, he decides he will return to using the crystal ball, aiding them in finding the location of Dhoulmagus, revealing that he has headed south.
The aspiring mage, Jessica AlbertThe party heads south, soon discovering the town of Alexandria and the location of the Albert family. They discover that the daughter of the family, Jessica Albert, has been held up in her room for several days after her brother Alistair's death. However, the party soon finds that Jessica has secretly left the house and is heading for the tower to avenge Alistair's death. With a written letter as proof, the party enlists Bangerz and Mash's help, her little brothers, to open the way to the tower for them. As they reach the top of the tower, they discover a statue with jewels for eyes. They then encounter Jessica, who mistakes them for a pair of thieves and Alistair's murderers. As she begins to cast a powerful fire spell, her brother's voice tells her to stay her spell. The voice comes from the statue, where Alistair's soul has merged with only for a brief time. He reveals that Dhoulmagus murdered him and tells Jessica that she must follow her heart to deal with the grief. Jessica tells the party she will meet up with them back at the town, as she wishes to mourn at the statue a while longer. Back in town, the party is put up in the inn for the night. The next day they visit the Albert mansion, where they find Jessica, who, with a confrontation with her mother, announces her plans to leave the town and avenge Alistair's death, following her heart as he wished. Furious, her mother banishes Jessica from the town, which Jessica gladly obliges. She storms off and leaves Alexandria. The party decides that they must leave for the southern continent to chase Dhoulmagus, so they head for Port Prospect, where they meet up with Jessica, who tells them that they cannot cross the sea to the south until a sea monster has been dealt with. With Jessica's help, the party manages to defeat the monster, Khalamari, opening the way to the southern continent.
Jessica then proposes that they team up with her to join the party since they share a common goal. Setting sail for the southern continent, Yangus reveals to Jessica how he met up with the Hero. After leaving his town, he tried to start a new life devoid of crime, but with no looks and no skills, he soon had no option but to go back to being a thug. While setting up a toll for a bridge, he meets the Hero and King Trode, who refuse to pay money. Angered, he strikes the bridge with his ax, which causes the bridge to collapse, with the Hero and Trode managing to make it to the other side. With Yangus clinging on by just a rope, Trode tells the Hero he should leave him, calling it poetic justice, but the Hero decides to rescue him. Yangus then tells him he is in his debt and joins him.
Angelo, the troublemaker and playboy.The party finally reaches the southern continent, where they head south, until finding the Mealla Abbey. They plan to speak to the Abbot for clues of Dhoulmagus' whereabouts but cannot gain access. Moving on, they discover the town of Simpleton. Entering a bar, they find a templar named Angelo, who fixes a card game, causing a bar fight to break out. Exiting through the back, they meet up with Angelo, who gives Jessica a ring and tells them to ask for his name at the Abbey to gain access, much to Jessica's loathing. They manage to gain access to the Abbey using Angelo's name but are still unable to meet with the Abbot due to a Jester's appearance, who the party suspect is Dhoulmagus.
Meanwhile, Angelo is scolded by his brother, Marcello, who has learned of the fight at Simpleton, ordering him not to leave the Abbey again. As they are leaving, Angelo approached, who tells them he fears a sinister presence, and unable to leave the Abbey urges them to protect the Abbot. He tells them they can find a secret entrance to the Abbot's chambers through the ruins of the old Abbey nearby and can gain access using the ring he gave them. They manage to make their way through the ruins and enter the Abbot's chambers, where they discover Dhoulmagus, who disappears just before killing the Abbot. Suddenly, the templars of the Abbey and Marcello diverge to the chambers where they discover the party. Suspecting the party are the culprit, they take them back to the Abbey for questioning. With mounting evidence against them and finding King Trode, whom they discern is monster acquittance, he questions how they came into possession of the ring, calling in Angelo, who states they stole it from him. Positive of their guilt, he throws them in jail, where he plans to torture them in the morning. The next day, when the party thinks that they are done for, Angelo comes to the rescue, revealing that had he told the truth, he would have had no chance of rescuing them, opening their cell and showing them a secret exit out of the Abbey. Upon exiting, they see that the Abbey is on fire. Fearing the worst, Angelo sets off towards the Abbey. The party makes their way back to the Abbot's chambers, where they find Dhoulmagus has overpowered the guards and is set on killing the Abbot. The Abbot is unafraid, stating that if the Goddess wishes for him to die, he will die. Soon King Trode enters the room and demands that Dhoulmagus return him to his previous form. Dhoulmagus then aims a shot at King Trode, but the Abbot dives in front, blocking the shot's impact and killing him. With his objective complete, Dhoulmagus leaves, leaving the Abbey to mourn the death of their Abbot. The next day, the party is summoned to Marcello's chambers, where they are given a world map and instructions to hunt down Dhoulmagus. They are also instructed to bring Angelo along with him, which he agrees to, growing tired of the Abbey.
The party heads east, discovering the kingdom of Ascantha, where they decide to ask the King if he knows the whereabouts of Dhoulmagus. They learn that the King has been mourning his wife's death for the past two years, unable to lead his kingdom, praying that he can see her just one more time. They are soon approached by the King's maid Emma, who pleads with them to seek a place where wishes can be granted so the King may be restored to his former self. She is unsure of where such a place exists, so she directs them toward her mother, who lives to the west. When they meet up with her mother, she tells them of an old legend that if you go south to a strange hill and wait all night in silence, a door to another world will open. After managing to find a secret entrance to the hill, they ascend to the top of the hill, where they discover a single-window frame and a wall. After waiting all night, the moonlight causes the window frame to cast a shadow on the wall, opening up a door to Moonshadow Land. They meet Ishmahri, who tells them that he will use memories to put the King at rest while he cannot bring back the Queen. Bringing Ishmahri back to the King, he uses his harp to cast memories of the Queen around the room. The King reminisces on the Queen's life, and one such memory is when the Queen was mourning her mother's death. She reveals that while she misses her, she cannot get upset because then the part of her mother in her would die. Realizing that the Queen would have wanted him to be strong and lead the kingdom and let the Queen live on in him, he can finally overcome his grief. The King throws a feast for the party, and while he has nothing to aid them at the time, he will do anything to help in the future. The party leaves Ascantha and heads south to the town of Pickham, a dangerous town full of criminals and beggars. It is here that King Trode realizes that nobody cares about his appearance, so he is free to enter the town, soon set off for the pub. Yangus tells the party that he knows of a person named Brains who knows everything, which will help them find Dhoulmagus. While they manage to find his house, it is empty, leaving the party no option but to go back to the pub.
As they are telling Trode the news, they hear Medea in a panic outside. Heading outside, they find that she has been kidnapped. Discovering that the kidnapper has not yet left town, they search for the culprit. They soon find the thief who has sold Medea for 1000 coins. Furious, Yangus threatens him, causing the thief to give back the money. The party heads to the town's fence, where they offer to buy back the horse, but find that the fence already sold it to a woman named Red, Yangus's old lover. With no other options, they leave for Red's house to the west.
Red.Upon meeting Red, Yangus offers to buy back Medea for whatever price she names, but Red refuses, stating the horse is one-of-kind. She tells them that the only thing she will give the horse up for is the Venus Tear, located in the Swordsman's Labyrinth to the north. With no choice, the party heads off. At the Labyrinth, Yangus reveals that he had once attempted to steal the Venus Tear to impress Red but injured himself and was forced to escape. The party manages to retrieve the Venus Tear and bring it back to Red. Red then takes the Venus Tear but tells them she will not give them the horse, stating that she would merely "think about it." This causes Vangus to fall to his knees and beg for Medea. Red is taken back by this and tells him to stop, saying she was merely joking and would give back the horse. With Medea retrieved, Trode tells her he will never leave her side again. The party decides to head back to Pickham to see if Brain has returned, discovering he has. He tells them that he does indeed know of Dhoulmagus' whereabouts, telling them he has left for the western continent but reveals that no boats are heading in that direction because of monster attacks. He tells them that the only way to chase him is to find a ship back on the northern continent and west of Port Prospect, where a previously blocked road has been opened. They discover the ship, but it is at the bottom of a valley, with no water to sail it out to the ocean. King Trode then realizes that they are just south of his old castle, stating they should go there and look for clues on how to get the ship to the ocean. Upon arrival, the King reveals to the Hero what happened the day Dhoulmagus entered the castle. Dhoulmagus planned to steal an ancient scepter known as the "Scepter of Trodain," which has been protected by a magical barrier in the castle for generations. Upon stealing it, he tests its strength on the King and Medea. Protected by the magical barrier, the spell merely places a curse on them instead of killing them. Exiting the magical barrier, Dhoulmagus is able to unleash the staff's true power, destroying the castle. King Trode then wonders how the Hero survived but concludes it must be pure luck. The party makes their way through the ruined castle and to the library, where they find little information to help them. As night falls, they discover the moonlight once again casts a shadow upon a window frame and a door to the Moonshadow Land. There they once again ask for the assistance of Ishmahri, who gladly helps as he begins to play; however, the strings on his harp snap, revealing that his harp is not strong enough for the spell. He tells them to seek out the Moonshadow Harp, hidden somewhere in the kingdom. He tells them it has someone they have helped once before, prompting the party to head for Ascantha.
The arrogant prince, Charmles.At Ascantha, they ask the King if they may have the harp. True to his word, the King tells them it would be his honor to help the party and takes them to the King's treasury, where the harp is located. Upon arrival, though, they find that everything has been stolen through a tunnel that has been dug into the castle. Following the tunnel, they discover a kingdom of moles and their leader who has stolen the harp and misplayed it, tormenting the mole population. After defeating the mole leader and retrieving the harp, the moles thank the party and allow them to leave. With the harp acquired, they return to Ishmahri, who, with the help of Medea's singing, is able to call forth the memories of the sea and allow the ship to get to the ocean once more. With transportation taken care of, the party set off for the western continent, where they find the small town of Baccarat, home of the world's largest casino. There they find that the town's wealthiest member, Mr. Golding, has been murdered by a Jester, obviously Dhoulmagus. They learn that the children of Mr. Golding have sent a team of guards to an island to the north in chase of Dhoulmagus, where they plan to avenge his death. The party then heads to the island where they find the Dark Ruins, Dhoulmagus' hideout. However, due to dark magic enveloping the ruins, they are unable to enter. They learn that the only way to gain access is with a magical mirror, located in the south-eastern kingdom of Argonia, with the players setting off for the kingdom. When they arrive, King Trode reveals that the Prince of the kingdom is the planned fiancé of Medea. They decide to speak to the King and ask if they may take the magic mirror, but the King refuses, telling them that it is an ancient treasure and is against giving it to people he barely knows. However, he will give up the mirror if they help him. He reveals that his son, Prince Charmles, refuses to complete an initiation trial due to his fear of lizards but must complete the trial to succeed him and marry Medea. While the Prince is meant to complete this trial independently, the King fears this will never happen unless he gains some help. He summons the Prince and tells him that the party will accompany him in secret to the Royal Hunting Grounds where he must kill an Argon Lizard and bring back his heart; the Prince is initially unwilling. However, after the King uses Jessica's assets to show him what awaits him, he agrees. It is here that the Prince turns out to be arrogant and selfish, stating that he will not leave until he finds the biggest lizard heart, bossing the party around and calling them servants and, after growing tired, orders that a camp to be set up for the night. In the morning, he insults the party and crudely rides Medea, whipping her and throwing insults, completely oblivious that it is his fiancé. They soon discover an overly large lizard, and he states that they must kill it and take its heart. With the deed complete, they head back to the kingdom, where a bazaar has opened. It is here that the Prince finds an even bigger Argon heart and buys that instead, giving the real heart to the party. Unbeknownst to him, though, the King has seen this transaction.
Medea speaking to the Hero in one of his visions.Back in the throne room, the Prince reveals the large heart, impressing everyone in the room. The King asks if he swears that he gained it through legitimate means, with the Prince claiming it is. Despite knowing the truth, the King merely congratulates him. He questions the party if they even took him to the hunting ground, prompting them to show him the real heart. The King states that he should have shown that one, as he cares not of the size. He concedes that perhaps the Prince is still too immature to be king or to marry. With the party's end of the bargain complete, the King gives them the mirror, but it is devoid of magic. They are told that an old magician named The Seer to the west may know how to restore its power, so the party sets off to find him. After discovering his house, they soon find him by a lake, where they are shocked to learn that he is unaware that Medea is a horse, revealing that he is blind and sees everything with his mind. He tells Medea to drink from the lake, which might break the curse. Upon drinking the water, Medea is returned to her former self, with the party ecstatic. Their celebrations are premature, however, as she soon transforms back. The Seer tells them that the curse is far too strong, and the only way to break it is to defeat the person who placed the curse in the first place. The party then tells The Seer of the mirror and asks if he knows how to restore it. He tells them to sail their ship to an arch in the north where they find a Sea Dragon, casting a powerful light spell that the mirror absorbs, returning its power. With the magical mirror restored, they once more set off to the Dark Ruins, where they place the magical mirror in front of the ruins and manage to gain access. They make their way through the ruins, finally meeting up with Dhoulmagus, whom they fight.
Once they defeat him for the first time, he reveals that he was merely healing and transforms into his true form, a beast-like creature. The party manages to defeat him for good, destroying him and leaving but a pile of sand. The whole party celebrates, but Jessica reveals she still lacks closure, telling the party that defeating Dhoulmagus will not bring her brother back. When Trode and Medea meet up with the party, they are shocked to learn that they have still not transformed back. Confused, they decide to head back to Argonia, with Trode asking Jessica to take the scepter with her. After resting at an inn, the party is awoken by Yangus, who tells them that Jessica has left with the scepter. They learn that she has headed north, through the northern checkpoint, and to the city of Arcadia, prompting the party to set off in pursuit of her.
The possessed Jessica.Upon arrival at Arcadia, they find the townsfolk worried and tell the party that something terrible is happening in the mansion of Master Dominico. The party enters the mansion, finding Master Dominico being attacked by a noticeably possessed Jessica. Dominico's servant David tries to protect him, annoying Dominico, who manages to hold her off with a magical barrier. Jessica teleports away once the party intervenes, stating she will return. Dominico tells the party that he will be unable to create a magical barrier to protect himself unless the party helps him, asking them to fetch the Kran Spinels from Rydon at a house nearby. Rydon is nowhere to be found; however, his son informed the party he is currently building a tower to the north and gives them a stone sword, the key to the tower. After making their way up the tower, Rydon reveals his family has not had the Spinels in generations, stating he has not even seen them himself. However, he knows of their whereabouts in the same statue from the beginning of the game, back in Alexandria. Once again, they climb the tower near Alexandria, where they find the Spinels. The ghost of Alexandria appears, telling them that Jessica is the only one who can continue the Albert bloodline with Alistair dead, urging them to aid her. With the spinels retrieved, they return to Arcadia and find Dominico tormenting David. Inside, the party hands Dominico the jewels, who instruct them to retrieve him a book, "The Big Book of Barriers," from his secret library. Just as they do so, Jessica returns. Dominico orders them to go outside the mansion and try to stall her. Outside, the party encounter the possessed Jessica, who reveals that David is the real target, a descendant of a sage named Kupas, one of the seven who sealed away the Lord of Darkness, Rhapthorne.
The possessed Jessica attacks the party but is successfully defeated, causing her to summon a large spell to destroy the entire town. However, Dominico intervenes and casts the barrier, knocking Jessica out and protecting the town with Dominico's dog Sir. Leopold is running off with the scepter, and David orders to chase after him. Jessica is no longer possessed and taken back to the inn. The next day she reveals that she was under the control of the Rhapthorne, ordering her to seek out and destroy the seven sages' heirs so his seal would be broken. The people that Dhoulmagus previously killed were the descendants of these sages. They realize that the scepter is the power source and realize that David is in danger, returning to the mansion. There they find that Sir. Leopold has been possessed and has mortally wounded David. Discovering his body, Dominico realizes his wrongdoing, breaking down with the knowledge that he was meant to protect David the entire time. He urges the party to go after the possessed Leopold and defeat him, stating that it is his dog no more.
Marta faces Leopold.The party heads north for the snow-covered town of Orkutsk. Along the way, however, they end up in the middle of an avalanche. Luckily, they are dug out of the snow by a dog named Boris and wake up in Marta's house, who lives out in the mountains to grow herbs. She gives them each some herbs known as nook seeds, which protect them from the cold. The party asks her if she has seen Leopold headed in this direction, but she has not, suggesting they ask people at Orkutsk. After staying the night, Marta gives them a bag to deliver to Marek, and they set off for the town. Here they learn that Marek has set off to a cave to the northwest named the Herb Grotto to gather herbs. The party heads there and moves through the ice cave, where they finally manage to meet up with Marek, trapped inside the cave after running away from a pack of wolves and is freezing to death. Using the nook seeds from Marta's bag, however, he is brought back to health. Upon leaving the cave, they are attacked by a pack of hellhounds, under Leopold's control, but he realizes that Marek is not the heir he is searching for and calls them off. Back at Orkutsk, Marek reveals that Marta is his mother and, fearing for her safety, sends the party off to Marta's cottage to make sure she is okay. Upon arrival, they find the house is filled with hellhounds and make their way to ruins behind the cottage where they find Marta and Boris, who protect themselves in a magical barrier. However, Marek has arrived at the wrong time, and Leopold has taken him hostage and set fire to the cottage.
Leopold demands that Marta come forward and accept her fate, and he will let Marek go. Marta then gives the party the "Ultimate Key," a key that may open any chest or door. As Martha approaches, he reveals he will kill him anyway, but she throws nook seeds in his eyes, temporarily blinding him, allowing Boris to rescue Marek. Enraged, Leopold kills Marta; with only one heir left, he transforms into a creature with wings and flies to the east towards Lord High Priest's island. Marek tells the party that the only way for them to follow him is to enlist the God-bird Empyrea, telling them to read the tablets in the ruins to learn of its whereabouts. They learn that to find the God-bird Empyrea, they will require an illuminated sea chart. With the party assuming that Leopold is heading towards Lord High Priest's island, they head there and learn that Marcello has been appointed head of the guard, but Leopold is nowhere to be found.
Cash and Carrie.With no real clues, the party ends up at Baccarat. With Mr. Golding gone, his foster children Cash and Carrie are fighting over his inheritance. To decide who will inherit the family fortune, they are holding a contest and are seeking bodyguards. In order to be the rightful heir, one must travel to the Dragon Graveyard and obtain a mark of the family crest and be the first to bring it back. The party may choose to help either Cash or Carrie. Once decided, the party is treated to a banquet and go to sleep. The next morning, they realize sleeping powder was placed in their food and are already at a disadvantage, causing them to quickly make way for the southern area of the continent, in the middle of a harsh desert where the Dragon Graveyard is located. Making their wave through the cave, they discover that the opponent is in danger, being surrounded by a pair of beasts, Red Horn and Blue Fang. Their sibling attempts to come to the rescue but is knocked down, but they are saved when the party defeats the monsters. With such a close death encounter, the siblings agree to stop their rivalry, and the opponent decides to make the sibling the sole heir. With the monsters defeated, they make their way to the "Doors of Judgement" with the handles turning out to be scolding hot, which gives the heir the mark of the family crest. With the doors too heavy for a single person to move, the siblings decide they will both open them and share the fortune evenly. They return to Baccarat, and the party rest at the mansion. Afterward, they learn of a Pirate's Cove's location in a lake in the middle of the northeastern continent, which could hold the illuminated sea chart.
Using the key Marta gave them, they manage to gain access. Upon entry, a boat sails in with a familiar face: Red. She states that she too learned of the treasure inside the Cove and says the first person to find it gets to keep it and sets off. The party makes their way to the Cove's bottom, where they discover Red has beaten them to the treasure. Opening the chest, the ghost of Captain Crow appears, knocking Red unconscious. The party fight and defeats Captain Crow, who is impressed with their skill and allows them to take his treasure: The illuminated sea chart. Red is not impressed with the sea chart and decides she is happy with the 10,000 gold she picked up along the way and leaves.
The party meet Empyrea.Using the illuminated sea chart, they discover an X on the map, which they sail to. Upon reaching the X, a trail illuminates the water and leads the way to a secret entrance into the island where the God-bird Empyrea is located. On arrival, they see the shadow of a bird but fail to see anything in the sky. Making their way east to the town of Empycchu, they learn that the shadow belongs to Godbird Empyrea, who is very mysterious, showing only her shadow. This is because long ago, she aided in stopping an evil ruler from the Dark World who planned to enter the Light World. While she managed to stop him, she had no energy to return, and thus only her dark side, her shadow, remains. It is usually very rare to see but has been happening more and more frequently as of late. It is revealed that if they plan to enter the Dark World, they can use the bird's shadow as a portal, known as the "Dark Eye." Heading southwest, they discover an arc with the bird's shadow being cast around it. Following it, they discover the portal to the Dark World and enter it. The Dark World is a copy of the Light World, where everything except fire, water, and themselves is black and white. The party makes their way to the dark version of Empycchu, where the villagers there are baffled by their colorful appearance. They learn that Empyrea has attacked the village, and they plan to kill it. All the villagers speak a strange language except for the chief, who invites them into his house. He reveals that he knows that Empyrea would never have attacked the village by her own will. With his blessing, he wishes the party to discover what Empyrea wants and informs the party of where to find it, a rock formation known as "Empyrea's roost" to the southwest. When they reach the formation, they are attacked by Empyrea. After defeating her, she reveals that the fight was merely a test, and she requests the help of the party. After sealing away the world of darkness, she earned the enmity of the servants of Rhapthorne. Gemon, a servant of Rhapthorn's minions, has stolen her egg and is holding it hostage, who forced Empyrea to attack the village if she wanted to save her child. She asks the party to retrieve the egg for her, with the party agreeing, she takes them to the base of the mountain where the egg is located. They reach the top of the mountain where they encounter and defeat Gemon, but cannot save the egg, with Goemon destroying it as he dies. Empyrea arrives and mourns the death of her egg, but her child comes back as a ghost and tells the party he will do anything to help as thanks for trying to come to his rescue. He transforms into a soulstone, which will allow the party to transform into a bird at their will and fly. With their goal complete, the party leaves the dark world.
Leopold making a scene.With the power of flight, they head for the previously unreachable Tryan Valley, where humans, elves, and monsters all live happily together with the power of flight. King Trode is ecstatic to find another place where he can roam without ridicule and heads to the town's bar where he learns the story of Tryan Valley. The great sage Kupas once found an elve and a monster severely injured. Unable to see any creature in pain, he tended to their wounds. The monsters then swore their allegiance to Kupas and decided to establish a settlement where all creatures could live in peace.
Further exploring the town, they meet an elf named Raya. She tells the party that David used to live in the valley and knows of his death. Sensing his presence within the party and discovering they were there when he died, he asks them a favor. Rhapthorne is close to reawakening but can still be stopped. The only way to stop Rhapthorne from reawakening is to seal away the evil scepter that has contained him. Raya gives the party the "Darktree Leaf," which can point to a source of great evil when placed on a map. Using the leaf, they pinpoint Leopold's location and chase after him. Leopold lands at the home of the Lord High Priest, attempting to kill him. The party intervenes, however, and manages to kill Leopold once and for all. After the battle, Marchello and Rolo enter the room and discover the Lord High Priest still has a pulse, with Rolo ordering him to take the priest back to his chambers. However, Marchello believes that Rolo hired the party to attack the Lord High Priest to take his position. The party and Rolo are exiled to Purgatory Island, and Marchello picks up the scepter. With the Lord High Priest dying due to shock and Rolo out of the picture, Marchello plans to take the position for himself. Suddenly, the scepter begins consuming him, growing thorns around his arm, but Marchello manages to cut off the thorns and resist the scepter, stating he will not take orders. At Purgatory Island, they learn that all the inmates were sent there with the plotting of Rolo and Marchello, attempting to pave their way to the High Priest position. After a month of being imprisoned, the party discovers that the High Priest has been killed and conclude that Marchello is the culprit. Deciding that escape is their only option, they use the old "guard, I am sick" trick, managing to break out of their cell. However, when attempting to escape, they learn that one person must stay behind to operate the lift, with Rolo offering to stay behind, stating that even if he escaped, the church would catch up with him sooner or later.
Rhapthorn shows his true form.After escaping, they make their way back to their boat and decide it is time to go after Marchello, heading for the kingdom of Neos. Here they find Marchello addressing a large audience, assuring that the High Priest died due to natural causes and that he has no intention of becoming the next Lord High Priest, stating that such a title is unsuitable for him and that the High Priest never achieved anything and that all kinds and goddesses are the same, incompetent upon their throne. Being born into a common home with no nobility in his veins, he sees himself as a much more capable ruler. He commands the audience to follow him and oust the world's rulers and appoint him as the new leader. For those who refuse, he states they will meet the same fate as the party, whom he sends guards after. Luckily, the soul stone of Empyrea transports them away from danger and towards Marchello, attacking him. However, after being defeated, they learn that his strength was the only thing keeping Rhapthorne at bay, allowing him to transform fully. With all the heirs gone, he can reawaken, using the scepter to destroy the city's massive statue and causing it to rise above the ground, enveloping the world in darkness. After awakening, the party finds Marchello holding on for his life at the edge of a bridge. Before falling, Angelo catches him. Marchello orders him to let go stating that he could have had all of Rhapthorne's power, but it is now all over. Marchello refuses, telling him he will be forced to live on in a world where the brother he once despised took pity on him, where he will not get to have everything his way. When Angelo first came to the Abbey after losing his family, Marchello was the first person he spoke to, who treated him with genuine kindness but turned his back on him after learning who he was. Marchello leaves, stating that Angelo will regret the day he saved his life.
Marchello then gives Angelo his templar ring, telling him it means nothing to him now. With no other options, the party set off for Rhapthorns hideout: The Black Citadel. After moving through the illusions of the Citadel, they finally encounter Rhapthorne in his reawakened form. He plans to combine both the World of Light and the World of Darkness, which he will rule. After managing to defeat him, the Citadel begins to collapse, with the party managing to escape just in time using the God-bird soul stone, facing monsters, statues of themselves, and a giant colossus along the way. However, Rhapthorne has grown even stronger, growing to an enormous size and summoning innumerable monsters and sending them after the party, breaking their bird form and sending them falling to the world below. Rhapthorne then opens the gate between the Light and Dark Worlds, but this allows Empyrea to come through and rescue the party. Rhapthorn has assumed his full physical form and as such, sealing him away is out of the question; the only option is to defeat him in battle. However, to defeat him, his shield must first be brought down. Empyrea gives the party the Echo Flute, which can be used to locate the orbs containing the souls of those who sealed Rhapthorn away long ago. These orbs are the only thing that can bring down the shield to defeat Rhapthorn.
Medea and the HeroTo find the orbs, the party must travel to the places where the heirs were murdered, sending them around the world and collecting them from places they have previously visited. After collecting all of the orbs, the party return to Empyrea, who gives them the Scepter of Trodain. The party is fearful, but Empyrea assures them it is safe, no longer holding the soul of Rhapthorn but instead holding the seven sages' souls. It is revealed that Empyrea was the person who crafted the scepter in the first place, and it was originally named the God-bird Scepter. Using it, they can destroy the dark shield around Rhapthorn. With their objective in mind, Empyrea and the party set off to defeat Rhapthorn once and for all. In order to bring down Rhapthorn's shield, the entire party must pray to the God-bird scepter a total of seven times for each sage. After calling forth all sages, Rhapthorn's shield is destroyed, leaving him open to physical attacks and allowing the party to finally defeat him, perishing him in a large explosion. They are returned to Trodain by Empyrea Toe, and Medea is awaiting them. Questioning whether they will return to their former selves, Empyrea assures them that Rhapthorn's power is fading and that her true name is Ramia. She then leaves, taking the Soulstone with her. With Rhapthto defeat him, perishing him in a large explosion. Finally, inhabitants return to normal, ecstatic, Trode throws a banquet in celebration. Several months later, the Hero is in Trodain and has been promoted to the head of guards and has been tasked with ecortidea to Savella Cathedral and is joined by his former party. Yangus has visited him and tells him he has given up crime and has become an honest merchant, traveling the world trading goods. Angelo has also arrived and is flirting with the castle's women. He, too, has been traveling the world, repaying the kindness that the Abbot showed him when he was alone. He also meets up with Jessica, who scolds him for not visiting her in Alexandria and reveals that Yangus and Red are now together. The Hero finally finds Medea on the third floor, playing the piano. She is visibly against the marriage and reminisces about her time with the Hero, but leaves the castle anyway. At the cathedral, they find that Prince Charmles is as obnoxious as ever and refuses "commoners" to be allowed to view the ceremony. Enraged, Angelo urges the Hero to protect Medea's happiness by kidnapping her and taking her to safety. With Yangus' help, the Hero breaks through the cathedral entrance but learns that Medea has disappeared. Charmles blames her disappearance on the Hero and demands the guards to seize him. Escaping, the Hero meets up with the rest of the party, who find Medea and King Trode surrounded by guards. King Trode urges the Hero to take Medea away from here, stating that he cannot allow her to marry someone as arrogant as Charmles. The party and Trode escape, leaving Charles at the altar. He demands that the guard retrieve the princess, causing his father to scold him, telling him that he thinks he can solve all his problems with only wealth and power. The Hero and Princess Medea set off in a marriage driven by Trode with Jessica, Yangus, and Angelo looking on.
Log in to comment