3D sculpting tutorial: Live
By warxsnake 4 Comments
Anyway, feel free to check it out @ http://www.livestream.com/warxsnake
Or if you are interested, suggest a different format or whatever.
Fast-Sculpting a character now.
J.E.F.F.
By warxsnake 164 Comments
I was listening to the Tron soundtrack again and was reminded how Jeff liked the movie and Tron in general, and also how he likes ME2. Decided to doodle/sculpt a tron-jeff for some zbrush practice
voilà :P

Tutorial :: Rapid 3D conceptualization (Zbrush)
By warxsnake 14 Comments
Warrap
So here I'll show you what it takes (or at elast my workflow) to create quick 1-2 hour high res "doodles", or 3D concepts, in zbrush. Usually in the gaming business, concepts are obviously done in photoshop with traditional painting styles. However, with powerful tools like zbrush, you can now make concepts straight in 3D, high res as well, which is incredibly useful, since if the concept is approved lets say, you can just take your concept to the next level and polish it to make the final high res version of whatever you are making.
So in this instance, I'm doodling a fucking weird creature, I have no refs (stupid, always have refs on the side), and I'm kinda going by feel as to what my creature is going to look like. I like this method of working, it's pretty natural and nothing is pre-planned, you never know what you are going to end up with, and if you are lucky you might end up on something great. In the industry, this is called Happy Accidents... and it happens a lot.
As you will see, the creature I decided to go for is a retarded mix of dinosaur, spider, crab-thing, no I don't smoke.
(if the video streaming quality is shit, which i'm guessing it will be, you can download the mov version from the vimeo site)
So to start, since this is a pretty organic thing with limbs n shit, I start directly in zbrush with zspheres; this allows me to create the armature and basic shape of the creature... where the limbs are, body, size. This is the opposite method of what I did in my other tutorial way back then, since that was a knife I preferred to make a basic but "controlled" shape in 3dsmax that I brought into zbrush to sculpt over.
Anyway whatever, once I'm done screwing with the zspheres (as you can see, I went from Inverted Penis -> Scorpion Shape -> Spider Dinosaur) - Everything in zbrush starts with a penis shape btw - I turn the zsphere structure into a mesh, with pretty low resolution.
You want to start low-res to easily modify the general shape of whatever you are doing. It's a bad idea to just start subdividing right after making the mesh, its hard to modify if you want to make big changes. Anyway that's the way I do it, you can it whichever way you want.
Once I have modified the low res to a better shape (using Move Brush, Inflate Brush, Standard Brush, etc), I then start subdividing to achieve a high polycount (high res). Usually I subdivide-modify shape ; subdivide-modify shape, iteratively to get the best shape in the end, but in this case I had a pretty good shape in low res, I just subdivided a few times till I got to around 4 million polygons (decent high res) and started the detail work.
So after subdividing, I'm ready to actually do cool stuff on it. Again, 3D artists work in different and mysterious ways, my way is to use a rough brush on my first pass(Clay Tubes Brush). I use this to define general muscle mass and in the same time add texture (loooots of texture) to my model. This process starts at 1:58 in the vid. This is the same way I started the detail work on the knife in the other tutorial.
You can see me switch materials (shading of the model) during work to get different perspectives on the model, sometimes you don't want strong shadows, to be able to see some areas, other materials highlight crevices and creases (for detail work), etc.
You can also see sometimes I return back to the first subdivision state (low res) to perform bigger modifications to the overall shape; because it's easier for the program to handle and you don't mess any detail work, all your high res work stays intact while you modify or repose the low res model.
Once I'm done using the Clay Tubes Brush to define muscle mass and general shape, I start using different brushes for detail (4:50). The one I use the most isdam_standard which creases and bumps in the same time. It's my favorite brush for fine detail, in this case defining the muscles and adding skin detail, features, etc.
Other brushes I use a lot are Flattening brushes, Slash brushes, Inflate, Standard, Smooth.
As you can probably tell, I didn't care much for the legs, I was lazy (usually thin objects in zbrush are hard to sculpt without carefully paying attention to what you are doing, couldn't be fucked with that). Anyway again, this is the workflow for a doodle/concept, not a fully fledged high res finished model, it's kinda like speed painting, do wtvr the fuck you want.
Like I said before, always go back to the low res to modify or fix large portions of the model, in this case, I modified the head a few times in low res to make it smaller and less cartoony as a result (in the very end), among other stuff.
Anyway, hope you enjoyed this look into rapid 3d doodling / speed sculpting
--
As a bonus, here's a doodle of a mass effect-inspired character portrait I made a while back (mix of turian/krogan/cobra snake). Couldn't record a timelapse vid of this because I kinda went on and off on this particular doodle and forgot to record some parts (mainly the part where a bucket of white paint exploded on the dude's face :D). I used the same workflow however, as well as coloring (polypaint) which I explain in the previous tutorial and is shown in the timelapse vid.
http://warxsnake.deviantart.com/art/Creatures-01-140065384

Tutorial :: Creating weapons for next-gen games ::
By warxsnake 29 Comments
Sup
So here I will be showing you the entire process behind making a weapon for a next-gen game/engine. I chose to make an organic weapon, a prehistoric / tribal dagger of sorts, since it's probably the easiest and fastest way to show the process. You can interpolate the same process for any other kind of organic weapon, staffs, bows, swords, etc... it just takes longer and there are more steps in the planning / sculpting stage to consider. Even though we are just dealing with a dagger here, all the important steps are there. Again this method is mostly used for organic non-mechanical objects.
While nothing stops you from sculpting a gun or rifle in zbrush (it's totally up to you), it's way more sensible to use a program like 3dsmax or XSI for mechanical hard-edge objects, so that you get good results.
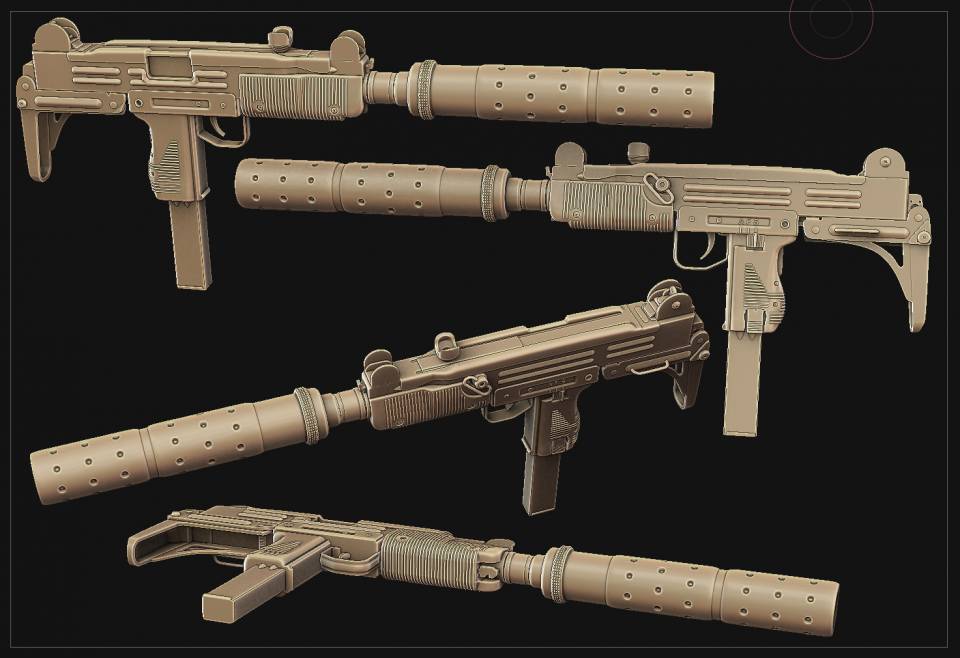
People ask me all the time what takes longer to create, something organic or mechanical? While it depends what you are making first of all, it usually takes waaaaaaaaaaay longer to make mechanical stuff, like the Uzi Sub Machine Gun that I linked in the intro blog. That took 2 days to create the high res model, and if I have the time, I will show you exactly why. Whereas what I am about to show you, took about an hour or so to create (and texture) the high res.
So let's get started with the basics. It's organic, so we bust out the Wacom and zbrush to sculpt it. Usually when I do a 3D doodle and I'm not really sure what direction I will be taking, so I start everything in zbrush, like in the timelapse video I showed in the previous blog. However, since I know what I will be doing from the start in this case, it's easier to model a base mesh in 3dsmax of roughly what my model will be. When you create a base mesh in max to be imported into zbrush, you want your objects to have consistent subdivision of polygons, so when you subdivide the object in zbrush, you will not get areas which are more subdivided than others. And it's even more important to have your object in quads (4 sided polygons), and not triangles, which will subdivide like shit in zbrush.
So here we go, we are doing a dagger right? so we go into 3dsmax, and we model extremely basic shapes, as basic as you can have it, while determining the core shape of the object. This is what we get:
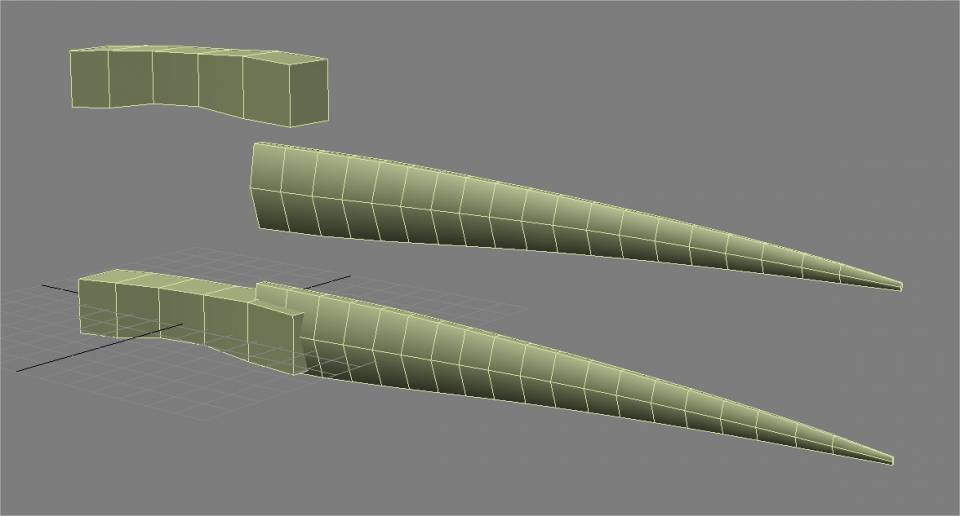
Now that we have our base mesh, we export it to zbrush. We could have used a single piece for the whole thing, but it's better to split your object into manageable parts.
So we export the handle, and then the blade, as separate files. We export them as .OBJ which is the most common 3D filetype in the industry (game/movies). Every 3D program should be able to read an OBJ file, if it doesn't, don't use it.
So now that we have both pieces exported and ready as OBJs, we import them into zbrush 1 by 1 and into the same zbrush document. We consequently get two subtools in zbrush, the handle, and the blade.
Now for the fun part! We are about to sculpt that piece of shit into a dagger. So what we do is go to giantbomb.com/podcast, load up the latest bombcast (this is key), and start working. I didn't use any references this time, so I kind of sculpted "whatever", but it's usually a good idea to bring up pictures of ancient weapons in this case, and put them up on the second monitor to get some good ideas; or obviously if you are working from a 2D concept or model sheet, put that up on the second monitor.
Now when you are sculpting, the main workflow is to work as much detail as you can at your current subdivision level (polygonal count). So at the low polygon levels, you want to move stuff around and get the general shape in. Once you start subdiving into the hundreds of thousands or millions of polygons, you can then start detailing. Once the sculpting process is complete, you can then paint color over the millions of polygons you have, which is called... holy crap... PolyPainting. Sculpting and coloring it took me roughly the amount of time to listen to the PAXcast, so roughly an hour and a few minutes. (sorry for the shit vimeo quality which blurs everything out, you can download the quicktime version at the video's webpage if you want)
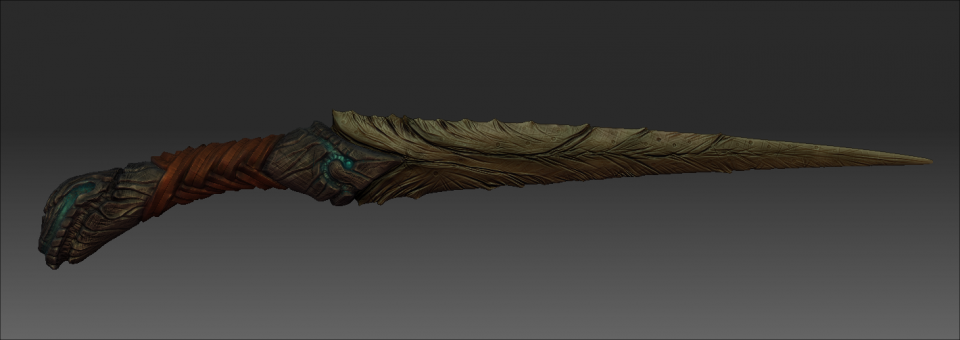
Okay, so now that the sculpting (and high res is complete), what we are going to take out from this is the high res mesh itself, the coloring (diffuse map) since we painted it, and also we are going to create our low-res model straight from zbrush thanks to a zbrush plugin called decimation master. What decimation master does is take a high-res model in the millions of polygons and reduces it down to whatever polycount you are aiming for.
In this case, our low-res will be about 5000-10,000 tris, which is good for First Person Games. That's actually a lot for a knife in a FPS, but that's fine for now. If we were making a low res of this for a Third Person Game, we would have had made a low res of 1000-5,000 tris, depending on the complexity. This dagger is pretty simple so we can keep things low.
Here comes a complicated part. We need to export our color painting off of the high res and onto the low res, right? To do that, we need it to have a texture unwrap on it. But wait, to decimate the model, we had to combine both subtools into a single piece. And when you combine both pieces into a single object, zbrush loses the unwrap that both subtools previously had, and also zbrush loses the subdivision history, so you can't go back to your low res version! So we have to reconstruct the object that you have above, while having it keep the coloring. This involves a tricky step in zbrush where you duplicate the model and reconstruct one of them so that you can have access to lower subdivisions. You also have it borrow the color polypaint. Once you do these two things, you will have an object that has all its subdivision states along with the colors! Now that you have that, to export the coloring into a PSD from zbrush, like every other object, you go to the lowest subdivision and export the color texture. Pretty complicated shit eh? I haven't even started.
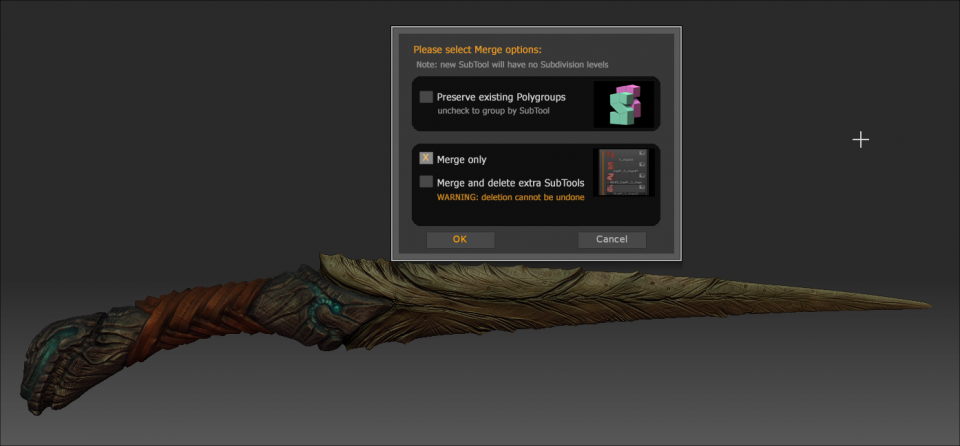

So now that I reconstructed the high res via a cloned high res, I can now go through all the subdivisions and I have the polypaint intact and available at the lowest subdivision! This is key because when you export a texture (the colors) from zbrush, you want to export from the lowest subdivision of your object so that it doesn't fuck up the texture you are exporting:
Dagger Reconstruct from Gregory Rassam on Vimeo.
So from the lowest subdivision you see there at the end of the video, I use GUVTiles on the object so that it generates an unwrap for the object.
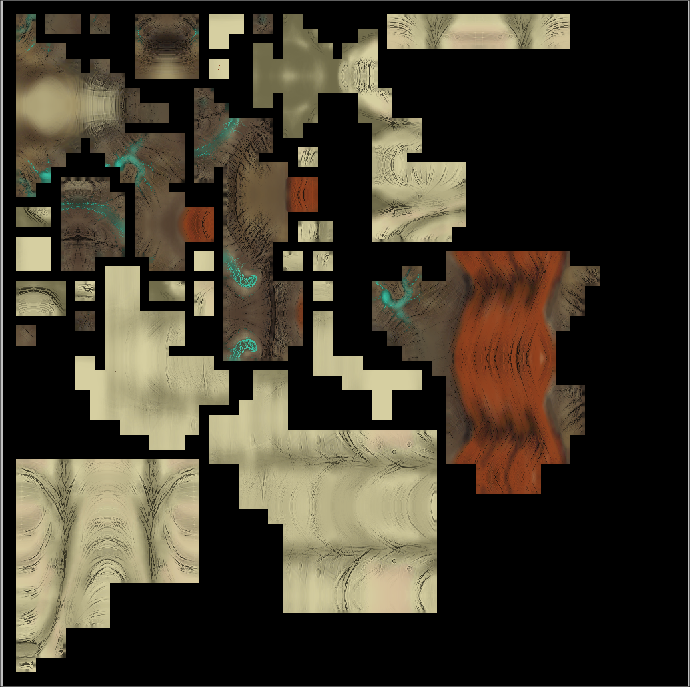
Now we decimate the high res model to get a cool looking low res model, you dont need to use Decimation Master, you can do this manually my modeling your own low poly over the high res, its just that decimation master is quicker for that stuff:
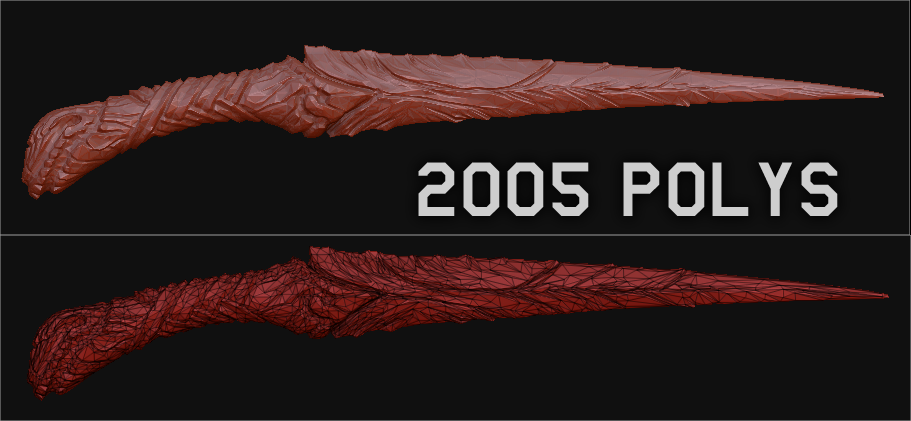
We then export the decimated low res and import into 3dsmax where we will unwrap the low res. This is so that the low res can "accept" the Color map, Normal map, Spec map, Ambient Occlusion map, that we will be giving it. Since the dagger is symmetrical, we can save texture space by deleting one side of the dagger and only unwrapping that part. Once one side is unwrapped, we then mirror the mesh so that it gets the other side back, just that the other side uses the exact same unwrap the first side is using. Unwrapping is the least fun job of an artist, like, ever.
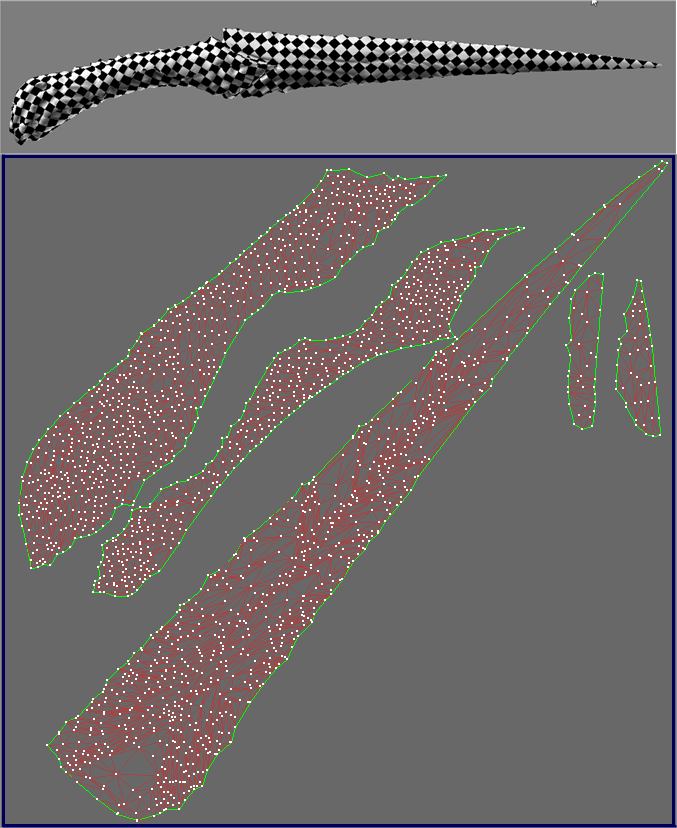
Now that we have our low res unwrapped, we can finally start the most important process, transferring all the shit from the high res to the low res. I use x-normal for that. In x-normal, you have to:
- Import High Res models
- Convert High Res Models from OBJ to SBM
- Import Low Res Models
- Apply Diffuse texture to High Res Models (zbrush's exported texture, has to be flipped vertically).
- Set values for proper normal baking (ray distances between high res and low res)
- Bake and save normal map
- Bake and save Diffuse map
- Bake and save Ambient Occlusion map
- Bake and save Cavity Map (optional)
Now for some photoshop magic, we will take these three maps and combine them in photoshop in different ways to create better textures than this default crap.
Once the awesome-sauce textures are done, we test them in 3dsmax on the model to see if anything is wrong. The textures I made in this case are:
- Diffuse map (color of object)
- Specular map (Shininess of object and color of shine)
- Normal map (3D light information of object)
- Self-Illumination map (Glow, for the blue parts of the knife)
After this it's pretty much exporting to whatever engine you want. I'll be exporting to Unreal Engine 3. I don't have much experience with it since we don't use it at Ubisoft, we use Anvil and Dunia instead. However, it's a learning process for all of us so let's do it for UE3.
After importing an ASE. of your low res and TGAs of your diffuse, normal, spec, emissive (self illumination) into the package of your choice, you can now place your object into the engine, create a new material and link those textures into the corresponding slots in the material.
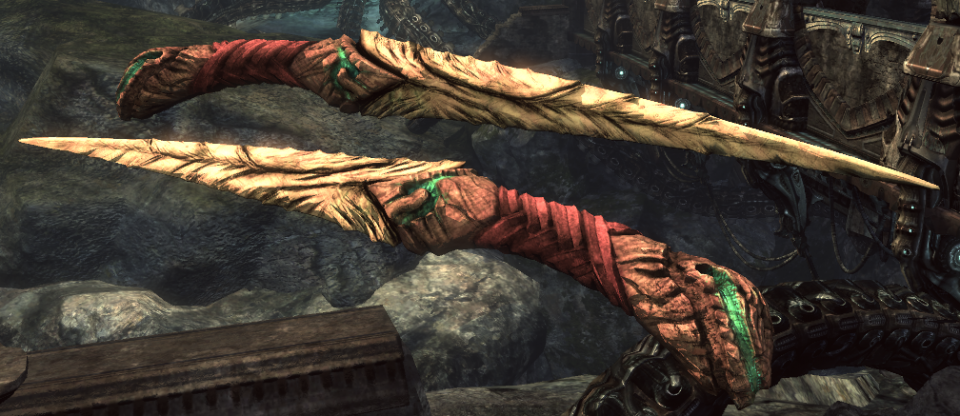
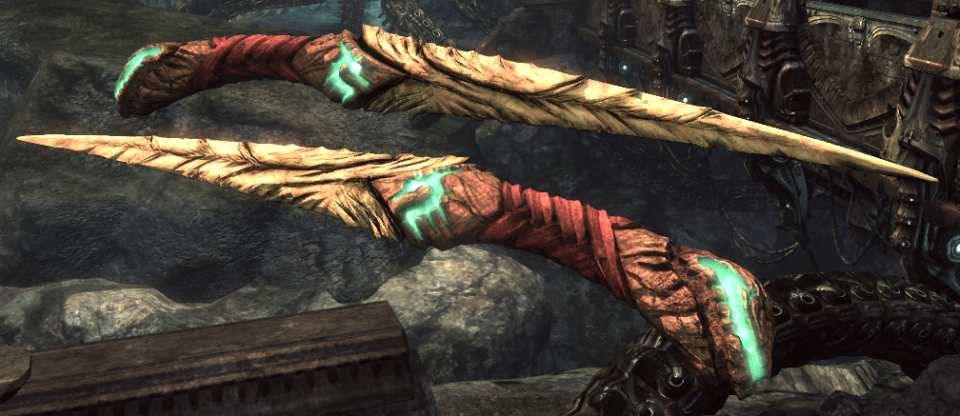
Tadaa! That's it. All that is left technically is to create LODs (level of detail over distance) and since its a weapon, animation riggers will set up bone systems on the weapon so characters in the game can hold it. As an artist, your part is done right about now.
Hope you enjoyed this little tutorial/look into what it takes to create assets for a game these days.
Tutorial :: How to create assets for a next-gen game :: Intro
By warxsnake 16 Comments
Sup
I will be making a series of tutorials about creating visual assets for "next-gen" games, both as a way to help aspiring game artists in the GB community, and as a measure for me to get off my lazy gaming ass and work more at home. At first I had written out paragraphs of how stuff like normals maps and ambient occlusion works, why we use them, etc, but it got waaaay too long, and I'm not good at explaining so.. I deleted that shit. What I will do is skip the history lessons of how normal maps came into play in the gaming industry and just show you how this shit works.
So basically, there are many ways to make objects for next gen games these days, and the way you do it depends on what you are doing. To keep it short, basically, the workflow is you want to make a high res version of whatever the fuck you are doing, and "bake" information from that high res onto a game-friendly low res version of the same object, whether its a weapon, prop, character, whatever. Now there are different ways of doing that, even...
So if you are doing something organic, you want to first create a high res model in zbrush since zbrush is the shit for anything organic.... and if you want to do something mechanical, you can use any of the "classic" modeling applications like 3dsmax, maya, xsi, silo, which are powerful to create, yes, mechanical stuff. Nothing is stopping you from creating mechanical stuff in zbrush, it just depends on your skill and whether you want to fuck with 3D brushes instead of verteces to create mechanical stuff. The same thing goes for creating organic shit in 3dsmax or classic modeling apps... why the fuck would you want to when zbrush is pretty powerful for that shit.
So surprise! I will fucking show you how to make both mechanical and organic in-game assets using the programs I mentioned above and the workflow that most game artists use today, which is to... again...... create a damn High Res, create a Low Res, and import all sorts of data from the high onto your game-ready low res.
Information that can be taken from a high res and applied to the low res model:
- Diffuse map (if you used zbrush polypaint, basically you are painting over millions of polygons which gives you a diffuse that you then export to the low res model)
- Specular map
- Ambient Occlusion
- Normal Map
- Cavity Map
Normal map is basically a 2D image with lighting information applied to a 3D model to make it look awesome-sauce. All those tiny effing details you see on Marcus Fenix's cod piece is thanks to normal maps. All those details were painstakingly sculpted and modeled and then transfered to the in-game model thanks to Mr Normal.
Ambient Occlusion is basically shadow detail taken from.... goddamnit... the high res.. and transferred to the low res. So fuck, its basically the same thing, but for shadows, right? yes correct.
Now for the programs you need (or the programs that I use, you dont need to use exactly the same, you can use other shit if you are more accustomed to it, whatever)
- 3dsmax 8,9,2008,2009,2010 (holy version clusterfuck batman, btw 2010 is the worst sack of shit ive ever used, use 2008 or 2009)
- Zbrush 3.1 (this program is just magical, i cream my pants every time I think about it)
- Photoshop CS3 (everybody knows photoshop rite? if you dont, ask 4chan)
- xnormal (middle-man program, used for exporting all sorts of normal maps and ambientz from high res to low res, its the shit, use it and learn it, grasshoppah)
- Crazybump (pretty CRAZY program.... lul... no but anyway, its good for creating normal maps from everyday textures like mom used to make, its more useful for environment textures, you dont need it for assets)
Useful Zbrush Plugins (Free!)
- Decimation Master (like holy shit, take a 6million polygon model and reduce it to 2,000 polygons without losing shape/silhouette, yet another magical program)
- Subtool Master (merge, mirror, copy, and generally fuck with subtools in zbrush)
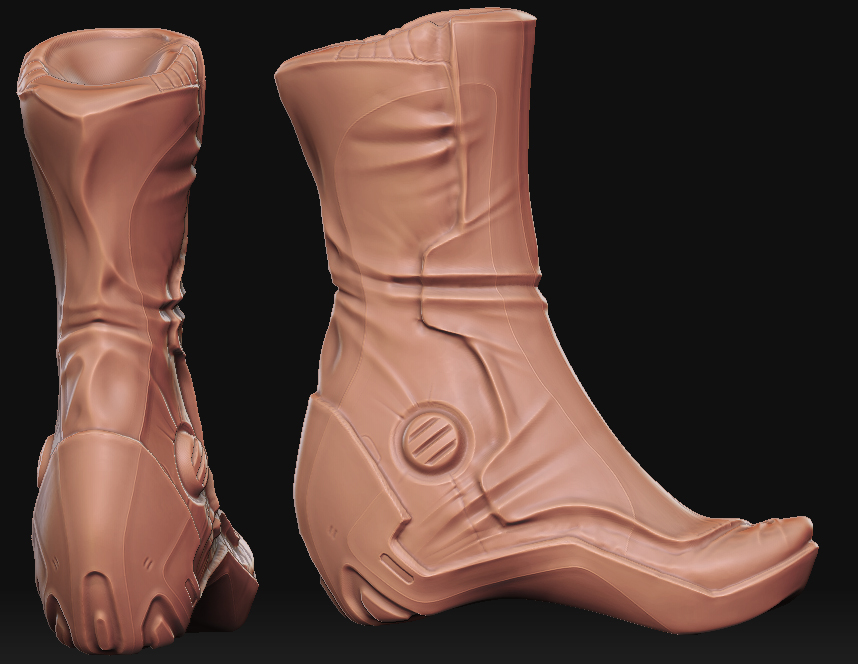
So now I'm gonna need some time to set up vids and actually make assets for you guys and I will update the thread. While waiting here's some shwag
Games to buy :: 2009 - 2010
By warxsnake 11 Comments
Dirt 2 (PC)
Resident Evil 5 (PC)
Red Faction Guerrilla (PC)
batman Arkham Asylum (PC)
Need for speed Shift (PC)
Alpha Protocol (PC)
Operation Flashpoint 2 (PC)
Cities XL (PC)
Fallout 3 GOTY (PC)
Brutal Legend (PS3)
Tropico 3 (PC)
Borderlands (PC)
Uncharted 2 (PS3)
Dragon Age Origins (PC)
Call of Duty Modern Warfare 2 (PC and PS3)
Assassin's Creed II (free - PC)
Left 4 Dead 2 (PC)
James Cameron's Avatar: The Game (free - PC)
The Saboteur (PC)
Max Payne 3 (PC)
Aliens: Colonial Marines (PC)
Bayonetta (PS3)
Jumpgate Evolution (PC)
God of War III (PS3)
Tom Clancy's Splinter Cell: Conviction (free - PC)
Dark Void (PC)
BioShock 2 (PC)
Just Cause 2 (PC)
Heavy Rain (PS3)
Mass Effect 2 (PC)
BattleField 1943 (PC)
Mafia II (PC)
Starcraft II (PC)
Half-Life 2 Episode 3 (PC)
Singularity (PC)
Deus Ex 3 (PC)
Dante's Inferno (PC)
Lost Planet 2 (PS3)
Fallout: New Vegas (PC)
The Last Guardian (PS3)
MGS: Rising (PC)
$$$ :(
Some 3D stuff (recent and old)
By warxsnake 31 Comments
Here's a city scene heavily inspired by Mirror's Edge. Also made a low-res vehicle for it, but it's still a work in progress:
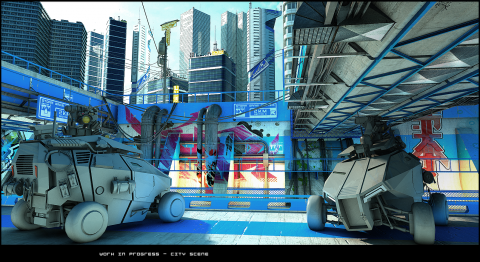
Full view link:
http://img.photobucket.com/albums/v204/SithSnake/CityScene_WorkinProgress2.png?t=1237148569
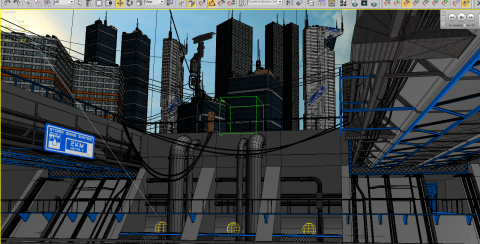
Here's a wireframe shot of part of the scene and most of the background:
Here's some work on the actual vehicles, including the animation rig (suspension,etc):
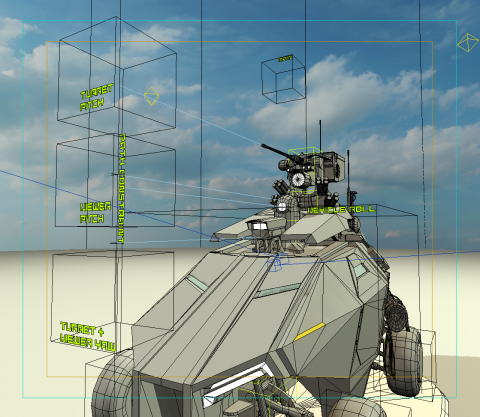
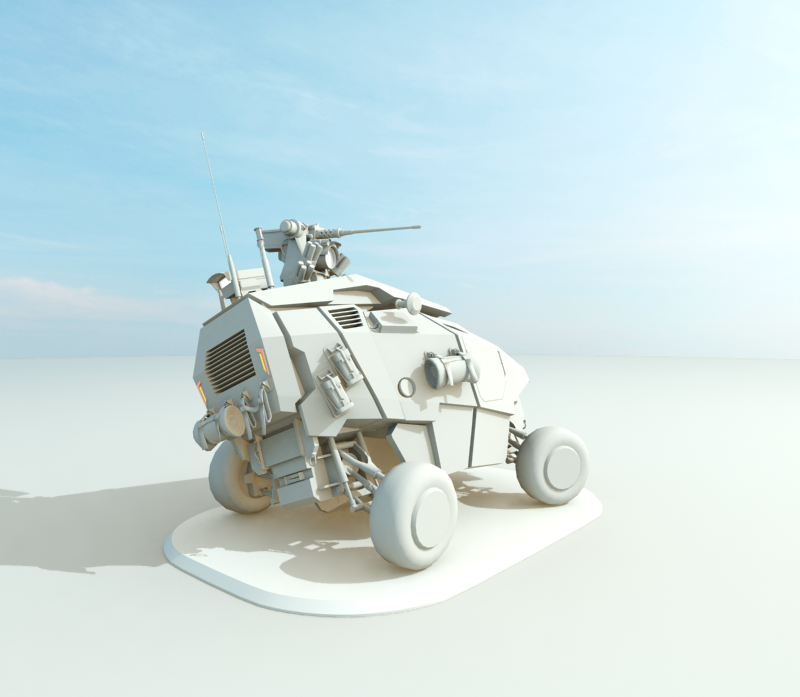
Some global Illumination renders of the vehicle alone (inspired by the Israeli UGV Gardium):

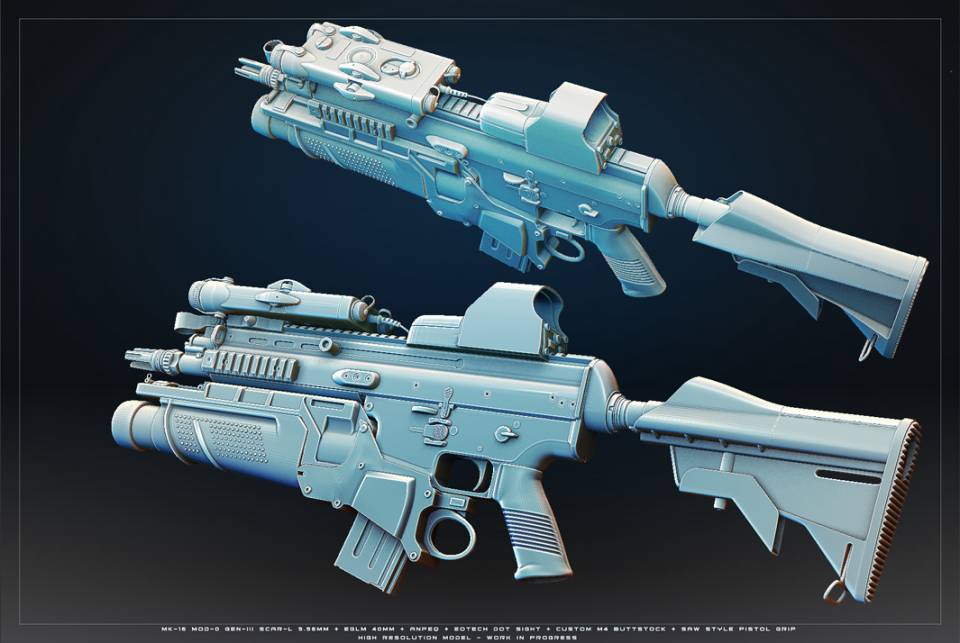
Here's another portfolio piece, a high res model of a FN SCAR-L with some addons, like a custom saw-style pistol grip, a custom buttstock, an EOTECH dot sight, an ANPEQ2 laser/LED, and of course, the EGLM 40mm grenade Launcher:
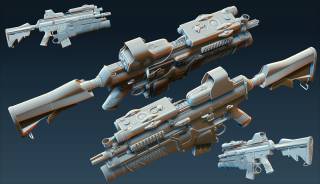
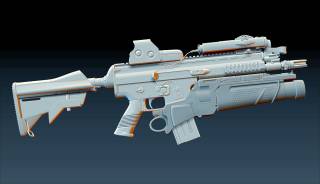
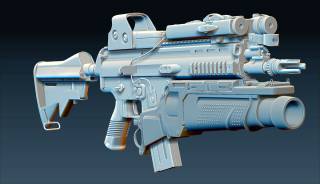
Full view:
http://img.photobucket.com/albums/v204/SithSnake/SCARDev.png
And here is some weird organic stuff (I don't specialize in organic modeling so it's a little noobish):
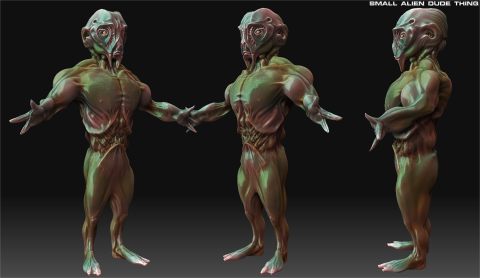
And... this...

Full: http://img.photobucket.com/albums/v204/SithSnake/ZB09.png?t=1237149330
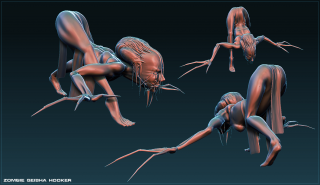
Full: http://img.photobucket.com/albums/v204/SithSnake/ZB03.png?t=1237149337
yeah I know, the hair is shit.
What more could someone ask for?
By warxsnake 1 Comments
The game guru duo is back and if official now, with elite sidekicks like Vin and Brad, really what more could someone ask for? Actually, err, maybe a Rich Gallup guest super podcast? lol.
Have a great launch and I wish you the best!


Log in to comment