
The Quest For The Worst Adventure Game Puzzles - The Legend of Kyrandia: Book One [Part 2]
By ZombiePie 4 Comments
Author's Note: This the second part of a two-part series on The Legend of Kyrandia. If you missed the first part please click this link:
If you enjoy this blog and would like to read my other adventure game retrospectives, here's a list of my previous episodes of this series:
- Episode 1: The Dig
- Episode 2: Atlantis: The Lost Tales
- Episode 3: Loom
- Episode 4: Drowned God
- Episode 5a: Indiana Jones and the Fate of Atlantis Part 1 & Episode 5b: Indiana Jones and the Fate of Atlantis - Part 2
- Episode 6: The Journeyman Project: Pegasus Prime
- Episode 7a: The Journeyman Project 2: Buried in Time (Part 1) & Episode 7b: The Journeyman Project 2: Buried in Time (Part 2)
- Episode 8a: The Journeyman Project 3: Legacy of Time (Part 1) & Episode 8B: The Journeyman Project 3: Legacy of Time (Part 2)
Ratings Explained: I'm using a continuum ranging from 1 to 10. Puzzles ranging from one to four are considered accessible sequences or set pieces that can be solved without guides or hints, regardless of your puzzle game expertise. Puzzles ranked between five and six are ones that only intermediate puzzle game players can solve, but beginners can solve in-game through clues, hints, or significant trial-and-error. From seven and above, we get into puzzles that most players cannot solve without consulting outside resources. Also in this category are puzzles that have major accessibility issues.
Zanthia's Area
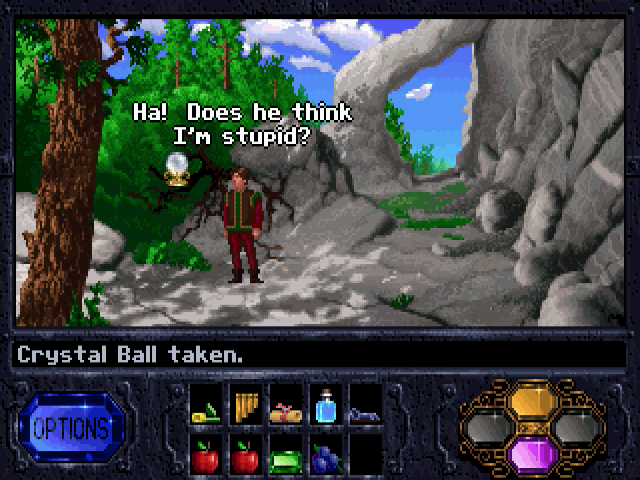
Picking Up The Crystal Ball - [Rating: 4/10] - I did mention in the last episode that Legend of Kyrandia's difficulty drops off a cliff. While there are some tricky sequences in the following two acts, nothing therein remotely rivals the cave labyrinth or birthstone quest. Regardless, with Brandon awakening from his slumber, he discovers himself in the laboratory of Kyrandia's most extraordinary alchemist, Zanthia. She reveals that she knows about Brandon's quest and plans to help him if he is willing to help her first. She asks Brandon to collect water from a magical fountain using a beaker. However, when you reach the fountain, Malcolm arrives and destroys it. You'll need to find a crystal ball to repair the fountain before you can collect the water. For the first step, you will need to move Bandon Down, Down, Left, Left, Left, Up, and Up from the fountain. Brandon will notice a bush on fire, and if he uses the frost scroll on it, he will be able to nab a crystal ball previously protected by the flames. Return to the fountain, and place the crystal ball into the area Malcolm destroyed.
This sequence is not too demanding but is yet another friendly reminder of Kyrandia's open-world format. If you decide to play the game blind, you might end up doing things out of sequence, which is still perfectly acceptable. Instead of prioritizing the crystal ball, you could also get the Royal Chalice or some blueberries Zanthia will ask for later. There's more than one way to skin a cat in Kyrandia, which makes things more engaging. For me, the only part of this equation I dislike is how unnecessarily separated important locations are from one another. There are so many interstitial levels that add NOTHING to the game, or its mechanical progression other than the designers wanted the game's world to feel bigger. Two of them are even named the same thing (i.e., "A Rocky Wall"), making it challenging to know where you are going.
Getting The Dispel Ability - [Rating: 2/10] - Here's something I forgot to do the first time I played the game. When you first collect the magical water from the fountain, you should drink one bottle rather than immediately depart for Zanthia's laboratory. Doing so unlocks the blue section of Brandon's amulet and provides the game's "Dispel" ability. Suppose you accidentally go to Zanthia's laboratory first. In that case, Zanthia will take the bottle and then hand over a new empty bottle in return. It's an impossible sequence to fail, but one you can make quicker, and I appreciate that. Though, due to the dialogue and writing in the game being as strong as it is, I think the least efficient route is the recommended one. Zanthia's snark is one of the best parts of the first game, and that's what makes the second game the best in the franchise.
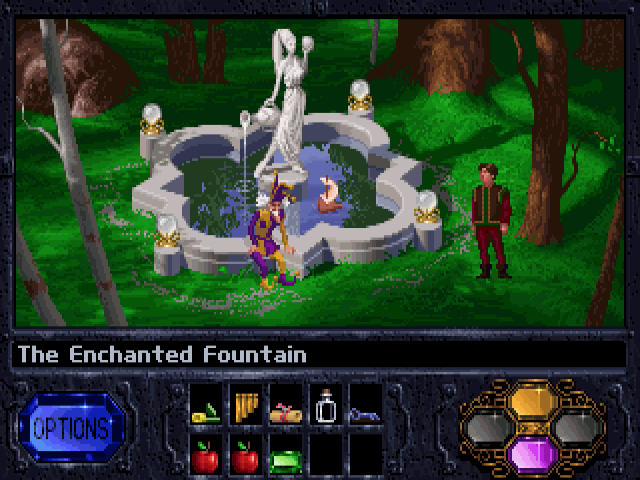
Fixing The Ruined Fountain & Collecting Water - [Rating: 2/10] - Oh, but I forgot to review the process of repairing the fountain and what happens after that! All you need to do is place the crystal ball into a broken light fixture, which causes it to transform back to its original state. Magic is a beautiful thing. It is worth mentioning that when you use items on parts of the environment, they have hitboxes, and the fountain, for whatever reason, has an incredibly picky hitbox. It's a minor annoyance, but with this being a click-based adventure game, it's worth mentioning. When you deliver the bottle of water to Zanthia, she provides a new glass. This action ducktails into another fiddly aspect of the game I have to mention. When the game gives you an item after a dialogue sequence or cutscene, it automatically gives it to you without placing it in your inventory. That means if you make any click besides putting the item into an inventory slot, the game flings it out of Brandon's hands to bounce around the environment before landing on a spot the game will allow it to rest. This design quirk is not a deal-breaker, but it isn't enjoyable when it happens.
Getting Zanthia Three Blueberries - [Rating: 3/10] - After completing the first part of Zanthia's quest, she then asks Brandon to fetch her three blueberries. Before you depart, there is a second empty flask for you to pick up in the lab in the background near Zanthia. The nearest blueberry bush is, predictably, a long walk away from Zanthia. The best route for Brandon is Left, Left, Down, Down, Left, Left, Left, Up, Left, Left, Left, and finally, Up. Considering all you do is pick three blueberries, I think that is at least five to six steps too many. There's no puzzle to solve when you find the berry bush. The bush is front and center in the screen, and nothing impedes Brandon's foraging. It is a glorified fetch quest, with the game getting a little indulgent with its tour of Zanthia's domain.
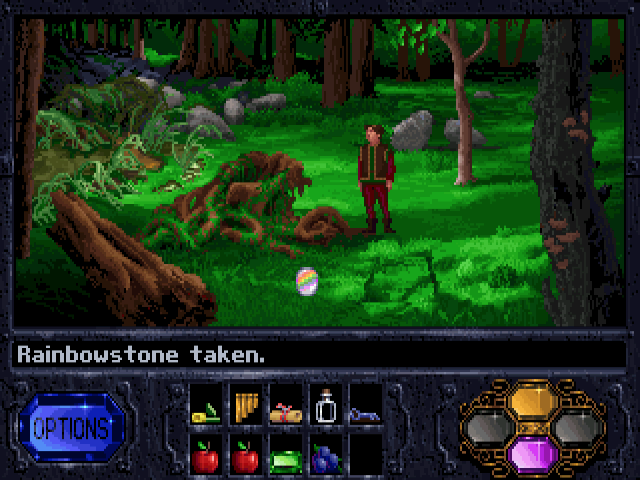
Getting the Rainbowstone - [Rating: 6/10] - When you attempt to hand over the blueberries to Zanthia, you discover she's missing. However, when you scan her laboratory, you'll notice the furniture has been moved, and in particular, a rug has been shifted ever so slightly. When you click on this rug, you will discover a trapdoor that leads to a new area of the forest inaccessible anywhere else. This second half of Zanthia's domain provides the segue to Malcolm's mansion, but for now, Brandon needs to examine a nearby stump at the entrance of the trapdoor on the other side to pick up the Rainbowstone. To save some extra steps when it is time to make potions, you should also move Brandon up two screens to pick two orchids. Then, with both of those matters settled, it's time to make some potions.
For the most part, I think the game does an excellent job of encouraging a sense of exploration while you are in Zanthia's domain. However, it struggles at even the most basic sign-posting, a problem the second game largely rectifies. When Brandon discovers Zanthia missing, he exclaims he must search her abode for clues but provides no further assistance directing the player on what they should do next. As was the case the last time a quest giver mysteriously disappeared (i.e., Brynn), the game feels shockingly directionless. Furthermore, while the trapdoor has a decent "tell," the Rainbowstone does not. No noticeable flicker or glow emanates from the tree stump, and it's not like Zanthia or Brandon clue the player into knowing to look for it in the first place. This puzzle is one of those sequences where the moment-to-moment individual tasks are not in and of themselves challenging. Nevertheless, the real challenge is knowing how to piece together each step in the first place.
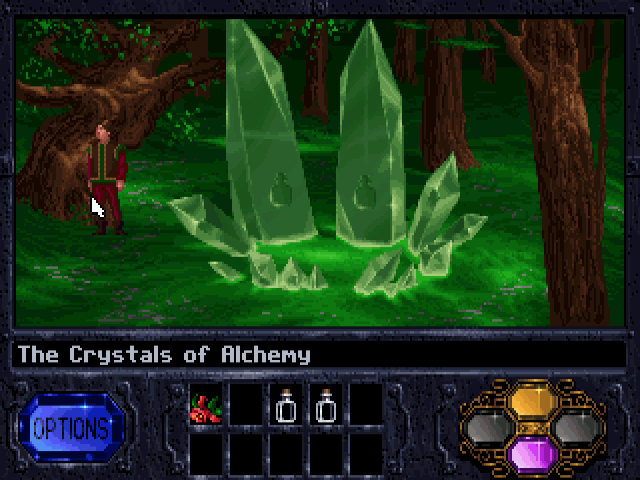
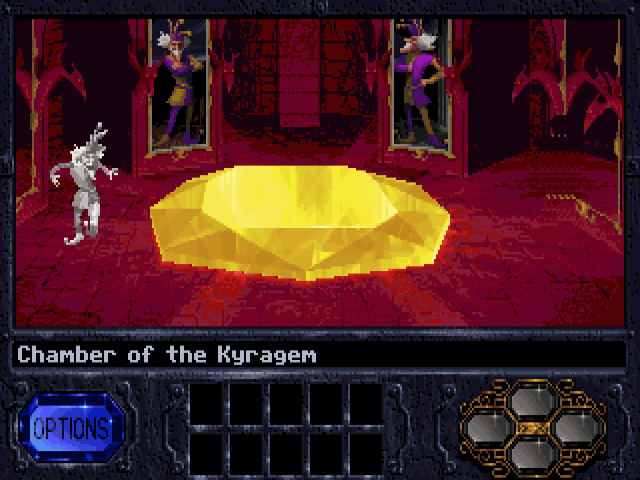
Mixing Potions In Zanthia's Laboratory - [Rating: 7/10] - Remember all those random gemstones and flowers I implored you to keep on your person when you started the labyrinth? Well, now is the time to put them to good use! Using Zanthia's large cauldron, you'll need to make three "basic" primary color potions before taking them to a combination area. Adding a ruby and orchid to the pot allows you to collect the red potion, and you'll need two copies. Mixing a blueberry and sapphire results in the blue potion, and tossing in a tulip with a topaz creates the yellow potion. With enough of each primary color in tow, Brandon will need to locate an environment with two large emeralds and placeholders for him to put his potions. These crystals allow Brandon to take the primary-colored potions to make secondary-colored potions. For example, placing a red and blue potion there creates a purple potion, and mixing red with yellow results in an orange one.
There are three fundamental design issues with this part of the game. First, if you somehow lost the items needed to make the primary-colored potions, you might be screwed. Well, unless you want to backtrack through the labyrinth a third and fourth time! The gemstones don't respawn in Zanthia's area, which reminds me of the second problem with this puzzle. The player already has limited inventory slots. Therefore, they can only reasonably make so much of any given potion. As a result, the room for error is slim. There's no tome of knowledge for you to consult on how to get the correct potions, and when you get to the mixing station, which is over ten steps away from Zanthia's laboratory, I highly advise you to have a cheat sheet on the standby. This quibble leads me to my last issue. If you use up all of your red potions to find the orange one but before the purple one and don't have any duplicates, you can end up in a bind. Yes, there are only so many correct color combinations, but it is possible for players experiencing the game for the first time to run out of workable materials. The good news is the potion mechanic in the second game is LEAGUES better and genuinely fun to use.
Refining The Purple & Orange Potions - [Rating: 4/10] - I already mentioned that Brandon needs to combine some of his primary-colored potions to create secondary-colored ones. The process is simple, but it is important to note that only two secondary colored potions allow you to progress the story, and any other colors will kill you. Brandon needs an orange potion to transform into a Pegasus and a purple potion to become tiny. If you manage to create a green or black brew, both are toxic, but Brandon does not immediately identify them as such. Also, the orange and purple potions need to be on your person at all times, and they play into my earlier criticisms of how the game poorly structures itself regarding item and resource management. That said, you don't have to deal with a complex color wheel here, so as long as you have the needed items, you should be okay.

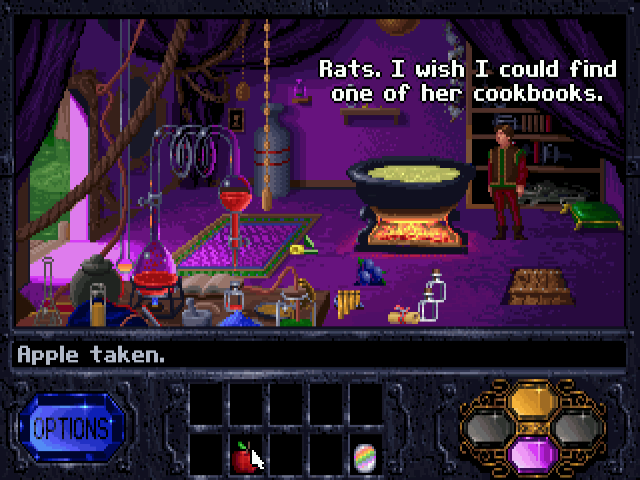
Getting The Royal Chalice - [Rating: 4/10] - Before leaving Zanthia's neck of the woods, you first need to do a bit of item collecting. For one thing, Brandon will need an apple from her laboratory and then explore the first half of the forest until he finds a golden chalice floating in the air. A magical barrier protects the goblet, but luckily, when Brandon uses his newfound "Dispel" ability, he can remove the forcefield. Unfortunately, as he is about to pick it up, a satyr nabs it and hides it in their home inside a nearby tree. Brandon then needs to follow the satyr to their home and use the purple shrinking potion to sneak inside the back door of their residence. When Brandon meets the woodland creature, he trades the apple for the chalice. When he exits the tree, he transforms back to his normal size and finds it behind the tree. Before you ask, you cannot check the back of the tree before using the potion and trading the apple to get the chalice.
This sequence is fun when you find it, and the puzzle-solving is intuitive when you get into it. Knowing to use one of your newly minted potions is a simple enough task, and following the satyr isn't that difficult to start things off, either. I even enjoyed how this puzzle is one of the few that requires the player to utilize both the potion and magic systems, with Brandon needing to down one of his brews and recall his dispel ability. If you take the time to talk to the satyr, you can learn more about the portion of the forest they occupy and their relationship with Zanthia. Unfortunately, it's spoiled slightly due to the game's usual formatting and structural choices. Picking up the apple is the real monkey wrench here, and if you attempt to strike a bargain with the satyr without it, you have wasted your purple potion. Given how hard it is to make one, let alone two, forgetting the apple when entering the creature's home is grounds for a reload by my metrics. Likewise, going from the emerald pillars to Zanthia's lab and then to the floating chalice involves a ridiculous amount of backtracking I won't bother to detail. Trust me, it's a lot and doesn't add anything to the game.
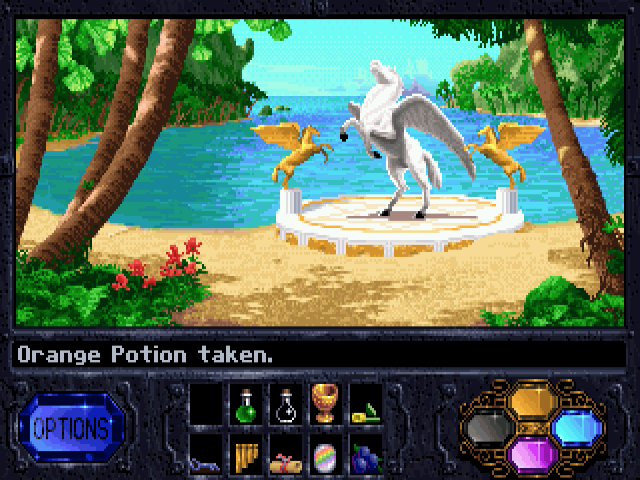
Turning Into A Pegasus - [Rating: 5/10] - With the chalice and at least the orange potion in tow, it's time to make a beeline to Malcolm's castle. However, much like earlier portions of the game, you'll need to do an inventory check before you attempt this. To avoid accidentally forcing yourself into any fail states, ensure you have the orange potion, chalice, orchid, iron key, and lavender rose. If you are missing any of these items, you're fucked and need to load an earlier save! If you have all these trinkets, find a tropical lagoon in the second half of the forest beyond the trapdoor. The lagoon has a golden platform, and if Brandon consumes the orange potion while on the platform, he turns into a Pegasus and automatically transports himself to Malcolm's mansion.
This puzzle is either one of the easiest in the game or the one that results in you smashing your computer screen in frustration. With items like the lavender rose or orchid, the game allows you to pick up multiples but never communicates the minimum amount. Also, the rose can only be picked from a part of the game that requires a massive amount of backtracking, so if you are down one, you're fucked. Mercifully, the game does respawn Brandon with all of his items on the floor of Zanthia's laboratory. Still, because there's a cap on how much any environmental screen can contain, they might spill over to the second part of her abode. Therefore, tracking down where all of your shit is can be a fucking pain in the ass.
The Castle
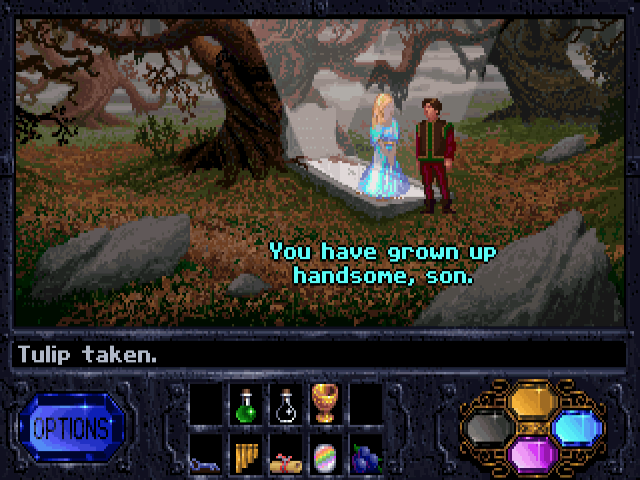
Meeting The Ghost Of Your Mother - [Rating: 4/10] - The landing pad from where Brandon first arrives is a ways away from Malcolm's mansion. However, when you move one screen to the right of the starting location, Brandon will note a handful of tombstones and notice one of them bears the name of his mother. If Brandon knew his mother's name, don't ask me how he managed to avoid knowing he was the prince of a kingdom. No matter, Brandon mentions wanting to pay tribute to the mother he once loved before continuing his journey. Select the rose in your inventory and place it on the correct grave to give Brandon some comfort. The ghost of Brandon's mother appears and provides him with words of encouragement. She also unlocks the last section of Brandon's magical amulet, which contains an invisibility spell.
I thought this puzzle was clever! There's a nearby gravestone with a wreath, so it's easy to deduce what you need to do here. It's also one of the franchise's more melancholy and humanizing moments. The voice actor for Brandon has a brief point of inflection when he talks about his mother that sounds like genuine grief, and it caught me entirely off guard. This scene also proves how Westwood cared more about telling stories with a "wholeness" of emotions than some of the other studios copying Sierra or LucasArts' homework. If there's one thing I hate about this puzzle, it has to be how easy it is to miss the tombstone. It isn't until the gargoyles at the front gate of the mansion begin murdering Brandon that the game provides a hint that there's something you need to do in the graveyard to continue the story. Furthermore, it's been a while since you last unlocked a new magical ability in the game. It does not help that the pacing with the amulet is all over the place. You unlock two amulet spells in the starting forest, one in Zanthia's area, and the last in the opening section of Malcolm's domain. As a result, it is impossible to know when the game is itching to teach Brandon a new essential ability. Nonetheless, while the fiddly structural stuff can rub some people the wrong way, none of it is game-breaking or immersion-shattering. I hate to sound like an apologist, but it is par for the course in this era.
Entering The Mansion - [Rating: 3/10] - After consulting with his mother, it is time for Brandon to make his way to Malcolm's spooky abode. Unfortunately, two sinister-looking gargoyles guard the entrance and will murder Brandon if he gets too close. To get past them, Brandon will need to recall the new invisibility spell he got from his mother, activate it, and quickly sneak past the gargoyles before the magic dissipates. I'm giving this a few marks above the lowest level because newcomers might have difficulty piecing together using the grave marker to get the invisibility spell. Other than that, it's a clever sequence that perfectly connects to Brandon's newly acquired ability.
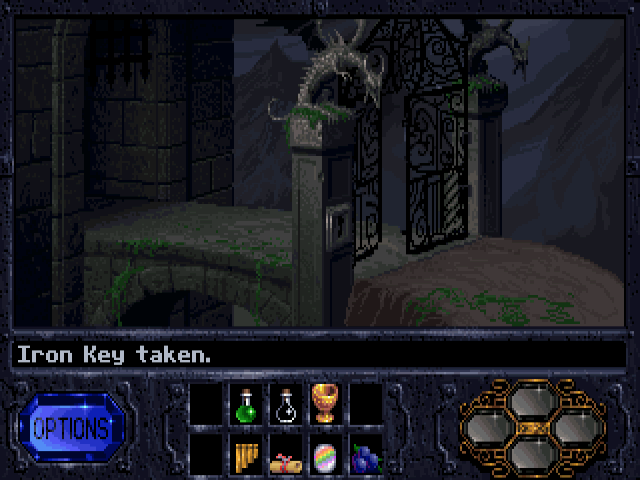
Getting The Gold Key - [Rating: 6/10] - When you first enter the mansion, Malcolm enthusiastically greets Brandon. He goads him to explore the estate, believing that the traps and obstacles he has placed in it will quickly dispatch Brandon. I mentioned earlier that the mansion is the only part of the second two acts that even remotely approaches the labyrinth, and I stand by that. It tries to interpret the game's earlier open-world format but in a self-contained environment and is far less effective. Knowing which doors are usable is challenging, and some of the mansion's turns and avenues are impossible to tell apart from the foreground and background textures. Finally, there are those traps Malcolm mentioned at the start of the level. Unlike in the previous forest levels, if you elect to explore every part of Malcolm's estate, it will occasionally murder you. That means it is essential to follow the game's untold critical path.
Unfortunately, that's easier said than done. For example, after Malcolm chides Brandon, your best bet is to find a gold key or collect the rest of the crown jewels accompanying the chalice. For the first gold key, Brandon will need to navigate a groan-inducing network of repeating hallways and room systems that begin to blur due to their repeating design. Additionally, getting to the key and returning to where you need to use it requires over TWENTY STEPS! To highlight how I am not bullshitting you after Malcolm departs, you'll need to move Brandon Left, Up, Right, and Left, and while in a study, click on a statue to activate a revolving door. While on the other side of the revolving door, you explore a basement catacomb and need to click Left, Left, Up, Up, Left, Up, Right, and butt up against a force field. To destroy the energy wall, use Brandon's dispel ability and move left. While it appears you might be at a dead end, the truth is the opposite. You need to notice an out-of-place brick, click it and pick up the key hiding underneath it. With this trinket in tow, you must repeat the same steps to get back to the study to complete a different puzzle.
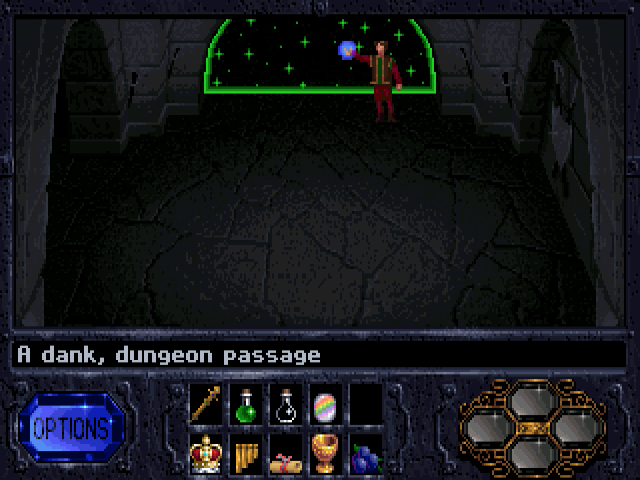
Getting to far-off corners of the castle only to pick something up and then needing to trace your steps to where you started defines the lion's share of what you do in the mansion. It's at its most potent form here, but needing to return to similar repeating hallways or dungeon passageways is something you do several times. The naming conventions for these interstitial levels have never been good, but it is unforgivable here. The game knows it is throwing you into a catacomb, and every screen save for the one with the force field is titled "A Dark, Dungeon Passage." Getting to where you need to be once is a tricky proposition, but when you add backtracking to the mix, you're dealing with something I think could cause you to quit with the finish line on the horizon. Yes, it's not nearly as bad as the cave sequence, but that doesn't give what was done here a complete pass.
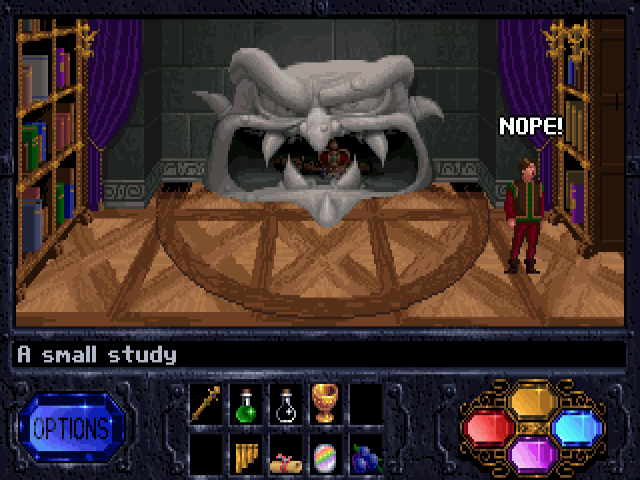
The Bookcase Puzzle To Get The Royal Crown - [Rating: 5/10] - I mentioned in the previous ranking that you need to solve a puzzle in the study with a statue that unlocks a revolving door. When you return, you must solve a variant of the "Pull Books That Start With The Correct Letters To Spell A Word" puzzle. In this case, you need to find a purple book about Opals, a grey book about Potions, a blue book about Enchantments, and finally, a book about Nature; with Brandon spelling, the word "Open." This action causes the mouth of the revolving statue to become slack and allows Brandon to gain his father's crown. I have no problem with book-pulling puzzles, but Kyrandia's version gets a few added levels because it does not appropriately communicate that it even wants you to complete one. When you enter the study with the library, some of the books you can click are already jutting out, but nothing suggests the rotating statue has something in its mouth. When you get to the penultimate screen before the end, Brandon chimes that the three platforms require a crown, scepter, and chalice. However, he offers no further assistance beyond that, which leads me to believe that this might catch some first-time players entirely unprepared.
Getting The Royal Sceptre - [Rating: 1/10] - For the final part of the royal jewels, head over to the main hall and then to the right to enter the kitchen. The Royal Scepter is on a table on the far right portion of the room. When you detect this golden wand, click it and promptly place it in an inventory slot. This "puzzle" is BY FAR the easiest part of the entire mansion because the joke is that Malcolm is using it as a meat spit in the kitchen. And you know what? It got a chuckle out of me!
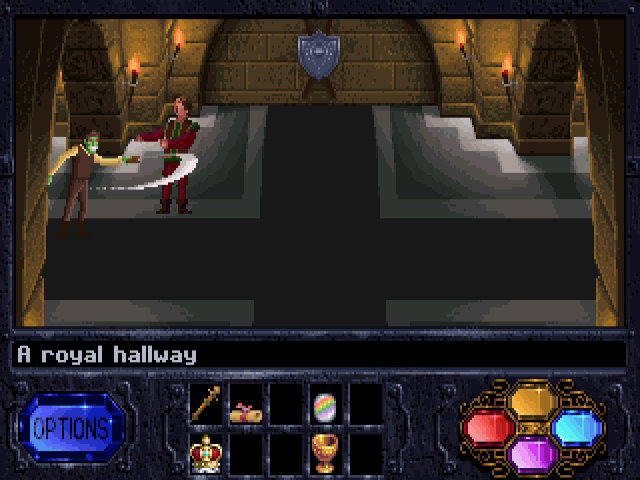
Dealing With Zombie Herman - [Rating: 5/10] - If you take the time to explore the "Great Hall" in more depth, you can have Brandon observe a large door in the back that appears to require two gold keys to open. To get the second of these keys, you'll need to find the royal bedroom, but mid-way during Brandon's trek, he'll encounter a zombified version of Herman the carpenter. Herman will pull out his saw from earlier, and if you are not quick, he will end up sawing Brandon in half. To stop him from following through with his massacre, click the yellow portion of Brandon's amulet to use his healing spell on Herman. The timing on this is incredibly tight, and it does not help that Herman's hitbox is not as big as you'd expect. If you misclick or don't land the command, it's "Game Over." I will give the game some credit. The last time you used the healing spell was when Brandon got poisoned, and his face turned the same shade of green as Herman's. Therefore, it's not impossible to figure out organically what you need to do.

Finding The Gold Key In The Yellow Room - [Rating: 5/10] - After dealing with Herman, move one screen to the left to find Zanthia petrified in the royal bedroom. However, you'll also notice a few musical instruments when scanning the room. Using a nearby mallet, Brandon needs to play Do, Re, Mi, and Fa to reveal the final gold key. This puzzle involves a bit of brute force if you cannot judge musical notes from their pitch, but even then, it is not inconceivable. It is worth noting the game doesn't immediately jump out and tell you to pick up the mallet and start playing a riff, but the musical motif is there. The only monkey wrench is the player knowing what to play, but with the solution being the first four letters of the solfège system, I can't fault it that much.
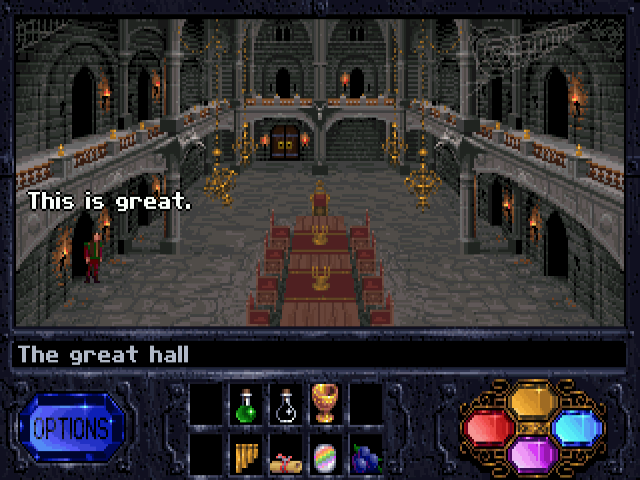
The Royal Foyer - [Rating: 4/10] - With the two gold keys and the crown jewels of Kyrandia in his pocket, it is time for Brandon to return to the Great Hall. When you reach the Great Hall, find the double doors in the back and use both keys in the proper receptacles. When the doors open, Brandon enters the penultimate level in the game but first must discover the appropriate placement of his crown jewels in a royal foyer. There are three pedestals, and Brandon must find which ones match the crown, scepter, and chalice. With three pedestals and three objects, there aren't that many permutations to worry about, and you can use brute force to solve this puzzle. If you were wondering, this part of the game is not randomized. The scepter goes on the left pedestal, the crown on the middle one, and the chalice on the right. It's a straightforward puzzle Brandon even muses about before the game releases control back to you.
Beating Malcolm - [Rating: 8/10] - When Brandon unlocks the final door, Malcolm waltzes out and begins taunting him. After pushing the prince one step too far, Brandon knocks out Malcolm, but as he enters the final room, he realizes he will need to hide from Malcolm or otherwise risk the same fate as his grandfather or Zanthia. To prevent Malcolm from turning Brandon into a stone pillar, you need to move him directly in front of a mirror in the room and then quickly pop off his invisibility spell. If you fail to do this in time or cast the spell in the wrong location, Malcolm will be able to locate Brandon due to the mirrors refracting the invisibility effect, thus resulting in a "Game Over." If you are in the correct location, then when Malcolm attempts to cast his petrification spell, it will bounce off a mirror and hit him. Somehow, this causes Malcolm's magical curses on everyone else to wear off, and the land of Kyrandia is finally free.
It's an interesting conclusion to the game but also incredibly fiddly. The location Brandon needs to occupy is tight, and the timing is even more unforgiving. If you are even off by the slightest pixel, Malcolm will detect Brandon, and you'll have to restart the entire sequence from your last save. The placement of Brandon is so specific in this one sequence that if he's even facing the wrong way, the game will still detect that as incorrect and consider the player's actions a failure. No other part of the game functions like this particular level, and this part always takes me a few tries. I wouldn't consider it incomprehensible, but it is something I don't think is possible to solve on your first attempt during your first playthrough.
Should You Play The Legend of Kyrandia: Book One (Answer: Sure! Consider It If You Want A Different Take On The SCUMM Era of Pixel Adventure Games)
The second game will always be the true high-water mark in the series by my metrics, but the first game in the Legend of Kyrandia series is no slouch. It provides a mostly seamless, non-SCUMM, and non-parser-based alternative to the genre conventions at the time. Games like it and Loom were the exception to the norm, and I cannot help but view the first Kyrandia game as a more "complete" experiment than Loom. It spawned two sequels and, unlike Loom, has a final act that doesn't feel like a mad dash to the finish line. The first Kyrandia game maintains the core appeal of its mechanics and gameplay for almost the entirety of its runtime. The labyrinth in the second environment is a low point, but the game at least follows it up with Zanthia's Domain, one of the game's most substantial acts.
There's also something about this game I prefer over the wackier tone of the second and third games. As mentioned during the first episode, the lush purples and dark greens of the starting forest, while the game plays its opening act relatively straight, work for me more than the circus act nature of the second game. Don't get me wrong, Zanthia is a far better character than Brandon, but the sense of exploration in the first game is more robust and rewarding. Yes, its open-world template comes at a massive cost, but when it works, learning more about the world while also tackling tasks in whatever order you want is far more empowering than the more scripted and rigid structures pioneered by LucasArts and Sierra. However, there's no denying a level of JANK present in this game Westwood managed to boil out in subsequent releases. Zanthia's alchemy mechanic is VASTLY SUPERIOR to Brandon's magical amulet, and you don't have to sweat bullets regarding item management in the second game, either. This game feels like a studio working out the kinks in real-time. As the game progresses, it gets more cinematic and relies less on its fiddlier aspects.
The first two games in this series are underrated buried treasures. While most adventure game fans from this era will go back and forth over whether LucasArts or Sierra should get the shine for helping the genre reach its zenith, Westwood also deserves commendation. Likewise, don't let some of my gnarlier rankings dissuade you from playing this game. If you could deal with the brick wall in Full Throttle or the absolute bullshit puzzles in The Dig, this game should not pose too much of a problem. It's a visual tour de force and has some excellent writing when you take the time to explore optional dialogue trees. Now, if only the third game weren't a complete tire fire. But more on that another time! For now, thanks for reading this two-parter, and next time, I hope to cover the second game in the Kyrandia franchise.
Also, here's an archive of my attempt to beat the game in a single sitting: