Overview
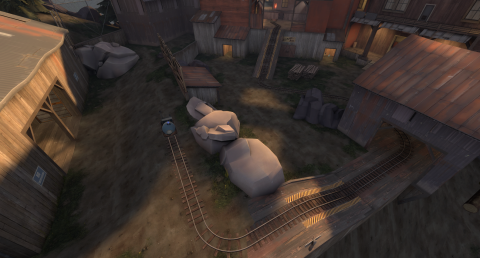
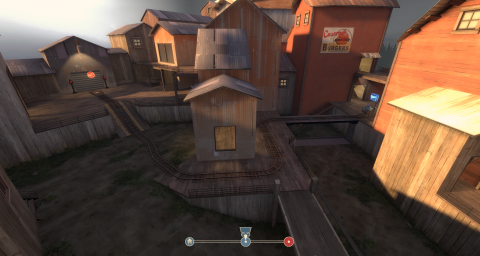
Thunder Mountain is a three-stage payload map. There is a single bomb-carrying cart on a track which runs from one end of each stage to the other. The goal for the BLU team is to get the cart to the other end of the track on each stage. The goal for the RED team is to prevent them from doing that. Each stage has at least two points for the BLU team to capture, and each time they capture one of the points, they receive additional time. The first two stages each have two points to capture, and the final stage has three.
If the RED team can prevent the BLU team from pushing the cart for 30 seconds, it will slowly go in reverse until the BLU team starts pushing it again. The cart will also stop going in reverse if it reaches an incline or a point that the BLU team has captured. If the BLU team manages to capture all of the points, the game moves to the next stage. However, if the RED team prevents them from capturing all of the points in a stage before the timer runs outs, the game returns to the previous stage. If the RED team wins on the first stage, or the BLU team wins on the third, the teams will switch.
Gameplay
Stage One

The first stage starts with a small section of track leading to a small decline. At the bottom of the decline there is a small building where RED engineers like to build sentries. Once you get through the small building there is an incline that leads to the first capture point. If the BLU team stops pushing the cart before it reaches the top of the hill, it will roll back down to the bottom. There is a building on both sides of the first capture point, connected by a bridge on the second floor. RED engineers will build sentries on the bottom floor of these buildings, facing the capture point. They will also build on the bridge connecting the two buildings and use the wrangler to manually pick off BLU players as they run from their spawn room to the capture point. Once the BLU team captures the first point, a bridge will rise near it to connect the first point to the path leading to the second point.

Once the bridge rises, the BLU team can continue to push the cart toward the second point. The second point is right outside of the RED team's spawn room, so the BLU team will need to use teamwork to push the cart though to the capture point. There is a building the runs along the left side of the cart's track, opposite of the RED's spawn building, where the BLU team can get an advantage over the RED team from the top floor. BLU engineers usually try to sneak into this building to build a teleport exit, allowing the BLU team easy access.
Stage Two

The first part of the second stage is pretty simple. It's all flat ground, and the BLU team only needs to get the cart across the bridge and between two buildings overlooking the capture point. These two buildings are the main obstacle for this section of the map, as the RED team will use them as shelter, and RED engineers will build sentries on the top floor. The BLU team can circle around to the outsides of these two buildings to find alternate entrances to the upper floor, allowing them to destroy the sentries easier and take control of the area. Once the BLU team has taken control of the area they can start to push the cart between the two buildings, toward the capture point. The RED team will be coming out of the tunnel that is right next to the capture point, so the BLU team will need to fight for control of that point. It is usually a good idea for some of the BLU team to fight off RED enemies in the tunnel, while a few of their teammates secure the first point.

The second section of the stage starts off with the BLU team pushing the cart through the tunnel that's right after the after first control point. This can be a bit of a challenge since the tunnel is pretty narrow, and there are a few corners for the RED team to take shelter behind, along with four different entrances for them to attack from. Once the cart is through the tunnel, the BLU team will be pushing it through the RED team's base, to the second capture point, which is right under one of the one of the RED team's spawn exits. The entire area is surrounded by buildings, which almost all have two floors. This will allow the RED team to attack from any direction, both high and low. Towards the end of this section there is a downhill slope. If the BLU team can push the cart to this point it will roll to the bottom, right next to the second capture point.
Stage Three

The third stage is the final stage in this map. If the BLU team wins this stage, they've won the round and the teams will switch. This map is in the form of a spiral. The cart starts on the bottom of the spiral, and the goal is for the BLU team to work their way up to the top, where the cart will drop into the center building and explode. The majority of the spiral is in the center of the stage, out in the open, so this is where most of the RED team will choose to pick their fights. There are two buildings on the outsides of the map, which each contain a capture point. The track doesn't go too far into these buildings - only far enough to reach the capture point, then circle right back around toward the center of the map. Since this is an upward spiral, there are several sloped sections of the track. If the BLU team stops pushing the cart before it reaches the top of a slope, it will roll back to the bottom of the slope.

The first capture point is right inside one of the buildings. The BLU team won't push the cart too far before finding their first incline just outside of this building. Once they get over this, it's all flat ground until the first capture point. The RED team will build sentries on the top floor of this building, and fire down on the BLU team from above. There are stairs on near the entrance of the building that lead to the top floor, so the BLU team can have a fair fight with the RED team once the sentry guns are down. After clearing the room of RED players, it's a straight shot to the first capture point, before heading out toward the center of the stage again. This point is usually captured pretty quickly, without too much of a struggle.

The second capture point is on the second floor of the building on the opposite side of the stage. Since it is on the second floor, the BLU team will find another incline in their path on the way over. The RED team will also be attacking from above as they pass over the bridge from one building to the other. Once the BLU team gets through that, they'll find the next capture point in the center of a bridge, being overlooked by the top floor of the building. RED engineers like to build sentry guns up there, and other RED players will jump down or attack from the floor above. The BLU team will be on a narrow path as they push the cart across the bridge, so they'll need to take out the defending RED team before pushing through. Once the RED team is gone, it'll be an easy push across the bridge, and toward the next capture point.

Now it's time for the BLU team to push for the final capture point in the map. The point is on the top of the spiral in the center of the stage, and the BLU team will have to push the cart up two slopes along the way. The top floor of the spiral is also connected to a path that leads to the RED team's spawn room, allowing them easy access to defend the final point. The RED team's engineers will, again, guard this area with sentries, and the RED team will try hard to prevent the BLU team from pushing the cart up the slopes. It will be quite a fight as the RED team makes their final stand, and they will have the height advantage. If the BLU team can manage to get up the two slopes, they can claim the final point, and celebrate their victory for the round.
Strategies
Stage One
- RED team's engineers can build sentries in the ledge of the shack near the start of the stage.
- BLU team can use the alternate entrances to the buildings overlooking the first capture point for an easier way to take out the sentries, and surprise the other RED players.
- BLU team can sneak into the building to the left of the second capture point, and shoot down on the RED team from the second floor. Once the sentries are down, BLU team players can jump down and fight the RED team up close.
Stage Two
- RED team will want to build sentry guns in the top floor of the two buildings, to overlook the first capture point.
- BLU team can gain an advantage over the RED team by running around the outsides of the buildings and taking out the sentries. This will allow the rest of your team to move in and fight for control.
- BLU team should try to take control of the buildings surrounding the second capture point, so they can use it against the RED team instead.
Stage Three
- RED team should use the spiral's height to their advantage. It's much easier to shoot down at enemy's than up, and you will have the option to back off and heal up if you need to.
- BLU team can use the narrow paths inside the buildings to their advantage. Lure the enemies into the buildings, where they'll be outnumbered, and have little room to run or hide.
- When pushing the cart up a slope, crouch behind the cart on the opposite side as the enemies are coming from. This will make it harder for them to hit you, and might buy you enough time to get it to the top.
Log in to comment