The Quest For The Worst Adventure Game Puzzles - The Legend of Kyrandia: Hand of Fate [Part 1]
By ZombiePie 9 Comments
If you enjoy this blog and would like to read my other adventure game retrospectives, here's a list of my previous episodes of this series:
- Episode 1: The Dig
- Episode 2: Atlantis: The Lost Tales
- Episode 3: Loom
- Episode 4: Drowned God
- Episode 5a: Indiana Jones and the Fate of Atlantis Part 1 & Episode 5b: Indiana Jones and the Fate of Atlantis - Part 2
- Episode 6: The Journeyman Project: Pegasus Prime
- Episode 7a: The Journeyman Project 2: Buried in Time (Part 1) & Episode 7b: The Journeyman Project 2: Buried in Time (Part 2)
- Episode 8a: The Journeyman Project 3: Legacy of Time (Part 1) & Episode 8B: The Journeyman Project 3: Legacy of Time (Part 2)
- Episode 9a: The Legend of Kyrandia: Book One [Part 1] & Episode 9b: The Legend of Kyrandia: Book One [Part 2]
- Episode 10: D (The Game)
Preamble (i.e., Oh, What Could Have And Should Have Been A Bigger Deal)
When I first reviewed The Legend of Kyrandia (i.e., The Legend of Kyrandia: Book One), I mentioned it to be one of the more compelling alternatives to the works of LucasArts and Sierra Online. I stand by that statement to this day, but there's no denying that the adventure game or Fables & Fiends team at Westwood Studios found their stride with the second entry in the franchise, The Legend of Kyrandia: Hand of Fate. Most adventure game enthusiasts will back me up on that and even cite Hand of Fate as a highwater mark during the "Golden Age" of the genre. The game was released the same year as Sam & Max Hit the Road and Maniac Mansion: Day of the Tentacle, as well as Gabriel Knight: Sins of the Fathers and Space Quest V: The Next Mutation, and it lived to tell the tale. However, unlike those titles, Hand of Fate continued the first game's tradition of side-stepping the use of verb parsers or SCUMM-based engines in favor of more straightforward and intuitive click-based gameplay. When you want to combine two items, all you need to do is click the first item and then click on the second one, and the game will promptly tell you if you have found a winning combination. When you want to add something to your inventory, you click it and then drag it to an open slot. It's that easy, and honestly, I cannot imagine Hand of Fate benefitting from a more complex system like SCUMM considering its storytelling aspirations are much more light-hearted than its predecessor. However, Hand of Fate still embraces the open-world format of the first Legend of Kyrandia game and permits you to explore its world and even solve its puzzles in any order you see fit.
However, let's return to the issue of the contemporary competition that surrounded Hand of Fate. 1993 had some real adventure game heavy hitters, so Hand of Fate got lost in the mix. The game sold poorly and received little to no press coverage at its release. When Westwood packaged it with the third game, Malcolm's Revenge, it finally started to get its due. That's unfortunate, considering Hand of Fate provides clever innovations to several genre norms worth noting. First, it improves upon its predecessor by giving players endless inventory slots. It also features an item-burning mechanic when its main character, Zanthia, progresses from one set piece to the next. The game also continues the series' tradition of altogether avoiding unwinnable scenarios. While there is character death in this game, it is much less of a problem than in the first Legend of Kyrandia game.
These gameplay innovations meld well with the new storytelling ambitions Westwood tried with Hand of Fate. This game is far more comedic and silly than the first and even has a more whimsical art style. The only complication comes when you need to interact with the game's potion-making system, which, admittedly, is far more complex than the amulet system in Book One. However, I find the thematic underpinning of Zanthia's alchemy mechanic far more compelling than the spells in Book One but less confusing than the mood-based mechanic in Malcolm's Revenge. While I tend to avoid passing summative judgments about my topics until the final entry, I can't help it with Hand of Fate. Despite some of my grousing with a few puzzles, I want you all to know I found this game to be an absolute delight and strongly recommend it if you haven't heard of it. So, without further ado, let's look at some puzzles!
Zanthia's Swamp
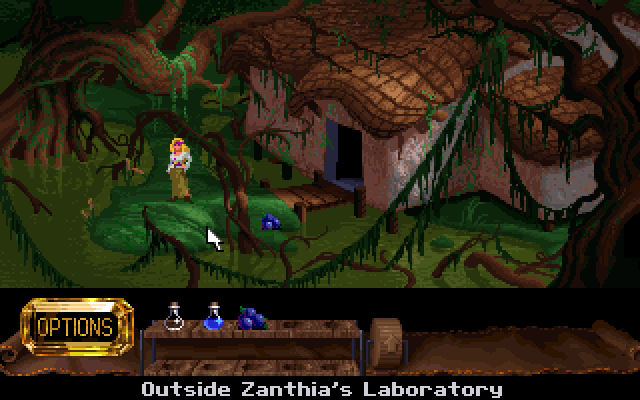
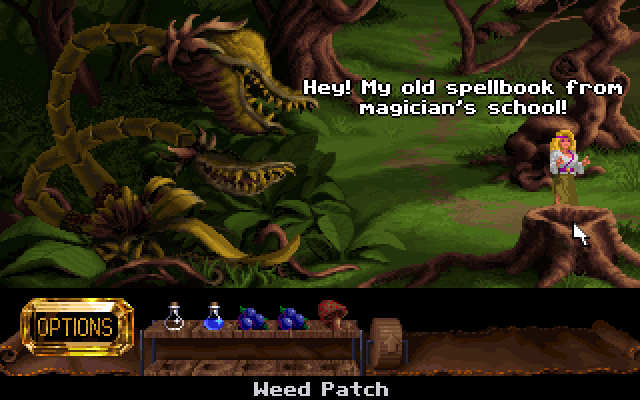
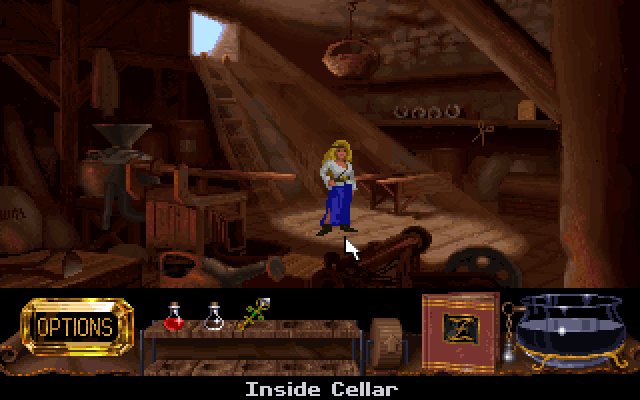
Picking Up A Bunch of Shit in Zanthia's Laboratory - [Rating: 3/10] - The game starts innocently enough with Zanthia discovering parts of her home and surrounding swamp disappearing into thin air. As the mage tasked with entering the planet's center to prevent things from worsening, Zanthia declares she will likely need a few of her belongings before properly starting her quest. One quick note, the game fails to tell you what those items might be or when you have all the necessary effects. However, some parts of the game will act as "Gear Checks," wherein it is required to locate the appropriate materials. Luckily, the game has no "fail states," where you cannot go further if you miss the required items when they were first presented. Every item needed to complete a quest is available until you can move to a different chapter where it is no longer needed. Finally, it is critically important to pick up Zanthia's cauldron in a random stump on the screen named the "Weed Patch." Without this pot, completing the game is impossible, and it sure does suck that one of the game's core mechanics is hidden in a random stump.
Despite its many quality-of-life additions, it is frustrating to see Hand of Fate relying on the identical pixel-hunt-based puzzles that sometimes made the first game a chore. When it comes to Zanthia's Laboratory, you'll need to grab an empty flask, a blueberry, and a water flask. Some of these items are in the background, like the empty flask on a bookshelf, and your hint they are selectable parts of the environment can be challenging to detect. There's also a part where Zanthia must pick the roots from a tree at a weed patch to collect "gnarly bark," but the single tree with this resource looks no different than any of the trees you see in the background that are entirely non-interactive. It's not that bad here, but it is a hallmark of this game operating in an "era" where that was the norm.
Sometimes your only clue to pick something up is a single flashing pixel, but worse is the game failing to communicate how many of any given item you need. For example, with the blueberry, you can pick up several, and when we talk about the alchemy mechanic, that is by design. The one downside of Hand of Fate's endless inventory system is that you can run into cases where you don't know if you need something because you already have one. Also, you pick up a lot of shit during this opening sequence. Even after you exit the opening swamp, there are two onions you need to collect from a twisted tree and after watching a cutscene involving Marko. There's also a mushroom you need to grab after a tree disappears, but in that case, you must be careful to notice its monochromatic brown texture on top of a big brown patch of dirt. All of this is possible, but it's not the best first impression of what to expect from Hand of Fate. Luckily, the character work, worldbuilding, and dialogue are top-notch.
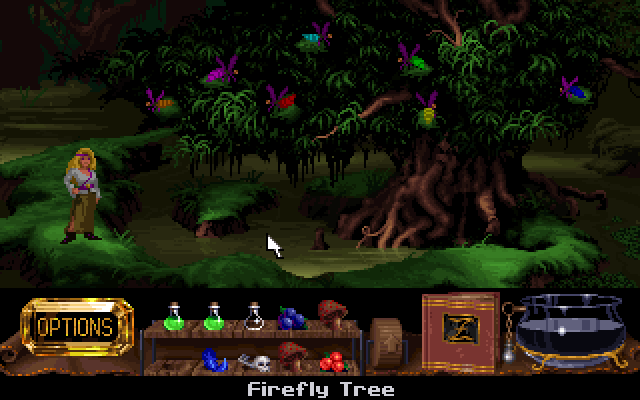
The Firefly Tree Puzzle - [Rating 3/10] - The first "real" puzzle in Hand of Fate doesn't take place until the ten-minute mark. After exploring the initial swamp, Zanthia will identify her first mission objective: getting money to pay for a ferry to Morningmist Valley. Unfortunately, thanks to the robbery that recently targeted her laboratory, Zanthia is seriously lacking in the financial department. From the cave entrance, where she runs into Marko, you must move Zanthia downward and locate a tree covered in different colored fireflies. When you click on any firefly, the one you clicked will flash, and then another will flash and play a musical note. The second flashing bug is meant to be your "start" for playing a game of Simon Says. It is essential to mention how the game expects you to write down the notes to the song, as you will need to use this music track in a later puzzle. Also, the order of the notes is randomized with every playthrough.
I have played my fair share of Simon Says with this series, and this is one of the least irritating examples I have experienced. The good news is that following the song is easy, and the interface for inputting the notes is manageable. The same cannot be said for future entries in this series (i.e., Shivers), and at the very least, the game does not kill you whenever you input a wrong note or screw up a sequence after a certain point. I am not rewarding this puzzle with a lower mark because you need to remember this song for future puzzles. Also, I prefer it when games randomize puzzles like these, so there's always something to keep you on your toes, but I can also see that being a problem for others. Finally, this puzzle, being color-based, is a step harder for the color-blind due to the notes not being placed on a standard sheet music-styled scale.
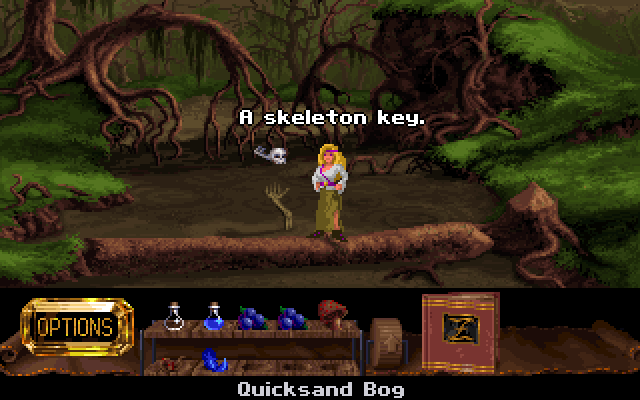
Getting The Skeleton Key At The Quicksand Bog - [Rating 2/10] - I forgot to mention that the order I complete the puzzles at the starting swamp can be different in your playthrough. Hand of Fate revels in the open-world format of its predecessor but with far fewer warts or rough edges. Regardless, after you are done playing with bugs, the nearest puzzle takes place four screens to the left. However, remember to pick up a feather from a bird's nest when you reach the third screen after a random rock disappears. While in the swamp, the game uses the disappearance of objects or things in the background to signal the player that they need to pick up something in that level or screen before moving forward. I LOVED this feature and wished it continued after the first act, but instead, it ceases to exist when you reach the farm. After you move left from the feather, you'll notice a skeleton key sticking out of a pit of quicksand. To grab this key, you'll need to identify a rotten log, tip it over and use the log to walk over and nab the key before moving left again. It's a simple enough task and one of the first times the game calls on the player to manipulate a part of the environment to solve a puzzle. I found it to be a pretty miraculous tutorial puzzle, and the pun associated with it is pretty good (i.e., a skeleton is holding a skeleton key).

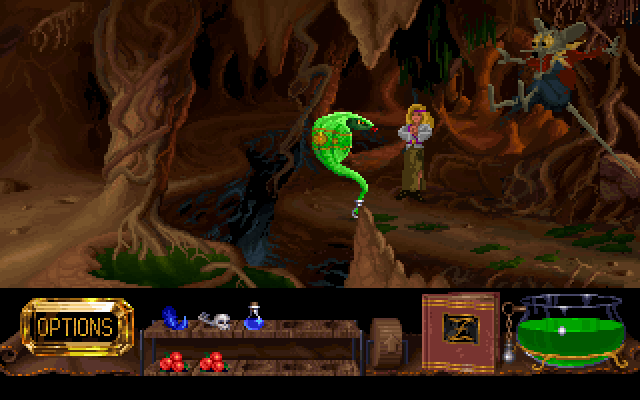
Collecting Crocodile Tears & Getting Zanthia's Cauldron - [Rating: 5/10] - After you move left from the skeleton key, Zanthia will butt up against a crocodile. You can avoid the crocodile if you want, but there's something you'll need to collect from it if you wish to complete the game. Take the feather from Zanthia's inventory and use it on the crocodile. When the reptile starts crying, you have a narrow window to use her empty flask to collect its tears. If you succeed, examining the flask will say it contains "Reptile Tears," and I was SHOCKED the game passed on making an Elton John reference. However, you'll also need to pick up Zanthia's missing cauldron before the crocodile stops crying or be prepared to use the feather again. Near the crocodile is a tree with a hole. If you click on that hole, Zanthia will find her missing cauldron.
I mentioned this point in my retrospective of the first game, but every Legend of Kyrandia game has a few times when the hitbox of an item or object feels "off." One example is the area where the game will allow you to use the flask to collect the crocodile tears. It's not a monstrously tricky endeavor, but given the timed aspect of this puzzle, it can be frustrating. There's also no denying that it can be challenging to know to collect the tears in the first place. Zanthia's verbal prompt when she first sees the crocodile suggests your goal is to run away from it, but the game instead expects you to collect something from it. That poor signposting is compounded by the game doing NOTHING to suggest a cauldron hiding in the tree. In hindsight, it's bizarre that one of the critical defining mechanics of this game is unlocked by pixel hunting in what feels like a throwaway puzzle.
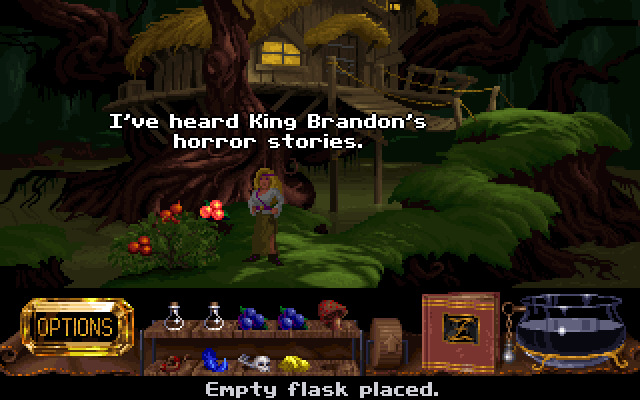
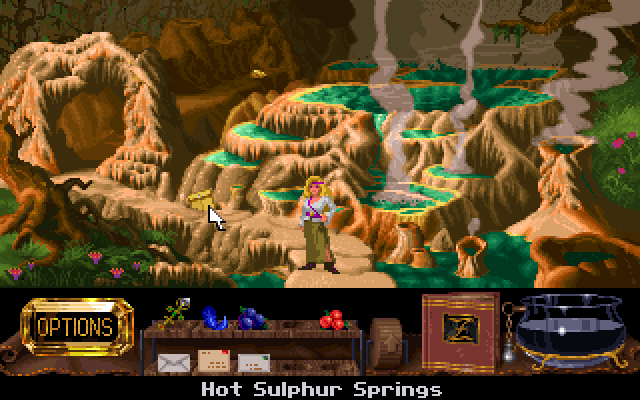
Picking Up Shit Outside And Inside Herb's Shack - [Rating: 3/10] - After dealing with the crocodile, move up to the hot springs and grab a sulfur rock. The springs will be the crux of a puzzle coming up shortly! From the springs, move down and then right twice to re-enter the dark swamp before moving up once. Zanthia will now face a familiar fixture from the last game, Fireberries! To collect the berries, apply the water from the laboratory flask to cool them down so Zanthia can pick them, but remember to pick up all three. With the berries in tow, Zanthia should enter a shack an anthropomorphic frog named Herb runs. After talking to them, ask them to take an empty flask on their desk and scan their store for a "Toad Stool" next to a crate and a bag of plant food, which you also need to nab. I will match this sequence's score with the last collect-a-thon, even if this one is more involved. If you delay going to Herb's Shack for too long, you might forget about the water flask in Zanthia's inventory. Likewise, the stool and bag of plant food are a bit too blended into the background for my tastes. However, there's a nice gag with the Fireberries, and Herb is one of the more fanciful characters in the game and a perfect vessel to communicate the more light-hearted tone of the second game compared to the first.
Making Your First Potion - [Rating 5/10] - Now it's time to talk about the mechanic that often makes or breaks Hand of Fate for most people: potion making. First, if you take the time to explore the starting hub world out of sequence, you might end up in a cave guarded by a sizeable anthropomorphic rat. The cave's exit leads Zanthia to where she can nab some cash to pay the ferryman, and if you explore your dialogue options with the rat, you'll learn he is afraid of snakes. Luckily for you, one of the few remaining pages of Zanthia's potion book has a recipe for the "Swampsnake Potion." To make life easier, return to the hot springs, use one of the empty flasks on a spring to collect hot water, and open the page in the spell book to find the snake potion. The ingredients for this potion are gnarly bark, sulfur, an onion, reptile tears, a stool, and hot water. Place these ingredients in the cauldron, wait for the potion to form, and fill the colored concoction into all three of Zanthia's empty flasks. When you return to the rat in the tunnel, if you use the potion on Zanthia before waking him up, he will see Zanthia with a snake as a head and run away.
I mentioned how the alchemy mechanic "makes or breaks" people's impressions of Hand of Fate, and I'm not joking. Some find it forces players to engage in pixel hunts for raw materials and unneeded backtracking for ingredients. Others feel it improves the first game's amulet system and causes the game to dabble with more complex and compelling puzzle design. I admit needing to backtrack to pick up materials can be a pain if you are not careful, and the more complex potions are incredibly easy to screw up if you misclick even once. However, I credit the programmers for ensuring that every environment has all the needed materials to complete any level or environment and for those sources to be unlimited. Doing so guarantees if players make a mistake, they don't fuck themselves over involuntarily. The only quibble I have, which will pop up in a different sequence, is how using the potions and collecting them plays out mechanically. I always fill every empty flask I have when I brew a new concoction, and the game is NEVER CLEAR on how many copies of any potion are needed to complete a level, let alone the game itself. In this case, you could take the time to make the snake potion, collect one copy of it, dump the remainder in the cauldron, mistime your use of your only potion, and realize later that you will require a duplicate. In that scenario, you must ferry Zanthia around the world to collect the raw materials to make a new elixir all over again. That's what I call a "tough break!"
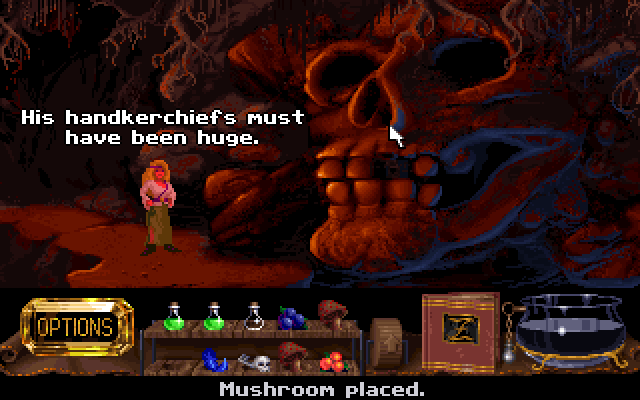
Playing Music On The Teeth Of A Skeleton - [Rating: 3/10] - After terrorizing the rat guard with her Medusa act, Zanthia immediately walks to the other side of the tunnel and encounters a gigantic skull. When you click on this skull's teeth, she'll note that they play music. If you recall my earlier warning, you'll immediately deduce that Zanthia needs to replay the song she played using the fireflies. Unfortunately, the teeth on the skull are in a different alignment than the fireflies, and you'll need to figure out how to play the right notes through trial and error. I will not be too harsh with this puzzle because it is a simple recall and repeat puzzle. However, I can attest from personal experience that it is a definite BUMMER making the walk of shame back to the fireflies if you fail to take note of the song the first time around. Also, there's a mushroom next to the skull Zanthia will need to notice and add to her inventory, and it is easy to miss.
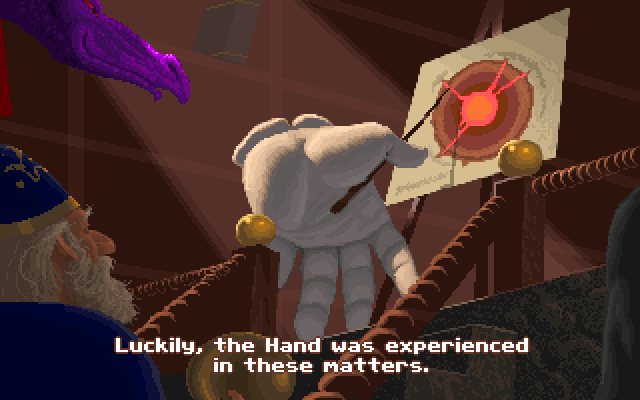
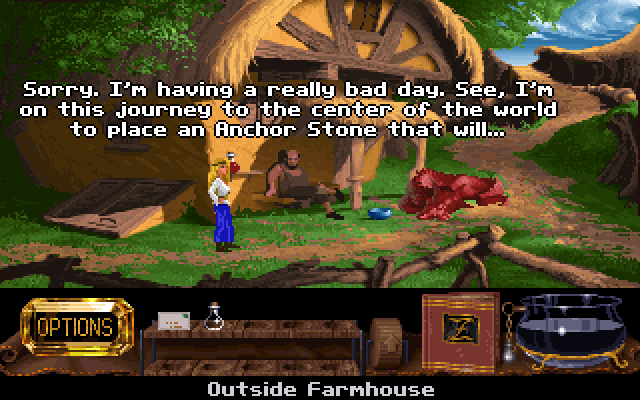
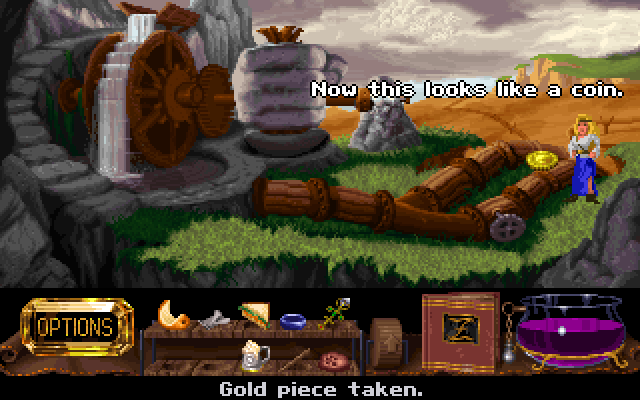
Saving Marko & Making A Gold Achor - [Rating: 4/10] - This sequence is where Hand of Fate finally "clicked" with me. Initially, I was skeptical of its sillier tone and cartoony visuals. Still, the following puzzle relayed a ton of clever and wonderfully acted dialogue and played briskly and up-tempo enough that it warmed my initially cold attitude. After playing the song, the mouth of the skull will open and reveal a chest. When Zanthia examines the trunk, she will locate her Alchemist's Magnet and a lump of moldy cheese. The magnet is one of the few inventory items that follow Zanthia throughout the game, and it is easy to miss the hunk of cheese because you need to click the chest TWICE, as the game is programmed to pick up items one at a time. After picking up these two items, move Zanthia left until she runs into two fishermen. Offer the cheese to them, and when they begin catching fish, rather than surrender their anchor, as the player might expect, they move to a different screen. It's one of the better examples of the game subverting the player's expectations, and I LOVED IT!
Without any steel to turn into gold, move Zanthia left, then down, and before continuing further, remember to collect an extra copy of gnarly bark. Zanthia will find Marko trapped by a monstrous plant when she moves down again. To free him, apply the plant food from the store to a weed below the one about to eat Marko, and it will defeat the evil plant and free him. When Zanthia moves to the right of the weed patch, she'll find the boat the fishermen from earlier were using but unoccupied. As you might assume, pick up the boat anchor, use the Alchemist's Magnet on it to turn it into gold, and then trace your steps back to the location of the ferry. There's some frustration involved with needing to backtrack this amount, but I did not hate it all that much. Applying the fertilizer to the other plant is a bit wonky, but everything else regarding this sequence goes off without a hitch. Now, if only the same could be said about the next part of the game.
Getting The Postman His Letters - [Rating 5/10] - When Zanthia returns to the ferry, she discovers a mailman, which happens to be a dragon, has destroyed it. The postman moans about losing four letters, and when Zanthia offers to track them down for transportation, he obliges. The following puzzle is a four-part fetch quest, and while it is not in and of itself challenging, it takes way longer than it should. To highlight, the nearest letter from the ferry requires Zanthia to move Right, Right, and Down. From there, you move Left, Left, Down, Down, Right, and Down before you find the second letter outside of Zanthia's lab. Next, Zanthia should move Up, Left, Up, Up, Left, and Left and snatch the third letter from the skeleton hand in the quicksand pit. All Zanthia needs to do for the final letter is move up to the hot springs, but if you want things to get "spicy," you can open and read the letters using one of the steam vents. With the four letters, Zanthia can return to the postman and hitch a ride on his back to get to her next destination. The cutscene that depicts this is one of the funniest scenes in the game, but getting to that point is no goddamn fun.
As suggested earlier, the issue here is not "difficulty." This puzzle is not complicated; it just sucks. By the time you get to this part, you've already talked to the most compelling characters in this environment, and most are gone. Likewise, much like the first game, the starting hub world has a TON of interstitial levels that add nothing to the game other than to pad out its runtime. Finally, if you play the game without a guide, there's a real risk you'll run around in circles without making any progress. That is because the letters are not precisely spread out equitably, with the last two smack dab next to each other. The result is that there are entire circuits of the swamp that have NOTHING! However, there's no denying that you can still solve this problem with brute force. Therefore, I do not feel compelled to rank it more than a five.
Morningmist Valley - The Farm
Delivering A Letter & Picking Up Random Tat Around The Farmhouse - [Rating: 2/10] - After landing in a wheat field and watching a fanservice gag at Zanthia's expense, Zanthia will notice a letter on the ground that she can pick up and eventually identify who its recipient should be. Before she delivers this letter, it would be prudent to collect some wheat and click the haystack she exits for one empty flask. When you move Zanthia downward, you'll immediately note the farmer the letter is meant for and their pet dragon. When you hand over the letter, Zanthia must pick up the dragon's food bowl and a bottle of vinegar by a window. Everything at the start of the farm is simple and does an excellent job of setting the scene. The transition from the swamp to the farm is when the game first employs its item-burning mechanic. The game removes all unnecessary inventory items from Zanthia's possession when she transitions from one environment to the next. The only reason I'm not giving this part of the game the lowest possible score stems from some of the materials you need to snatch from the farm. The dragon's dish is tiny, and knowing to click the haystack isn't that apparent to the player. That said, it's all in good fun.
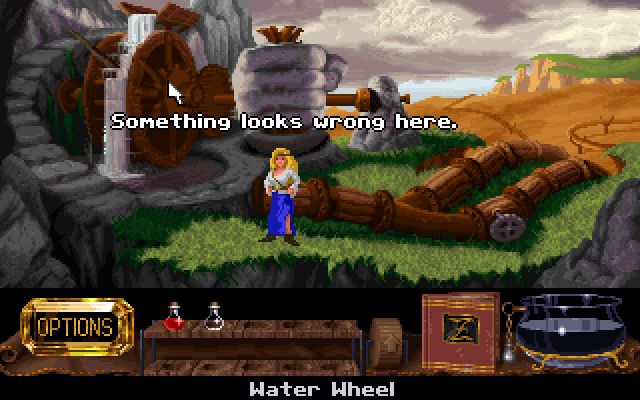
Making Flour For Bread - [Rating: 3/10] - Again, you can do any part of a new environment in whatever order you want. The key concept with the farm is that the farmer is known for making the best mustard in all of Kyrandia, and near the farm are guards to the city that will not allow Zanthia to pass but complain of being hungry. If you can't piece together what that entails, you need to make a sandwich to distract the guards. The first and easiest step involves making flour for bread. That step involves moving left from the farm and locating a mechanical water wheel. Next, find a stick causing the wheel to malfunction and place it in Zanthia's inventory. Finally, pinpoint the giant wheel in the center of the screen and use a wheat stalk on it. The wheat will become freshly ground flour. However, Zanthia will need to use the dragon's food dish to collect the flour.
It's important to emphasize that fixing the contraption with the wheel requires the player to find a misplaced stick and click it. After that, knowing to use the wheat on the central platform is easy enough. Where people start to chime in about how much they hate this level is how hard it can be to figure out you need to make a sandwich. Instead of providing a clear sense of what Zanthia needs to do, which is what the game accomplishes in every other environment, the farm poses problem after problem with few visibly signposted solutions. This playthrough was my second time running through the game, and I had the benefit of remembering I needed to make a sandwich, but I can tell you from experience that in proper "blind" playthroughs, it's TOUGH knowing what you need to do here! This is a shame because the writing finds itself at the farm, and the tasks are far from impossible. For example, fixing the water wheel and making flour takes about five to six clicks. Ultimately, I'm incredibly conflicted about ranking this section of the game, and you can feel free to share what you think in the comments.
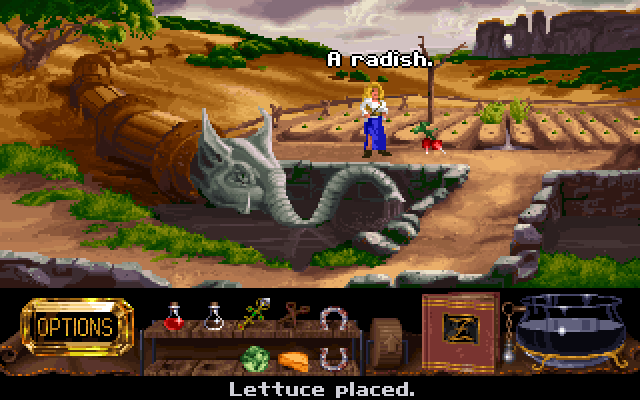
Growing Lettuce And Radishes - [Rating: 2/10] - After making some flour, Zanthia returns to the farmhouse and watches the farmer process a shipment of mustard. If you pay close enough attention as he talks about his load, you'll learn about something in his cellar that will significantly assist Zanthia's journey, but more on that later. Instead, continue right to enter a garden and find Zanthia's Alchemist's Magnet on the ground. After picking that up, notice the surrounding area is a garden, and there's an elephant-looking water spout Zanthia can turn on if you click on a nearby valve. If you attempt to visit the garden before you fix the water wheel, no water will flow after adjusting the valve. Still, if you remember to pull the stick from the wheel before clicking the valve, water will flow, and a field of vegetables will grow from the ground. Among those vegetables will be radishes and lettuce, which are necessary ingredients for creating the sandwich potion. Besides not knowing what to do with the garden if you explore the farmhouse out of sequence, there's nothing here that's too difficult to parse out on your own. Once you fix the wheel, getting what you need is a simple mouse click away. However, I need to mention, again, the poor signposting of how much of any ingredient you need.
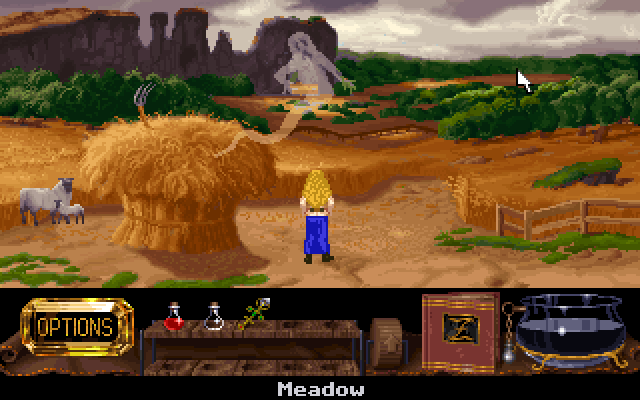
Using A Ghost To Scare The Farmer - [Rating: 4/10] - As suggested earlier, the farmhouse's cellar contains a mixing device that can make cheese. Unfortunately, the farmer prevents Zanthia from using that device. To deal with the farmer, you'll first need to return to the garden to observe an ineffective scarecrow and then return to the wheat field where Zanthia first landed. If you click on one of the hay bales or wait long enough, a ghost will appear and reveal the farmer has cursed them to scare away woodland creatures from eating his crops, hence his recent success in cornering the mustard market. The ghost promises to give the farmer a piece of his mind but requires a body to do so. As such, use an empty flask to carry them to the garden and then use the bottled ghost on the scarecrow. The spirit will then chase away the farmer, allowing Zanthia to explore the farm without limits.
This puzzle is more annoying than challenging. The only tricky part is getting the ghost to spawn, and I have heard conflicting reports about the necessity of clicking on the scarecrow to make them appear in the meadow. I take that step because Zanthia has some funny comments to relay, but there are earlier hints of a ghost existing in the wheat field before you get to this part of the game. Unfortunately, there's no connective tissue tying it back to the farmer. Worse, the ghost asks for a "body," which is a bit of a red herring if you are not careful. When I first played the game, I thought he wanted to possess a person rather than an inanimate object, and I was confused when I couldn't use the bottled ghost on the farmer. Besides these quibbles, it's a hilarious scene with the farmer getting his just deserts.
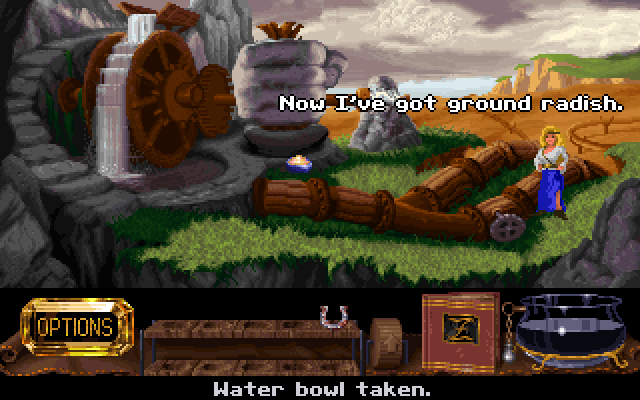
Making Mustard - [Rating: 5/10] - Before entering the farmhouse's cellar, you'll need to return to the water wheel where you made flour. Place a radish where you ground wheat and when it turns into a white paste, use the vinegar bottle from earlier on it to make mustard. Now, I know what you are thinking, and I thought the same thing when I played this game the first time, but you don't make mustard using radishes. In fact, that leap of logic makes knowing what you need to do with the radishes all the more challenging. Nonetheless, there's nothing with this bit that is objectively difficult. You use the radish no differently than what you did with the wheat stalks from earlier, and I enjoy the game using an environmental object more than once. So, I can't give it a high score, but it doesn't deserve a low mark either.
Making The Sandwich Potion - [Rating: 5/10] - After making a batch of mustard, return Zanthia to the meadow and if you have a spare empty flask, use it on the sheep that now roam there to collect a glass of milk. Return Zanthia to the farmhouse and have her climb down into the cellar. As you explore the farmhouse basement, you'll run into a cheesemaking device, and applying the milk flask on the device results in a block of cheese. With this item, Zanthia should have all the ingredients to make the sandwich potion. These ingredients include lettuce, mustard, flour, and cheese. The concoction should be orange if you throw these and only these ingredients into her cauldron. However, before you use this potion to distract a duo of guards, there's other stuff in the farmhouse Zanthia will need to steal. That includes an empty flask, four horseshoes, one upside-down, and a pair of shears. Then, AND ONLY THEN, is Zanthia fully prepared to leave the farm and transition into the city portion of Morningmist Valley. Or so you think.
Making cheese and the potion are simple enough steps. Operating the cheese maker only entails a few clicks, and the sandwich recipe is one of the few you do not need to hunt down to know. However, knowing to pick up the various items from the farm before you leave is a colossal pain in the ass in part because almost every item in the cellar is five to six screens removed from when you need to use them. The horseshoes play a significant role in dealing with the pirate bar, and the same goes for the shears. Much like in previous sections of the game, needing to make a "walk of shame" to pick up missing items is not a great feeling. Finally, some of these objects blend into the background and can be challenging to locate.
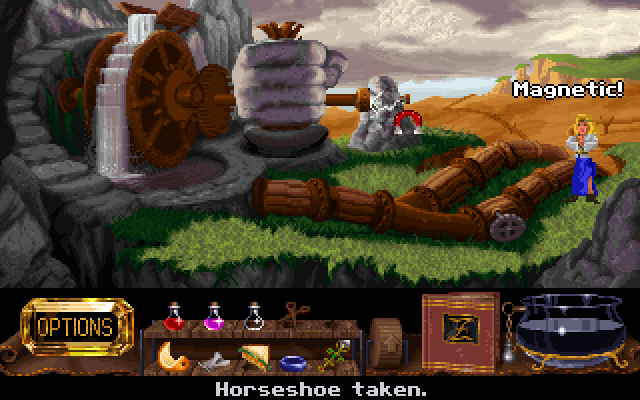
Making A Magnet - [Rating: 8/10] - Speaking of added extra steps that can screw you over if you are not careful, let's talk about turning one of the horseshoes into a magnet! If you hope to get through one of the more involved sequences in the game (i.e., getting Zanthia out of prison), then you will need to make a magnet. And it would help if you did that now rather than drag Zanthia from the sheriff's office back to the water wheel. While at the water wheel, where you have made flour and mustard, apply one of the "normal" horseshoes to electrical sparks bolting out of a part of the machine. This action will cause the horseshoe to become magnetized. When you eventually find Marko locked in jail, he'll mention needing a magnet to nab some keys that could free him from his cell. Where things get obtuse to a fault is knowing to use horseshoes and not the one required recurring item in Zanthia's inventory CALLED A MOTHERFUCKING MAGNET! Worse, you must create this magnet by applying a single horseshoe to a random flickering environmental texture that is incredibly easy to miss. I also have a tough time imagining someone figuring this shit out organically or without the help of a guide. That's especially the case when you consider how far removed the location where you make this magnet is from where you use it. Overall, this puzzle is one of the few bizarre miscalculations in the entire game.
Collecting Reptile Tears - [Rating: 5/10] - Will you look at that? It's ANOTHER puzzle with the farm where you need to remember to collect something you have no idea to gather in the first place until you butt up against a roadblock five to six scenes later down the road! UGH! This time, you need to recall the farmer's pet dragon and the food bowl you stole from them a while ago. You must trigger their crying animation by placing the bowl next to them and then taking it away. While they are crying, apply an empty flask near their face to get another batch of "Reptile Tears." I can't get too mad at this puzzle, considering it is a re-tread of something you have already done. However, the timing is still annoying as it was the first time around, and knowing to do this in the first place is only apparent to the player much later. While there's one level far more annoying than the farm (i.e., Volcania), that does not absolve it of being inane to a fault. Also, it is critically important to have the water dish in Zanthia's inventory for the rest of the game's second act.
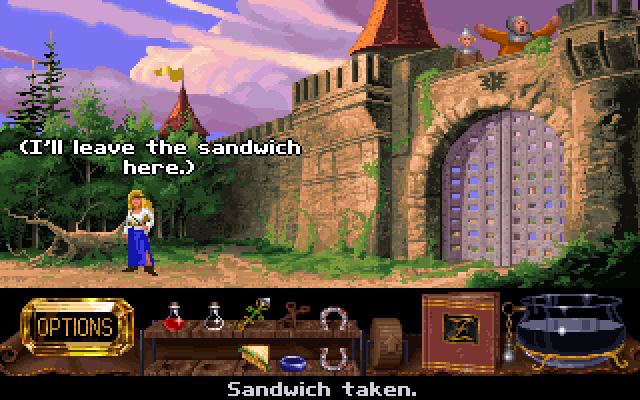
Distracting The Guards - [Rating: 1/10] - With the sandwich potion in hand, it is time to put it to good use. As mentioned earlier, two guards constantly complaining about hunger block the entrance to the city of Morningmist Valley. To get them out of Zanthia's way, apply one copy of the sandwich potion to Zanthia to acquire a sandwich and place it in front of the soldiers. If you want to watch a funny optional scene, have Zanthia eat the sandwich in front of the guards. Regardless, once you present a sandwich to the soldiers, they begin fighting and allow Zanthia to get past them. This sequence is more a comedic set piece than a proper puzzle. All you need to do is use a potion you have spent ten to fifteen minutes making, and the game does the rest for you.
Morningmist Valley - The City
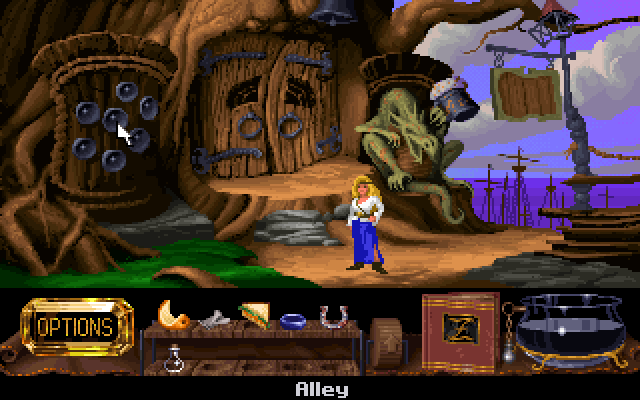
Entering The Tavern - [Rating: 3/10] - Before we get to the tavern, it's essential to take note of a broken fountain at the entrance of the city shaped like a seahorse. If you click on a stick plugging the fountain, you will add the twig to Zanthia's inventory and repair the fountain. With that out of the way, walk into a store with a frozen attendant and leave to an alley. As you continue moving left in this corridor, Zanthia will notice a dragon statue with different colored lights on it. For the third and final time, play the song from the game's first act involving the fireflies in the swamp to unlock a door to a pirate's den. I don't know why the designers thought it was a good idea to call back to the firefly song one more time. This edition of the musical puzzle is the least defensible, considering you can't refer back to the source if you have forgotten it. If that's the case and you don't have the song written down, then you're fucked. That said, it is a leitmotif the game repeats several times prior, making it impossible to forget in the grand scheme of things unless you are incredibly forgetful.
Making Sweet & Sour Sauce - [Rating: 3/10] - When you enter the tavern, Zanthia will need to pick up a few things before she interacts too much with her surroundings. First, pick up a mug and fill it with root beer. Pour the mug of root beer into the water dish from the farm and mix it with the bottle of vinegar to create a plate of "Sweet & Sour Sauce." Finally, locate a barrel near the root beer tap and have Zanthia nab some taffy. There's an Easter Egg where you can kill Zanthia by having her overeat root beer and taffy until her stomach pops, but I digress. I love this level. It's not a too-involved environment; if anything, it's an excellent comedic set piece with incredible voice acting and writing. Obviously, the team behind the game was trying their best to levy some digs against Monkey Island. Their efforts are better described as being "cute" and embodying the saying "imitation is the sincerest form of flattery." Nonetheless, the scene involving Zanthia reading poetry still puts a smile on my face to this day.
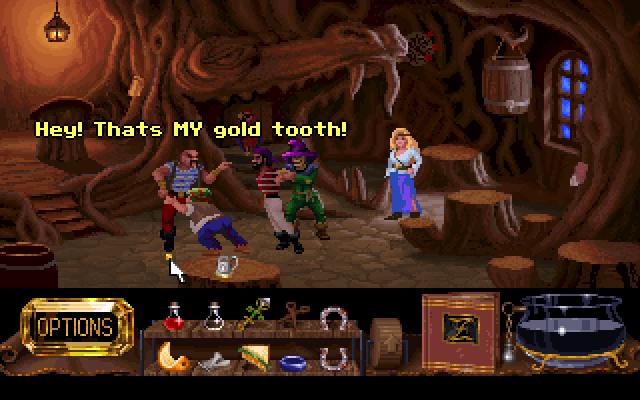
Stealing A Sailor's Gold Tooth - [Rating: 4/10] - When you decide you and Zanthia have had enough of the family-friendly pirate's den, you'll bump against a giant octopus that challenges Zanthia to a game of "Find the Pea" (i.e., a shell game). Completing this game is a requirement, but Zanthia needs a way to pay the dealer's ante. To rectify that problem, re-enter the bar and discover the pirates in a fistfight over the merit of rhyming in iambic pentameter; it makes sense in context. When one of the sailors attempts to get physical, they end up with a gold tooth knocked out of their jaw. However, if Zanthia tries to pick it up, they will shout at her not to steal their molar. The player needs to use Zanthia's Alchemist's Magnet to convert the gold tooth to steel, grab it, and then turn it back to gold outside the bar.
The timing for changing the golden tooth to steel is shockingly narrow, and it took me a few tries to figure out what I needed to do in the first place. When the gold tooth flies out of the sailor's mouth, it's clear the game wants you to pick it up. It even has a unique flickering animation when it lands on the ground. What took me some time to recall was using the Alchemist's Magent, as the last time you used it was when Zanthia needed to turn the fishermen's anchor into gold. That's a wide gap between then and now. That said, there's no denying this is one of the better-signposted logic puzzles in the game, and everything is a stone's throw from each other. If you mess up the game with the octopus, getting a new gold tooth is a simple and quick process, and you don't have a vast journey to cross either. It's tricky the first time, but eventually, nabbing extra teeth becomes automatic. Also, it's another funny and well-written sequence, so I can't get too angry at it.
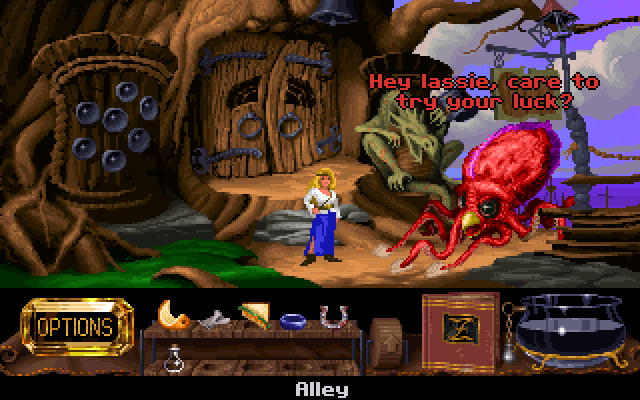
Playing "Find The Pea" - [Rating: 3/10] - While nabbing the gold tooth is at least passable due to its innate silliness, playing an actual shell game seems like the laziest shit imaginable in a puzzle-based adventure game. What's more, the way you go about "solving" the octopus rigging the game against you is as predictable as things get. When you picked up the horseshoes, you might recall one of them being upside-down, and if you have Zanthia examine it, she'll mention it making her feel "lucky." That's your hint it is a lucky horseshoe, and if you use it when the kraken presents his three shells, you'll always win at his game. You should have three gold teeth by the time he discovers Zanthia's ruse. If you don't, you should be able to pick up one more from the pirate before you leave the alley permanently. Overall, the predictability of this puzzle makes it a cinch. I'd even go so far as to suggest I have experienced this exact puzzle and sequence in games that predate Legend of Kyrandia 2 more than once.
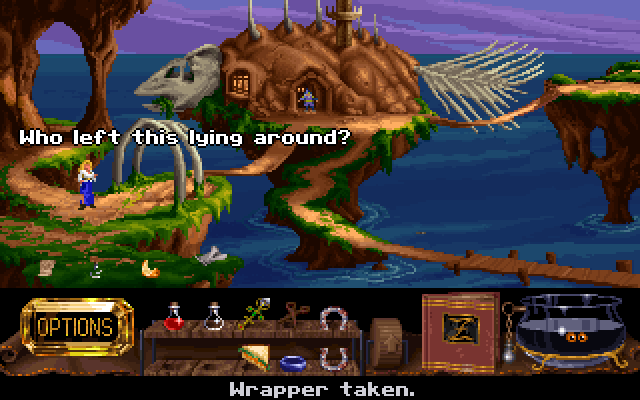
Picking Up Trash Off The Street And Making An Impression Of A Rabbit's Foot - [Rating: 5/10] - After leaving the alley, have Zanthia return to the city gate and move East. Eventually, she notices a large house shaped like a fish and a petrified sheriff by the building's entrance. Near the police officer is a pile of trash on the ground. Much of this debris is required to complete the game, but not all of it. Zanthia will need an orange peel, a candy wrapper, another empty flask, and a piece of parchment to complete her adventure. The parchment is the most important of these as, upon examining it, Zanthia realizes it is a missing potion recipe from her alchemy book. When you look at the recipe, you'll find that it is for a "Skeptic Spell," which will factor into the back half of the city and those "frozen" NPCs I mentioned earlier. Nonetheless, Zanthia's next task is to move northeast to enter a forge and pay note of a rabbit statue. Applying a piece of candy to the foot of the figure makes an impression of a rabbit's footprint. This item counts as an ingredient for the skeptic serum.
While the part with the statue is a bit tough to figure out, this is another well-signposted sequence. Zanthia hears about a bustling city when she interacts with other NPCs leading up to this point. Finding everyone paralyzed is a clever way to direct the player toward their next spell, which immediately rectifies that problem. The issue here is twofold. The trash next to the prison is easy to miss, and you must stop and think about using taffy on the rabbit statue when you blindly play the game. As long as you remember to read the parchment, you should be able to discern the rabbit figure is needed for the "Rabbit Footprint" ingredient it demands. However, what is worth noting is the distance between this statue and where you need to process all of the elements of the skeptic serum into the final skeptic potion, which we will discuss next!

Making The Skeptic Potion - [Rating: 6/10] - It's time to review one of the most unnecessarily tedious puzzles in the first half of the game! From where you apply the taffy on the statue, move right to a canyon, and use a stick you pulled from the fountain on a hanging rope. Eventually, Zanthia will find herself at the Altar of Doubt, where she can process her skeptic serum into a usable potion. To make the serum, toss the lucky horseshoe, rabbit footprint, sweet and sour sauce, and lizard tears into Zanthia's cauldron. Use all of the empty flasks you have, and one at a time, apply them to the altar to turn them into workable spells to reverse the paralysis that seems to be afflicting everyone in the city.
Sounds simple enough, right? Well, here's the kicker. It's imperative you only drain Zanthia's cauldron once you are completely done with the city, as more people need the potion than you have empty flasks. The game gives you two flasks, but you have three required recipients, and if you drain the cauldron, you have to remake and recollect all of the ingredients. Even if you avoid this mistake, you still need to backtrack to the altar before you can awaken the ship captain at the end of the sequence, and that is a colossal pain in the ass. For that reason alone, I am comfortable bumping this puzzle a point above the average. It's not necessarily the most demanding puzzle, but it is annoying and a massive waste of time.
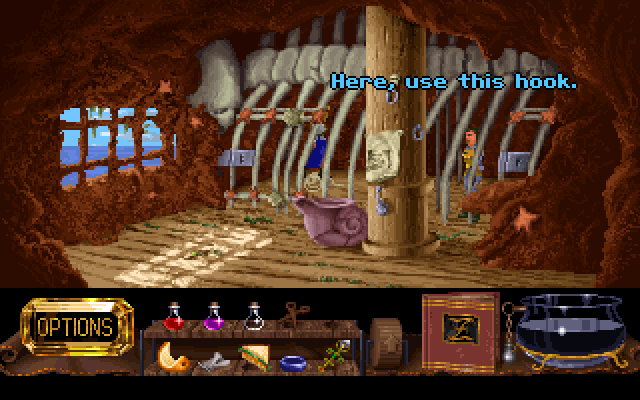
Breaking Out Of Prison - [Rating: 4/10] - Many people hate this puzzle partly because it requires you to spend a lot of time combining items and figuring out which combinations work. However, I love this puzzle because it is a great marriage between the game's goofy tone and free-flowing mechanical structure. The frozen sheriff by the fish-shaped building is the first person who requires a completed skeptic potion. When you apply the spell on them, they hurry away before you can ask them a single question. When you enter the sheriff's office, you'll find Marko in jail with his glove-looking companion. Talking to Marko reveals the sheriff lost his keys in the body of water below his prison. When Zanthia uses the magnetized horseshoe on a pond, she'll pick up the keys needed to free Marko. However, when you attempt to unlock him, the sheriff will catch Zanthia in the middle of her act and lock her away in a nearby cell. To get Zanthia out of her current predicament, click on a rug a few times to collect some thread and then talk to Marko, who will surrender a hook. Zanthia puts the two items together, and you need to use the finished product on the window of Zanthia's room to nab the keys again and free yourself and Marko.
Yes, using two items together can be fiddly, but this is one of the more enjoyable puzzles in the first half of the game. The game also clues you into what it expects you to do far better than many puzzles prior to this one. When you attempt to search for the keys the first time, there's a flickering grey texture in the pond that has it. When you collect the thread, Zanthia automatically constructs the fishing device after Marko provides a hook. All you need to do is use the horseshoe once, click on a rug three times, and apply a fishing rod to a window. None of those actions is anything outside of the realm of possibility of a normal playthrough.
Buying And Using A Travel Voucher To Leave The City - [Rating: 6/10] - Once out of jail, you are in the home stretch of the first act. All that remains is booking a trip out of the city. For the first step, return to a store that has a frozen shopkeeper and use your second skeptic potion on them. It is up to you if you want to make a third potion now or wait until after you get Zanthia a ticket, but know a third copy of the spell is needed to complete the game. When you talk to the shopkeeper, he shares that he has tickets to a ship that is leaving the main continent of Kyrandia but demands three gold coins as payment. You can offer the three gold teeth for a funny but optional scene, but those teeth are the key to hitching a ride out of the city. Unfortunately, the game needs you to drag your ass back to the water wheel on the farm to crush the teeth into the shape of gold coins. It is worth noting that the water wheel is five to six screens removed from the store. When you hand the three gold coins to the merchant, he provides a voucher for a ship at a wharf right of the store. Unfortunately, as I suggested earlier, the ship's captain is frozen and will need a newly minted potion from the Altar of Doubt.
This puzzle is manageable, but much like everything else in the farm and city, it has two or three added steps that make it annoyingly tedious. Remaking the potion on a far-off altar is tedious. Returning to the water wheel is tedious. Collecting the ingredients for the tonic if you drained the cauldron is SUPER TEDIOUS! It's a weirdly finicky and obtuse end to the first act, which provides a solid first impression. The good news is that the second half of the game, for the most part, is more consistent than the first. However, there's one more part to Hand of Fate that is bound to get your blood boiling, but more on that next time!