CV3: Speedrun Guide (Trevor-only)
By lordofultima 8 Comments
Foreword
Though these are more short-hand notes with self-explanatory thumbnail images for myself, I figure someone out there can get use out of them as well. If you need reference, check out Funkdoc's Trevor-only speedrun, practice a bit on emulator, and then you will better grasp the mechanics and levels to where these notes will then become useful.
Introduction
Castlevania III is a really tough game. But like many NES games, it can be conquered with relative ease just through trial-and-error memorization. I watched a speedrun of the game just to figure out cheap boss strategies for my casual playthrough, but eventually I wanted to give the real thing a go.
But then of course, it becomes hard again, because you're resetting every time you lose your sub-weapon of choice, or miss a jump and fall into a pit. Hopefully my notes are of some help to you (or maybe inspire you to speedrun this or another game from your childhood).
Practicing
Practicing should be done on an emulator, and FCEUX is the most accurate NES emulator out there, so I recommend that. If you want to take it a step further you can get a USB NES controller adapter, which is what I use, to emulate as much of the console feeling as possible.
First, watch the speedrun to get a lay of each level, and the tricks involved. CV3 is a solid game, and doesn't have any sequence breaks or glitches...so it's all solid play all the time (and a tiny bit of randomness).
Next, create savestates at the beginning of each level. Grind away at the tough sections of each stage, reloading until you feel comfortable with each level. It sounds tedious because it is. Thus is any form of practice. Remember that these are save states and things that are random (such as item drops from enemies) will never behave the same way in any legit run of the game. For instance, you can't bank on the owl ALWAYS dropping a stopwatch that you have to jump over, because that probably won't happen in the same place again.
What you can do is practice good habit...jump over EVERY enemy corpse when possible, because every enemy has a chance to drop random crappy sub-weapons, and since the run is built on maintaining your sub-weapon and multiplier, if you pick up a knife drop from a merman, the run is over. Practice ways to control the randomness. The Mermen in stage 5 spawn semi-randomly from the water, but you may be able to develop a strategy that takes care of multiple formations without having to do anything different. Anything you can put into muscle memory is invaluable.
Tenants
- Always maintain forward momentum unless a strategy specifically involves pausing for a moment, or you have to stop for projectiles/platforms/etc.
- Attacking with whip or sub-weapons is always faster while in a forward-moving jump. Always jump attack when possible.
- Max your sub-weapon multiplier ASAP. You must hit 10 things with the sub-weapon to get X2, and then 10 more for X3. This allows 2 or 3 instances of the same weapon on screen at once. Hitting things includes candles, enemies, and projectiles.
- Max your whip upgrades ASAP. The first can be gotten from a candle or enemy when you have 5+ hearts. The second requires 10+ hearts. You can only get the second after getting the first. These increase the damage and then length of the whip.
- Jumping over enemies is quicker than killing them, so all infinite spawning enemies like zombies should be jumped. This will also 100% avoid drops since them living means they can't drop anything.
- Avoid enemy drops by jumping over the spots enemies die on. If you kill them on an edge you have to jump off of, you have no choice but to wait. Flying enemies or ones that come from the ceiling (spiders) are often killed while you're directly under them, so sometimes you will get a drop that is unavoidable, and thus the run is over.
- Know the heart counts you need by the bosses, having too much isn't bad, except that the counter has to count down all remaining hearts at the end of a level. Expend excess hearts before the orb materializes when possible.
- Have a back-up plan. Maybe dying isn't the end of a run if you know a holy water is a room away in a candle somewhere. Sometimes it's better to reset, but not always.
- Trevor jumps a set distance and height every time, he walks a set distance every time you input a forward direction. Knowing this, using visual cues for jumps, boss triggers, and other strategy is a must. Since the ground is broken up into blocks, I use them as a marker on where I need to stand to perform things. In the large tower climb rooms, a lack of visual cues likely will mean your death.
The Guide
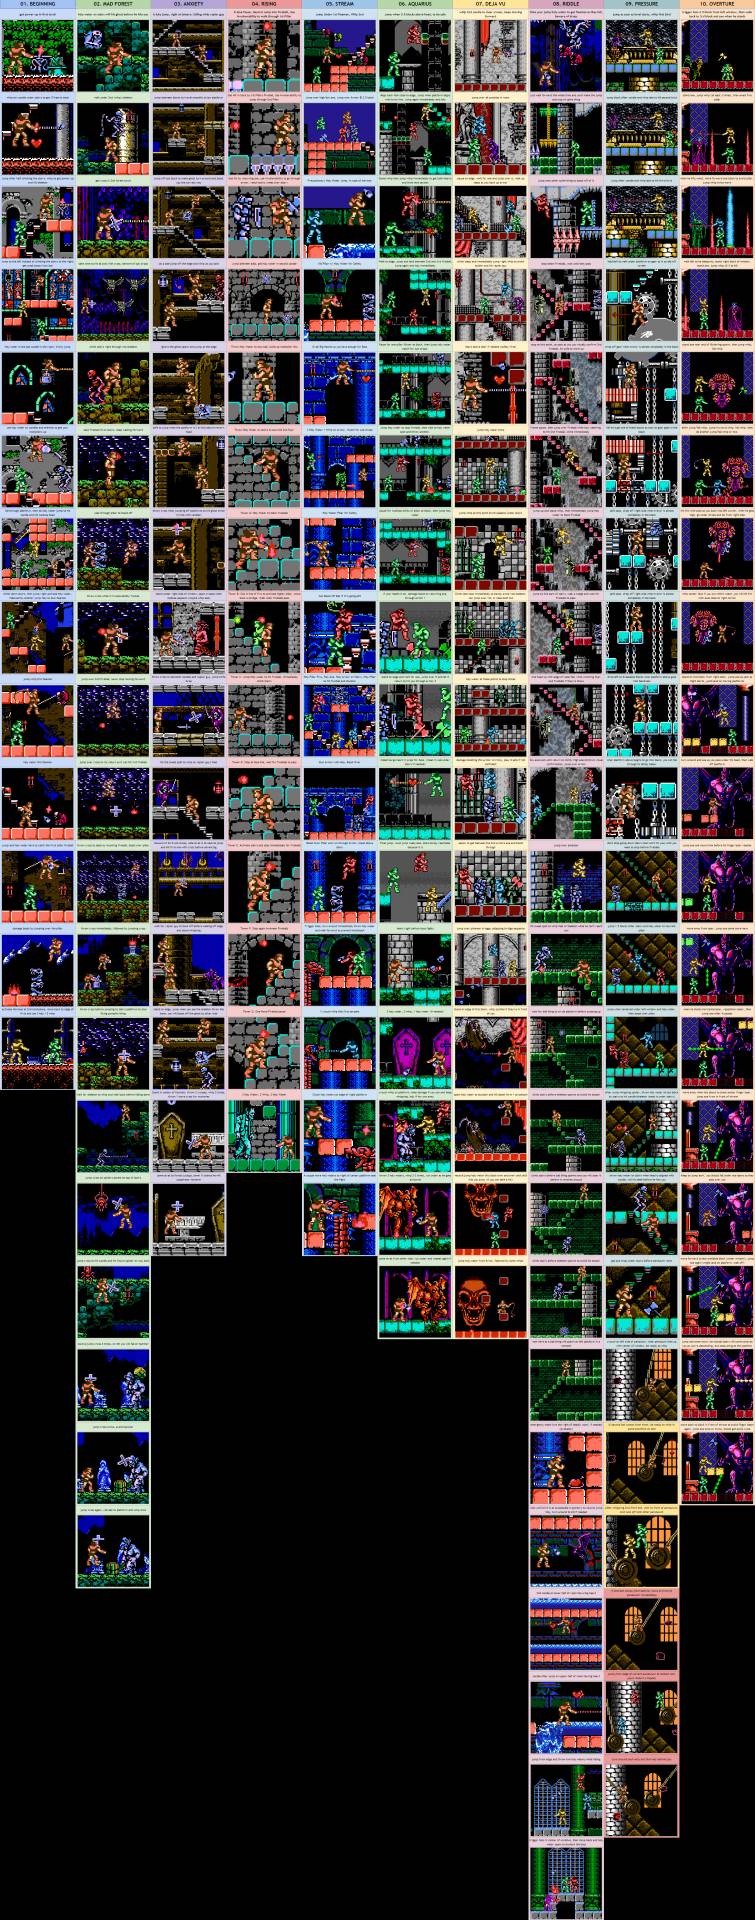
Unfortunately Giant Bomb doesn't have a guide feature anymore, which is kind of a shame as I would have been happy to create it here. Instead, I had to do it in a google spreadsheet, which is available publicly here. There's too much content and images to put it in a blog/forum post, but it's one click away and is easily navigable.
The "guide" contains a short description followed by a thumbnail image that illustrates parts of the level that are worth noting. This is not a normal guide for the game, so if you look at it not having played through CV3, you're likely to be confused as it leaves a lot of stuff out. The stuff left out is usually common sense, like "kill these enemies in a normal way that doesn't take a bunch of time" or something. Anything that you don't inherently grasp from the thumbnail will be gained through experiencing the game itself, and watching a speedrun of it.

Several images have multiple instances of Trevor, and are sometimes color-coated to denote meaning, though the colors them self don't mean anything, instead just serving to differentiate one character model from another.
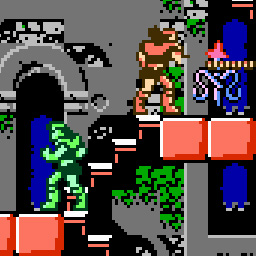
This thumbnail to the left for instance, says in no words, "climb this half of the stairs, from the point Trevor is standing (he's green), do an immediate jump to the right (Right+A), and then whip in midair to hit the candle and skeleton simultaneously...which will give you your second whip upgrade.". This is why that saying "pictures speak 1,000 words" exists. It's kind of true, and I could think of no better way to actually take notes for position-based things like this.
I"ll embed an image of the entire guide below, I suppose it looks more like a flowchart or something. Remember to just go to the spreadsheet, it's more comprehensible as you can read the notes and scroll around.

