Scenic Routes: Super Mario 64 (Part One)
By Mento 14 Comments
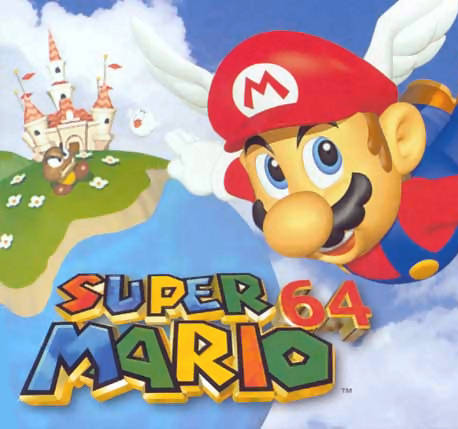
It's fair to say that Super Mario 64 is a monumental game for many reasons. It was Nintendo's first true bold step into 3D gaming, launched Mario into a new dimension without sacrificing an iota of the quality the core Mario series is known for and ensured that the fledgling N64 system started off in the best of circumstances. What tends to get overlooked amid the accolades for its trailblazing of numerous 3D platformer conventions is just how inventive it is when setting up goals and obstacles to overcome. I have a small theory based on my (limited) experience in the game industry as to why this is:
Y'see, at many points during a game's conception and development, the designers will get together to have a pow-wow about what they want to add to the game. Designers on big projects like these are often encouraged to be as wild with their notions as possible, because it's better to pare down a giant list of incompatible ideas (due to myriad concerns with a game's budget, the desired time frame of development or simply because it's not possible with the current tech) than to not have any innovations or distinctive features worth capitalizing on. With Super Mario 64, no-one really had any idea what the game should include other than extremely concise 3D controls (which I imagine were difficult enough to implement on their own) and maybe a big blocky goomba or twenty. Therefore, almost all the weird, off-the-top-of-their-heads notions the designers conceived would find themselves included in the game, rather than the usual handful. It's why Super Mario 64 feels so much more like a puzzle game with the way the criteria for completion could shift significantly between each Power Star, though one could argue that this was a natural evolution from Super Mario World given that game's huge number of hidden exits and secrets.
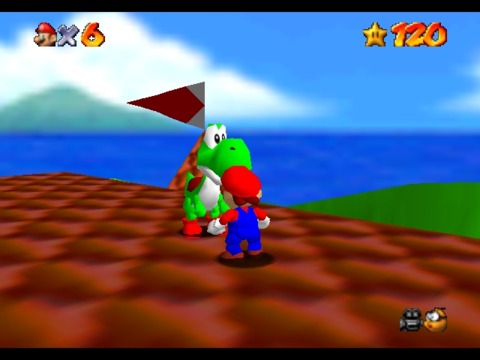
Anyway, I recently got a hankering to play through the whole thing again (I blame the Game Grumps), and it's surprising how much of its content sticks with you. It's not a particularly transparent game in most respects (barring Mario's Invisibility Cap) and the single sentence hints the player receives for each of the game's 105 Stars (the last 15 are entirely secret) aren't always enough to go on if there's some obfuscated trick to summoning the Stars in question. I want to talk more about the odd design decisions the game chose to make, how they designed certain aspects of the fifteen courses and how such a visually basic (by necessity) 3D game still makes its art direction distinctive. Really, though, I want to focus on the game and level design in particular.
(Because I'm going to get super in-depth with these courses, I'll be splitting this up into multiple parts. Today is the castle's exterior and ground floor, as well as the first two courses and a couple of secret Stars. I'll try for the last three courses of the first area and the first Bowser Road next time.)
Peach's Castle - Exterior
After a few introductory blurbs whizz past the screen for those who would be completely immobile without them (hardly one of the earliest 3D games with analog controls, but Nintendo likes to be thorough), we're introduced to the game via this entirely superfluous castle exterior area. It comes into play exactly once while hunting for Stars, as home to the Invisible Cap zone, but it's really meant to let players get their bearings in this strange new universe. The player's free to run, jump, climb trees, swim in the moat and take any number of exploratory leaps before walking across the castle's drawbridge and beginning the game proper. Mario also starts the game pointing directly at the castle's entrance, so there's no ambiguity for those who wish to jump right into the action.
The exterior is remarkably packed with details given how minimal its importance is to the rest of the game. Every course, Star and NPC is within the castle's walls, barring the above exception and a special post-game bonus later on, so there's really no reason for it to be as expansive as it is. There's not a whole lot to do either - there's a waterfall to one side where the moat begins and a small lake where the moat ends, and a curious square hole in the ground covered by an impregnable metal grate. A few mysteries are raised, like an inaccessible door under the moat's surface, but the sole purpose of this area is to show off how attractive the game looks - there are birds and butterflies everywhere, some calming ambient sounds and the impressive looking castle itself with its Peach stained glass window - and to let the player get a firm grip on the controls in a safe environment.
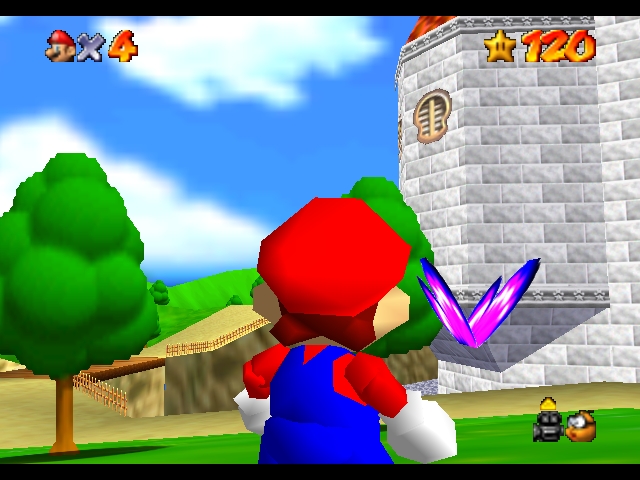
Important to note here is that Super Mario 64 has no overt tutorials as such. It simply has a few signposts that give you a rundown of context controls for whatever apparatus are in the area (like climbing trees) and then gives you a big playground to test them in before it starts throwing any enemies or tricky jumps at you. It respects your intelligence, even in spite of the fact that most of the game's mechanics were scary and new at the time.
Peach's Castle - Ground Floor Foyer
The unusual aspect with the first floor of Peach's Castle, besides Bowser's ominous and apparently telepathic warning to am-scray, is how it adopts a locking mechanism for almost all its doors that prevent the player from exploring the rooms beyond until a certain number of Stars have been found. However, after the initial three Stars, this feature is all but dropped to only include the three Bowser Road stages, which lead to the game's encounters with the King of Koopas himself and a key that will unlock a new floor of the castle to explore. Clearly the game was eager to ensure that the first Star of Bob-Omb's Battlefield (which isn't necessarily the first Star you can earn there, simply the first you have the hint for) would be the first the player claims before more of the game opens up to them. A single Star is all that is required to open the way to the second course (and the first two hidden Stars), and three for the third and fourth courses. There is the matter of the spooky fifth course, but this won't be accessible until the player has found at least twelve Stars (however, the fountain courtyard is still free to explore, sans its future ghostly inhabitants).
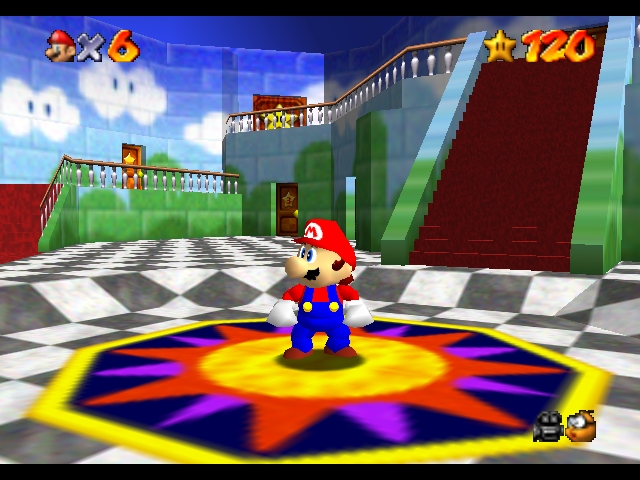
There's a Toad here too, one of Peach's several servants that all appear to have been cursed along with the castle, remaining transparent until Mario acknowledges them. (Maybe the game's making some sort of cynical point about Mario's lofty status in the Mushroom Kingdom.) Most Toads just dole out advice, and given how little the game tends to tell you about some of its more obtuse elements like the 100-coin Challenges or how some course portraits operate, it's useful to seek them out. Three of them even have hidden Stars that they'll happily hand over, though you'd never know it if you deigned to ignore them all. This is what happens when you disregard the little people, Mario: you miss out. And then the bloody coups and revolutions start happening. Pretty easy to figure out who needs to be sent to the guillotine when only the rich have small enough heads to fit through the hole. Just saying.
The only other points of interest are two locked doors and the double doors to the first Bowser Road, which requires a meager eight Stars to open. Seeing how there's almost forty you can obtain before you ever need to open this door, it's clear the developers wanted to softball the first significant Star-count barrier. As for the Flying Cap zone, also accessible in the castle's lobby after ten Stars are found, we'll discuss that later along with the two hidden Stars for The Princess's Secret Slide.
Bob-Omb Battlefield
The Course
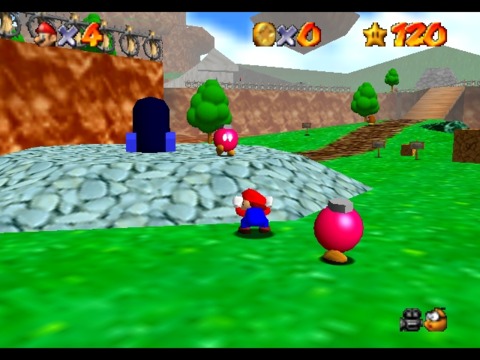
The very first course and the only one that's initially available. You begin next to two Pink Bob-Ombs, which you can quickly ascertain are allies with their benign behavior. They won't move, so you have all the time you need to move up to them and try punching them. The punch button, of course, doubles as the "talk to NPC" button, so if you hadn't figured out that they were friendly you will once they start talking to you about the course.
First off, it's important to note that there are no bottomless pits on this course. Coins are plentiful and there's a heart spinner (essentially free healing) halfway up the mountain. That isn't to say the course is entirely safe, but the designers removed a lot of what would become common causes of SIDS (Sudden Italian Death Syndrome) in later courses.
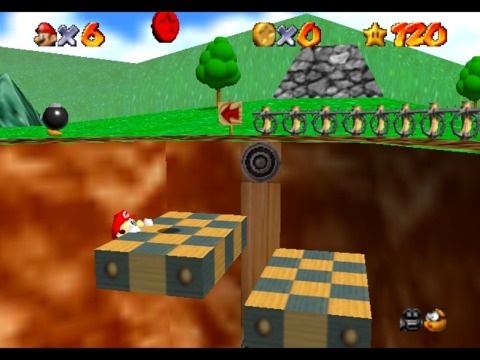
Of note is the elevator system near the bridge up to the next height level of the course. This system has no real reason to be here given that there's an easier alternative route nearby, so what it does instead is introduce a type of recurring moving platform puzzle in a situation where, once again, the player is all but guaranteed safety. The way it flips over as it reaches the apex, for instance, is an element of this design that might frustrate players in later instances (especially the Invisible Cap zone). Also of note is the chequerboard design: it's a simple texture that helps the mechanical items in the environment stand out next to the more natural browns and greens of the landscape. The few times the game attempts a more sophisticated texture (say, the barbed wire fences in the above shot, or the various other instances of animated sprites in a 3D landscape) it doesn't always look so hot, so the artists had to find some creative ways to employ basic 3D model textures that would be distinct and still congruous to the world design. I should state that, in spite of dabbling with Maya in my younger years, I'm certainly no expert on 3D CGI and graphical design, but all the same it feels like they do a lot with a little in this game in that regard. (I just remember a whole lot of chequered orbs floating over water textures from that period of my life. Or maybe that was from my time with Amiga 500 art programs.)
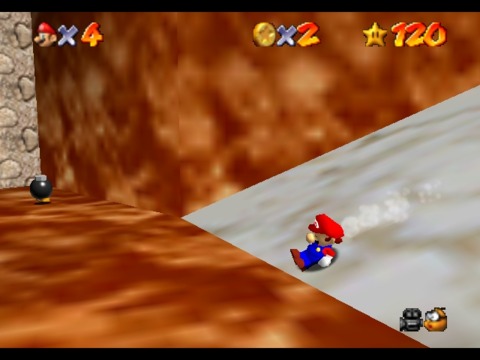
The course then gives way to the mountain, providing an obstacle course as the player works their way up the spiral path. Rolling balls are a common nuisance in this and future courses, a clear means of exploiting three-dimensional space to produce a challenge. The balls are designed to be too big to leap over easily, unless the player is employing one of Mario's higher jumps, so instead players are encouraged to duck and weave around their predictable paths. An alcove in the wall presents one of (at least) two teleporters in the course. The game's teleporters are tricky to find because they require the player be stationary. This plays against the player's instinctual need to keep Mario constantly in motion; always jogging to the next goal or place of interest. Using this teleport skims a few seconds of the journey up, but it's unlikely a novice player will know about it. It almost feels more like a shortcut for speedrunners, or perhaps for those who are so fed up at getting hit by the rolling rocks that they look up a "cheat" to get past them.
The Stars
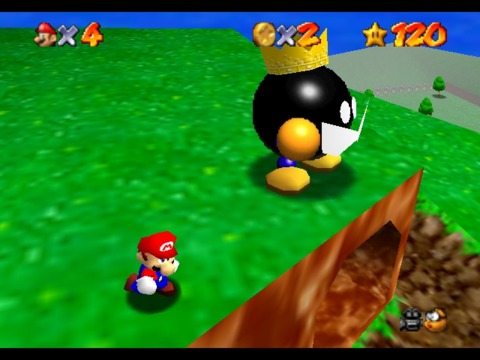
The Big Bob-Omb fight is important because it teaches players the first rule of each Bowser fight: find a way to get behind the opponent and grab them. Big Bob-Omb's attack is a throw that will probably not do much harm unless the player is unfortunate to be turfed off the mountain, but even in these cases there's a heart spinner nearby to revitalize oneself and try again. The Nintendo rule of three comes into play here as well, setting up most of the other boss fights in the game. Given the big guy's extremely slow gait, the challenge isn't so much the fight itself but getting there in one piece. After this, the game is convinced that the player knows enough of the basics to survive, and thus opens the second course of the game: one that has similar challenges, but is otherwise less lenient.
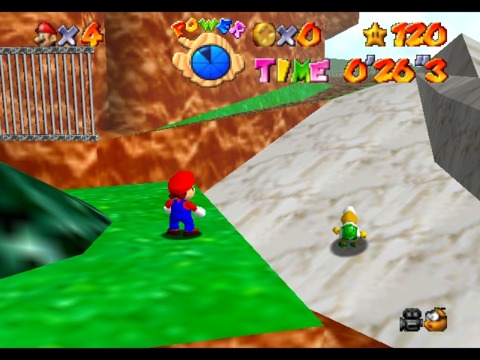
Bob-Omb's Battlefield's second Star is a race against Koopa the Quick, a particularly large Koopa that is - like the Pink Bob-Ombs - immobile until the player gets close to them and talks to them. The race itself is interesting, because Koopa gives Mario a general idea of where to head (the top of the mountain) but then takes a course that Mario cannot possibly follow: up the sheer marble slope that serves as the terminal stop for the rolling boulders. This is a necessity due to Koopa's programming: a seesaw bridge makes it hard to path a course through, especially if the player decides to hold one side down. Instead, the player is required to take the long way around and up the mountain, but Koopa makes sure to jog a little slower when tackling this hill so that the player can keep up. If the player takes either of the teleporters (there's a second one in a bed of flowers), Koopa will angrily demand that you start over because Mario skipped over part of the course. The same is true if Mario decides to use one of the cannons as a shortcut. That the game acknowledges that Mario "cheated" is impressive enough, though it's really only looking for a few activated triggers. If players had a hard time reaching Big Bob-Omb and had to practice the route a few times, then this Star feels a lot easier because they're so used to the journey by this point. If it's a close race towards the end, then Mario has one last ace up his sleeve by jumping up the thin ledge that separates the last part of the spiral path to the summit, giving the player a much appreciated eleventh-hour advantage. While the game is sparing with its timed sequences - there aren't too many occasions where you'll need to head somewhere within a short time limit - there's enough of them to generate some novel instances.
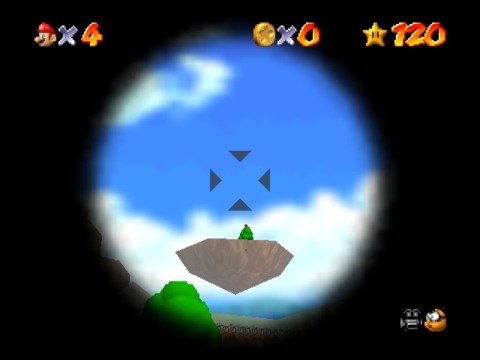
The third Star requires that the player unlock the cannons and use them to launch Mario to a floating island that is visible at numerous points along the course, especially as the player gets higher up. This begins a recurring puzzle in half the game's courses of finding a Pink Bob-Omb on the course (often hidden away somewhere) and precision-aiming a cannon to shoot to an otherwise impossible-to-reach Star. As we see again with many recurring concepts being introduced to the player in this first course, it is almost impossible to die while getting the hang of aiming Mario's trajectory. The course doesn't have pitfalls, as stated, and Mario is immune to falling damage while he arcs through the air after the cannon fires. It might take the player a while to find the best angle, and of the four cannons in the level only two realistically have a chance of reaching the island. The second cannon, located just after the elevator, can reach the island with a sufficiently high angle. However, it's the fourth and final cannon most of the way up the mountain that gives players the best chance, as it is parallel to the island and gives the player a target to shoot for in the guise of a single tree. Unusually, the star is located inside a ? block rather than being out in the open, possibly to prevent players from trying to fire themselves directly at it. A few other stars are concealed in these ? blocks for often unknown reasons; it's especially jarring given how many of these blocks contain comparatively inessential extra lives or coins.
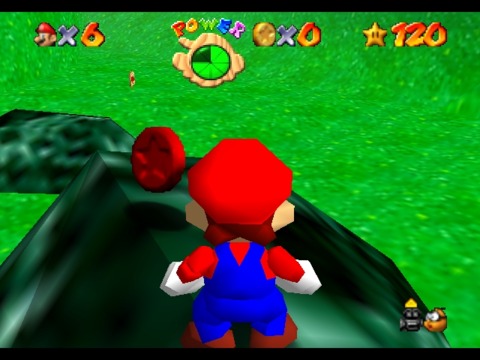
The fourth Star is the game's first instance of the red coin rush. Each course in the game, without exception, has an instance where Mario has to find eight red coins and then head to a Star that appears elsewhere in the course. Sometimes the red coins are spread across the entire course, as they are here, while occasionally they're all located within a single enclosed area. The red coins of Bob-Omb Battlefield are spread out in such a way that they aren't particularly well-hidden, but most will involve going out of the player's way; therefore, it's unlikely for a player to go actively searching for them while pursuing other Stars. Of course, there's nothing stopping a player from doing exactly that, though they might find that the floating island red coin is inaccessible without first activating the cannons. The first two red coins are close to the start and involve riding the elevator and exploring a patch of greenery away from the beaten path. The third is on the Chain Chomp's post, which might also act as a hint. The fourth and fifth are a little past the Chain Chomp/seesaw bridge and surround the location where the Star will eventually appear, as if to highlight it. The sixth is quite well hidden, situated under the bridge that connects the hill to the rest of the level. The seventh is midway up the hill, which you can either reach by sliding down or just by sprinting up that slope without stopping. The eighth is on the aforementioned floating island. It's a gentle introduction to running around collecting coins (something that heavily factors into the 100-Coin Challenges) and ensures that the player has explored the course thoroughly. It's never a bad idea to do that with any new course, really.
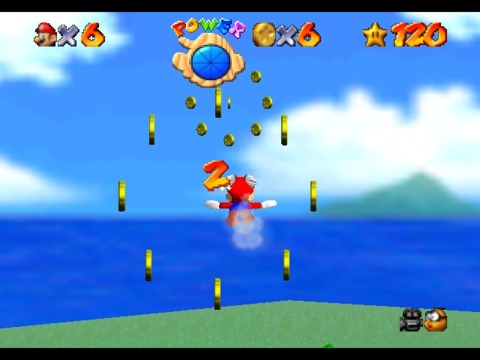
The fifth Star is where Bob-Omb Battlefield gently reminds the player that there's other locations to explore. At this point, the player will have found enough Stars to unlock the next three courses, and the chances are they might wish to thoroughly plumb Bob-Omb's Battlefield of its Stars until no further challenges remain. The game puts a stop to that by ensuring that the player has found the Flying Cap for its fifth Star, which involves flying through five rings (and introducing another game-wide conceit; the five "hidden activators" which simply ping a number in a 1-5 sequence once Mario passes through them) via the cannon on the floating island. It is almost impossible to aim the cannon for the further rings due to the low draw distance for animated objects like coins, so it's more or less required that the player exit the course and get far enough into the game to acquire the Flying Cap. It might annoy completionists, but no more so than a Metroid area that has a dozen power-ups closed off to an under-equipped Samus Aran.
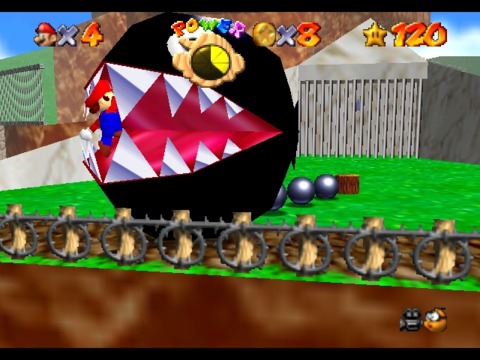
The most striking object in the whole course is the glorious 3D Chain Chomp that munches anyone who threatens to walk past him. The player doesn't have to be an Olympiad to run past it while it chomps at thin air, but he's a huge omnipresent menace that's meant to intimidate you more than anything else. He'll factor into the course's sixth and final Star, and it's simultaneously a peaceful means to conquer an enemy and a call back to Yoshi's Island, where ground-pounds were also the solution for freeing the poor, trapped creatures. The game has a handful of wooden stakes identical to the one holding the Chain Chomp down a little further along as well as a tip that suggests you try ground-pounding them. The player is thus required to put two and two together to free the Chomp. However, because this can be done on any "variation" of the course (many courses will make minute changes to the level design depending on the Star the player highlights before starting) and because the fifth Star for this particular course is inaccessible until the player finds the Flying Cap later in the game, this is a Star that the player might well intuit the solution for ahead of time. If the player does figure it out without the course hint - the Star is clearly visible behind the Chain Chomp, so a hint of some form is already there - they'll not only realize that they can obtain Stars without needing the hint beforehand, but can do so before acquiring the previous Stars in the sequence. While this isn't always true - course changes occasionally need to happen for certain Stars to become accessible - the game feels a lot more open once this epiphany occurs.
100-Coin Challenge: I'm trying not to turn this analysis into a walkthrough, but the 100-Coin Challenge is a level design curiosity because I'm half convinced it was added as an afterthought. For one thing, a lot of stages have "blue coin blocks", which briefly summon a number of very valuable (five coins each) blue coins clearly placed there to bulk up the insufficient coin count for the stage. Second, finding a 100-Coin Challenge Star will not instantly remove Mario from the stage, so it feels like they were designed far later in the process. Bob-Omb's Battlefield is, like it is in many other respects, a very gentle introduction to this feature, with well over 100 coins to find and no pitfall perils to instantaneously undo the player's progress. Having the Flying Cap makes this particular challenge considerably easier, as there's almost half the coins the player needs in those floating rings.
Whomp's Fortress
The Course
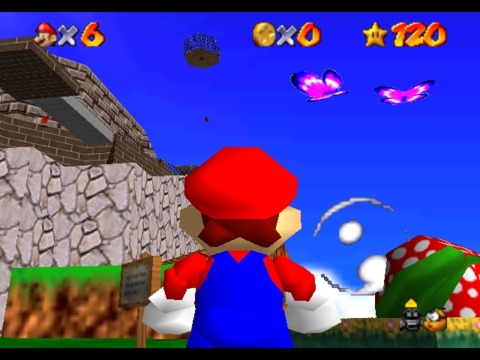
Immediately, the game raises the stakes with a course completely surrounded by an empty void that will cause Mario to lose a life should he fall off - a characteristic common to at least half of the game's courses. It's not so much an issue here, given the amount of focus on the center of the course (which is once again vertically-oriented, like the latter half of Bob-Omb Battlefield), but still an ever-present threat. The player is once again following a linear path to the peak, but there's a lot to unpack on the way there.
First off, there's one of the course's irascible piranha plants, here depicted as a grouchy sleeper. A nearby signpost warns Mario to "walk quietly", which the player might eventually ascertain to mean gently holding the stick in one direction instead of pushing it all the way. This makes Mario far slower and stealthier, though it's rarely used anywhere else in the game besides sneaking up on sleeping piranha plants. This control feature does find its way into many other games after this, however. Even Super Mario 64's tossed off ideas are practical enough to become institutions of the genre.
The course features a lot of other favorites too, including the Thwomps, the new and far more mobile Whomps and a Bullet Bill launcher that only shows up after the first Star has been acquired. There's more elevators, traps and moving platforms but not a whole lot else to the course. In a sense, it feels smaller than Bob-Omb's Battlefield and more streamlined towards creating challenges for the player.
The Stars
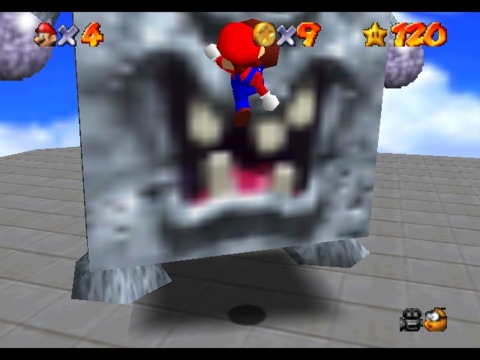
The first Star, similarly to Bob-Omb Battlefield, simply involves the player scaling the course to reach a boss at the top. In this instance, the player has to ground-pound the immense Whomp three times to subdue him. It's a delayed introduction to the ground-pound move, which hasn't really been emphasized yet though should be familiar to anyone who played Yoshi's Island, the previous game in the Mario series (well, depending on your interpretation as to what games are considered "core" Mario games). Whomp has a funny little rant about the literal downtrodden role of sentient rocks in the Mushroom Kingdom, which could also be construed as terrifying. I wouldn't want to consider for one moment that a cobblestone road involved the indentured servitude of a thousand tiny Thwomps.
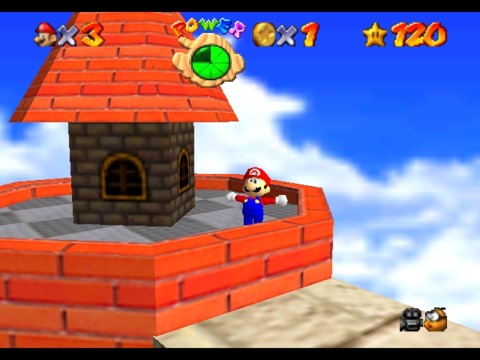
The second Star replaces the giant Whomp boss with a cylindrical tower full of moving platforms. (I doubt it was intentional, but it gave me some fond flashbacks of Nebulous/Castelian.) It's the most significant change to a course's layout yet, though not that much more of a significant challenge. The player could even fire themselves up there if they have the cannon unlocked, though it's not an easy shot.
The third Star requires the cannon, this time firing for a small enclosed area underneath a flagpole. Given the prison-like pillars that surround this enclosure, the sensible player will determine that you need to aim for one of the far pillars to stop Mario from flying right on through and out the other side to his doom. There's a few other targets the player might consider instead from this cannon vantage point (especially as the hint is vague, beyond requiring a cannon) including the caged Star and certain parts of the course which are more destructible than they appear.
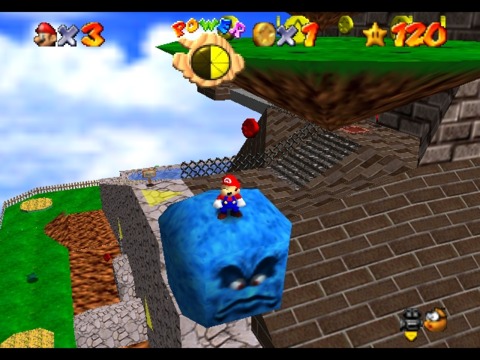
The fourth Star is another red coin scavenger hunt. The cleverest one is hidden above the second Thwomp, which requires riding the thing up to reach. The first six are otherwise all located on the path to the top, which the player will have undoubtably bumped into a few times while chasing the previous Stars. The last two require knocking down a plank of wood with Mario's fists, creating a bridge to a few floating islands. While it's not quite a physics puzzle, the player is left to suss out the secret behind this tall plank before they can move on.
The fifth Star is contained within a caged island with no top, and instructions to "drop in". A player may determine that this requires a well-aimed cannon shot: a dangerous proposition given how easy it is to shoot off the course if the angle is too low. Rather, the true solution to this puzzle is to climb the first tree in the course and wake up an owl who will helpfully fly Mario around, telling him to let go when his shadow is over his desired landing site. The Star is considerably easier to reach this way, though it's likely the owl might go completely ignored by players (and thus the cannon might be perceived as their best shot, so to speak).
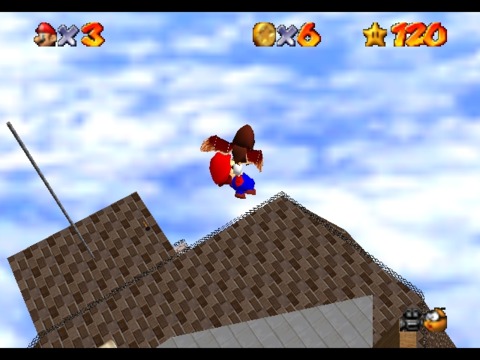
The sixth Star is, like the sixth Star of Bob-Omb Battlefield, one that the player might find entirely incidentally. It involves blasting away a jutting piece of platform to reveal the buried Star underneath. This protuberance is directly between the cannon and the caged Star, so if the player grossly misjudged the angle of the shot, they could well hit it without realizing there was a Star there. The hint of "blast away the wall" isn't particularly helpful, so this is a Star that might stymie players for a while. I'm fairly sure that the first time I played the game, I was given a tip to use the cannon by a friend who had watched a demo of the game. The game rarely got this obtuse with its course Stars, but some of the other hidden Stars were pretty tricky to find in that (mostly) pre-internet era.
100-Coin Challenge: The challenge is a lot less lenient this time, though the blue coin block provides a handy twenty to get players started. The lion's share involves killing the various piranha plants and Whomps scattered across the tower, each worth five coins. The course isn't shy about putting rows and rings of coins everywhere either, and the relatively compact area means the player can hit their required 100 quickly and without putting themselves at risk too many times. While there's barely over a hundred coins on the course, they're all placed fairly obviously, with perhaps the exception of a ring of coins where the third star can be found.
The Princess's Secret Slide
While there's a few slides in the game, one coming up soon in the fourth course, this is the only one to be entirely secret. It involves opening a door leading to a tiny room with three Peach stained glass windows and an almost hidden note from the Princess herself, who implores Mario to save her and the Toads and to look for a secret entrance to one of the Stars she's personally hidden. The slide employs the game's momentum physics, giving players some control over the direction of Mario's slide, but not necessarily enough to make these slides a doddle.
While many players find the secret Star at the end of the Princess's Secret Slide, they tend to miss the bonus Star that Mario earns from completing the slide as quickly as possible (under 21 seconds, I believe is the cutoff). It's the only secret area with two hidden Stars, and the signpost at the beginning of the slide only hints at a secret Star that can be obtained by going down the slide as fast as possible. If nothing else the Secret Slide is good practice for the two harder slides in the game, in course four and course twelve respectively.
The Flying Cap Zone
Once the player has found their tenth star, they'll discover that the lobby has a bright sunbeam pointing over the sun rug in the center of the hall. The idea is to stand on the rug and stare up at the light source, which immediately teleports the player to a secret stage. A similar idea would feature in The Legend of Zelda: Ocarina of Time, in which the player is given the hint to fire an arrow directly at the sun at the right location, unlocking the useful fire arrows. It's another instance of the game taking a mechanism new to the format, in this case the zoomed-in camera controls that allow the player to look around, and finding a way to integrate a puzzle into it. How anyone is supposed to know to do this is one of the game's many mysteries, though I'm sure there's a hint somewhere if the player searches enough.
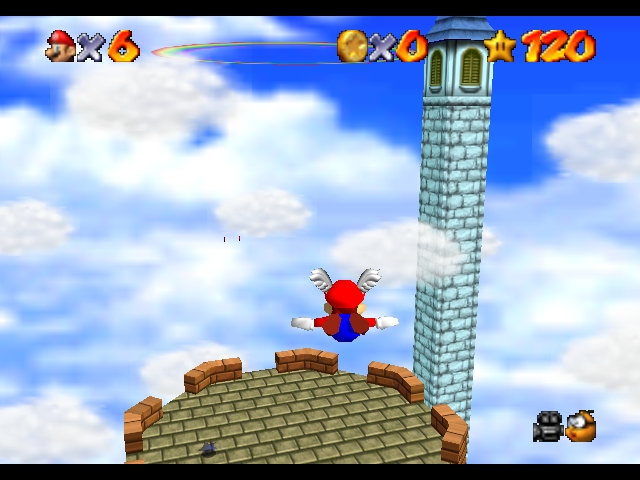
The Flying Cap Zone is a baptism by fire, requiring that the player use the Flying Cap (the game drops a few paragraphs of flying controls on you, which is exonerable given that you're presently in mid-air) to steer their way to the Red Switch - a giant red button that appears to be right out of Super Mario World - to activate every red Flying Cap block in the game. The Flying Cap provides a lot of freedom, though it's not so much flying as gliding: the player cannot go much higher than the height of their initial launch jump, and while they can stay level for a while they'll inexorably start falling towards the ground. However, the addition of cannons greatly expand the utility of this power-up, and many of the game's trickier Stars depend on the player's prowess while soaring through the air.
Given that there's also eight red coins floating around, it's easy enough to surmise that there's an additional secret Star here too. After at least two courses, the player should by this time be conditioned to recognize that any string of red coins will eventually lead to a star, even if the gray Star placeholder next to the switch wasn't sufficient hint.
The Bit at the End
I'm enjoying this closer look at Mario 64, coming at the game with an experienced eye, but I'm not entirely sold on this format just yet. I'd like to focus more on the smaller touches and less on each individual Star moving forward, especially as many tend to repeat themselves within new surroundings. From here on out, I might just pick on a few features per course and secret area to investigate.
I'd be happy to field criticism or suggestions in the comments below, as well as your own experiences with the game. How readily and without assistance did you discover the game's various secrets? How difficult did you find the game overall, either going for all the Stars or just acquiring enough to defeat Bowser? Did you play it recently, and if so do you feel it holds up or is incredibly dated? I'm curious what people think, because I feel there's a lot of inherent virtues to this game that no other like it (and there has been plenty like it) could quite replicate. Hopefully, I'll be able to put into clearer terms what those virtues are. At any rate, thanks for reading.
| Part One | Part Two |
| Part Three | Part Four |
| Part Five | Part Six |
| Part Seven |
