Overview
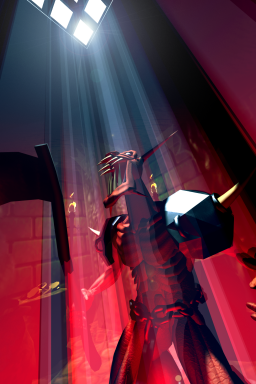 The Horned Reaper awaits...
Developed by Bullfrog Productions under the direction of Peter Molyneux, Dungeon Keeper is a game focused on the creation and upkeep of a vast subterranean dungeon. Though it can be most easily described as a real-time strategy game, it contains elements of many other game genres, such as god games, management simulations, role-playing games, and even first-person shooters. In addition to amassing a large enough army to defeat one's enemies as in most RTS games, Dungeon Keeper also requires the player to attend to the general well being of creatures under their control, making sure that they are well-paid, well-fed, and tasked with jobs that they enjoy. At the apex of this creature management imperative is the Horned Reaper, a minion who causes incredible destruction when unhappy. A skilled keeper must be sure creatures have easy access to things they like while being shielded from things they don't.
Dungeon Keeper was successful enough to warrant one commercial expansion, The Deeper Dungeons, which featured 15 new scenarios as well as several AI tweaks. Dungeon Keeper 2 was also released two years after the original, which included many changes to the original formula. The sequel contained a trailer for Dungeon Keeper 3, though this title was publicly cancelled the following year. Electronic Arts, who eventually acquired Bullfrog Productions, announced Dungeon Keeper Online in 2008. Though it is unlikely to be released in western countries, EA has expressed interest as recently as 2009 in further exploring some of Bullfrog's properties.
Gameplay
As in many RTS games, players interact with the world of Dungeon Keeper through an isometric perspective. From here the player is able to exert their influence through a mixture of indirect commands as well as direct interaction. The basic peon, known as the Imp, is the general-purpose workhorse, and the only creature that is unerringly loyal to it's keeper. They will perform any given task without question, with their main duties being excavating and claiming land in addition to gold mining. On top of setting general goals for Imps, like tagging areas to be mined, the player can manually pick up and drop Imps and other creatures near tasks they wish them to perform.
 Conditions topside will deteriorate as the player gains victories.
The main objective at the beginning of most levels is to create a dungeon of such magnitude and grandeur as to attract several types of powerful minions to one's cause. Minions will generally enter through any claimed Portal, with one usually being situated near the starting point. Once there, creatures can be made to engage in several activities such as producing useful spells and items for their keeper or training in order to become more powerful. Training and the like requires gold, and creatures themselves will expect to be paid periodically, so a constant influx of gold is necessary to prevent creatures from becoming upset or stagnated in their progress.
Once sufficiently powerful, a keeper must defeat the opposition, which consists of heroes, enemy keepers, or both, depending on the level. While heroes do not create dungeons and thus cannot replenish their numbers, keepers are theoretically capable of creating a self-sustaining dungeon just like the player, though in practice they have several exploitable tendencies. Once all foes have been defeated, the player is given the choice to continue development of their dungeon before progressing to the next level by hitting the space bar.
Minions
Minions are both the army and the work force of any dungeon, and all types can be trained from level one up to a maximum level of ten. Creatures are primarily attracted to the player's service through Portals, and all but the weakest types have some manner of prerequisite before they will appear. In addition, units usually come with very specific proclivities in the duties they will perform, making it necessary to have a diverse group of monsters to be successful in most levels.
 Imp Imp | ImpThe keeper's basic labor force, Imps are responsible for excavating and maintaining the player's dungeon, in addition to claiming land and carrying items. If it is feasible to train them, they can learn Speed and eventually Teleport, which are both supremely useful. Training them to level three to get Speed can be well worth the investment, though continuing to level ten in order to get Teleport is usually a waste of time. - Key Abilities: Dig, Speed, Teleport
- Prerequisites: Create Imp spell, Sufficient gold
- Affinities: Dungeon Creation, Maintenance
|
| Beetle | BeetleThe bog-standard unit of Dungeon Keeper, the Beetle can learn Freeze at higher levels, but there are minions whose training pays much higher dividends than this lowly insect. A decent option if there are no others, but there almost always will be. If the dungeon starts getting cramped, it's not a bad idea to boot these bugs. Or better yet, they can be tortured and killed to make a better unit. - Key Abilities: Freeze
- Prerequisites: 1 Lair tile
- Affinities: None
|
| Bile Demon | Bile DemonBoasting more hit points than any minion save Horny himself, these shambling behemoths make up for their lack of speed with heavy hits and an immunity to poison gas. They are also heavy enough to be unaffected by the push back effects of Wind spells. Make sure to have a large Hatchery to support them, as they have an appetite to match their girth. Despite their corpulence, they are happy to volunteer in the Workshop if one is available. - Key Abilities: Poison Cloud, Fart, Grenade
- Prerequisites: 25 Lair tiles, 25 Hatchery tiles
- Affinities: Manufacturing
|
| Dark Mistress | Dark MistressWith some extremely useful spells such as Lightning, Speed, and Teleport, the Mistress is a very handy minion to have fully trained. If they are kept out of the Torture Chamber long enough to do so, keepers will soon have one of the fastest and deadliest units in the game. Unlike most creatures, she enjoys being slapped, making it a particularly effective form of encouragement for her. - Key Abilities: Lightning, Speed, Drain, Teleport
- Prerequisites: 9 Torture Chamber tiles
- Affinities: Training, Torture
|
| Demon Spawn | Demon SpawnThese inexplicably adorable hell spawn are likely to be the workhorse of most armies early on as they'll usually head straight to the Training Room where they quickly gain a few levels. They transform into level five Dragons if trained past level ten, though once they start appearing in earnest it's easier to just train a Dragon from scratch. - Key Abilities: Missile, Heal
- Prerequisites: 1 Treasure Room tile, 1 Training Room tile
- Affinities: Training
|
| Dragon | DragonThese guys are a bit of a slow burn (no pun intended). They don't kill enemies particularly fast, but a tenth level Dragon is incredibly tough to kill, meaning they'll eventually come out on top in most scenarios. They will train voluntarily, though they prefer research. In levels where they appear in large numbers, a Lair of immense size is required, as they occupy four squares apiece. - Key Abilities: Heal, Grenade, Meteor, Word of Power
- Prerequisites: 15 Lair tiles, 25 Treasure Room tiles
- Affinities: Research, Training
|
| Fly | FlyAbout as useful as one could expect a giant fly to be, Flies are more handy than the Beetle due to their ability to quickly scout the map, though they are likely to be killed by the first enemy they encounter. Training one will give it better tools for scouting, but does little to improve its survivability. Once Spiders start to appear, they will kill Flies on sight, which is a bit of a blessing. - Key Abilities: Sight, Speed
- Prerequisites: None
- Affinities: Scouting
|
| Ghost | GhostWhen a unit dies in the Torture Chamber, it is resurrected in the form of a Ghost of the same level. Ghosts are not going to be among a dungeon's front-line fighters, but they have a few useful abilities that might make it worth keeping one around, such as their ability to see invisibly units. - Key Abilities: Reflect, Invisibility, Wind, Rain
- Prerequisites: Torture Chamber
- Affinities: Research, Haunting the Temple
|
| Hellhound | HellhoundA decent if unremarkable attack dog, by the time Hellhounds appear in the campaign they are a little underwhelming. Their amazing speed and lava immunity makes them great for scouting purposes, though as with the Fly their inquisitive nature quickly gets them killed if the player is not fast enough to pull them out of trouble. - Key Abilities: Speed, Flame Breath
- Prerequisites: 9 Scavenger Room tiles
- Affinities: Scouting
|
| Horned Reaper | Horned ReaperThose who desire the assistance of the Reaper should be careful what they wish for, as keeping one satisfied is no mean feat. He is the true test for any keeper, as the only thing that truly pleases the Reaper is killing, and if he does not get what he wants, he can easily turn completely psychotic, destroying the keeper's dungeon and killing his minions. It is best to keep Reapers far from other creatures, preferably in their own separate wing. As if their general churlishness wasn't enough, they also expect to be paid handsomely. - Key Abilities: Speed, Slow
- Prerequisites: Temple
- Affinities: Killing
|
| Orc | OrcThe combat equivalent of the Troll, he's a hardy fighter who trains at a fast clip. The Orc may not have many flashy abilities, but he can dish out some damage and take a fair amount as well. When finished with their training they will man any empty Guard Posts in the dungeon, and this won't take long, as they are one of the fastest units to hit level ten. - Key Abilities: Speed, Armor, Grenade
- Prerequisites: 9 Training Room tiles, 1 Barracks tile
- Affinities: Training, Guard Duty
|
| Skeleton | SkeletonA Skeleton is created whenever an imprisoned creature dies. While a quick learner in the Training Room, Skeletons might be a little too fragile to hang with the late-game big boys, though until then they're a great addition to a well-rounded army. They're also incredibly cheap, meaning its never a bad idea to have a small group of them trained up. - Key Abilities: Armor, Lightning
- Prerequisites: Prison
- Affinities: Training
|
| Spider | SpiderLearning Freeze and Slow at very low levels, Spiders are the go-to units in the early game for incapacitating enemies, and they've got a pretty decent melee attack to boot. Unfortunately, they are outpaced by later units since they train at an excruciatingly slow pace. They fight and kill Flies if the player has any, though in all honesty this is not a major loss. - Key Abilities: Slow, Freeze, Hail Storm
- Prerequisites: 9 Lair tiles, 9 Hatchery tiles
- Affinities: Training, Harassing Prisoners
|
| Tentacle | TentacleSomething of a late-game equivalent of the Spider, Tentacles have more health and defense, but no other remarkable abilities to speak of. Unfortunately, by the time they start appearing, there are several alternative units that are just as good or better, meaning they don't really stand out. They are also one of the rarest creatures, only appearing in later levels of the campaign. - Key Abilities: Freeze
- Prerequisites: 9 Lair tiles, 9 Temple tiles
- Affinities: Training
|
| Troll | TrollThough they're not terrible fighters when trained, Trolls are unlikely to see much combat being that they're the de facto manufacturing unit of the game. Before committing to train one, it is useful to note that they are basically a weaker version of the Orc, so preference should be given to their purple brethren if available. - Key Abilities: Speed, Fireball, Grenade
- Prerequisites: 1 Workshop tile
- Affinities: Manufacturing
|
| Vampire | VampirePossessing many of the same abilities but with higher overall stats, Vampires are a clearly meant as a replacement for Warlocks in the late game. They also gain the unique ability to resurrect themselves upon death, being penalized with a level reduction. They are extremely powerful and level quickly early on, though their wage requirements are second only to the Horned Reaper, so make sure to have plenty of cash on hand. - Key Abilities: Fly, Slow, Teleport, Heal, Drain, Armor, Wind, Word of Power
- Prerequisites: 9 Lair tiles, 9 Graveyard tiles
- Affinities: Research, Scavenging
|
| Warlock | WarlockThe poor man's Vampire, Warlocks for the price are quite useful for spellcasting and research. A tenth level Warlock demands less in wages than a level one Vampire, so a cash-strapped keeper might prefer them. Once gold is not an issue, however, their value severely diminishes. Stronger Warlocks also tend to be more surly, and will even attack friendly units that interrupt their research. - Key Abilities: Fireball, Heal, Meteor, Invisibility, Navigating Missile, Sight, Wind, Word of Power
- Prerequisites: 9 Library tiles
- Affinities: Research
|
Heroes
Heroes are the main opposition outside of enemy keepers, and like minions they range in strength from levels one through ten. They do not enter through Portals like normal creatures, instead appearing at predetermined points in a level or entering through special Hero Gates when certain conditions are met. Though they are never friendly, all Hero types can be captured and converted to the player's cause if they are in possession of both a Prison and a Torture Chamber, though not all varieties are worth the effort.
| Archer | ArcherA pretty decent harassment unit and a very efficient Imp killer, this ranged specialist predictably has trouble with enemies who can close the distance. This becomes less of a problem at higher levels when he gains Speed and Slow. If he can be pinned down he's easy enough to kill. - Key Abilities: Navigating Missile, Speed, Slow
- Affinities: Manufacturing
|
| Barbarian | BarbarianA heavy-hitter much in the same vein as the Giant, he doesn't hit quite as hard, but he's not as slow either, and tougher versions have the Armor ability. He's one of the first heroes encountered that is actually worth converting, and he sports a nice pink mohawk, too. - Key Abilities: Armor
- Affinities: Training
|
| Dwarf | DwarfA fairly nondescript fighter outside of his penchant for gold pilfering. He can do a fair amount of damage, to be sure, but when encountered in a group he's not likely to be the primary (or even secondary) threat. They are good at manufacturing, though not enough so to go out of one's way to get one. - Key Abilities: Armor, Rebound
- Affinities: Manufacturing
|
| Fairy | FairyThough at higher levels she can really dish it out, she isn't able to take it, thanks to her miserable hit points and crummy defense. She doesn't have any tools to get foes off of her, either. Fairies are only really troublesome when they're floating over impassible terrain like lava where they can fling spells without fear of retaliation. - Key Abilities: Drain, Lightning, Heal, Invisibility, Navigating Missile, Rebound, Meteor, Freeze
- Affinities: Research
|
| Giant | GiantThis guy can hit harder than a Knight of the same level, but is thankfully quite slow, that is until he gains the Speed ability at level ten. A couple of minions with high hit points can keep him well occupied while others pelt him with spells, as he has no spell resistances to speak of. - Key Abilities: Speed
- Affinities: Training
|
| Monk | MonkThe Monk can heal himself and allies in addition to casting other damage-based and status-affecting spells, and is more adept at melee combat than the average caster. But don't take this to mean that he's a double threat (that distinction belongs to the Samurai), as the normal rules of dealing with spellcasters still apply. - Key Abilities: Heal, Armor, Slow, Missile, Drain, Hail Storm, Word of Power
- Affinities: Research, Temples
|
| Samurai | SamuraiOn top of his considerable sword skills and tough constitution, the Samurai can cast the Speed, Lighting, and Freeze spells, making him one of the nastier enemies encountered in the game, as well as a prime candidate for conversion in the Torture Chamber. Be careful when doing so, however, as they do not get along well with Mistresses. - Key Abilities: Sight, Lightning, Speed, Freeze
- Affinities: Everything
|
| Thief | ThiefWith barely more health than a spellcaster, the Thief is the bottom of the totem pole for the do-gooders, combining low hit points with close quarters combat. His skills seem to indicate that he is meant to be a stealthy character, which is appropriate, as not being seen is probably his only chance of survival. Their only redeeming quality is that they turn into level three Knights when trained past level ten. - Key Abilities: Speed, Invisibility, Rebound
- Affinities: None
|
| Tunneler | TunnelerThe Tunneler functions as the light-side equivalent of the Imp, digging through unfortified walls. Although he is basically just a means for other heroes to enter the player's dungeon, he still ends up being a better fighter than the Thief. They behave just like Imps when converted, though they can't learn Speed, meaning they're actually inferior to them. - Key Abilities: Teleport
- Affinities: Excavation
|
| Witch | WitchDespite the name, Witches apparently fight on the side of light. Similar to the Fairy, but much more durable, she also comes with a Wind spell that makes her much more effective at keeping attackers at a distance. Also, she apparently hates Vampires, so this should be taken under advisement before converting her. - Key Abilities: Flight, Poison Cloud, Rebound, Wind, Lightning, Heal, Navigating Missile, Hail Storm
- Affinities: Research
|
| Wizard | WizardThe above-ground equivalent of the Warlock, the Wizard has a good mix of direct damage and status effect spells, as well as Heal. Probably the best spellcasting unit for the heroes, though its a pretty close race between him and the Witch. - Key Abilities: Missile, Fireball, Rebound, Heal, Freeze, Hail Storm, Drain, Slow, Meteor
- Affinities: Research
|
| Knight | KnightAlso known as the Lord of the Land, this brawler is usually the final obstacle between the player and total conquest of a particular realm. Capturing rather than killing him will allow a special torture scene once the level is completed. Gains a healing ability at higher levels, though this is his only notable talent. Despite being portrayed as the counterpoint to the Reaper, they are not nearly as strong. - Key Abilities: Rebound, Heal
- Affinities: Fighting
|
| Avatar | AvatarThe final opponent of Dungeon Keeper is understandably quite brutal. The strength and hit points of several Giants, incredible damage mitigation, powerful magic: you name it, he's got it. Defeating him paves the way for total conquest of the surface world, though doing so is no easy task. - Key Abilities: Armor, Heal, Freeze, Drain, Navigating Missile, Invisibility, Word of Power
- Affinities: Annihilating Anything
|
Rooms
Rooms serve a variety of purposes, from storing gold, to feeding troops, to imprisoning enemies. The Treasure Room, Lair, Hatchery, Training Room, and Library are considered the basic room types, and are usually available from the start of a level, while others are researched through the Library. Claiming a room type that was not previously researched will also allow a keeper to build said room without researching it.
| Treasure Room | Treasure RoomThe Alpha and Omega of any dungeon, the Treasure Room is where a keeper's wealth is stored. Imps will bring gold they have mined to this location, and minions will travel there on payday for their wages. Needless to say, it is a good idea to place a Treasure Room close to any substantial gold veins in order to minimize the amount of time Imps spend depositing their freshly mined gold. - Gold Cost: 50 per tile
- Hotkey: T
|
| Lair | LairThe first stop for any creature who joins a dungeon, the Lair represents the dwelling place of the player's minions, where they rest and recuperate between tasks or after battle. Some creatures may take up more than one square, though Imps, having no need to rest, do not use the Lair at all. It is often prudent to have multiple Lairs rather than one large Lair so that irreconcilable minions can be kept in separate domiciles. - Gold Cost: 100 per tile
- Hotkey: Shift-L
|
| Hatchery | HatcheryAll living beings (save Imps) require sustenance, and thankfully for the player, evil minions seem to like the taste of chickens. A constant supply of them magically sprouts from the floor of this room, just waiting to be plucked up and gobbled down by any nearby dungeon inhabitant. Some creatures don't have much of an appetite, taking just one, while others, such as the Bile Demon, require much more to remain happy. - Gold Cost: 150 per tile
- Hotkey: Shift-H
|
| Training Room | Training RoomFrom the lowly Imp to the mighty Horned Reaper, any creature can be sent to the Training Room to improve their skills. Most minions will train alone, but some will spar with other creatures to gain levels more rapidly. Training a minion will slowly drain one's gold reserves, which is represented in-game by a number that periodically appears over a training unit's head, representing the amount of gold just spent to train them. - Gold Cost: 150 per tile
- Hotkey: Shift-T
|
| Library | LibraryOne of the most crucial rooms in any dungeon, the Library allows for the use of spells other than Possess Creature and Create Imp, as well as providing the blueprints for more advanced room types. It is important to make the Library large enough, as, in addition to creatures, each spell takes up physical space in the room, lowering the number of possible researchers that can study there. - Gold Cost: 200 per tile
- Hotkey: L
|
| Bridge | BridgeNot a room per se, though it counts toward the room total, Bridges are useful to cross both water and lava, and not much else. It is worth noting that selling a Bridge tile that is in the process of being claimed by an enemy Imp can sometimes kill two birds with one stone, as it will not only prevent the Bridge from being claimed, but also potentially kill the Imp (if the Bridge was situated over lava). - Gold Cost: 30 per tile
- Hotkey: Shift-B
|
| Guard Post | Guard PostA raised platform which simply serves to give minions a place to patrol and watch for trouble. It is best placed at the perimeter of one's domain or at weak points in a dungeon's defenses. Certain unit types such as Orcs are naturally predisposed toward guard duty, though Ghosts are another good candidate due to their ability to see invisible units. - Gold Cost: 50 per tile
- Hotkey: Shift-G
|
| Workshop | WorkshopThe epicenter of all trap and door creation in a keeper's domain. Like the Library, products of the Workshop take up physical space, and will eventually crowd out workers if not used. Combining this with tile requirements for manufacturing certain items necessitates that any keeper who is serious about trap and door production make their Workshop of sufficient size to sustain production over the long term. - Gold Cost: 200 per tile
- Hotkey: W
|
| Prison | PrisonEnables the use of the imprison button. Once activated, fallen enemies will not be killed, and their bodies can be dragged to the Prison by the keeper's Imps. Unruly minions may also be placed here as punishment. Some minions, such as Spiders, will also derive pleasure from antagonizing units held in the player's Prison. Units who die in a Prison will become Skeletons. - Gold Cost: 300 per tile
- Hotkey: Shift-P
|
| Torture Chamber | Torture ChamberAllows enemies and minions alike to be tortured. Creatures being tortured may reveal information about enemy territory or even convert entirely to the keeper's cause. This is also the preferred haunt of the Dark Mistress, as more often than not she will make her way here when she is not training. Units that die in a Torture Chamber will come back as Ghosts. - Gold Cost: 350 per tile
- Hotkey: Alt-T
|
| Barracks | BarracksThe Barracks allows the player to gather several monsters into a single group. Once done, the keeper can then possess one of them to lead the aforementioned group wherever he choses. This can be a good way to lead an assault into an area outside the keeper's normal reach, though players will not receive updates on their own dungeon's status while possessing a creature. The group will disband once the possession has ended. - Gold Cost: 125 per tile
- Hotkey: B
|
| Temple | TempleThe Temple serves three main purposes. First of all, creatures sent to the Temple will gradually gain happiness, so it is a good way to improve an unhappy minion's mood. In addition, dungeon denizens can be sacrificed here for potential boons, and this is the only way currently known to obtain the Horned Reaper. Lastly, a minion that has been to a Temple cannot be scavenged for a short period of time. - Gold Cost: 300 per tile
- Hotkey: Ctrl-T
|
| Graveyard | GraveyardOnce a dungeon has a Graveyard, Imps will endeavor to bring any corpses they find to decompose there. This is not merely cosmetic, as after enough bodies have decomposed, a Vampire will rise from the grave. It is important to make sure one has a sufficient work force before building a Graveyard since Imps will add corpse retrieval to their list of regular duties, and there is no way to disable this outside of selling one's Graveyard. - Gold Cost: 300 per tile
- Hotkey: G
|
| Scavenger Room | Scavenger RoomAs its name implies, the Scavenger Room allows new minions to be scavenged from opposing factions. A creature placed here will search first for other creatures of its type to seduce into their keeper's service, though if none are to be found they will attempt to lure other creatures away. It will also increase the chances that a creature of that type will emerge from the player's Portal. - Gold Cost: 750 per tile
- Hotkey: S
|
Spells
Magic in Dungeon Keeper is not governed by mana, instead being directly funded by the keeper's gold reserves, though both Possess Creature and Call to Arms can be cast for free. Create Imp and Possess Creature are usually available from the start, while other spells are locked until they are fully researched in the Library.
| Possess Creature | Possess CreatureThis spell allows direct first-person control of any minion, allowing the player to mine faster with an Imp, personally lead his armies into battle, or just admire his own dungeon from a closer perspective. It also separates the player from any direct control over their dungeon until the possession has ended, and it is likewise easy to miss important notifications while in this mode. - Gold Required: None
- Casting Target: Any player-owned minion
|
| Create Imp | Create ImpThe only way of creating new Imps, this spell becomes more expensive the more Imps one has, increasing the cost by 150 gold for each subsequent Imp. This can be offset by sacrificing Imps in the Temple, which significantly reduces the price of the spell. As Imps are the lifeline of any dungeon, this spell is available to players by default. - Gold Required: 150 plus 150 * (total number of Imps)
- Casting Target: Any player-owned tile
|
| Sight of Evil | Sight of EvilAllows the player to temporarily remove the fog of war from a circular portion of the map, revealing enemy territory and getting a general lay of the land. While this is primarily intended for scouting purposes, there are a few spells (Cave-In and Lightning Strike) that can be cast in the area revealed by this spell, making it somewhat useful offensively as well. - Gold Required: 50-130
- Casting Target: Anywhere
|
| Speed Creature | Speed CreatureIncreases a creature's effectiveness by dramatically increasing its speed, though many creatures learn this spell innately through training. It's relatively cheap, and it can be used in any scenario where something needs done more quickly. A few judicious uses in an otherwise evenly matched encounter can be enough for a decisive victory. - Gold Required: 100-900
- Casting Target: Any player-owned creature
|
| Must Obey | Must ObeyForces all creatures to perform their given tasks at an accelerated rate. Extended use can have a significant negative effect on morale, making this somewhat of a strange spell, as poor morale would be the main reason to use it in the first place. A keeper that is in need of this spell should probably be wondering why their minions are so disobedient to begin with. A double-edged sword, to be sure. - Gold Required: 25 per second
- Casting Target: Non-targeted
|
| Call to Arms | Call to ArmsThis spell calls any nearby minions to defend a certain area. Since it is free to cast on player-controlled territory, its main use is in fending off incursions, though it is also good for making a final push into an enemy dungeon. Special care should be taken when using it offensively, as It drains gold at a constant rate when cast on enemy tiles. - Gold Cost: 0-8 per second
- Casting Target: Any visible tile
|
| Conceal Creature | Conceal CreatureRenders an individual minion invisible, though some creatures (such as Ghosts and Vampires) will still be able to see it. Lasts up to 55 seconds depending on how long it is charged. This spell has a number of good uses. Invisible Imps are a great way to claim territory, for instance, and an invisible diseased creature could cause a great deal of damage in an enemy Lair. - Gold Cost: 100-900
- Casting Target: Any player-owned creature
|
| Hold Audience | Hold AudienceImmediately summons all friendly creatures to the player's Dungeon Heart. Like Must Obey, using this spell is to be avoided if at all possible. It's a last-ditch defense mechanism for when enemies have penetrated deep into one's dungeon, and all precautions should be taken to make sure that this doesn't happen to begin with. - Gold Cost: 1000
- Casting Target: Non-targeted
|
| Cave-In | Cave-InCollapses the dungeon ceiling over a selected area, causing damage to any hostile or non-hostile units caught in the downfall. Since it can be cast on enemy tiles, it can be quite effective at sowing general chaos in opposing dungeons, especially when fully charged. The manual also states that it can be used to create solid ground over a water tile, though this may be one of the manual's many inaccuracies. - Gold Cost: 1000-2600
- Casting Target: Any visible tile
|
| Heal | HealA basic healing spell that many creatures will learn for themselves, it can be juiced up to increase the amount healed. In the heat of battle, it is generally better to target minions through the combat window rather than try to pick them out of a large cluster of units. It is also best to fully charge it before using, as a full Heal is exponentially stronger than a partial one. - Gold Cost: 300-1200
- Casting Target: Any player-owned creature
|
| Lightning Strike | Lightning StrikeSummons a lightning bolt that damages enemies within its radius. A quick zap will stop an enemy Imp from capturing a room, and it's a great general harassment tool, as it can be cast on any visible tile, even without line-of-sight. Due to the strange proclivities of Dungeon Keeper's AI, using Lightning Strike in conjunction with Sight of Evil to harass an enemy keeper's gold mining units will often cause their entire economy to collapse. - Gold Cost: 600-3000
- Casting Target: Any visible tile
|
| Protect Creature | Protect CreatureIncreases damage protection for one unit for a short period, perfect for when enemies are focusing fire on a particular minion. This spell works pretty much as advertised, with a longer charge increasing the duration. Much like Heal, this is another instance of a spell which many creatures are able to learn innately through training. - Gold Cost: 100-900
- Casting Target: Any player-owned creature
|
| Turn to Chicken | Turn to ChickenTurns a single unit into a chicken for a short while. Aside from not being able to attack, the unit will retain all its normal attributes, meaning that it will still be as tough to kill as its pre-chicken self. Special care should be taken when friendly minions are affected, as any chickened unit will meander its way to the nearest Hatchery where it are likely to be eaten. A quick trip to one's Temple will cure the afflicted unit. - Gold Cost: 1200-3000
- Casting Target: Any creature on a player-owned tile
|
| Disease | DiseaseReleases a contagion that gradually drains health and has a chance to spread to other creatures. This spell can single-handedly decimate an enemy keeper when used properly, though finding a means to unleash it can be tricky. One option is to use the Fly or Hellhound as a carrier, as they frequently come into contact with enemies, and aren't likely to survive the encounter anyway. Temples will heal plagued minions. - Gold Cost: 7000-9000
- Casting Target: Any creature on a player-owned tile
|
| Armageddon | ArmageddonA version of Hold Audience that affects all units, after a short timer expires every creature in the level will be transported to the player's Dungeon Heart. If a keeper is confident in their martial strength, this can be an easy way to level their opposition without having to deal with a dungeon's defenses, though it can just as easily backfire. - Gold Cost: 60000
- Casting Target: Non-targeted
|
| Destroy Walls | Destroy WallsThe only means of breaching a fortified wall, Destroy Walls is a useful way to bypass a dungeon's usual defenses. Due to the ungodly amount of time it takes to research, however, there's a good chance an opening will present itself long before this spell is accessible. It will also destroy a regular wall if cast on it, though why one would want to spend such an exorbitant amount to do so is a mystery. - Gold Cost: 10000-26000
- Casting Target: Any Wall or Earth tile
|
Traps
One of the two item types created in the Workshop, traps do not cost any gold to create or deploy, though minions are required to manufacture them and Imps are required to place them. Some traps require a Workshop of a specific size before they can be produced, and each level also has a predetermined selection of traps that can be manufactured. All trap types will eventually expire after a set number of activations. Be careful when placing traps, as many will affect any creatures nearby, friendly or not.
| Alarm Trap | Alarm TrapThe Alarm Trap has more charges than any other trap, though it is also the only one that doesn't do any damage. It will, however, notify any of the player's creatures in the immediate vicinity of nearby enemy units. For this reason, it should definitely be placed close to a Lair or any other heavily trafficked area to ensure a quick response. - Workshop Tile Requirement: None
- Number of Charges: 12
- Friendly Fire: No
|
| Poison Gas Trap | Poison Gas TrapReleases a choking cloud of gas upon activation. Since it will affect any unit not immune to poison, it's a good candidate for use outside of one's dungeon or near the Lairs of creatures who are immune to the effects of poison gas, such as Bile Demons. Then again, this might be redundant, as Bile Demons themselves are essentially walking gas traps. - Workshop Tile Requirement: 10 tiles
- Number of Charges: 5
- Friendly Fire: Yes
|
| Lightning Trap | Lightning TrapA reasonably damaging trap with a good number of charges and no effect on friendly units, the Lightning Trap is a great all-purpose trap that can be safely deployed anywhere, meaning it will likely be the most attractive option on maps in which it is available. It will furthermore strike several times with each use if the enemy unit remains near it, and can even switch to a different target. - Workshop Tile Requirement: 13 tiles
- Number of Charges: 8
- Friendly Fire: No
|
| Lava Trap | Lava TrapSomewhat underwhelming as a trap, but a useful defensive tool nonetheless. Enemies are unlikely to die as a result of this trap, but once activated it creates a permanent tile of lava which bars passage to flightless creatures. It can also be a nasty (and potentially lethal) surprise for any enemy Imp that attempts to claim a keeper's tile. - Workshop Tile Requirement: 17 tiles
- Number of Charges: 1
- Friendly Fire: Yes
|
| Boulder Trap | Boulder TrapA powerful trap that must be placed with special care, the Boulder Trap will continue rolling for a long time after being triggered, and will flatten anything in it's path indiscriminately. It is a potentially devastating trap due to its ability to instantly kill multiple units regardless of hit points, though if poorly placed it can potentially cause more harm than good. - Workshop Tile Requirement: 17 tiles
- Number of Charges: 1
- Friendly Fire: Yes
|
| Word of Power Trap | Word of Power TrapReleases a Word of Power spell. This is the most potent multi-charge trap that will not harm player minions, though it can only be activated three times before breaking. The knockback caused by Word of Power can be used to one's further advantage by placing it near lava pools in order to toss enemy units to their fiery deaths. - Workshop Tile Requirement: 21 tiles
- Number of Charges: 3
- Friendly Fire: No
|
Doors
The second item type that can be manufactured in the Workshop, doors are a passive defensive option for one's dungeon as well as a means of strategically restricting creature access to certain parts of the dungeon. Doors are produced and deployed in much the same way as traps, though they do not have to be placed by Imps, instead appearing instantaneously in the selected location. Just like traps, there are predetermined doors available in each level, and they have specific Workshop tile requirements in order to begin production.
| Wooden Door | Wooden DoorThe first and weakest door available to the player, the Wooden Door is a meager means of defense that can be easily destroyed by just about any creature. It can, however, prove useful for controlling minion access to certain parts of a dungeon, leaving other doors to be used for defense. Outside of controlling the flow of traffic in non-critical areas, however, it has very little use. - Workshop Tile Requirement: 10 tiles
- Strength: 400 HP
|
| Braced Door | Braced DoorThough certainly a better alternative than the Wooden Door for defensive purposes, the Braced Door is still somewhat lacking in terms of sheer stopping power. It can be a decent second line of defense once a main door is breached, or a good primary door in areas that are fortified well enough that they are not likely to be breached. - Workshop Tile Requirement: 13 tiles
- Strength: 750 HP
|
| Iron Door | Iron DoorBeing twice as strong as the Braced Door, this is the first barrier that will actually significantly hinder enemy progress. Placing traps directly in front of it is essential in order to maximize its lifespan, as it will take some time for a creature to breach this door by its lonesome, allowing for multiple trap activations before the door gives way. - Workshop Tile Requirement: 17 tiles
- Strength: 1500 HP
|
| Magical Door | Magical DoorIronically, this door is not inherently strong against magic. Thankfully, it is nigh-impervious to physical attack. A concerted effort is required to break it, and clever reinforcement via traps can make it even more difficult to overcome. As enemies are likely to throw everything they have at this door, placing a Boulder Trap behind it as a surprise can be particularly devious. - Workshop Tile Requirement: 21 tiles
- Strength: 3000 HP
|
Trivia
- In the original release, many of the introductory voice-overs for levels were played in the wrong order, though all post-mission voice-overs were in the right order.
- The game manual contained several inaccuracies, such as stating that Imps are able to learn Conceal Creature and Fly, and also described unimplemented game mechanics, such as Cave-In being able to transform lava tiles into solid ground.
- The Avatar's sprite (final boss) is the same as the avatar from Ultima VIII: Pagan.
System Requirements
Windows
- CPU: Pentium 75MHz
- RAM: 16 MB
- Operating System: Windows 95
DOS
- CPU: 486DX4 100MHz
- RAM: 8 MB
Log in to comment