Overview
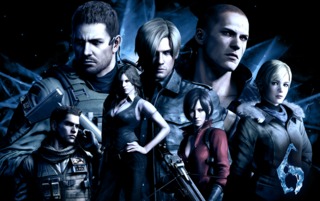
Resident Evil 6 is the eighth mainline entry--when including Code: Veronica & Zero--in the popular Resident Evil series, announced by Capcom on January 19th, 2012 and released at October 2nd, 2012. Set in 2013, four years after Resident Evil 5 (and 10 years since the downfall of Umbrella), Resident Evil 6 brings back the two most prominent leads Chris Redfield and Leon S. Kennedy to canonically star together for the first time in Resident Evil history.
Shying away from a linear progression like the most recent Resident Evil titles, Resident Evil 6 allows players to select from any of the four available campaign stories--Leon, Chris, Ada, and the new character Jake Muller--in whichever order they so choose, somewhat reminiscent of the first two Resident Evil games. Despite this freedom of choice, it was suggested by RE6 director Eiichiro Sasaki that Leon's story be tackled first.
Initially Ada's campaign had to be unlocked upon first completing the three prior campaigns, however via a patch update it is now available from the outset.
Gameplay
Overview & Controls
 Each of the four campaigns feature their own unique aesthetic for the HUD
Resident Evil 6 is an action-shooter with an over-the-shoulder perspective in the same vein as prior entries, Resident Evil 4 and Resident Evil 5, though it features a "totally new control scheme" allowing much more manoeuvrability. This includes the ability to now move and shoot similar to the 3DS Resident Evil games, Mercenaries 3D and Revelations, and a full 360 movement scheme replacing the series' long-standing tank controls. Characters can now utilise a roll ability to help dodge incoming attacks and also now for the first time are able to quickly dive into prone and fire their weapon.
RE6 sees the return of cover mechanics along with the newly introduced ability to sprint. While sprinting, the character will automatically vault over obstacles and jump across ledges without any additional player input. Because of the added ability to sprint, characters now run automatically by pushing on the analogue stick all the way; pressing it gently will have the character walk instead. The player's camera view has also been expanded, now allowing a full 360 degree perspective rather than being restricted to as far as the character's neck can turn.
Additional customization options have been afforded for players within the options menu. These allow players to now freely switch between aiming from the right side or left, to whether or not their weapons will reload automatically, to choosing between the new cross-hair or the classic laser sight for aiming their weapons, to then even choosing from a small selection of colors for said laser sight.
Melee & Quick Shot
Melee combat has been heavily streamlined and can be utilised at any time--rather than requiring specific context-sensitive button prompts--which will allow the player to string together a few simple combos using the RT/R2 button. Context-sensitive prompt attacks are still available, however they have primarily been reduced to the available attack whence stunning an enemy via a headshot.
Players may attack with a dive should they be in the middle of a sprint, and breakable boxes no longer require a knife and can instead be automatically destroyed with a regular melee attack. To compensate, characters have a stamina gauge that slowly depletes (but will recharge) after each melee attack; when timed correctly just before an enemy melee attack, the player can do a powerful counter attack. The gauge is used up when players make use of the Quick Shot ability, which allows the player to swiftly fire off a shot with their equipped weapon complete with auto-aim.
Inventory
Along with the overall control scheme, the inventory system has also been given a complete overhaul, now designed as two separate menus for supplies and weapons -- both of which the player must scroll through horizontally. The player may now move while perusing their inventory, though they control their inventory navigation with the right analogue stick temporarily removing control of the in-game camera. The player switches between the two menus using the RB/R1 button by default for the 360 and PS3 respectively.
Health items can now be used with just a single button press as well. For a more convenient approach, the alternative is to use the directional buttons (left/right for weapons, up/down for supplies) to scroll. Items cannot be combined within this menu, however.
Herbs & First Aid Sprays
Herbs can once again be combined, but this time must be converted into 'tablets', which will allow players to heal themselves with just the press of a button rather than having to first select it out of their inventory; players can also tap the button consecutively to use multiple tablets at once. First Aid sprays must still be equipped for use, however. There exist no blue nor yellow herbs this time around and only green and red can be found and combined; red herbs still have no effect when used on their own.
A list of the herb to tablet conversion is as follows:
- Green Herb + Green Herb = Three tablets.
- Green Herb + Green Herb + Green Herb = Six tablets.
- Green Herb + Red Herb = Six tablets.
Should a player take enough damage, they will enter into a 'dying state. Here, the player can only crawl, but can also pull up their weapon and attempt to defend themselves. Unlike RE5, however, the player will eventually bring themselves back off the ground once enough time has passed without the player getting attacked; the player's partner character can also still revive the player as well to speed up the process. The player is still within the 'dying' state during this stage and must heal themselves, otherwise a single attack will kill them outright.
Skill Settings
Unlike Resident Evil 4 and Resident Evil 5, players cannot buy weapons. Instead players will find all of each respective campaign's weaponry as the story dictates it, and certain weapons are exclusive across specific campaigns and even characters. Weapons cannot be upgraded either, and now players may purchase ''Skills'' and can equip three at a time. Players can create up to eight different combinations at once and then choose to switch between their configurations mid-game Most, but not all, Skills such as Piercing or Defense can be upgraded after they've been bought for an additional price, increasing their overall effectiveness.
A list of the Skills are as follows:
- Firearm - Increases firearm power.
- Melee - Increases power during melee attacks.
- Defense - Reduces damage received.
- Lock-On - Steadies hand when shooting.
- Rock Steady - Reduces recoil after shooting.
- Critical Hit - Increases the chances of scoring a critical hit.
- Piercing - Increases firearm piercing potential.
- J'avo Killer - Increases strength of attacks on a J'avo.
- Zombie Hunter - Increases strength of attacks on a zombie.
- Eagle Eye - Adds an extra level of magnification to sniper rifle scopes (cannot be upgraded).
- Quick Reload - Lessens the time required to reload weapons (cannot be upgraded).
- Last Shot - Increases the strength of a players remaining shot.
- Shooting Wild - Removes the player's targeting sight, but increases firepower.
- Combat Gauge Boost - Increases the player's Combat Gauge by 3 blocks.
- Breakout - Allows the player to break free more easily from an enemy's grasp.
- Item Drop Increase - Causes more defeated enemies to drop items.
- Recovery - Speeds up recovery when dying.
- Team-Up - Strengthens a player's partner's attacks when they are near each other (Cannot be upgraded; Single player only).
- Field-Medic - Allows the player's partner to give them health tablets when they're revived (Cannot be upgraded; Single player only).
- Lone Wolf - Keeps the player's partner from helping them when they're in trouble (Cannot be upgraded; Single player only).
- AR Ammo Pickup Increase - Allows players to pick up an increased amount of 5.56 NATO ammo.
- Shotgun Shell Pickup Increase - Allows players to pick up an increased amount of 10 and 12 gauge shotgun shells.
- Magnum Ammo Pickup Increase - Allows players to pick up an increased amount of .50 Action-Express and .500 S&W Magnum ammo.
- Rifle Ammo Pickup Increase - Allows players to pick up an increased amount of 7.62 NATO and 12.7mm ammo.
- Grenade Pickup Increase - Allows players to pick up an increased number of 40mm explosive, acid, and nitrogen rounds.
- Arrow Pickup Increase - Allows players to pick up an increased number of normal and pipe bomb arrows.
Cooperative
 4-player cooperative gameplay.
Cooperative play is once again featured within the game, with each of the three storylines starring two main characters. Leon has Helena Harper at his side, Chris is teamed with BSAA marksman Piers Nivans, and Jake Muller is paired with Sherry Birkin. Matchmaking has been introduced to allow a more accessible venue for cooperative play, including drop-in drop-out capability. When played solo, players can now select which of the two main characters to star as, rather than having to complete the campaign first to unlock the secondary character. Like in RE5, the other character is taken control by an AI should it be a solo game. Though this time around there is no inventory management between the two characters, and the AI is invincible with infinite ammo.
With each of the three stories primarily happening concurrently, this eventually allows certain characters to coincide with one another introducing the concept of 4-player cooperative play in Resident Evil 6. As long as the player(s) is online, once they reach a point in one of the stories (eg. Leon & Helena) where the cast will meet up with two from another story (eg. Jake and Sherry), the player is given the option to search online for any other player(s) who is currently at the same spot with the other characters. From there, the quadruple can then temporarily play together to fight against a specific story-dictated boss battle. Otherwise the player(s) can opt to fight alongside two temporary friendly AI's instead.
Quick Time Events
QTEs once again return, though they are now much more prevalent overall than previous games in the series. They are still most commonly encountered should a player be grabbed by an enemy or in the case of bosses to sometimes avoid an attack entirely. Though unlike in Resident Evil 5 for example, some enemies will require the player to complete multi-tiered QTEs in a row, such as wiggling the stick and then having to time a button press afterwards to throw the enemy off.
They are also encountered during specific cutscenes, where the player must press the on-screen prompts as they appear otherwise they will die. Sometimes players may also have to rapidly tap a single button as well, usually as a means to further illustrate a scene depicting a struggle for example. Not only do they occur during cutscenes, but even during in-game events as well. This includes a QTE involving the player dodging an incoming train, to one that has players climbing up a long string of rope by alternating between R2/RT and L2/LT at a specific pace.
If playing cooperatively, cutscene QTEs are divided between players depending on which character is doing the action on-screen. Though there are still some that require both players to press the prompts simultaneously.
Via an online patch, a setting was added so as to make cutscene QTEs automated with no fail state. However in-game QTEs will still persist.
New Game+
Like past Resident Evil games, Resident Evil 6 allows players to go through any of the completed campaigns with all the weapons they've found and as much ammo and healing supplies as how they left it. When playing through the already completed campaign with the alternate character, however, the player will begin with that character's default equipment only and will have to collect the campaign's set of weapons again. Though even when heading again with the same character as they completed the game with, the game will also give players the option to play through again with the character's default equipment should they so desire.
Characters
After surviving Raccoon City and saving the President's daughter, Leon isn't ready to retire just yet. In fact he now must go back into the heart of the nightmare as his employer and the man he believes in most, the President of the United States, has turned into a zombie and another American City is overrun with infected.
Helena is a relatively new addition to the United State's Secret Service. Unlike most of the other Resident Evil 6 protagonists, Helena hasn't had much experience battling B.O.W.s. Trying to get to grips with the nightmarish situation she's found herself in, she ropes in Leon S. Kennedy to help her save her sister, Deborah Harper.
Chris still with the B.S.A.A. works alongside B.S.A.A. marksman Piers Nivans amidst their excursion in China to uncover the plot revolving around the latest strand of B.O.W. virus, the C-Virus.
A BSAA sniper, Piers is an up and coming soldier within the unit who has been serving with Chris for a long while. As the very man who manages to bring Chris back into the B.S.A.A, after suffering Post-Traumatic Amnesia, Piers will try his best to both battle the J'avo and save Chris from his own downfall.
An all new character, Jake Muller is the third protagonist of Resident Evil 6, who is directly related to previous series antagonist Albert Wesker.
The daughter of deceased Umbrella scientists, William Birkin and Annette Birkin, Sherry finally returns into the fold with Resident Evil 6 working alongside Jake Muller.
The mysterious and often illusive Ada Wong also makes her timely return. Attempting to capture Jake Muller because of his natural immunity to reanimation viruses, Ada will come into conflict with both Chris Redfield and Leon S. Kennedy as her true motives are finally revealed.
Presidential aide and friend to Adam Benford, Derek is soon revealed to be the culprit behind the Tall Oaks C-Virus outbreak and as such the death of the President. Strongly believing in his own vision of 'World stability', Derek's methods for sculpting the world as he sees fit is often at the expense of innocent human life.
Plot
TBC
Weapons
Survival/Combat Knife
Exclusive to only Chris Redfield and Leon S. Kennedy, they're both equipped with a knife from the outset as a reference to their experience across the franchise. Leon's is the Survival Knife whereas Chris is given the Combat, though besides some cosmetic differences they mostly function the same. The name difference is implied to signify the style and tone of both character's respective campaign they're both assigned to, with Leon's slower-paced more horror-oriented atmosphere, and Chris' much more action-focussed military aesthetic.
The Knives are slow and not exceptionally powerful, though when used with the Quick Draw ability, the character will do a quick few swipes. Executions on downed enemies are also more powerful with the knife equipped.
Stun Rod
Sherry Birkin's own exclusive melee weapon, the Stun Rod can do minor electrical damage to her foes, and can also be charged up to discharge a significantly more powerful current - one that can even spread across multiple enemies.
Hand-to-Hand
Jake Muller, while can still do regular melee attacks, also has available his own additional set of melee attacks tied to his 'Hand-to-Hand' weapon. Using the regular attack buttons, Jake can perform a few simple combos, including a flurry of acrobatic attacks should the player continually use the Quick Draw ability. Jake can also ready himself for a running lunge attack not unlike that of Albert Wesker by holding down R2/RT; from there players can select their target and then 'fire' to have Jake rush forward and perform a forward strike.
Using Hand-to-Hand will still deplete the player's stamina gauge.
Wing Shooter
A semi-automatic pistol and one that is exclusive to Leon S. Kennedy, the Wing Shooter has an alternate firing mode where Leon will equip another and duel-wield the two for more damage output, but less accuracy.
Picador
Helena Harper's own semi-automatic pistol. It is slightly more powerful than the others but has no alternate firing mode. While Helena is the only playable character across the story to have it available, in The Mercenaries mode Carla Radames also has it as apart of her inventory and is shown with it equipped during the flashback in Edonia during Chris Redfield's campaign.
Nine-Oh-Nine
Standard military sidearm whom both Jake Muller and Chris Redfield have available, the Nine-Oh-Nine is the weakest of all the handguns and has no alternate fire.
Triple Shot
This is Sherry Birkin's exclusive pistol and like the name applies can fire in bursts of three. Though there is also an alternate single-shot mode where it'll fire like a regular pistol instead.
Shotgun
Standard pump-action shotgun available across both Leon's and Jake's campaigns.
Hydra
Returning from Resident Evil 5 is the Hydra sawn-off shotgun. However, this time around it is only available for Helena and is made available from the outset. Loaded with up to three shots, the Hydra is able to unload all three of its shells as fast as the player can press the firing button. When used with Quick Shot, Helena perform a number of unique stunt-roll animations per shot; after all three shots, Helena will then immediately reload the shotgun as she gets back up.
Assault Shotgun
Similar in power to the regular Shotgun, the Assault Shotgun is semi-auto and can hold more rounds. This variety of shotgun is available across Chris Redfield and Ada Wong's campaigns.
Ruger SMG
For Ada's hands only, the Ruger SMG is shot from the hip and has a high fire-rate, though little damage output.
MP-AF
Starting SMG for Piers Nivans, the MP-AF is highly accurate but deals little overall damage. It has two firing modes available: full auto and single-shot.
Assault Rifle for Special Tactics
Chris Redfield's starting assault rifle and his primary weapon. Accurate and rather powerful, though its reload animation is slightly longer than the other assault rifles in the game.
Its name is a reference to Chris' history as a STARS member -- Special Tactics and Rescue Service.
Bear Commander
Available across Jake Muller and Ada Wong's campaign, the Bear Commander is the most powerful assault rifle in the game, though to compensate has the worst accuracy. It also comes equipped with a grenade launcher attachment.
Assault Rifle RN
Found exclusively in Leon's campaign, the Assault Rifle RN resides within a middle ground, with its modest power and accuracy. Though what really sets it apart is the added bayonet, which when equipped will allow the player to use it for any melee attacks and finishers.
Lightning Hawk
Also returning from Resident Evil 5, the Lightning Hawk continues on with its specific blend of power and recoil resistance. This weapon is only found in Leon's campaign.
Elephant Killer
Resident Evil 6's own revolver-magnum, the Elephant Killer is the most powerful weapon in the game minus the RPG. Its recoil is strong, though its power is so great it can often shoot through up to three enemies at once.
Sniper Rifle
A standard bolt-action sniper rifle, this weapon is only found in Jake and Ada's campaigns.
Semi-Auto Rifle
Found in Leon and Chris' campaigns, the Semi-Auto Rifle has a much faster firing rate and quick reload, though it lacks in power to its sniper rifle brethren.
Anti-Materiel Rifle
Piers' sniper rifle exclusive only to him, the Anti-Material Rifle is the third most powerful gun in the game behind the Elephant Killer and RPG. Because of its power, it has a hard kickback and requires that every bullet must be loaded between shots.
Grenade Launcher
Found only in Chris' campaign, and as is custom with the series the Grenade Launcher can equip multiple types of grenades. There are regular grenade rounds, acid rounds, and freeze rounds. The grenade rounds deal heavy explosive damage with plenty of splash damage to go with it; acid will continually do damage over time; and freeze rounds will instantly freeze all common enemies - from that point on the player only needs shoot once, or use a melee attack, to shatter the frozen enemy.
Crossbow
Another weapon only for Ada, the Crossbow has two different types of arrows: regular and explosive. Regular arrows generally do little damage, but will always kill a regular enemy instantly when shot to the head. Explosive will stick to an enemy and then quickly proceed to tick down. Once it explodes the damage dealt is about on par with the Grenade Launcher.
RPG
Only found and used in Leon's campaign for the sole purpose of finishing off the mutated Derek C. Simmons, the RPG can only be attained and kept in the player's inventory if they let their cooperative partner shoot Simmons instead. Once it's unlocked, the purchasable Skill to get infinite RPG ammo is also made available.
Hand Grenade
Found only in Chris and Ada's campaigns, the hand grenade is an exceptionally powerful tool that can disperse and destroy small crowds with ease.
Incendiary Grenade
Found in Leon and Ada's campaigns, the incendiary doesn't do as much initial damage as hand grenades but still continually burns through enemies after so many seconds. Using an incendiary grenade is also the only way to truly kill a Rasklapanje.
Flash Grenade
While it deals no damage, flash grenades will briefly stun enemies allowing players to perform context-sensitive melee moves. Unlike the Las Plagas from RE4 and RE5, flash grenades will no longer instantly kill a mutated enemy.
Remote Bomb
About as powerful as a hand grenade, Remote Bombs have an added perk in the ability for players to choose when it will explode, introducing the possibility to set a trap.
Enemies
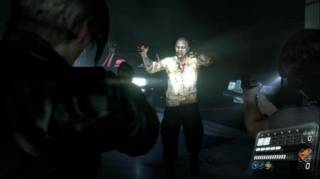
Zombie
Resident Evil 6 sees the return of the classic slow, shambling zombies that hounded the heroes of the series up until Resident Evil 4. This particular iteration of the zombie is much more advanced over the usual zombies from the past, however. They're much faster, agile, and can even leap a small distance through the air to attempt to grab the player by surprise.
Their main source of attack is to grab and start biting the player, requiring the player to wiggle the stick to escape without any partner character assistance. Sometimes if a zombie is weak enough there'll be a two-part QTE; the first involves wiggling the stick, and the second involves a timed button press which will result in the player character killing the zombie. During the first phase the player will continually take damage, though no such damage is inflicted during the second.
Zombies will also sometimes spit acid at the player. While the damage is minimal, it will force the player to have to wait through a prolonged animation before they regain control.
Furthermore, these zombies are occasionally seen to wield melee weapons--which they groggily attempt to attack the player with--such as pipes, axes, bottles, and can also even use firearms -- specifically the Assault Rifle for Special Tactics and the Elephant Killer. Though much like their effectiveness with melee weapons, zombies have poor accuracy and tend to lamely fire aimlessly until they run out of ammo and then throw the gun at the player. While zombies are still generally sluggish in movement, this iteration of the undead has the capacity to climb ladders.
There are a few zombie variations throughout the game. Beyond the regular civilian zombies, there are firefighters that have their extinguishers still residing on their back. Shooting it will create a small explosion that'll kill the zombie and at least do damage to any nearby zombies. BSAA zombies will also be encountered, which due to their body armor are immune to regular gunfire in all but their head. Finally there are the more rotten, decayed zombies of the catacombs, which can sometimes be found wearing armor on their torso and head. This'll then make them immune to most forms of gunfire. Some catacomb zombies can also be found strapped with dynamite around them, which when shot will of course result in a small explosion, potentially damaging if not killing any other nearby zombies.
Zombies are primarily encountered across all of Leon S. Kennedy's campaign, though they do still make an occasional appearance during portions of Ada Wong's as well.
Certain zombies will have a noticeably red skin-pigment, and should they suffer a headshot there's a high chance they will then begin to mutate into a Bloodshot. Sort of resembling the Crimson Head zombies from the Resident Evil remake, Bloodshots are significantly more durable than regular zombies and will often attempt to leap at the player and bite them, doing a sizeable amount of damage. Their one weak spot is their heart, which sporadically reveals itself beneath the hard-casing that has formed around it. Melee attacks aren't as effective as against regular zombies, however, though continuous firearm fire is still a viable solution for taking down a Bloodshot. Countering their leap attack will also deal a significant amount of damage.
Because these are an advanced mutation of zombies, Bloodshots are also only encountered across Leon and Ada's campaigns.
Zombie Dog
Alongside zombie humans, zombified canines also return to the rogues gallery. Like previous iterations, zombie dogs are extremely fast and tenacious. They will routinely stay on the move in an attempt to avoid gunfire, though they don't require many bullets to kill. If they're close enough to the player character the player can do a prompted stomp attack, which'll deal minor damage.
Their main source of attack is leaping at the player and munching on their neck, dealing a considerable amount of damage over time. To escape players must waggle the analogues stick, if not be saved by their partner character.
Whopper
Huge, morbidly obese zombies. While whoppers somewhat resemble the infamous Boomer from the Left 4 Dead series, Whoppers are in actual fact extremely resistant to most forms of damage. They typically attack by stampeding forward, knocking over anything that's in their way -- including other enemies. They will also usually attempt to grab the player character and feast on their torso, requiring the player to rapidly wiggle the analogue stick to escape its grasp.
Simply shooting at it will eventually do the trick, though their legs are weak enough that after withstanding enough damage the Whopper will then fall to its knees. From there the player can perform a powerful melee attack.
Shrieker
Shrieker's are another rare breed of zombie. They are found to be cowardly and will often run away from the player, that is unless their lungs are shown to be bloated and vividly red. That'll then signify they're ready to use their distinctly loud, wailing shriek. Should the player be caught in it they will be temporarily stunned by the noise while taking some damage at that, though the shriek will also pop any nearby zombie's heads at that.
Its weak point are its lungs once they're in their bloated state, though whence they've been destroyed the Shrieker will make one last shriek before succumbing to death, which'll result in the same stunned state and accompanying damage if the player is caught within the vicinity.
These multi-eyed monsters are the newest version of heavily mutated common enemies, such as the Ganados from Resident Evil 4 and the Majini in Resident Evil 5, that weren't simply mindless zombies but rather mutations that would grow and change. However, the J'avo from the very beginning are able to utilise a variety of firearms and grenades.
They are most commonly equipped with Ruger SMGs or machetes. Though despite advanced capabilities over zombies, they are still commonly found to offer little resistance to player advances. They will still fire their weapons and take cover when necessary, it's their overall numbers that define the challenge.
Certain J'avo will also be encountered while equipped with LMGs, RPGs, or sniper rifles. The LMG J'avo are more aggressive and continued fire from their weapon will quickly force the player character to topple over onto the ground. RPG J'avo are as one would expect and will deal a high amount of damage if they can hit their mark. Because they have no laser-sight for their weapon this can thusly make it difficult to pinpoint their location at that. J'avo with Sniper Rifles are equally as damaging and a single shot from one will knock the player over, though unlike the RPG J'avo their sniper rifles are fitted with a laser-sight to help notify the player of their position.
The J'avo are faced across chapters set in Edonia, China, and Neo-Umbrella's underwater base, however the differences between the three are purely cosmetic. They are also fought across all campaigns besides Leon's.
J'avo Mutations
Like the Ganado and Majini before them, J'avo have a high chance to mutate whence enough damage has been sustained. However the variety of mutations is far greater and is dependant on which part of the J'avo's body is damaged. J'avo can sometimes undergo two mutations at that before finally dying.
When going through the mutation the J'avo temporarily gains an exceptional increase in defense, and even then their overall defensive properties will have increased when the mutation has finished. Furthermore, contrary to Ganado/Majini mutations, their mutated body part will be much more resistant to damage than the rest of their body.
Glava-Sluz
A mutation related to head damage. The Glava-Sluz will spit out a sticky mucus substance that, while it won't deal any damage, will temporarily trap the player to the spot leaving them incredibly vulnerable. To escape players must wiggle the analogue stick.
Glava-Smech
A mutation related to head damage. While it is triggered by damage to the head, this mutation involves the entire upper torso of the J'avo mutating into what looks like two pincers. From there it will attempt to rush with it's new 'head' and grab the player thattaway, doing considerable damage. If enough damage is dealt to its glowing torso region then there's a chance the J'avo may then explode, dealing damage to any nearby enemies.
Glava-Dim
A mutation related to head damage. For this mutation the J'avo will now prefer to avoid combat and attack from afar. Its new series of wasp-like heads will spew a red mist that will slowly deal damage to the player should they be within it, and will also make it difficult to see at that.
Glava-Begunats
A mutation related to head damage. Strangely enough this mutation doesn't give the J'avo any additional attacks of sorts, and instead incites it to go into a frenzied state as it rapidly swings its weapon--whether it had equipped a machete or an SMG--around.
Telo-Eksplozija
A mutation related to torso damage. This mutation now turns the J'avo into a suicide-bomber of sorts. It has no form of attack available, but when close enough it will then kneel down in its attempt to explode nearby the player. It can otherwise undergo its explosion prematurely if the player deals enough damage, particularly to its legs. Its explosion will deal damage to any nearby enemies, and can potentially cause a chain reaction of Telo-Eksplozija J'avo if more are close.
A mutation related to torso damage. This mutation focuses purely on defense as it encases the J'avo's torso with scales that make it immune to gunfire. Though explosions and melee attacks can still deal damage.
A mutation related to torso damage. With this the J'avo will be forced to stay stuck to the ground, completely immobile. Though it will emit a poisonous gas within the vicinity so long as it's alive.
Ruka-Khvatanje
A mutation related to arm damage. The most common mutation, this one will gift the J'avo a long, stretchy arm akin to a Bandersnatcher enemy from Code: Veronica. Not only will it allow the J'avo a far-reaching melee attack, but it also gives it the ability to pull the player character from afar and pull them to it -- even if the player is currently hiding behind cover. Should this mutation be paired with the Glava-Smech, when it pulls the player towards it it will be to grasp the player with its pincers to bite rather than merely slamming them to the ground.
Ruka-Srp
A mutation related to arm damage. This mutation turns the J'avo's arm into something resembling a scythe, which they can then use to attack in swiping motions when the player is close enough.
Ruka-Bedem
A mutation related to arm damage. With this the J'avo turns its arm into a sort of shield, used for both defense and offense. The shield is indestructible, though enough damage will at least eventually knock the J'avo off balance allowing the player to perform a melee attack. Its most common attack is to charge at the player with its shield up, though it will always charge in a straight line, allowing the player to potentially move out of its way and attack its rear.
Noga-Trchanje
A mutation related to leg damage. Through this mutation the J'avo's entire lower half now resembles an arachnid, though it only has six legs as opposed to eight. Nonetheless, its new-found mobility allows the J'avo to skitter up and along walls and ceilings. The J'avo will still primarily use its firearm, though it will also attempt to quickly leap at the player, though the damage it inflicts is minimal. If it is close enough the player will be given a prompt to stomp on the J'avo, dealing some light damage.
Noga-Let
A mutation related to leg damage. This mutation also gifts the J'avo an increase in mobility, only now it has the capacity to fly. This is its only major benefit, however, as it attack only with a Ruger SMG.
Noga-Skakanje
A mutation related to leg damage. The J'avo with this has access to a new pair of giant legs resembling a grasshopper of sorts. It can now run much faster and jump exceptionally high, though it will primarily use its Ruger SMG to attack. If close enough, however, it will attempt to kick the player.
Noga-Oklop
A mutation related to leg damage. This mutation now gives the J'avo significantly increased attack power its legs. It will still use its firearm, but will now also sometimes charge in and do a number of powerful mid-air kicks.
Chrysalid Mutations
Even after mutating, there's a chance a J'avo may mutate even further. They will first begin to burn up and become encased in a giant chrysalid, before a new form of monster then 'hatches' from within. Chrysalids can be destroyed, however it can take significantly more punishment than what the creature that bursts out of it would require to destroy.
Strelats
A very fast and mobile monster that resembles a lizard of sorts. It can very quickly scurry throughout the area, often rushing past the player to knock them aside a little--the player will receive no damage during this action, though--and can crawl up and around walls. Its main source of attack is to shoot a swath of needles from its chest, which if one hits the player will knock them over to the ground. It also sometimes spew a sort of acidic liquid should players be close enough, which can potentially keep a player stunlocked without assistance from their partner character.
Strelats weakness is against melee attacks. Should one be stunned, either by gunfire of a flashbang, the player can enact a QTE that involves three button prompts, each of which will show the character kicking the creature's torso before then doing a roundhouse kick against it. The roundhouse kick will always end the combo, even should a player fail the QTE.
Napad
A large, hulking creature that moves and attacks akin to a gorilla. They are encased in a tough shell, though it can be broken apart after enough punishment. From there its fleshy muscles will be revealed, which are more susceptible to damage. It also has a notary weak-point on its back.
While Napads are slow in movement, its primary attack involves it charging towards the player in its attempt to ram the player over; it'll start beating its chest to signify when it's ready to charge. Players can attempt to get out of the way, though there's also a QTE prompt that'll show up for the player to jump over the beast before it hits.
Beyond charging, it'll attempt to to punch the character when close enough. Napads can potentially explode should be they killed with an explosive weapon, though if they're killed with melee attacks or firearm fire it will wildly swing its arms around as a final attack before it succumbs to death.
Mesets
A monster that resembles a large, black bird. Mesets will fly around the area, before its latches its claws onto the player character and pulls them up into the air. The player must then wiggle the stick to escape, if not rely on their partner character to shoot the creature to release the player character.
Gnezdo
Arguably the most dangerous Chrysalid mutation. Gnezdo primarily consists of a female humanoid shape, made up of hundreds of what look like bees. Shooting the figure enough will then force the queen bee to temporarily reveal itself -- killing the queen will then finally end the creature for good.
It only has one attack, where it envelops the player character and rapidly deals damage. The player must wiggle the stick to escape, however the continuous damage can be so severe that it can prove to be physically impossible to escape before death.
Boss Battles
Leon S. Kennedy Campaign
Lepotitsa Part I
Unlockables
Mercenaries
Returning once more is the popular Mercenaries minigame, which is pretty much an exact replica of the Resident Evil 5 iteration, and is unlocked by completing the Prelude. Starting with 2 minutes, players are to kill as many enemies as possible within the time limit. Where RE6's Mercenaries differ is the addition of an enemy counter, which shows how many enemies out of a set amount of spawns on the map the player has killed. The more enemies the player kills, the more aggressive the enemies get, and will also begin spawning sub-bosses as well.
Players can extend their overall time by finding and destroying Time Bonuses throughout the map, and any enemies that are killed via a melee attack will grant the player an additional few seconds. Mercenaries can be played cooperatively for up to 2 players in both local split-screen and online.
By default there are only three characters available and one map. More characters are unlocked by attaining a B rank on each map, and two more maps are unlocked by completing both Chris and Jake's campaigns - one per campaign. Alternate costumes are also available, and are unlocked per character by attaining an A rank with the character itself. Much like in RE5, each of the character's alternate costumes will have a different set of weapons and supplies.
Like the main campaign, skills are available for players to purchase with in-game points and equip, though only one Skill may be equipped at a time. These Skills are also completely separate from the ones in the main game, and the player's point currency is unique to Mercenaries and doesn't carry over, nor can it be imported, from the main game. Instead players must collect Skills points from defeated enemies in the Mercenaries mode itself.
Characters:
| Character Portrait | Starting Inventory | Taunt |
|---|
| Leon S. Kennedy (Default) | - Wing Shooter
- Shotgun
- 4 Remote Explosives
- 50 handgun rounds
- 8 twelve gauge shotgun shells
| |
| Leon S. Kennedy (Costume 1) | - Assault Rifle RN
- Sniper Rifle
- Grenade Launcher
- 60 assault rifle rounds
- 30 sniper rifle rounds
| |
| Helena Harper (Default) | - Picador
- Hydra
- Grenade Launcher
- 50 handgun rounds
- 30 ten gauge shotgun shells
| - "This is a waste of time"
|
| Helena Harper (Costume 1) | - Ruger SMG
- Sniper Rifle
- Red Herb
- First-Aid Spray
- 3 Incendiary Grenades
- 50 handgun rounds
- 20 sniper rifle rounds
| |
| Chris Redfield (Default) | - Assault Rifle for Special Tactics
- Lightning Hawk
- Combat Knife
- 3 Hand Grenades
- 60 assault rifle rounds
- 7 magnum rounds
| - "Never had a mission this easy"
|
| Chris Redfield (Costume 1) | - Nine-Oh-Nine
- Shotgun
- RPG
- 50 handgun rounds
- 20 twelve gauge shotgun shells
| |
| Piers Nivans (Default) | - MP-AF
- Anti-Material Rifle
- First-Aid Spray
- 3 Remote Explosives
- 50 handgun rounds
- 20 anti-material rounds
| - "You're dealing with pros here"
|
| Piers Nivans (Costume 1) | - Ruger SMG
- Semi-Automatic Rifle
- Assault Shotgun
- 30 handgun rounds
- 15 sniper rifle rounds
- 10 twelve gauge shotgun shells
| |
| Jake Muller (Default) | - Nine-Oh-Nine
- Elephant Killer
- Hand-to-Hand
- 2 Flash Grenades
- 50 handgun rounds
- 10 magnum rounds
| |
| Jake Muller (Costume 1) | - Survival Knife
- Semi-Automatic Rifle
- Grenade Launcher
- First-Aid Spray
- 20 sniper rifle rounds
- 12 grenade rounds
| |
| Sherry Birkin (Default) | - Triple Shot
- Lightning Hawk
- Stun Rod
- Red Herb
- Red Herb
- First-Aid Spray
- 30 handgun rounds
- 10 magnum rounds
| - "I'm tougher than I look"
|
| Sherry Birkin (Costume 1) | - Bear Commander
- Assault Shotgun
- Red Herb
- Red Herb
- First-Aid Spray
- 2 Flash Grenades
- 60 assault rifle rounds
- 20 twelve gauge shotgun shells
- 3 grenade rounds
| |
| Ada Wong (Default) | - Ruger SMG
- Crossbow
- 3 Incendiary Grenades
- 30 handgun rounds
- 60 regular bolts
- 30 explosive bolts
| |
| Ada Wong (Costume 1) | - MP-AF
- Sniper Rifle
- Red Herb
- Red Herb
- 3 Hand Grenades
- 2 Flash Grenades
- 30 handgun rounds
- 6 sniper rifle rounds
| |
| Carla Radames | - Picador
- Grenade Launcher
- 50 handgun rounds
- 12 grenade rounds
- 6 acid rounds
| |
Maps:
- Urban Chaos - set within a Chinese shopping district.
- Steel Beast (Unlocked by completing Chris' campaign) - Set within the surrounding area of a bridge in Edonia.
- Mining the Depths (Unlocked by completing Jake's campaign) - Set within a mine in Edonia.
- Rail Yard (Unlocked within RE.net) - Set within an underground train station in Tall Oaks.
- High Seas Fortress (Unlocked within RE.net) - Set on Carla Radames' missile carrier.
- The Catacombs (Unlocked within RE.net) - Set within the underground Catacombs in Tall Oaks.
- Liquid Fire (Unlocked within RE.net)
- Requiem for War (Unlocked within RE.net)
- Creature Workshop (Unlocked within RE.net)
- Rooftop Mission (Unlocked within RE.net)
Skills:
- Eagle Eye - Adds an extra level of magnification to sniper rifle scope.
- Item Drop Increase - Causes more defeated enemies to drop items.
- Go for broke - Makes it easier to pull off combos as time runs out.
- Time Bonus - Increases time awarded by a Time Bonus.
- Combo Bonus - Increases time for a Combo Bonus.
- Limit Breaker - Increases the points earned for surpassing 50 combos.
- Blitz Player - Increases the players attack power if they attack immediately after another player.
- Quick Shot Damage Increase - Increases power of quick shots.
- Power Counter - Greatly increases the power of counters.
- Second Wind - Increases power to firearms and melee attacks when life gauge is low.
- Martial Arts Master - Increases strength of physical attacks, but the power of firearm-related attacks are greatly reduced.
- Target Master - Increases strength of firearm attacks, but the power of physical attacks are greatly reduced.
- Last Stand - Greatly Increases attack power, but attacks against the player hurt three times as much.
- Preemptive Strike - Increases attack power when the player attacks from behind.
- Dying Breath - Greatly increases attack power when dying, but recovery is comparably shortened.
- Pharmacist - Increases the potency of health tablets.
- Medic - Heals a teammate that's far away when the player uses a health tablet.
- First Responder - Makes it easier to rescue dying teammates.
- Take It Easy - Increases speed of natural recovery when using cover.
- Natural Healing - Increased speed of natural recovery.
Agent Hunt
A competitive multiplayer mode similar to the Left 4 Dead series Versus mode, Agent Hunt allows players to take on the role of a creature (J'avo, zombie ect.) across any of the campaigns and then try to impede players currently going through the story. However, they can only invade players who have already allowed the option before hand in the lobby.
Agent Hunt is unlocked by completing any one of the campaigns.
Infinite Ammo Skills
Once all four of the campaigns have been completed, Infinite Ammo Skills per weapon type are made available for purchase.
Ada Wong Campaign
Initially, once all of the original three campaigns had been unlocked Ada's was then made available. Though via a patch it is now accessible from the beginning.
Ada's differs in that it is a single player campaign with no AI partners, though it can still be played in coop. There also still exist segments where Ada will connect with the other campaigns and the option to search for other players to join in as temporary allies is still available. Otherwise they are controlled by the AI and function just like the player's partner characters in the original campaigns.
Dog Tags
Dog Tags have three different categories, the template, emblem, and titles which is unlockables when playing the game.
Template
There are 22 unlockable templates.
Default: Default dog tag, no need to unlock it.
Silencer: Unlocked when finishing the first chapter on Leon's campaign.
Silencer - Gold: Unlocked when finishing the second chapter on Leon's campaign.
Silencer - Copper: Unlocked when finishing the third chapter on Leon's campaign.
Silencer - Red: Unlocked when finishing the fourth chapter on Leon's campaign.
Hand Grenade: Unlocked when finishing the last chapter on Leon's campaign.
Hand Grenade - Gold: Unlocked when finished the first chapter on Chris' campaign.
Hand Grenade - Copper: Unlocked when finishing the second chapter on Chris' campaign.
Hand Grenade - Green: Unlocked when finishing the third chapter on Chris' campaign.
Virus Shot: Unlocked when finishing the fourth chapter on Chris' campaign.
Virus Shot - Gold: Unlocked when finishing the last chapter on Chris' campaign.
Virus Shot - Copper: Unlocked when finishing the first chapter on Jake's campaign.
Virus Shot - Light Green: Unlocked when finishing the second chapter on Jake's campaign.
Wings: Unlocked when finishing the third chapter on Jake's campaign.
Wings - Gold: Unlocked when finishing the fourth chapter on Jake's campaign.
Wings - Copper: Unlocked when finishing the last chapter on Jake's campaign.
Wings - Pink: Unlocked when finishing the first chapter on Ada's campaign.
Tank: Unlocked when finishing the second chapter on Ada's campaign.
Tank - Gold: Unlocked when finishing the third chapter on Ada's campaign.
Tank - Copper: Unlocked when finishing the fourth chapter on Ada's campaign.
Tank - Yellow: Unlocked when finishing the last chapter on Ada's campaign.
Emblem
There are 50 unlockable emblems, however unlocking this also unlocks achievements and trophies.
The Longest Night: Unlocked when finishing the prelude.
Gone to Hell: Unlocked when finishing the first chapter on Leon's campaign.
Buried Secrets: Unlocked when finishing the second chapter on Leon's campaign.
Get on the Plane: Unlocked when finishing the third chapter on Leon's campaign.
Big Trouble in China: Unlocked when finishing the fourth chapter on Leon's campaign.
The Trouble with Women: Unlocked when finishing the last chapter on Leon's campaign.
Rescue the Hostages: Unlocked when finishing the first chapter on Chris' campaign.
Tragedy in Europe: Unlocked when finishing the second chapter on Chris' campaign.
After Her!: Unlocked when finishing the third chapter on Chris' campaign.
There's Always Hope: Unlocked when finishing the fourth chapter on Chris' campaign.
Duty Calls: Unlocked when finishing the last chapter on Chris' campaign.
Money Talks: Unlocked when finishing the first chapter on Jake's campaign.
A Revolting Development: Unlocked when finishing the second chapter on Jake's campaign.
Let's Blow this Joint: Unlocked when finishing the third chapter on Jake's campaign.
Still on the Run: Unlocked when finishing the fourth chapter on Jake's campaign.
See You Around: Unlocked when finishing the last chapter on Jake's campaign.
I Spy: Unlocked when finishing the first chapter on Ada's campaign.
Counterintelligence: Unlocked when finishing the second chapter on Ada's campaign.
This Takes Me Back: Unlocked when finishing the third chapter on Ada's campaign.
Ada's Demise: Unlocked when finishing the fourth chapter on Ada's campaign.
What's Next: Unlocked when finishing the last chapter on Ada's campaign.
Green Around the Ears: Unlocked when finishing the game in Amateur mode.
Normal is Good: Unlocked when finishing the game in Normal mode.
Back in My Day: Unlocked when finishing the game in Veteran mode.
Leave it to the Pro: Unlocked when finishing the game in Professional mode.
Check Out My Dogs: Unlocked when customizing your dog tag.
Titular Achievement: Unlocked when earning 10 different titles.
One Is Better Than None: Unlocked when purchasing a skill.
Mad Skillz: Unlocked when maxing out all the skill that level up.
Silent Killer: Unlocked when killing 5 enemies silently.
Finish What You Start: Unlocked when performing a coup de grace on 10 enemies.
Bob and Weave: Unlocked when countering an enemy 3 times a row.
Down, Not Out: Unlocked when defeating an enemy while dying and recover.
Lifesaver: Unlocked when helping or rescuing partner 10 times.
Weapons Master: Unlocked when killing 10 enemies with each gun in the game.
Give a Little Push: Unlocked when knocking 10 enemies off a high place.
Rising Up: Unlocked when earning a level four title.
They're ACTION Figures!: Unlocked when collecting 3 figurines.
Stuntman: Unlocked when defeating 20 enemies with the Hydra using quick shot.
Bring the Heat: Unlocked when taking down an enemy from 50 meters away with a headshot using a thermal scope.
High Voltage: Unlocked when defeating 10 enemies with a Stun Rod charge attack.
Zombie Massacre: Unlocked when defeating 500 zombies.
J'avo Genocide: Unlocked when defeating 500 J'avo.
B.O.W.s Are Ugly: Unlocked when defeating 100 enemies that have come out of chrysalid cocoons.
I Prefer Them Alive: Unlocked when rescuing 2 female survivors at the cathedral in Leon's campaign on Chapter 2.
Flying Ace: Unlocked when piloting the VTOL without getting a scratch on it in Chris' campaign on Chapter 4.
Hard Choice: Unlocked when shooting the helicopter pilot with a Magnum at point-blank range in Jake's campaign on Chapter 4.
Sneaking Around: Unlocked when shooting the aircraft carrier's bridge area with being noticed in Ada's campaign on Chapter 4.
Covered in Brass: Unlocked when earning 150 different medals.
Heirlooms: Unlocked when collecting all Serpent Emblems.
Title
There are 255 titles including the DLC titles.
Miscellaneous
- Resident Evil: Default title, no need to unlock it.
- Curious Fan: Unlocked when finished playing Resident Evil 5 campaign.
- Hardcore Player: Unlocked when playing Resident Evil 6 for 100 hours.
- Global Player: Unlocked when playing with 300 other players online.
- Rollin' with the Homies: Unlocked when playing online with a friend 300 times.
- My Skills: Unlocked when earning a total of 200,000 skill points.
- Skill Collector: Unlocked when purchasing 80 skills.
- File Collector: Unlocked when reading all 80 files.
- Figure Collector: Unlocked when collect all 78 figures.
- Earning Them Medals: Unlocked when earning 2,000 Medals.
- Title Collector: Unlocked when earning 200 titles.
- People Eater: Unlocked when playing as a zombie 300 times.
- J'avo Juice: Unlocked when playing as a J'avo 300 times.
- Left My Mark: Unlocked when tagging 300 enemies with a marker.
- Tag Master: Unlocked when all 300 enemies you tagged are killed by other players.
Traveling, Helping/Saving
- Enjoying the Scenery: Unlocked when walking 5,000 meters.
- Running My Shoes Off: Unlocked when running 100,000 meters.
- Mad Dasher: Unlocked when dashing 5,000 meters.
- Rock-Hard Buns: Unlocked when traversing 500 meters on your backside.
- Big Baby: Unlocked when crawling 300 meters.
- Like a Duck to Water: Unlocked when swimming 1,000 meters.
- Joyrider: Unlocked when travelling 500 kilometers with a vehicle.
- Easy Target: Unlocked when requiring help 300 times.
- Rescue Me: Unlocked when receiving help 300 times.
- Hero: Unlocked when rescuing another player 300 times.
- Death Wish: Unlocked when requiring saving 100 times.
- Resuscitated Agent: Unlocked when saved from dying 100 times.
- Phoenix: Unlocked when recovering on your own from dying 100 times.
- Last Hurrah: Unlocked when defeating 100 enemies while dying.
- Lifesaver: Unlocked when saving other players from dying 100 times.
Dying, Killing Methods
- Dead Ringer: Unlocked when being killed 200 times.
- Going Out in Style: Unlocked when being killed awesomely 50 times.
- Headshot Master: Unlocked when making a headshot 1,000 times.
- Gunslinger: Unlocked when hitting enemies with a quick shot 1,000 times.
- Potent Pugilist: Unlocked when landing a physical attack 1,000 times.
- Relentless Attacker: Unlocked when performing 300 successful follow-up attacks.
- Combat Master: Unlocked when performing a unique physical attack 300 times.
- By Any Means: Unlocked when using an enemy's weapon 100 times.
- Badass: Unlocked when attacking 100 times with zero stamina.
- Executioner: Unlocked when performing 300 coups de grace.
- Counter Attacker: Unlocked when performing 300 counterattacks.
- Stealth Killer: Unlocked when performing 300 stealth kills.
- Slip Slider: Unlocked when sliding 500 times.
- Slide 'n' Smash: Unlocked when destroying 300 objects while sliding.
- Bone Breaker: Unlocked when killing 100 enemies while sliding.
Weapon - Specific Kills
- Nine-Oh-Nine Expert: Unlocked when killing 1,000 enemies with the Nine-Oh-Nine.
- Picador Expert: Unlocked when killing 1,000 enemies with the Picador.
- Wing Shooter Expert: Unlocked when killing 1,000 enemies with the Wing Shooter.
- Shotgun Expert: Unlocked when killing 1,000 enemies with the shotgun.
- Assault Shotgun Expert: Unlocked when killing 1,000 enemies with the assault shotgun.
- Hydra Expert: Unlocked when killing 1,000 enemies with the Hydra.
- Lightning Hawk Expert: Unlocked when killing 1,000 enemies with the Lightning Hawk.
- Elephant Killer Expert: Unlocked when killing 1,000 enemies with the Elephant Killer.
- Sniper Rifle Expert: Unlocked when killing 1,000 enemies with the sniper rifle.
- Semi-Auto Sniper Rifle Expert: Unlocked when killing 1,000 enemies with the semi-auto sniper rifle.
- Anti-Material Rifle Expert: Unlocked when killing 1,000 enemies with the anti-material rifle.
- Ammo Box 50 Expert: Unlocked when killing 1,000 enemies with the Ammo Box 50.
- Triple Shot Expert: Unlocked when killing 1,000 enemies with the Triple Shot.
- MP-AF Expert: Unlocked when killing 1,000 enemies with the MP-AF.
- A.R. for Special Tactics Expert: Unlocked when killing 1,000 enemies with the Assault Rifle for Special Tactics.
- Bear Commander Expert: Unlocked when killing 1,000 enemies with the Bear Commander.
- Assault Rifle RN Expert: Unlocked when killing 1,000 enemies with the Assault Rifle RN.
- Explosive Round Expert: Unlocked when killing 1,000 enemies with explosive rounds.
- Acid Round Expert: Unlocked when killing 1,000 enemies with acid rounds.
- Nitrogen Round Expert: Unlocked when killing 1,000 enemies with nitrogen rounds.
- Rocket Launcher Expert: Unlocked when killing 100 enemies with the rocket launcher.
- Crossbow Expert: Unlocked when killing 1,000 enemies with the crossbow.
- Crossbow Master: Unlocked when pinning 1,000 enemies to the wall with the crossbow.
- Survival Knife Expert: Unlocked when killing 1,000 enemies with the survival knife.
- Combat Knife Expert: Unlocked when killing 1,000 enemies with the combat knife.
- Stun Rod Expert: Unlocked when killing 1,000 enemies with the stun rod.
- Hand-To-Hand Expert: Unlocked when killing 1,000 enemies with your bare hands.
- Gatling Gun Expert: Unlocked when killing 300 enemies with a gun turret.
- I Spy: Unlocked when killing 300 enemies with a camera gun turret.
- ATV Gun Expert: Unlocked when killing 300 enemies with the military vehicle's gun.
Weapon - Specific Kills, Miscellaneous
- I Got Hand: Unlocked when killing 100 enemies with Piers' mutated arm.
- Hand Grenade Expert: Unlocked when killing 1,000 enemies with hand grenades.
- Incendiary Grenade Expert: Unlocked when killing 1,000 enemies with incendiary grenades.
- Flash Grenade Expert: Unlocked when killing 100 enemies with flash grenades.
- Flash Grenade Master: Unlocked when blinding 1,000 enemies with flash grenades.
- Demolition Expert: Unlocked when killing 1,000 enemies with explosive objects.
- Pipe Bomb Expert: Unlocked when killing 1,000 enemies with pipe bombs.
- Remote Bomb Expert: Unlocked when killing 1,000 enemies with remote bombs.
- Manipulator: Unlocked when using an enemy's attack to kill 300 other enemies.
- Need a Pick-Me-Up: Unlocked when consuming 2,000 health tablets.
- The Chemist: Unlocked when combining herbs 1,000 times.
- Need My Meds: Unlocked when using the first aid spray 100 times.
- Not an Acrobat: Unlocked when using the zip-line 300 times.
- Undercover: Unlocked when using cover for a total of 100 minutes.
- Reloader: Unlocked when reloading 5,000 times.
Creature - Specific Kills
- Zombie Hunter: Unlocked when killing 3,000 zombies.
- Shrieker Hunter: Unlocked when killing 500 Shriekers.
- Whopper Hunter: Unlocked when killing 500 Whoppers.
- Zombie Dog Hunter: Unlocked when killing 500 zombie dogs.
- Bloodshot Hunter: Unlocked whenKill 500 Bloodshots.
- J'avo Hunter: Unlocked when killing 3,000 J'avo.
- Cocoon Hunter: Unlocked when destroying 300 chrysalids.
- Glava-Sluz Hunter: Unlocked when killing 1,000 Glava-Sluzes
- Glava-Smech Hunter: Unlocked when killing 1,000 Glava-Smeches.
- Glava-Begunats Hunter: Unlocked when killing 1,000 Glava-Begunatses.
- Glava-Dim Hunter: Unlocked when killing 1,000 Glava-Dims.
- Ruka-Srp Hunter: Unlocked when killing 1,000 Ruka-Srps.
- Ruka-Khvatanje Hunter: Unlocked when killing 1,000 Ruka-Khvatanjes.
- Ruka-Bedem Hunter: Unlocked when killing 1,000 Ruka-Bedems.
- Noga-Trchanje Hunter: Unlocked when killing 1,000 Noga-Trchanjes.
- Rasklapanje Hunter: Unlocked when killing 200 Rasklapanjes.
- Ogroman Hunter: Unlocked when killing 200 Ogromans.
- Ustanak Hunter: Unlocked when killing 200 Ustanaks.
- Oko Hunter: Unlocked when killing 300 Okos.
- Derek Hunter: Unlocked when killing 200 Dereks.
- Carla Spore Hunter: Unlocked when killing 300 Carla Spores.
- Haos Hunter: Unlocked when killing 100 Haoses.
- Road Rage: Unlocked when killing 300 enemies using vehicles.
- Open Season: Unlocked when killing 300 animals.
- Metal Muncher: Unlocked when destroying 300 helicopters or tanks.
- Kickin' Ass & Takin' Names: Unlocked when defeating 10,000 enemies.
- Fire Hazard: Unlocked when setting 1,000 zombies on fire.
- Face Smasher: Unlocked when destroying 1,000 J'avo masks.
- Any Port in a Storm: Unlocked when using chrysalids for cover for 20 minutes.
- Chuter Shooter: Unlocked when killing 100 parachuting enemies.
Campaign Accomplishments
- Getting Good Grades: Unlocked when completing all campaigns with an S rank.
- Decorated Agent: Unlocked when earning all the 175 different medals in the campaign.
- Medal Agent: Unlocked when earning 1,500 medals in the campaign.
- Amateur: Unlocked when completing all campaign chapters on Amateur.
- Got Some Experience: Unlocked when completing all campaign chapters on Normal.
- I Know What I'm Doing: Unlocked when completing all campaign chapters on Veteran.
- Professional: Unlocked when completing all campaign chapters on Professional.
- Dare to Hope: Unlocked when complete all campaign chapters on No Hope.
- Action Junkie: Unlocked when completing 200 campaign chapters.
- Respect the Skills: Unlocked when complete all campaign chapters without seeing the game over screen.
- Lone Wolf: Unlocked when completing all campaign chapters by yourself.
- Amazon: Unlocked when completing 15 campaign chapters with female characters.
- Party Time!: Unlocked when playing with 3 other players 30 times during a story intersection.
- Props to You: Unlocked when praising your partner 100 times during the campaign.
- Herb Sharer: Unlocked when feeding your partner 200 health tablets during the campaign.
Collectibles, Character - Specific Accomplishments, Miscellaneous
- Emblem Finder: Unlocked when finding all 80 serpent emblems during the campaign.
- Treasure Hunter: Unlocked when opening 100 treasure chests during the campaign.
- Exterminator: Unlocked when killing an Agent Hunt player 200 times during the campaign.
- Still in Training: Unlocked when continuing 100 times during the campaign.
- Survivalist: Unlocked when completing 1 chapter in Leon's campaign with just the survival knife.
- Hydra Tamer: Unlocked when completing 1 chapter in Leon's campaign with just the Hydra.
- Combat Specialist: Unlocked when completing 1 chapter in Chris' campaign with just the combat knife.
- Snipe This!: Unlocked when completing 1 chapter in Chris' campaign with the anti-material rifle.
- Martial Artist: Unlocked when completing 1 chapter in Jake's campaign with just hand-to-hand combat.
- Beat-Down King: Unlocked when completing 1 chapter in Jake's campaign with just the stun rod.
- Eagle Eyed: Unlocked when completing 1 chapter in Ada's campaign with just the crossbow.
- Trigger Happy: Unlocked when using all the ammo in your weapon 1,000 times during the campaign.
- Button Masher: Unlocked when pressing an action button 10,000 times during the campaign.
- Spin Doctor: Unlocked when performing a rotation action 200 times during the campaign.
- The Right Touch: Unlocked when pressing an action button at the exact time 200 times.
The Mercenaries
- Hired Killer: Unlocked when playing The Mercenaries 200 times.
- Decorated Mercenary: Unlocked when earning all 44 different medals in The Mercenaries.
- Medal Mercenary: Unlocked when earning 300 medals in The Mercenaries.
- S.T.A.R.S. Leader: Unlocked when getting an S in all stages of The Mercenaries.
- Professional Mercenary: Unlocked when getting an A in all stages of The Mercenaries.
- Soldier of Fortune: Unlocked when completing all stages of The Mercenaries.
- A Cut above the Rest: Unlocked when getting an S with all the characters in The Mercenaries.
- Killing's What I Do: Unlocked when killing 5,000 enemies in The Mercenaries.
- Gettin' My Hands Dirty: Unlocked when killing 3,000 enemies with physical attacks in The Mercenaries.
- Combo Master: Unlocked when pulling off 150 combos in The Mercenaries.
- Man of the Hour: Unlocked when getting 500 time bonuses in The Mercenaries.
- Under the Wire: Unlocked when finishing a round of The Mercenaries with 5 minutes to spare.
- Killin' Like a Boss: Unlocked when killing a hidden boss 200 times in The Mercenaries.
- Let's Work Together!: Unlocked when chaining physical attacks with your partner 200 times in The Mercenaries.
- Team Player: Unlocked when rescuing a partner from dying 30 times in The Mercenaries.
Agent Hunt
- Agent Hunter: Unlocked when playing Agent Hunt 200 times.
- Brutal Hunter: Unlocked when killing an agent 200 times in Agent Hunt.
- Decorated Hunter: Unlocked when earning all 45 different medals in Agent Hunt.
- Medal Hunter: Unlocked when earning 300 medals in Agent Hunt.
- Assassin: Unlocked when performing 30 coups de grace on agents in Agent Hunt.
- Stay Outta My Turf!: Unlocked when staying in the same stage with an agent for 30 minutes or more in Agent Hunt.
- Mutant: Unlocked when mutating a body part 300 times in Agent Hunt.
- Metamorph: Unlocked when mutating completely 200 times in Agent Hunt
- Vagabond: Unlocked when playing 12 stages of Agent Hunt.
- Mad Dog: Unlocked when playing as a zombie dog 200 times in Agent Hunt.
- Blood on My Hands: Unlocked when playing as Bloodshot 200 times in Agent Hunt.
- Shrieking Awesome: Unlocked when playing as Shrieker 200 times in Agent Hunt.
- Disjointed: Unlocked when playing as Rasklapanje 200 times in Agent Hunt.
- Ultimate Hunter: Unlocked when playing as all enemy characters in Agent Hunt.
- Cannon Fodder: Unlocked when player die 300 times without hurting an agent.
Onslaught
- Slaughtering is Fun: Unlocked when playing Onslaught 200 times.
- Decorated Slayer: Unlocked when earning all 39 different medals in Onslaught.
- Medal Slayer: Unlocked when earning 300 medals in Onslaught.
- Slaughterer: Unlocked when defeating your opponent 100 times in Onslaught.
- King of the Abattoir: Unlocked when winning 15 times in a row in Onslaught.
- Clever Slayer: Unlocked when winning in Onslaught with all the characters.
- Combo Conquistador: Unlocked when achieving a 30-combo chain 200 times during Onslaught.
- Killing Time: Unlocked when winning by time running out 100 times in Onslaught.
- Trigger Finger: Unlocked when using counterattacks to defeat 200 enemies during Onslaught.
- Death Becomes Me: Unlocked when losing 100 times in Onslaught.
- Mighty Spammer: Unlocked when sending 2,000 enemies to your opponent's stage in Onslaught.
- The Big Goodbye: Unlocked when using coups de grace to defeat 200 enemies during Onslaught.
- See You in Hell: Unlocked when an enemy you sent kills your opponent 30 times in Onslaught.
- Line 'Em Up!: Unlocked when your opponent sends 2,000 enemies your way in Onslaught.
- Doing it on the Floor: Unlocked when killing 200 enemies while sliding in Onslaught.
Survivors
- Still Alive: Unlocked when playing Survivors 200 times.
- Decorated Survivor: Unlocked when earning all 90 different medals in Survivors.
- Medal Survivor: Unlocked when earning 500 medals in Survivors.
- MVP: Unlocked when getting the most points 200 times in Survivors.
- Last Man Standing: Unlocked when being the last survivor 200 times in a death match in Survivors.
- Staying Alive: Unlocked when winning death matches with all characters in Survivors.
- Last Team Standing: Unlocked when winning 200 team battles in Survivors.
- It's a Team Effort: Unlocked when wining team battles with all characters in Survivors.
- No Man Left Behind: Unlocked when reviving a teammate 200 times during a team battle.
- Talk to Me!: Unlocked when using chat 200 times during a team battle.
- Back in the Saddle: Unlocked when becoming human again 100 times in Survivors.
- Master Duelist: Unlocked when winning 100 times in Survivors with only 1 player.
- Sliding Menace: Unlocked when killing 100 agents by sliding in Survivors.
- Mr. Death: Unlocked when killing 5 agents without dying Survivors.
- Going the Distance: Unlocked when killing 200 agents from 20 meters away in Survivors.
Predator
- The Hunted: Unlocked when playing Predator 200 times.
- Decorated Predator: Unlocked when earning all 45 different medals in Predator.
- Medal Predator: Unlocked when earning 300 medals in Predator.
- Ustamaster: Unlocked when getting first place 100 times in Predator.
- Killing Machine: Unlocked when defeating 200 agents in Predator.
- Predator: Unlocked when capturing 200 agents in Predator.
- Super Punching Bag: Unlocked when getting last place 200 times in Predator.
- Like Rag Dolls: Unlocked when throwing an Agent 1,000 times as Ustanak.
- Debbie Downer: Unlocked when destroying the Agents' weapons 300 times as Ustanak.
- Boom!: Unlocked when killing 200 agents with the shotgun arm in Predator.
- I'm a Loser, Baby: Unlocked when getting last place 100 times in Predator.
- Denied!: Unlocked when destroying Ustanak's tools 300 times as an Agent.
- It Bleeds, I Kill It: Unlocked when performing 200 coups de grace on Ustanak in Predator.
- Get in the Ring: Unlocked performing 100 coups de grace on Ustanak with physical attacks.
- One Foot in the Grave: Unlocked when dying as an agent 1,000 times in Predator.
Siege
- Siege Mentality: Unlocked when playing Siege 200 times.
- Decorated Warrior: Unlocked when earning all the different medals in Siege. (38)
- Medal Warrior: Unlocked when earning 300 medals in Siege.
- Biohazard Commando: Unlocked when winning 300 times in Siege.
- Guardian: Unlocked when protecting the BSAA 200 times as an Agent in Siege.
- Holding the Fort: Unlocked when killing 2,000 creatures in Siege.
- Outta Time!: Unlocked when destroying 200 time-reduction objects as an Agent in Siege.
- Bodyguard: Unlocked when rescuing BSAA members 200 times as an Agent in Siege.
- Guardian Angel: Unlocked when rescuing a dying agent 200 times in Siege.
- Zombie Food: Unlocked when dying as an agent 200 times in Siege.
- Terrorists Win: Unlocked when defeating the BSAA 100 times as a creature in Siege.
- Agent Killer: Unlocked when killing an agent 200 times in Siege as a creature.
- Siege Perilous: Unlocked when being killed by an agent 1,000 times in Siege.
- Prey for the Prey: Unlocked when being defeated by the BSAA 100 times as a creature in Siege.
- Relic Hunter: Unlocked when destroying 200 enemy objects as a creature in Siege.
Development
Resident Evil 6 had been stirring within the public's mind for a while. Rumors and small tidbits referencing the game's development began circulating during E3 2011, when a logo for Resident Evil 6 was posted, along with the date to the same year's TGS show. Nothing Resident Evil-related occurred during the TGS show, however a trailer was released on September 16th, implying that Resident Evil 6 was to be set in Canada. The trailer was soon shot down by Capcom as a fake. The next batch of rumors began pointing towards China, after a voice actress' resume was found to state she would be portraying a ''Chinese zombie'' for Resident Evil 6.
In a similar move during Resident Evil 5's marketing, Capcom began a purposely shoddy looking viral campaign called NoHopeLeft.com, which sprinkled random blogs and notes much like for some sort of conspirators website, detailing how the entire world is under siege. Only one day before the début trailer, the site posted a movie of a greatly distressed Chinese woman making a vlog for a loved one, under the guise of a civilian currently in the midst of whatever catastrophe is going on. It cuts out as she is seemingly attacked by something. Soon afterwards, another video is posted just with the date and time of ''01.19.12 14:00 PST''. Without fail, the site then posted a link to the début Resident Evil 6 trailer at 2pm Pacific the next day with the words ''This explains a lot!!!!''.
Continuing the viral campaign, on February 21st the nohopeleft website was ''seized and put under investigation'', with a logo not seen before within the series at the bottom of the page linking a downloadable audio file titled ''praying audio''. Much like the title implies, it plays a short 14 second clip of a young Chinese woman (possibly the same one from the vlog) praying in her native language.
While originally slated for a 11/20/12 release, come the Captivate trailer in April, the date was pushed forward to 10/02/12. Despite only being announced early 2012, Capcom stated that development for Resident Evil 6 had been going on since 2010. It was also stated to be the ''largest'' Resident Evil game to date, and the Capcomteam working on it was the biggest one they had working on a single game --approximately 600 people. For comparison's sake, roughly around 120 people worked on Resident Evil 5. Capcom said that with Resident Evil 6, they want to combine the series strongest elements of horror and action; executive producer Hiroyuki Kobayashi coined the term ''dramatic horror'' to best summarise their ambitions, in an attempt to replicate Mikami's original fame for creating the Survival Horror moniker. The popular military-shooter series Call of Duty was recurrently bought up as influential--notably regarding its sales--in how Capcom decided to steer forward the next instalment of the Resident Evil series.
At the Electronic Entertainment Expo's Microsoft Conference, Hiroyuki Kobayashi and Eiichiro Sasaki took to the stage to unveil their first trailer showing off unedited gameplay, focussing on Leon's story, for Resident Evil 6.
Only minutes after the Microsoft Conference was over, Capcom uploaded another cinematic trailer surrounding the plot of the game. On the show floor, multiple streams showing off small segments of Leon's, Chris' and Jake's stories were shown as well, along with further explanation for the gameplay debut of 4-player boss battles.
SDCC 2012
After the overall poor reception of the 360 demo released on July 3rd--most notably regarding the camera and screen-tearing--Capcom quickly saw fit to showcase a more updated edition of Resident Evil 6, including a much more manageable camera with the character model not taking up so much of the screen, and improved technical aspects. Capcom also used this opportunity to introduce more segments for each of the campaigns, as well as upload another edited story trailer.
Street Date Broken
On August 31st, more than a month before Resident Evil 6's officially scheduled release, a few copies of the full game--PS3 version--were made available for retail sale in the Polish City of Poznań. Capcom quickly reported that such copies were in fact 'stolen'.
Logo Controversy
The purposely abstract Number ''6'' logo for Resident Evil 6 went under some scrutiny shortly after it was revealed within the début trailer for its appearance - which has been said to resemble a giraffe, whilst wearing a boot, receiving fellatio from a woman. It sparked a lot of talk on many forums across the internet (most notably 4chan) and was subjected to parody and even drawings to better illustrate the ''hidden image'' within the number 6 logo.
While Capcom didn't go as far as to acknowledge the fellatio comparison, they were open to admitting and making fun of the similarities the logo shares with a giraffe via a Facebook update.
To coincide with Capcom's other equally invested IP, Dragon's Dogma, Capcom slotted in a code to unlock a demo for Resident Evil 6 for players who buy new copies of Dragon's Dogma. However, there is a large interval regarding the activation dates between the 360 and PS3 versions because of Microsoft paying for temporary exclusivity; the 360 demo is available to download on July 3rd, whereas for the PS3 it's September 5th. A public demo was then released for all on September 18th for the PS3 and 360 Gold Members (Silver members had to wait until September 25th) which contained different sections of gameplay than in the first demo for each of the three campaigns.
Capcom have stated that their reasoning for separating the demo activation dates as a ''strategic business decision''. Head of the UK branch David Turner also further elaborated by saying that, ''The dream would be that the millions of Call of Duty fans that are enjoying these fast-paced online games are attracted to this Resident Evil'', implying that they're pushing for the 360 because of its larger player base surrounding Call of Duty.
July 3rd/September 5th Demo
At under 1GB, the Resident Evil 6 demo included a small excerpt from each of the three campaigns, Leon, Chris, and Jake--which were originally shown on the stage-floor of 2012's E3 expo.
Leon's was situated during the beginning, after he is forced to kill the zombified President Adam Benford. Along with Helena, they make their way through the Tall Oaks University, before bumping into a lost father and daughter who are both infected with the C-Virus, and are eventually forced to defend themselves against an onslaught of zombies.
Chris Redfield's begins around the time he and Piers Nivans reunite after their mission in Europe 6 months prior. Then, skipping to their mission during China, the two fight across the rooftops of Langshiang against a small band of J'avo resistance. Jake Muller's demo gives players the taste of one of Resident Evil 6's boss battles as he along with Sherry do battle with B.O.W. Ustanak programmed by Neo-Umbrella to hunt down Jake Muller -- not unlike how The Nemesis stalked Jill Valentine during Resident Evil 3.
All three of the campaigns can be played solo or online with another player, though not in splitscreen. Should players die they must restart the demo level over - there are no checkpoints.
September 18th Public Demo
Sized at 847MB and available for all on both PS3 and 360, Resident Evil 6's second demo gave another taste of each of the three main campaigns. Alongside that, the demo featured a better optimised camera and smoother technical properties.
In partnership with Valve, Capcom have included additional exclusive L4D2-themed content for Resident Evil 6's PC version free of charge. The four main characters of L4D2--Coach, Ellis, Nick, and Rochelle--are available as playable characters in the Mercenaries Mode with their own inventory loadouts. Some of the special mutated infected, such as The Witch and The Tank, also appear in the mode as additional mini-bosses.
Furthermore, many of Resident Evil 6's J'avo and its own special zombie enemies will also appear in Left 4 Dead 2 as well for free.
Patch Updates
After Resident Evil 6 underwent waves of criticism by both fans and critics, Capcom saw fit to release numerable patches to attempt to 'fix' certain commonplace issues, while also opening up a lot of content that was initially required to be unlocked. Such alterations included thus far have been:
- A much wider Field of View.
- An option to make QTE's much easier to deal with.
- Numerous tweaks and balances to the overall difficulty.
- The option to now select between lesser chapters within the main five chapters for each campaign.
- Making Ada Wong's campaign playable from the outset.
- The option to play Ada Wong's campaign in cooperative play; though it can still be played solo just as Ada, with no permanent AI partner.
- Making Agent Hunt mode to be playable from the outset.
Special Editions
Anthology/Archive Collection
Scheduled for release on the same day as the default Resident Evil 6 game are the Anthology and Archive collections - a compilation of the main Resident Evil games for the PS3 & 360 respectively. The name difference signifies more than just console difference, however, as each one features a different selection of games:
Anthology (PS3):
Archives (360):
Collector's Edition
Exclusive to European regions, the Collector's Edition is fitted with the usual set of additions alongside the main game - all of which are packed within a needle-bomb themed box:
- Resident Evil 6 video game
- Zombie-themed steelbook
- Hardback artbook
- DLC codes for an avatar if it's the 360 version or a dynamic theme if the PS3
- Three Emblem insignias featuring signatures from RE6 developers Hiroyuki Kobayashi, Yoshiaki Hirabayashi and Eiichiro Sasaki
- Tall Oaks Ivy University sweatshirt
Premium Edition
Exclusive only to Japan is the Premium Edition, which includes the full RE6 game along with four tablet covers and an exact replica of Leon S. Kennedy's jacket during the part in Tall Oaks. Because of the high price of 105,000 yen, otherwise roughly conversed as 1,300$, the reaction was tepid at best. Capcom's official US blog, Capcom Unity, held a poll asking their International audience whether they wanted the edition to be made available over in the States. Rounded to a basis of 100, the poll shown that only 20/100 votes were in favor of purchasing the edition should it be made available.
PC system requirements
Minimum:
- OS: Windows Vista®/XP, Windows 7, Windows 8
- Processor: Intel® CoreTM2 Duo 2.4 Ghz or better, AMD AthlonTM X2 2.8 Ghz or better
- Memory: 2 GB RAM
- Hard Disk Space: 16 GB free hard drive space
- Video Card: NVIDIA® GeForce® 8800GTS or better
- DirectX®: 9.0c or greater
- Sound: Standard audio device
Recommended:
- OS: Windows Vista®/XP, Windows 7, Windows 8
- Processor: Intel® CoreTM 2 Quad 2.7 Ghz or better, AMD PhenomTM II X4 3 Ghz or better
- Memory: 4 GB RAM
- Hard Disk Space: 16 GB free hard drive space
- Video Card: NVIDIA® GeForce® GTX 560 or better
- DirectX®: 9.0c or greater
- Sound: Standard audio device
Soundtrack
The game consist of 151 songs and is separated into four disks. The original CD/DVD/Blu-ray was released on November 14, 2012 and it is also available on iTunes as a digital download.
Disk 1
| Track No. | Title | Artist | Duration |
|---|
| 1. | Main Theme | Laurent Ziliani & Thomas Parisch | 3:15 |
| 2. | Prelude | Laurent Ziliani & Thomas Parisch | 1:15 |
| 3. | Life or Death | Laurent Ziliani & Thomas Parisch | 2:09 |
| 4. | First Zombie Attack | Laurent Ziliani & Thomas Parisch | 0:56 |
| 5. | Heading to Quad Tower | Laurent Ziliani & Thomas Parisch | 0:56 |
| 6. | Run! | Laurent Ziliani & Thomas Parisch | 1:32 |
| 7. | Pull Up! | Laurent Ziliani & Thomas Parisch | 1:05 |
| 8. | Main Title/Descent into Despair | Akihiko Narita, Akiyuki Morimoto, Azusa Kato, Kota Suzuki | 0:24 |
| 9. | Invasion of Darkness (Leon) | Akihiko Narita, Akiyuki Morimoto, Azusa Kato, Kota Suzuki | 2:11 |
| 10. | Death of a President | Akihiko Narita, Akiyuki Morimoto, Azusa Kato, Kota Suzuki | 2:42 |
| 11. | Silent Party | Laurent Ziliani & Thomas Parisch | 1:43 |
| 12. | The Unexpected | Akihiko Narita, Akiyuki Morimoto, Azusa Kato, Kota Suzuki | 0:39 |
| 13. | Campus | Akihiko Narita, Akiyuki Morimoto, Azusa Kato, Kota Suzuki | 1:57 |
| 14. | No Way Out | Akihiko Narita, Akiyuki Morimoto, Azusa Kato, Kota Suzuki | 1:47 |
| 15. | Underground Nightmare | Akihiko Narita, Akiyuki Morimoto, Azusa Kato, Kota Suzuki | 1:13 |
| 16. | The Town | Laurent Ziliani & Thomas Parisch | 1:46 |
| 17. | Gas Station | Laurent Ziliani & Thomas Parisch | 2:10 |
| 18. | Gun Shop | Laurent Ziliani & Thomas Parisch | 2:34 |
| 19. | Bus Escape | Laurent Ziliani & Thomas Parisch | 1:02 |
| 20. | From Whence Came-Lepotitsa | Laurent Ziliani & Thomas Parisch | 1:37 |
| 21. | Searching For... | Laurent Ziliani & Thomas Parisch | 1:18 |
| 22. | Underground Lab | Laurent Ziliani & Thomas Parisch | 2:19 |
| 23. | Deborah's Transformation I | Laurent Ziliani & Thomas Parisch | 2:35 |
| 24. | Deborah's Transformation II | Laurent Ziliani & Thomas Parisch | 2:06 |
| 25. | Fearsome Foe | Akihiko Narita, Akiyuki Morimoto, Azusa Kato, Kota Suzuki | 1:01 |
| 26. | Cavern | Akihiko Narita, Akiyuki Morimoto, Azusa Kato, Kota Suzuki | 1:24 |
| 27. | Brzak | Akihiko Narita, Akiyuki Morimoto, Azusa Kato, Kota Suzuki | 1:21 |
| 28. | Brzak (Final) | Laurent Ziliani & Thomas Parisch | 1:10 |
| 29. | Pull the Throttle! (Airplane) | Laurent Ziliani & Thomas Parisch | 1:13 |
| 30. | Swarm of Bombs | Laurent Ziliani & Thomas Parisch | 1:50 |
| 31. | Sudden Intimacy/Crossover | Akihiko Narita, Akiyuki Morimoto, Azusa Kato, Kota Suzuki | 1:26 |
| 32. | Leon vs. Chris | Akihiko Narita, Akiyuki Morimoto, Azusa Kato, Kota Suzuki | 1:36 |
| 33. | Kith and Kin | Laurent Ziliani & Thomas Parisch | 3:39 |
| 34. | Emergency Situation I | Akihiko Narita, Akiyuki Morimoto, Azusa Kato, Kota Suzuki | 1:21 |
| 35. | Emergency Situation II | Laurent Ziliani & Thomas Parisch | 1:20 |
| 36. | Through the Fatal Glass/ Requiem Theme | Laurent Ziliani & Thomas Parisch | 3:23 |
| 37. | You Won't Be Missed | Akihiko Narita, Akiyuki Morimoto, Azusa Kato, Kota Suzuki | 0:53 |
| 38. | Ancient Blood | Laurent Ziliani & Thomas Parisch | 3:17 |
| 39. | The Ties That Bind (Leon) | Akihiko Narita, Akiyuki Morimoto, Azusa Kato, Kota Suzuki | 0:37 |
| 40. | Floating Nightmare | Laurent Ziliani & Thomas Parisch | 3:19 |
| 41. | Escape from the Tower | Akihiko Narita, Akiyuki Morimoto, Azusa Kato, Kota Suzuki | 1:18 |
| 42. | Back for More | Akihiko Narita, Akiyuki Morimoto, Azusa Kato, Kota Suzuki | 3:57 |
| 43. | Trouble with Women | Akihiko Narita, Akiyuki Morimoto, Azusa Kato, Kota Suzuki | 1:58 |
| 44. | Results (Leon) | Akihiko Narita, Akiyuki Morimoto, Azusa Kato, Kota Suzuki | 1:11 |
Disk 2
| Track No. | Title | Artist | Duration |
|---|
| 1. | Invasion of Darkness (Chris) | Akihiko Narita | 2:12 |
| 2. | Fallen Hero | Akiyuki Morimoto | 1:35 |
| 3. | Bioterrorism in Lanshiang | Akiyuki Morimoto | 4:09 |
| 4. | Mutation | Akiyuki Morimoto | 0:48 |
| 5. | Separated | Akiyuki Morimoto | 1:05 |
| 6. | At the Ace of Spades | Akiyuki Morimoto | 1:53 |
| 7. | Rescue the Hostage | Laurent Ziliani & Thomas Parisch | 3:08 |
| 8. | Unexpected Countdown | Laurent Ziliani & Thomas Parisch | 1:19 |
| 9. | Eastern Europe, Six Months Ago | Akiyuki Morimoto | 1:57 |
| 10. | Mission in Edonia I/Ogroman | Azusa Kato | 3:57 |
| 11. | Mission in Edonia II/The Bridge | Daniel Lindholm | 2:56 |
| 12. | Mission in Edonia III/In Front of City Hall | Laurent Ziliani & Thomas Parisch | 2:53 |
| 13. | Ominous Escort/City Hall | Laurent Ziliani & Thomas Parisch | 1:41 |
| 14. | The Trap | Akihiko Narita | 2:29 |
| 15. | Invisible Sign | Laurent Ziliani & Thomas Parisch | 1:05 |
| 16. | Neo-Umbrella's Assault | Daniel Lindholm | 2:47 |
| 17. | Iluzija I | Laurent Ziliani & Thomas Parisch | 2:14 |
| 18. | Iluzija II | Laurent Ziliani & Thomas Parisch | 2:11 |
| 19. | Gnezdo/Memento | Akiyuki Morimoto | 2:03 |
| 20. | Conflict | Akiyuki Morimoto | 1:00 |
| 21. | Chase I/ You're Not Gonna Lose Us, Ada! | Akihiko Narita | 3:25 |
| 22. | Chase II/Step On the Gas | Akihiko Narita | 2:22 |
| 23. | Aircraft Carrier-Rear Hanger/Waves of Attack | Daniel Lindholm | 1:53 |
| 24. | Aircraft Carrier-Bridge/Extended Chase | Daniel Lindholm & Kota Suzuki | 2:03 |
| 25. | Vengeance Served? | Akiyuki Morimoto | 1:58 |
| 26. | Aircraft Carrier-Forward Hangar/Searching for Hope | Azusa Kato | 2:32 |
| 27. | Aircraft Carrier-Space/VTOL | Daniel Lindholm | 3:23 |
| 28. | The Longest Elevator | Akihiko Narita | 1:47 |
| 29. | Underwater Facility/Let's Get Jake and Sherry | Laurent Ziliani & Thomas Parisch | 2:56 |
| 30. | Chrysalid (Chris) | Laurent Ziliani & Thomas Parisch | 1:26 |
| 31. | Haos/Apostle of Chaos | Akiyuki Morimoto | 3:12 |
| 32. | Determination | Akiyuki Morimoto | 1:25 |
| 33. | Escape from Underwater Facility | Akiyuki Morimoto | 1:25 |
| 34. | Entrust Oneself to the Future | Akiyuki Morimoto | 3:12 |
| 35. | The War Isn't Over | Akiyuki Morimoto | 0:47 |
| 36. | Result (Chris) | Akihiko Narita | 1:41 |
Disk 3
| Track No. | Title | Artist | Duration |
|---|
| 1. | Invasion of Darkness (Jake) | Akihiko Narita, Akiyuki Morimoto, Azusa Kato, Kota Suzuki | 2:10 |
| 2. | Boy Meets Girl | Akihiko Narita, Akiyuki Morimoto, Azusa Kato, Kota Suzuki | 2:11 |
| 3. | The Odd Couple | Akihiko Narita, Akiyuki Morimoto, Azusa Kato, Kota Suzuki | 2:21 |
| 4. | Mission: Escape | Akihiko Narita, Akiyuki Morimoto, Azusa Kato, Kota Suzuki | 0:47 |
| 5. | Ustanak/Collapsing Building | Akihiko Narita, Akiyuki Morimoto, Azusa Kato, Kota Suzuki | 2:01 |
| 6. | Jake's Attitude/Ogroman Fight | Sebastian Schwartz | 1:30 |
| 7. | Jake's Counterattack/Ogroman Fight | Sebastian Schwartz | 1:28 |
| 8. | Inside the Helicopter | Laurent Ziliani & Thomas Parisch | 1:33 |
| 9. | Ustanak/In the Air | Laurent Ziliani & Thomas Parisch | 2:46 |
| 10. | Ugly Costumers I | Sebastian Schwartz | 2:55 |
| 11. | Mountain Retreat | Akihiko Narita, Akiyuki Morimoto, Azusa Kato, Kota Suzuki | 1:17 |
| 12. | Ugly Costumers II | Akihiko Narita, Akiyuki Morimoto, Azusa Kato, Kota Suzuki | 1:41 |
| 13. | Avalanche | Laurent Ziliani & Thomas Parisch | 3:01 |
| 14. | Cave/Hide and Seek | Akihiko Narita, Akiyuki Morimoto, Azusa Kato, Kota Suzuki | 1:32 |
| 15 | Cave/ Head-on Fight | Sebastian Schwartz | 1:56 |
| 16. | It's Always Something | Akihiko Narita, Akiyuki Morimoto, Azusa Kato, Kota Suzuki | 1:25 |
| 17. | Unarmed Combat | Sebastian Schwartz | 1:08 |
| 18. | Jake in China | Laurent Ziliani & Thomas Parisch | 1:55 |
| 19. | The Tank | Laurent Ziliani & Thomas Parisch | 3:07 |
| 20. | Speeding Bike I/ Runaway | Sebastian Schwartz | 3:16 |
| 21. | Speeding Bike II/Shoot it! | Sebastian Schwartz | 2:20 |
| 22. | Poisawan Courtyard | Sebastian Schwartz | 2:02 |
| 23. | Raccoon City Reunion | Akihiko Narita, Akiyuki Morimoto, Azusa Kato, Kota Suzuki | 1:12 |
| 24. | Ustanak/Airplane Crash Site | Sebastian Schwartz | 2:55 |
| 25. | Unpredictable | Laurent Ziliani & Thomas Parisch | 2:08 |
| 26. | Double Betrayal | Akihiko Narita, Akiyuki Morimoto, Azusa Kato, Kota Suzuki | 2:49 |
| 27. | We're Finally Here | Akihiko Narita, Akiyuki Morimoto, Azusa Kato, Kota Suzuki, Thomas Parisch, Laurent Ziliani | 3:27 |
| 28. | Quake and Crawl | Laurent Ziliani & Thomas Parisch | 2:05 |
| 29. | Blood Ties | Akihiko Narita, Akiyuki Morimoto, Azusa Kato, Kota Suzuki | 1:38 |
| 30. | Strange Fate | Laurent Ziliani & Thomas Parisch | 2:16 |
| 31. | The Cocoon Hatches! (Jake) | Akihiko Narita, Akiyuki Morimoto, Azusa Kato, Kota Suzuki | 1:31 |
| 32. | Ustanak Immolated/No More Holding Back | Akihiko Narita, Akiyuki Morimoto, Azusa Kato, Kota Suzuki | 2:57 |
| 33. | The Last Escape | Sebastian Schwartz | 2:08 |
| 34. | At the End of a Long Escape | Akihiko Narita, Akiyuki Morimoto, Azusa Kato, Kota Suzuki | 4:24 |
| 35. | A Promise Kept | Akihiko Narita, Akiyuki Morimoto, Azusa Kato, Kota Suzuki | 1:51 |
| 36. | Results (Jake) | Akihiko Narita, Akiyuki Morimoto, Azusa Kato, Kota Suzuki | 1:40 |
Disk 4
| Track No. | Title | Artist | Duration |
|---|
| 1. | Invasion of Darkness (Ada) | Akihiko Narita, Akiyuki Morimoto, Azusa Kato, Kota Suzuki | 2:10 |
| 2. | The Submarine | Akihiko Narita, Akiyuki Morimoto, Azusa Kato, Kota Suzuki | 1:55 |
| 3. | Tiptoeing Through Shadows | Akihiko Narita, Akiyuki Morimoto, Azusa Kato, Kota Suzuki, Thomas Parisch, Laurent Ziliani | 2:57 |
| 4. | The Riddle | Laurent Ziliani & Thomas Parisch | 2:08 |
| 5. | Misidentification | Laurent Ziliani & Thomas Parisch | 2:01 |
| 6. | Big Nuisance | Akihiko Narita, Akiyuki Morimoto, Azusa Kato, Kota Suzuki, Daniel Lindholm | 2:44 |
| 7. | Sudden Crisis | Akihiko Narita, Akiyuki Morimoto, Azusa Kato, Kota Suzuki | 0:44 |
| 8. | The Flood | Akihiko Narita, Akiyuki Morimoto, Azusa Kato, Kota Suzuki | 2:13 |
| 9. | Point of Implosion | Daniel Lindholm | 2:09 |
| 10. | Ada Takes Action | Akihiko Narita, Akiyuki Morimoto, Azusa Kato, Kota Suzuki | 1:46 |
| 11. | Eye for an Eye, Tooth for a Tooth | Akihiko Narita, Akiyuki Morimoto, Azusa Kato, Kota Suzuki | 2:49 |
| 12. | Ubistvo I | Laurent Ziliani & Thomas Parisch | 2:34 |
| 13. | Chinese Market | Laurent Ziliani & Thomas Parisch | 2:22 |
| 14. | Ubistvo II | Laurent Ziliani & Thomas Parisch | 1:47 |
| 15. | Ada on Aircraft Carrier | Daniel Lindholm | 3:18 |
| 16. | How I've Waited | Akihiko Narita, Akiyuki Morimoto, Azusa Kato, Kota Suzuki | 3:31 |
| 17. | Undesirable Truth | Akihiko Narita, Akiyuki Morimoto, Azusa Kato, Kota Suzuki | 0:59 |
| 18. | Indisposition | Akihiko Narita, Akiyuki Morimoto, Azusa Kato, Kota Suzuki | 1:15 |
| 19. | Too Soon for Tears | Akihiko Narita, Akiyuki Morimoto, Azusa Kato, Kota Suzuki | 2:08 |
| 20. | Infinite Metamorphoses | Akihiko Narita, Akiyuki Morimoto, Azusa Kato, Kota Suzuki | 3:18 |
| 21. | Zombie Wasteland | Akihiko Narita, Akiyuki Morimoto, Azusa Kato, Kota Suzuki | 2:43 |
| 22. | High-Rise Area | Akihiko Narita, Akiyuki Morimoto, Azusa Kato, Kota Suzuki | 1:56 |
| 23. | Joint Struggle | Laurent Ziliani & Thomas Parisch | 4:05 |
| 24. | Reminisance | Akihiko Narita, Akiyuki Morimoto, Azusa Kato, Kota Suzuki | 1:11 |
| 25. | The Ties That Bind (Ada) | Akihiko Narita, Akiyuki Morimoto, Azusa Kato, Kota Suzuki | 0:39 |
| 26. | Indelible Memory | Akihiko Narita, Akiyuki Morimoto, Azusa Kato, Kota Suzuki | 1:05 |
| 27. | Ada's Smile | Akihiko Narita, Akiyuki Morimoto, Azusa Kato, Kota Suzuki | 1:34 |
| 28. | Infinite Metamorphoses - Ultimate Bottom's Mix- | Akihiko Narita, Akiyuki Morimoto, Azusa Kato, Kota Suzuki | 4:23 |
| 29. | Results (Ada) | Akihiko Narita, Akiyuki Morimoto, Azusa Kato, Kota Suzuki | 1:41 |
| 30. | New Purpose | Akihiko Narita, Akiyuki Morimoto, Azusa Kato, Kota Suzuki | 1:18 |
| 31. | Collections | Sebastian Schwart | 2:36 |
| 32. | Heat on Beat 2012/ The Mercenaries | Daniel Lindholm | 3:50 |
| 33. | Evil Eye/Agent Hunt | Daniel Lindholm | 4:08 |
| 34. | Results (Extra Content) | Akihiko Narita, Akiyuki Morimoto, Azusa Kato, Kota Suzuki | 1:15 |
| 35. | You Are Dead | Akihiko Narita, Akiyuki Morimoto, Azusa Kato, Kota Suzuki | 0:18 |
Log in to comment