Overview
 Killzone 2 CGI Trailer (E3 2005)
Killzone 2 is a military-themed first-person shooter that offers a futuristic, sci-fi slant as the soldiers of the ISA head to the enemy's home planet to fight back against the invasion seen in the previous game. This sequel to the 2004 PS2 title from Guerrilla Games was first announced during Sony's E3 2005 press conference via a pre-rendered teaser trailer. The footage left many in awe, and even more in speculation debating the legitimacy of the trailer being real gameplay. Later, it was confirmed and clarified by Sony that the footage was indeed a computer generated target render, leaving many disappointed.
The game utilizes an intuitive cover system, referred to by the developers as "lean and peek." Guerrilla strived toward the creation of a cinematic gameplay experience. In what they call "Hollywood Realism", the camera perspective remains in first person for the vast majority of the game, with the HUD being minimalist. That includes moments where the player must take cover, climb ladders, and when cut scenes gain full attention. This cover system allows the player to simply hold a trigger to latch onto cover, and then move the movement-assigned analogue stick in the direction of the player's choice - whether it be up, left, or right . Virtually any position can be used as a cover anchor. The player can also enter a scope/ iron sight with their weapon when leaning out from behind cover. Vehicles, on the other hand, are not controlled in first-person view for the sake of streamlining.
Destructible environments and cover are a crucial part of Killzone 2, with nearly every piece of cover being able to be chipped away by gunfire and explosions until only a frame remains. Less permanent objects, such as trash bags, tin cans, and chairs, are movable and destructible. According to Guerrilla, the inclusion of destructible cover was not something added for players to be able to rip everything apart until it's completely non-existent like Battlefield: Bad Company , but was added to further instil a more intense sense of realism, where everything in the world reacts as you would expect, and portrays movements which make sense in terms of real-world physics.
 SIXAXIS Motion Controls
Killzone 2 supports SIXAXIS motion controls as well, "in ways that make sense". Valves can be turned by holding the L1 and R1 buttons, the character's left and right hands, respectively, and then making a twisting motion with the controller, acting as if the player is interacting with a tangible object. C4 charges can be placed with a similar functionality, and the Sniper Rifle has a steady-shot component built in. When the player zooms in on an enemy or object, the controller must be kept completely still to ensure the greatest possible accuracy. Jeff Gerstmann also noted that the game's loading screens feature "quite possibly the best use of SIXAXIS technology to date".
Killzone 2 includes full Trophy support, DualShock 3 rumble support, as well as some level of Home integration.
Guerrilla Games released patch version 1.27 on June 4th, 2009, among the changes being the inclusion of a High Precision control option. Players can toggle between the classic Killzone 2 control style and one similar to other online shooters, such as the popular Call of Duty 4: Modern Warfare. By default, this feature is set to "On" for new players and "Off" for existing players. The patch also tweaked the multiplayer portion of the game, adding a party system that allows friends to consistently stay on the same team and squad. Furthermore, all badges are now available when playing Skirmish Mode, so that players of lower rank can experience offline the weapons and abilities of each badge while playing with and against bots.
Single Player Campaign
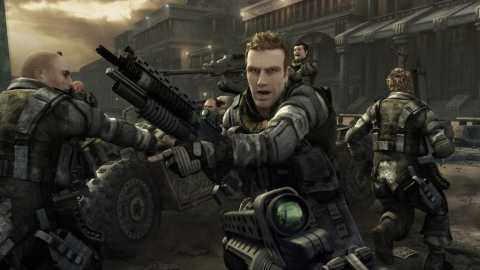
 The Alpha Team (from left to right: Garza, Rico, Sev, Natko)
Killzone 2 is set two years after the events of the first game, after the dust settled from the Helghan invasion of planet Vekta. The ISA are now taking the war back to the enemy, in attempt to capture the Helghan leader, Emperor Scolar Visari. But unlike the past games set in a world of Helghast army invasion, Killzone 2 takes place on the Helghast home planet, Helghan, where a fully fledged war has begun. You play as a new character to the Killzone franchise, named Sev, who is part of an elite four man special forces group called the Alpha Team. The squad is made up of Master Sergeant Ricardo Velasquez (aka Rico), Sergeant 1st Class Tomas Sevchenko (aka Sev), Corporal Shawn Natko (aka Natko), and Lance Corporal Dante Garza (aka Garza).
Alpha Team, along with hundreds of ISA troops, are deployed over Pyhrrus, the capital city of Helghan, to begin the final invasion of the Helghast home planet. The Invasion proceeds as planned until the Helghast activate their arc tower defenses, wiping out much of the first wave of the assault.
ISA scientist Evelyn Batton discovers that the arc towers are built out of an element called Petrusite, mainly located at Tharsus Refinery. Alpha Team is sent to find a way to disable the towers.In the course of the mission, Sev and Rico leave to activate a communications tower, and the rest of the team is kidnapped by the Helghast. They find the team being held by Colonel Radec, who is about to execute them. Rico rushes in to save the squad, resulting in Garza being killed and Radec escaping.
The Team returns to the New Sun, the ISA flagship, when the Helghast begin a massive assault and board much of the fleet. Colonel Radec infiltrates the bridge of the New Sun, kills Evelyn,steals the ISA nuclear strike codes, and mortally wounds Fleet Commander Jan Templar. Templar sacrifices himself, deactivating the New Sun's engines and crashes the ship into Tharsis Refinery, deactivating the city's defense grid.
The ISA and Alpha Team regroup to attack Visari's palace, but a nuclear bomb is detonated in the city, wiping out most of the ISA forces. The remaining soldiers storm the palace, and Alpha Team severely injures Radec, who commits suicide to avoid capture.
Sev and Rico confront Scolar Visari, who tells them that even if he dies, he will be a martyr to the Helghast, only strengthening their war effort. He says that he is the only one keeping the Helghast under control. Rico, avenging Templar and Garza, kills Visari, whose last words are, "The madness begins." Sev leaves the palace, shaken from what has happened, and sees a Helghast fleet wiping out ISA forces, proving what Visari had said.
Campain Missions
- Corinth River
- Blood Meridian
- Visari Square
- Salamun District
- Salamun Bridge
- Suljeva Village
- Tharsis Refinery
- The Cruiser
- Maelstra Barrens
- Visari Palace
Online Multiplayer
Online Multiplayer GameplayKillzone 2 offers a robust online multiplayer aspect, with Guerrilla going as far to say that it makes up about "50% of Killzone 2". The multiplayer features up to 32 player games (16 vs 16), 12 different military ranks to unlock, 46 different ribbons and medals to unlock, up to 64 player clans, 8 different maps (which vary in size), tournaments of up to 256 clans, 6 different classes which each have a primary and secondary ability, called badges (Total of 12 badges to mix and match), and 12 different character models (Non- customizable); two character models for each class type (ISA model/HGH version).
Classes in Killzone 2 offer players a way to cater to their custom play style. There are a total of 6 different unique classes; Engineer, Medic, Scout, Assault, Tactician, & Saboteur. Each class has two badges; a primary and secondary badge (the primary badge determines character model), which are tailored to that classes' specific play style.
Online Multiplayer SniperFor example, the Medic's primary badge ability gives the player access to a specialized weapon that can heal downed/injured teammates (by shooting an electric charge at them). The secondary badge allows medics to toss a health pack which other players can pick up. But the unique aspect of classes in Killzone 2, is the combining of badges; for example, a player could take the primary badge of the Saboteur class (Which allows the player to disguise themselves as randomly selected enemy player), and the secondary badge of the Assault class (Which temporarily increases running speed), allowing the player to run faster and be disguised as the enemy. You can change your badge ability combination depending on what game type you are playing as well. The above badge combination for example, may best suit your play style for a game of capture the flag. Since each player may have their own combination of badges, this changes the multiplayer experience greatly, both on a strategic level as well as suiting to your preferred play style. Note that not all badges/abilities will be accessible from the start, players have to unlock some classes fully (secondary abilities) by ranking up.
Killzone's multiplayer also features robust clan support, with up to 64 player clans, clan leaderboards, and clan tournaments. You can even setup clan challenges against other clans in-game, this is where the 'Clan Valor' system comes in. Valor is KZ2's online currency for clans; whichever clan has more valor points, the higher they are on the leaderboards. Though clans start off with a certain amount of valor to get started, in order for them to climb up the leaderboards they must challenge other clans and bid a certain amount of their valor; whoever wins the game takes all. This system is similar to gambling, where in order to gain more, you must risk more, though here in the end one of the two clans will always end up losing valor, which also means moving down on the leaderboards. If a clan has somehow lost all of their valor points, they will be unable to challenge other clans and be forced to play in specific tournaments in order to gain enough valor to start challenging other clans again. Tournaments can also be made, allowing up to 256 clans to compete against each other, giving them a chance to win large amounts of valor points.
Although certain players have the ability to request air support from AI controlled sentry bots, vehicle support was not included on release and despite rumors to the contrary has not appeared through a patch to the game.
Guerrilla is also trying to differentiate Killzone 2's multiplayer experience from most shooters on the market, with the introduction of other unique aspects (alongside classes and much more), such as in-game squad mechanics, trustworthy spawning system, as well improving the general flow/pacing of action. Through in-game mechanics, players can easily create a new squad on their team, which other teammates can join on-the-fly. Anywhere from 2 to 8 players can be in a specific squad, allowing a maximum of 8 squads per team if they so choose. Players in a squad will also share unique information amongst each other, such as the squads overall health, each players specific badges/ class combinations, as well as a custom chat channel. Spawning in online is also made easy; After death the map will be displayed, as well as what spawn points are available to choose from, to the left of the map is a live video feed of what is going on at whichever spawn point you have selected. This means you will have no one to blame for spawning in the middle of an explosive battle but yourself. The player can also choose to spawn on the squad leader (if in a squad), making it easier to always stay close and never get separated. Something else you don't regularly see in other multiplayer games, is a constant flow of action. In Killzone 2, after completing a specific task or mission, the game doesn't bring up a lobby screen or menu, it dynamically continues the game and pulls up the next mission, creating a constant flow of action.
Apart from players being able to automatically join a game using the 'Quick Join' feature (which attempts to match you up with players of similar skill level), Guerrilla has also stressed how important it is to them to allow users to "play what he wants to play". As well as trying to fulfill this goal with the custom classes system, players can also create custom games whenever and however they want. Customizations include the obvious features such as what maps, gameplay modes, and weapons are supported, but also deeper things such as how the classes work. The game will include official dedicated servers from Sony, as well as players' custom servers. Guerrilla promises to enable players with customizations to create their gameplay experience the way they want it to be in Killzone 2 online multiplayer.
Killzone 2 is heavily tied into Guerrilla's online website, Killzone.com. Users are able to link their PlayStation Network ID to the site, in order for their online, and even single player stats to be monitored, tracked, and shared amongst the community. As well as having access to the sites forums, Guerrilla Games news updates, and more, each player will has their own profile displaying all kinds of Killzone 2 stats, as well as Killzone Liberation (PSP) stats. Statistics include everything from leaderboards rank, current clan, favorite gametype, weapon, map, or class, to awards such as medals and ribbons.
Multiplayer Modes
- Assassination: One team member is the target and one team has to keep him safe, the other has to take him out.
- Body Count: Similar to traditional team death match game play.
- Search and Destroy: Defend an objective and make sure the other faction does not place charges.
- Search and Retrieve: Bring the propaganda pack to the drop-off point and try and stop the other faction from taking it to theirs.
- Capture and Hold: Capture and hold points around the maps and try and keep the other faction from doing the same.
Multiplayer Classes and Abilities
Rifleman
- This is the default multiplayer character and is assigned to the player when no primary badge is selected. However, a secondary badge can still be added. Riflemen class has available several different weapons to choose from, with the exception being for the specialized ones.
Medic
- Primary badge ability: Grants the player the ability to revive downed team mates.
- Secondary badge ability: Grants the player the ability to throw a health pack.
Engineer
- Primary badge ability: Grants to player the ability to set up an automated turret which automatically targets the enemy players.
- Secondary badge ability: Grants the player the ability to repair ammunition dispensers, mounted guns, and automated turrets.
Tactician
- Primary badge ability: Grants the player the ability to throw a colored smoke grenade, which serves as a spawn point.
- Secondary badge ability: Grants the player the ability to request air support from a sentry robot which targets enemy players
Assault
- Primary badge ability: Gives the player heavy armor, which is double the strength as normal.
- Secondary badge ability: Temporarily boosts the player’s running speed.
Saboteur
- Primary badge ability: Allows the player to assume the disguise of a randomly selected enemy player. The disguised player will display the name of the enemy unit which they are pretending to be.
- Secondary badge ability: Grants the player the ability to throw a sticky, proximity-activated C-4 explosive charge.
Scout:
- Primary badge ability: Grants the player the ability to use a cloaking suit to become almost invisible.
- Secondary badge ability: Grants the player the ability to tag all on-screen enemy players with a hidden marker, this ability then broadcasts their coordinates to team mates.
Multiplayer Maps
Pyrrhus RisePyrrhus Rise Among the first of the Petrosite mining fields (therefore being one of the older, depleted mines), Pyrrhus Rise is named after the Helghan capital. ISA Command was hoping to get an easy picking from the Helghast, thinking the security here would be slightly more lax than elsewhere. Little did they know the extent to which the Helghan army fights to hold on to every little piece of turf they own. Opponents battle not only each other, but the elements as well - harsh blowing wind, gaping canyons, rolling terrain, and the occasional bullet flying haphazardly through the air. With over ten ammunition boxes, four mounted weapons, five square kilometers to play in, and long lines of sight for those with the keen eyes, this is the largest of the original multiplayer maps. Four bridges span the monstrous canyon just off center of the map. The bridges mark the lowest point in the map, and with either end of the map being elevated, is an area prone to sniper fire. Dead Man’s land is what they call it. Cover abounds in the map, but with the large amount of open space, it’s a race from cover to cover while trying to achieve the mission objectives. |
Salamun Market Salamun Market Winding itself through Salamun Market is a road marked and scarred from recent battles, showing the importance of this area. With either faction turtled up at either end of the map, the showdown starts with the large two-story building located in the center of the map, as well as the focal point for most shoot-outs, showing the strategic importance of the location. Offering some of the best of indoor close-quarter combat and open outdoor spaces, Salamun Market turns out to be quite an entertaining map. Boasting an outstanding fourteen ammunition boxes, twelve mounted weapons, and thirteen explosive barrels, all crammed in two and a half square kilometers, this is one intense map. Variation in navigating the map is key here, as the urban layout is quite friendly to different routes. With a nearly straight line of sight to either key end of the map, two sniper buildings make an easy and importance appearance. |
Helghan Industries Helghan Industries Once a bustling experimental technology facility, Helghan Industries sealed its own doom when they failed to erase all sensitive information from the surrounding databanks, making this a focal point for the invading ISA, as well as the defending Helghan army. Placing focus on vertical combat, Helghan Industries is one of the unique types of maps that the game has to offer. With a two tier bridge overlooking the main route through the map, an open eye is absolutely key in the map. With choke points abounding, it offers combatants a chance to show what they are made of. Showcasing nearly three square kilometers of room, ten ammunition boxes, and six mounted weapons, it is quite a well rounded map. |
Visari Hammer Visari Hammer Home to one of the massive Arc Cannon protecting Helghan, the Visari Palace is a vital piece in the puzzle the Helghan strategy. In a desperate attempt to stop the brutal pounding the ISA ships are taking in orbit, numerous small drop ships have landed nearby, with the only goal of disabling the cannon, allowing for a foothold to be made in this key area. Possibly the most complicated, multilayered map of the original set, Visari Hammer is a maze when it comes to finding your way around, and those new to the map are likely to cause as much harm trying to find their way to the firefights, as the enemy is decimating the few who did manage to stumble upon their barrels. While the map may seem small upon first glance, once you make your way through the myriad of tunnels and covered pathways, it starts showing just how large it is when you get lost from your team. Hosting just over two square kilometers of play space, fourteen ammunition boxes, and seven mounted weapons, it is quite a well balanced map. Profound knowledge of what corridors lead where is key, as you may accidentally find yourself in the opposing base, facing the business end of an automated turret. |
Radec Academy Radec Academy A focal point in both the eyes of the Helghast and ISA, the Radec Academy is the main graduating source of the Helghan army. Losing this place would be devastating, both in terms of emotionality and sheer strength, to the Helghan war machine. Which is why it is high on the priority of the invading ISA. One small courtyard. Two small floors. Just over one square kilometer to move about. The formula for a completely chaotic battleground. Every win here is felt by the losses sustained. Nothing comes cheaply. |
Tharsis Depot Tharsis Depot Petrosite is one of the most powerful fuels in the galaxy. Tharsis Depot is where a major concentration of these barrels is found. The faction finding themselves on the end of these depots will find themselves having a huge advantage in turning the tide of the war. Both sides know this. Offering a scant one kilometer of killing space, prepare to have your abilities tested in this short lived map. Having eight ammunition boxes, and no mounted weapons, this map knows it means business. With a fair number of concrete cubes being stacked about, there is no shortage of cover. But what happens when you lose that cover, or you’re found out is when you really know what you’re made of. A control room towards the center of the map plays home to a number of the mission types, and plays quite a versatile role, as there are walkways abounding and offering little cover. With each base camp being a close boost run away, the fighting in the map is nothing short of glorious. |
Blood Gracht Blood Gracht The canal in Blood Gracht used to be a sight on the eyes, with the residential units surrounding allowing for a scenic neighborhood. War leaves such a scar. Resorting to guerrilla tactics, the army of Helghan is making their way to stopping and reversing the incoming ISA invasion, halting the advance into the capital. An asymmetrical map with less than a square kilometer of killing space, this map plays host to eight ammunition boxes, and three mounted weapons. With the canal being straight as a sniper shot, it plays nearly like a shooting gallery to those sitting atop with a keen eye and quick finger. Verticality does play a more than a small role here, with a plethora of ways to get to your intended target. Due to close quarters and the hectic nature of combat, those skilled at deception will find themselves comfortably at home here in the Gracht. |
Corinth Crossing Corinth Crossing Bridges have been a key strategic key in the history of warfare. Corinth Crossing finds itself home to such a bridge. Those who control the bridge and surrounding areas will find themselves holding a key strategic advantage. Having a bridge as your set piece plays host to a built in set of ideas. Back and forth gameplay, small verticality, and a tug of war that is going to happen. This plays just like that. With bases being at either end of the bridge, the conflict zones come into play at the top of the bridge and the base of the bridge, where the majority of the mission objectives are located. There are holes in the surfaces of the bridges, so a watchful eye on where you step is key, unless you’re comfortable with facing your enemy completely unprepared. |
| Steel & Titanium Map Pack |
|---|
Vektra Cruiser Vekta Cruiser This map is set on the Vektan warship from the single player game. Combat takes place over multiple levels with a more open area in the middle and cramped corridors surrounding it. |
Wasteland Bullet Wasteland Bullet This map featured a very original concept with the entire level taking place on a moving train. Players were able to leap between carriages however there would occasionally be towers and signal lights passing between them as the train moved along which could knock players onto the tracks. Gun turrets also featured heavily in this level with many being placed at strategic points for defending objectives. |
| Flash & Thunder Map Pack |
|---|
Beach Head Beach Head This map was perhaps the most unpopular of the DLC maps released. It is essentially a narrow corridor with very little vertical structures and only light cover. The layout of the map meant battles were typically fought in close quarters. |
Southern Hills Southern Hills This map features large, open areas surrounding a significant multi-level structure in the middle of the map. The most significant change Guerrilla made from the original Killzone map was the addition of a "nuclear strike" which would hit the map after a specific interval. When it did all players exposed in the open would instantly be killed which made for interesting gameplay, particularly on the search and retrieve game mode. |
| Napalm & Cordite Map Pack |
|---|
Suljeva Cliffside Suljeva Cliffside This map was loosely based around the mining facility you visit in the singleplayer game. It takes place on a narrow cliffside but features a walkway that runs along either side and connects through the middle as well as tunnels leading to a multi-level complex at either 'base'. Only this map contains the new Flamethrower weapon. |
Arctower Landing Arctower Landing This battle takes place on the rooftops from the early portion of the single player game. There is a significant complex on either end with a bridge connecting two in the middle. Only this map contains the new Boltgun weapon. |
Log in to comment