Overview
Call of Duty: World at War is a historical-military first-person shooter developed by Treyarch and published by Activision for the Xbox 360, PlayStation 3, Wii, and PC on November 11, 2008.
The fifth official installment of the Call of Duty series, World at War brings the gameplay and graphical improvements from Call of Duty 4: Modern Warfare back to World War II era conflict. In addition to expanded multiplayer (with vehicles) and a co-operative campaign mode, the game features a new bonus game mode which would later be a Treyarch staple in the series (the co-operative "Nazi Zombies" mode, which is not included in the Wii version).
The game takes place on two fronts: the Pacific Theater (with the United States Marine Corps against the Imperial Japanese Army) and the Eastern Front (with the the Red Army against the Wehrmacht). The Pacific Theater part of the campaign has players assuming the role of USMC Pvt. C. Miller (under the guidance of Cpl. Roebuck). The Eastern Front part of the campaign has players assuming the role of Red Army Pvt. Dimitri Petrenko (under the guidance of Sgt. Reznov).
It is the last game in the series to be primarily set in World War II for nearly a decade (until Call of Duty: WWII). Some of the game's characters and lore were later expanded upon in Call of Duty: Black Ops, the game's sequel. It also received a companion game for the PlayStation 2 by Rebellion (Call of Duty: World at War - Final Fronts) and a separate handheld version for the Nintendo DS by n-Space.
Plot
United States Marines
As a private in the USMC, you will be fighting against the Japanese soldiers, who seem prepared to accept any losses in order to secure a victory. The Japanese soldiers are armed with weapons typical of their time, such as the Arisaka rifle.
Initially, the first USMC mission begins with your character trapped in a hut by multiple Japanese soldiers, and a fellow prisoner. This occurs in 1942, and serves as a prologue to the main USMC story, on Makin Atoll. You are mocked by a Japanese officer, who berates you, saying that you are a fool for thinking you are strong for not talking. He blows his cigarette smoke in your face, causing the screen to haze, before going towards your ally. The fellow Marine spits in his face, angering the officer who orders you to both be executed. Your comrade is killed immediately, and before you meet the same fate, Sergeant Roebuck's squad intervenes.
You are led out of the hut by Roebuck, where you meet your squadmates. Sullivan is the commanding officer of the operation, and he tells you to pick up a rifle and help to 'tear this place apart'. Initial choices are an M1 Garand, or a Type 100 SMG. Of course, both can be taken, but you must drop the Nambu pistol. During the advance, your squad encounter groupings of Imperial soldiers. You will also meet the main reason that the Japanese army received a reputation for being utterly brutal: their traps. Your squad is ambushed during the mission, and the USMC squad repay the favor later on by crashing a Japanese fuel truck into a fuel depot. Your main objective is to blow up the ammo cache on the island - really denting the IJN's gear, and potentially flushing them out for other soldiers. Unfortunately, as you are leaving the area, a Japanese soldier swings a sword from a hut window, grievously wounding you. Roebuck shoots the swordsman, and carries you to the boat, where you black out.
The next mission for the Marine Corps takes place in 1944, on the island of Peleliu. Your squad is sent out with other groups in order to help take the island. Unfortunately, Peleliu is heavily defended by well embedded Japanese defenders. The boat used is caught on the coral barrier in the ocean, and the team are forced to wade through this while under enemy fire after the boat is hit with artillery. Again, the player's character (Private Miller) cheats death, when Sullivan pulls him from the water before he drowns. You are forced to wade through heavy fire, and reach the island. On the island you call off-shore artillery from the American ships in the water, and help the American Sherman tanks advance along the island. When the tanks reach their destination, the squad take cover in some huts. One of the Japanese survivors bursts into the house and stabs Sullivan to death with the bayonet attached to his rifle (these soldiers are known as banzais, and appear frequently in the USMC campaign). Due to the death of Sullivan, Roebuck becomes the commanding officer.
Under Roebuck's command, the group are expected to advance through a swamp in order to take the airfield on Peleliu. Along the path through the swamp, the group find the wreckage of an American P-51 Mustang plane and several living soldiers who had previously found the wreck. One of the soldiers investigates the wreck, and sets off a Japanese trap, which kills the unfortunate Marines who were investigating the wreckage. When the trap goes off the Japanese storm the area, leaving Private Polonsky to question the Japanese, saying "I can't believe they would booby trap our dead...". When the group move towards the airfield they encounter heavier resistance, which is eventually crushed, leaving the Marines free to travel onwards. When the airfield is captured the Japanese make a massive push in order to reclaim it, before the American reinforcements arrive. The Marines manage to hold down the anti-aircraft guns long enough to use them against the infantry, as well as allow the American support to arrive, which wipes out the Japanese tanks before they had a chance to fire any shells that caused major destruction.
The following mission to this involves playing as a different Marine for a single fight from a PBY Catalina gunship. Two Catalinas are attacking merchant ships that are traveling towards Japan, and they receive urgent distress signals from United States Navy ships, that are being attacked by kamikaze pilots. The two Catalinas travel to the location of the Navy ships, and do their best to protect them from the large number of kamikaze planes in the area. You are tasked with manning the guns on the Catalina, and to start with all is going well - the kamikazes are being suppressed and destroyed, and the Navy ships are slowly reaching land. However, everything soon goes wrong when the friendly PBY Catalina is shot down, and you are left alone to take on the kamikazes - saving yourself as well as the Navy sailors. One of the Zeroes manages to nail the target, and the ship goes down. The Catalina pilot lands the plane on the water, and you must save as many soldiers from their deaths. Upon saving as many soldiers as possible, you are caught in a compromising position. The Japanese are mounting an attack against the Catalina. Just before you are annihilated by the Japanese air force, additional backup arrives in the form of two Navy F4U Corsairs, which gun down the would-be attackers.
 Real life PBY Catalina
Back with Roebuck's squad, you are tasked with taking Wana Ridge from the Japanese. The Japanese are relentlessly attacking with mortars from Wana Ridge, and they are well entrenched in the area. The Japanese have mortars, and bunkers as well as machine guns. Taking Wana Ridge will be difficult, but not impossible. The attacking Americans are swift in their attack, and eventually you will prevail. Upon pushing the Japanese from Wana Ridge, the US Marines regroup with the commanding officer of the attack: Major Gordon. The Marines are given some less than positive news: their supplies of ammunition are running ever lower, and they are going to be taking the pinnacle of the Japanese defense next: Shuri Castle.
Before the team are sent out to take Shuri Castle, they are able to gather more supplies from a weapon drop. During this, a Japanese sniper nails one of your allies in the head, killing him as he dashes forward for supplies. As soon as this happens, the Imperial Japanese begin to fire mortars on the area. They have mortar positions that are located in the castle grounds. Without rushing forward, the Marines will be dead: and if they rush forward they're almost begging for death. Roebuck finds a solution, however: sprinting into the Japanese tunnels. While they are likely going to be well protected, the Marines are armed and willing to fight. Miller is sent forward in the tunnels to check for any Japanese and wipe them out, should they be present. Upon advancing, you will discover that there are Japanese, though they are desperate. They are standing around a table discussing the battle, and they appear to be afraid of the Marines after the recent losses they had made.
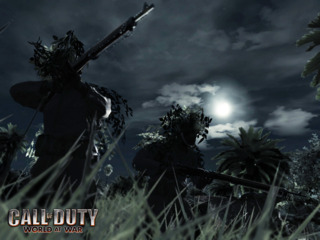 Japanese soldiers wait to strike. Notice the Banzai with the bayonet mounted to his Arisaka.
Upon leaving the tunnels, the marine squad find themselves outnumbered again, before they regroup with other marines. When they regroup, they are able to push forwards into the courtyards of the castle, where the Japanese mortars are located. Naturally, the mortars are protected by Japanese soldiers, as they are the main asset of the castle at this stage. However, the Japanese defense is beginning to falter due to the losses they have sustained, and the ferocity of the Marines. Taking Shuri Castle means going home; ending the war; ending the campaign in the Pacific islands; it means everything to the Marines who are still fighting. After clearing the mortar positions for the Marines you are fighting alongside, Roebuck asks you to man a Japanese mounted machine gun and use it against its owners in order to allow a fellow squad of soldiers to push through as well. When this is completed, the team advance to the main courtyard of Shuri Castle: right outside the main building. On their way to this location however, the team encounter three Japanese soldiers who appear to be surrendering. Private Polonsky and Sergeant Roebuck both advance towards the surrendering Japanese, and prepare to subdue them. However, the 'surrender' is a trap, and the Japanese grab both men.
You have the opportunity to save one, though there will always be a casualty. Saving Roebuck will reward you with an achievement or trophy, and saving Polonsky will not reward you at all. However, saving Polonsky seems to be a more fitting end due to his actions and dialogue. Saving Roebuck will result in the same scenario, where Polonsky is killed. However, when fighting the final wave of Japanese soldiers, Roebuck will remain completely calm and control his emotions. He will not say much or express his feelings at the loss of Polonsky, despite the fact the two soldiers seemed to have a close relationship in their work. Saving Polonsky will result in Polonsky fighting with you, and frequently speaking. He initially says 'They… they killed the Sergeant!', in shock. However, when fighting he will spout lines such as 'That was for Roebuck you bastard!', and other similar lines.
Unlike his normal mannerism, he frequently curses at the Japanese during this final moment. When the Japanese have been cleared and everyone is celebrating, Roebuck will say 'It's over… we did it… it's over.' If Polonsky is saved, he will shout something along the lines of 'Fuck yeah! It's over!'. During the mock surrender, you can choose to let both men die by simply walking on. If you do this, nothing changes during the final fight. This final fight also becomes much harder on Veteran difficulty, since Polonsky and Roebuck were invincible AI characters, and you could lie down when injured and let them carry on the fight for a few seconds. It may be better to save Polonsky during the fight on Veteran for he tends to be more aggressive at this point. Note also that there is an achievement for saving Roebuck, so it may be more canonical that Polonsky dies.
Upon completing the assault of Shuri Castle you are shown a cutscene of the Enola Gay dropping 'Little Boy', the world's first atomic bomb, on Hiroshima. In addition to this footage, speech from President Harry Truman is played in the background. When this cutscene wraps up, there is a message about WWII from Treyarch themselves. It reads:
'60 million lives were lost as a result of World War II. It was the most destructive conflict in human history.'
Soviet Campaign
The Soviet campaign follows Private Dimitri Petrenko as the protagonist; a private in the Soviet Red Army. The Nazis are brutal, and quite possibly more well armed than their Japanese counterparts. This campaign displays the brutality and violence of the Red Army, as well as that of the Nazi soldiers who will be fighting against you. Weapons in these missions change, and the fighting tends to take place in much more urban environments instead of the dense jungles of the Pacific Theater.
The first mission of the Soviet campaign opens with Dimitri lying in a fountain among the bodies of many Soviet soldiers, who have been brutally massacred. This battle takes place during the legendary Battle of Stalingrad, of 1942. Josef Stalin sent millions of Russians to fight against the German soldiers, who were trained - unlike the Russians ordered to fight to the death. Dimitri is lying beside the fountain, where he was aware of the ongoings. He sees some of the Russian soldiers crawling away, bleeding to death. Some of the Germans return, wielding MP40s. They open up into the fountain, spraying down anyone trying to survive their massacre. Luckily for Dimitri, he is not shot by the Germans as they believe he is already dead. After the Germans leave the scene of the massacre, one of the survivors puts his finger to his lips, to tell you to remain silent. The survivor is Reznov - a Sergeant in the army. He has been wounded in the battle, and has a badly wounded hand. This wound means that he is unable to snipe - which is not good considering the fact he has a plan to assassinate the General of the Nazi army who orchestrated the massacre you are lying in. However, he feels Dimitri will be capable of aiding him. However, he takes the time to give you a 'crash course' in sniping - through getting you to shoot dead the German soldiers who actually carried out the massacre. He teaches you to pick your shot at the right time and ensure you are not spotted. Once completed, he congratulates you (and if you kill all the enemies using less than five rounds to do so, he will call you a true marksman).
After proving your worth to Reznov, he leads you into a coffee shop in order to flank German General Heinrich Amsel's route. When in the coffee shop he assures Petrenko that 'One day… things will be different', and that they will take the fighting 'To their land… to their people… to their blood'. After making these remarks and advancing through, you will make it out into the streets. When in the streets, a shot is taken at you from a German building across the river. The shot narrowly misses Reznov, who takes no time in hurling himself through a window. After following his lead, you will have to engage the German sniper in a shootout, with Reznov's help. The Sergeant takes a massive risk by tempting the sniper into taking a shot through exposing himself, and this will aid you in taking the German down. Upon the death, Reznov beckons you to move quickly, as the Germans will most definitely have heard those shots being fired. During the advance through the house from which you fired, a German patrol spots you and attempts to set the building ablaze. You have to crawl through the house to avoid the flames until you reach the second floor, where you sprint to leap out the window.
Unfortunately, some burning wood collapses on Dimitri. Reznov rushes back to save the Private. He also waits for you to jump from the house first - an action that he barely survives. The explosion in the house flings him out onto the ground alongside Dimitri Petrenko. While lying on the ground, a German patrol arrives, and prepares to kill both of them. The Germans speak before making an action, and their dialogue is 'Roast these swines'. Before they are able to kill the two of you, a group of Russians open fire on them and aid you in getting up again.
The Russian view is that you will be of benefit to them, as they prepare to attack a German communications station. Immediately Reznov spots the advantage from aiding them: Heinrich Amsel will not be able to call for backup when he and Dimitri prepare to end his life. He tells the Russians to wait for Dimitri to fire his rifle, and the screams of dying Germans will signify the start of the attack. When you have aided your comrades in attacking the communications station, Reznov will tell of a vantage point from which Amsel will be an easy target. Amsel has several bodyguards who will try to protect him, though he willhide behind objects, such as the remains of a military transport truck, a Flak 88 cannon, and a wall. He will try to make it towards a German Kubelwagen in order to escape, though this can be prevented through killing the driver and then Amsel, blowing up the Kubelwagen, or sniping Amsel down. Once Amsel is dead, the Germans will begin to flood into the house from which you took the shot. The only escape is by leaping through a window into the river below. On the way towards the window, a full stairway of Germans will arrive. Reznov screams out, and mows them down with a PPSh-41.
The next Russian mission cuts to April 18th, 1945, in Seelow Heights. Dimitri is being held captive by three German soldiers. Two Russian soldiers have already been executed, and the Germans are preparing for the inevitable Russian attack. Dimitri spots an SVT-40 rifle propped against the body of an ally, and as he moves for it one of the Nazis spot him, and reward him with a boot to the face. As they prepare to execute Petrenko in the same manner they did his comrades, a T-34 tank fires a shell at the house, blowing out a large part of the wall, and hurling two of the Nazis onto the ground. The senior German, and the one responsible for assaulting you, survives the blast of the T-34. However, through the smoke flashes can be seen, and gunshots are heard. The Nazi falls to the ground, dead, as Reznov steps into the house. He greets Dimitri again, and tells another soldier alongside him to execute the two surviving German soldiers. This soldier instead sits down and begins to record the event in a diary. When Reznov screams at him to shoot the men dead, you will discover his name is Chernov. Chernov is one of the major members of your squad, similarly to Polonsky in the Marines. However, Private Chernov is a pacifist, and seems to shy away from combat. He argues that there is no point to shooting the two injured Nazis, as they are already bleeding to death. This may be the case, or he could simply be saying this to avoid having to pull the trigger. Reznov looks to Petrenko and grimly says 'Perhaps our friend here could help them bleed faster…'.
When exiting the house, Reznov commands the men under his squad to use their Molotov Cocktail's to burn their wheat fields down. When the fields are being torched, the Nazi soldiers will come running out of the fields, and in some cases will burn to death. The team move across a small river before fighting through some trenches. Reznov remarks to Dimitri that 'They have brought the fight to their land, to their people, and to their blood'. After pushing through the trenches, the team find some houses in what appears to be a farm. However, most farms do not have Tiger tanks operating in them. Therefore, the Tigers will need to be destroyed to ensure the safety of all the Russian troops who are fighting. To do this, it will mean acquiring a German Panzerschreck. After this, the Russians fight forwards into a German camp outside of the town. Inside the camp are a large quantity of Nazis, who pose a major threat should they not be dealt with swiftly. Some of the Germans take up positions with rifles in the sniper towers, and are difficult to take down without a longer-ranged weapon, such as a rifle of your own. The mission closes with the squad climbing onto a Russian train, and Reznov making a speech about Dimitri. He says that 'As long as he lives, the heart of this army cannot be broken'.
After disembarking from the train in Pankow, the Russians are immediately under fire from the German positions, and the main threat is a mounted MG42 that is laying down lead across the entire area. The ground troops are tasked with moving forward to clear the way for Soviet T-34 tanks to enter the area. One of the T-34s takes aim at a building, which it then blows to pieces. The Russian soldiers are ordered to fight through this building and ensure there are absolutely no survivors. As soon as this is completed, and the Russian soldiers exit the area, they are attacked by well entrenched German troops in an asylum. When this happens, the Red Army decide to move tactically as opposed to using pure brute force. They split their force into two groups. One group will assault the asylum through the front courtyard, and the other group will move along the street and enter the asylum from behind, catching the Germans in a pincer movement. After getting into their position, both groups successfully enter the asylum, and after some intense fighting through it, they eventually wrestle control from the Germans who previously controlled it. When this is done, the Russians regroup with the T-34s that helped them push through Pankow initially. The Germans that previously controlled the asylum flee down the street, and the commanding officer, Commisar Markov announces that 'nobody can resist the will of the Red Army', and that the Nazis should give up all hope.
One of the final missions of the fight takes place in Berlin, on the 24th of April 1945. The Third Reich is nearing collapse, and the Germans are desperate. The Russians are no longer nearing the jewel of the Reich - they are in it. Initially, you are fighting from room to room, and in some of the rooms the Germans are unaware of your presence. When the building is cleansed of fascists, the different Soviet divisions meet up in the street, and charge the defenses with T-34 tanks as support. The Germans are desperate, and are fighting relentlessly. After some difficult fighting, the defenses weaken and the Soviets can move through the city of Berlin. Before entering a metro station in the city, there are a group of German soldiers who are surrendering to the Russians. Reznov feels they deserve nothing better than death for the suffering they caused to the Russian people during 1942, and the Battle for Stalingrad. The 'slow death' involves throwing a Molotov Cocktail and letting the Germans burn to death, whereas the faster death is simply putting a bullet in them. Reznov gives a more favorable comment should you choose the faster death for them. The next part of this mission takes place in the metro that the Germans were surrendering outside of. The Germans have this small area well fortified, and they are prepared to die here. After working through the metro, the Germans unveil their final stand, when they cut the power and flood the station in an attempt to drown the Soviets who are in it. To escape the wave of water, Reznov breaks open a locked door and brings Dimitri and his squad through it.
The final fight in the Soviet campaign takes place in the city streets beyond the metro station, and inside the Reichstag itself. To begin with, Reznov congratulates you on cheating death again, and tells you to take a few moments to regain your breath. Chernov is sitting writing in his diary, and this enrages Reznov. He grabs Chernov's diary, and slams it into his chest, shouting 'Nobody will ever read this!' at him. He then grabs the Soviet flag, and thrusts it onto Chernov, roaring "If you lack the stomach to kill for your country, at least show me you are willing to die for it!". Chernov accepts this treatment, and carries the flag without a complaint. Before setting off, Reznov hands Petrenko a PPSh-41 sub-machine gun like his own. The group are briefed by Commissar Markov again, and he tells them to help end this war.
Reznov's unit marches towards some housing, outside which there are three Nazi corpses hanging from the tree. Reznov states that 'The Germans hang their cowards from trees', and then orders the team to push forward into the housing the Nazis are controlling. After working through it, the squad will meet other groups preparing to assault the outside of the Reichstag, which is fortified with Flak 88 artillery cannons. Therefore, the Soviets are expected to destroy these in order to enter the Reichstag. Destroying the cannons is no mean feat seeing as the Germans will do anything to ensure the loss of the cannons does not happen. After brutal, slow-paced shooting, the Flak 88s will all be destroyed, and the team can advance. Chernov is unlucky however, and is torched by a flamethrower. Whether this flamethrower kills Chernov or not is unknown, but despite Reznov's mockery of his pacifistic ways, he sprints forward, shooting dead the flamethrower to check Chernov. He takes Chernov's diary, and during the next briefing scene, he reads out an extract from it. Below is the quotation from Chernov's diary:
The path to Berlin has been swift and brutal… all of it has been necessary.
The next battle, and the final battle of World at War, is inside the Reichstag. Reznov says that the men inside this building are the SS Honor Guard, and they will be prepared to die for the Third Reich. The SS are armed with some of the best weapons in the game, such as the STG .44, although some of them wield MP40s. Inside the building, the amount of resistance to the Red Army is so great that Reznov takes Dimitri Petrenko alongside him to the balcony, where they may provide support with a PTRS-41 anti-tank rifle. His reasoning for taking Dimitri is that after Stalingrad, he knows Dimitri is a good shot. When the Germans are all dead, and the resistance has pulled back, you are instructed to leave the PTRS and fight alongside your fellow soldiers. After working through the SS Honor Guard, the final remnants of the shattered Nazi army retreat to the roof, where they are wiped out in their entirety. The flag carrier is shot dead, and Petrenko takes the flag to place, as was done in real life by the Red Army. As Dimitri nears the flag pole, the final Nazi soldier stands up, armed with a Walther P38. He takes a shot, which strikes Dimitri. Reznov screams and lunges at the German with his machete. He butchers the Nazi, and pushes him from the roof of the Reichstag. He then aids Dimitri in placing the Soviet flag, by cutting down the Nazi swastika flag with the same machete. He also holds him, and says to him "You can make it, comrade. You never die. As long as you live, the heart of this army cannot be broken."
The Soviet campaign has gained a reputation for being extremely difficult in World at War due to the sheer number of grenades thrown, though this is a complaint also levelled at the Imperial Japanese missions. Even so, the final two missions in the Soviet campaign are probably the most well known difficult missions of the entire franchise.
Gameplay
World at War has the most mature theme of the Call of Duty franchise, with more blood and gore than other games. High-powered weapons can tear targets apart, 'gibbing' them (ie. blowing them apart). This increased violence reappeared in Black Ops, though does not carry into the online - however, in World at War, it did. Swimming became a viable choice in-game, with the inclusion of wading through water, albeit at a reduced pace. The M2 Flamethrower, first seen during Call of Duty: United Offensive, returns to the game as well. Treyarch have included flammable environments, in order to maximise the entertainment a heated jet of flame can have. Like previous titles, the game uses a first person perspective, but provides more of an awareness of the character - for example, when a burning log collapses on you, your character will put his hands out in order to protect himself.
One of the other additions made to World at War is the Bayonet. The Bayonet is an alternative melee weapon to a standard combat knife, and can be fitted to some weapons. Bayonets are similar to a standard knife, but have a longer melee range, and can only be used when holding a weapon equipped for the situation. Smaller weapons, such as the MP40, cannot have a bayonet attached, though larger rifles and machine guns can.
Missions are split between a Pacific and European campaign, with a focus on two main characters: Private Miller, and Dimitri Petrenko. Both theatres of war have slightly different play styles. The Japanese fight furiously, frequently rushing and attacking with bayonets, while the Wehrmacht are more cautious with their attacks. Weapons encountered during the campaigns are different, and take some adjustment to use. Missions remove some of the linearity, as there are occasionally multiple paths you may advance along, rather than a single laid-out route. However, these paths almost always join together again .
 World At War has a higher level of gore than other Call of Duty games
 World at War features a mature theme, much like the previous installments in the series. Swimming elements have been introduced to the series for the first time in both single and multiplayer. While in water, the player cannot sprint and will only move at half speed. Flamethrowers, first introduced in Call of Duty: United Offensive, have been reintroduced with new flammable environments. Another new addition to the game is the use of bayonets. Bayonets are used by pressing the melee attack button, they are similar to standard knife attacks but have a longer range. The game is slightly more open than previous games in the series, as there are sometimes multiple ways to complete missions.
Multiplayer
For the first time in the CoD franchise, World at War features cooperative gameplay for up to four players via split-screen (on consoles) or four players online. It also uses a perk system similar to CoD4 and makes use of player-controlled vehicles similar to Call of Duty 3. With support for up to 18 players, the game also features an updated party system, which includes the ability to create private parties. The game has a level cap of 65, as opposed to 55 for Call of Duty 4, but still has 10 prestige levels. Prestige levels now reward the player, albeit just an extra Create-a-Class slot every few levels.
The multiplayer itself is very similar to that of Call Of Duty 4: Modern Warfare. All of the previous game modes are available in World At War except for Cage Match, Old School Team Deathmatch, and Hardcore Headquarters (which may or may not be added in the future). The game allows the player to create custom classes to use during matches, with the option of changing the weapons and attachments as well as perks. The experience system is mostly the same as well. Night vision has been replaced with a map. In addition, players can create squads and use the map to set waypoints for their teammates.
RoundhouseKilling an enemy will net you 10 points in some game modes, 5 points in others, and 50 points in Search And Destroy. The assist system returns, but rather than getting 2 points each time, the player can get up to 8 points depending on how much they damaged the enemy. World At War also has game modes that were not in the previous installment: Capture The Flag and War. Treyarch have also included the " Nazi Zombies" subgame, a cooperative survival mode in the Horde style within World at War that is unlocked after players complete the single player mode. After Christmas 2008, Treyarch released an update for the game that unlocks the Nazi Zombies mode automatically. Up to 4 players must survive as long as possible against a never-ending horde of zombies. With each kill, players earn points which can be used to either buy new weapons and equipment or to unlock different parts of the map. Treyarch also revealed that there is no end to the amount of waves of zombies and that the studios personal best was surviving to wave 23, although many players have managed to make it to the thousands through use of glitches.
Multiplayer Maps
Airfield Airfield is a large map that takes place in an airfield. The map features many buildings, downed planes, and a large playing area. The two teams are the Marines and the Imperial Japanese. The map also features a small tunnel system which can be easily trapped with Bouncing Betty mines or used to ambush enemies. Both sides have access to this tunnel and therefore it can become quite hectic. It is also the only area of the map where a shotgun could prove extremely useful due to the closer engagements. | Airfield |
Asylum Asylum is a small map that is often used in free-for-all matches. It features a main building known as the asylum, as well as outdoor areas around it. There are many entrances to the building. The map also features a central courtyard in the middle of it. | Asylum |
Castle Castle is a medium-small sized map that is reminiscent of Japanese gardens. The map features a large castle on one side as well as another large building on the other side. There are many courtyards, alternate routes, and flanking opportunities on the map. Castle is based on the idea of Shuri Castle, and concepts from the single player mission at the castle can be seen in the map. This is not the same castle, though the courtyard is identical due to the reusage of resources from the single player in the online experience. Castle is also known for a glitch allowing you to walk through a wall and leave the map. Treyarch countered this by having those outside the map take damage from an invisible enemy, which players christened a shark. This is the only glitch in the entire game where Treyarch chose to leave it accessible upon discovery, but with a surprise. It has since been patched so it cannot be glitched out of. | Castle |
Cliffside Cliffside is a medium-large sized map that takes place on the edge of a cliff. On one side, is the cliffside itself along with buildings used for cover and picking players off. The other side features the alleys in the backs of mountains. On the north side, there is a small waterfall and rocks used for cover and sniping. The south side includes a building used for sniping as well. The main portion of this map is the large, open area in the middle, which can be attacked from many angles and is essentially a no man's land. | Cliffside |
Courtyard Courtyard is one of the smallest maps in the game and takes place in a small courtyard outside of a large, unenterable building. The action takes place along many small corridors and chokepoints despite being an outdoor map. It has a large fountain in the middle as well as many small structures for cover surrounding it. The action on this map is very much close-quarters combat. It appears that Courtyard is set in the courtyard of the map 'Castle', or in the Shuri Castle courtyards. | Courtyard |
Dome Dome is the smallest map in the game, and takes place in the ravaged Reichstag. One half of the map sports a large wooden structure in the middle used for cover but otherwise being very vulnerable. The two sides of this part are buildings with windows and holes in the walls for cover and shooting. The second half of the map can be traveled to by going down the stairs and has a few buildings as well as a fountain/statue. All the action on this map is close-quarters combat. | Dome |
Downfall Downfall is a medium-large sized map that is very open and sometimes sniper heavy. Two sides of the map include one side's small courtyard to defend as well as buildings for cover in the middle and open land on the sides. The middle of the map contains a blown up building commonly used as a capture point in objective-based game modes as well as another blown open building on the side used for sniping. Another building is situated on the other side of the center that seems to be a former library and contains large windows that can leave players very vulnerable or in perfect sniping position if they are good enough. The other half of the map contains a large building as well with a similar courtyard for defending. Deep into this half can be found some great sniping positions as well. This map also contains vehicles in the form of tanks that can be piloted by the player. | Downfall |
Hangar Hangar is a medium-small sized map; as the name would suggest, the central feature is a large aircraft hangar. The hangar contains multiple levels for the player to ambush with and take advantage of the verticality the map offers. The rest of the hangar is very open and contains airplanes, cars, and trucks. The rest of the map is outdoors and takes place around the hangar. There are many buildings including two main ones situated near the entrances of the hangar. The hangar features a walkway with approaches for both factions, and so can be used to get an ambush on enemies on the ground, but at the risk of being flanked. Machine guns and rifles tend to prove very effective on this map due to the very long sightlines within the hangar. | Hangar |
Makin Makin is a map that takes place on a beach. There are many straw buildings set up with multiple entrance points and a significant amount of verticality. It is a medium-small sized map that is generally used for small team game modes. The map features a large central building with a round room in the middle as well as outside places and water based combat. | Makin |
Outskirts Outskirts is a large map that contains vehicles in the form of tanks as well. The main feature is a large church in the middle with many levels and a watchtower on the top that is an ultimate sniping position. Outside of this main building, there are two main areas around the map in the form of buildings as well that create great setpieces and choke points. The map almost feels like a small city in itself and contains numerous small areas and buildings around the main attractions. This map also features vehicles in the form of tanks that can be used by the player. | Outskirts |
Roundhouse Roundhouse is a medium-large sized map that features a central attraction known as the Roundhouse. It is, as the name suggests, a large round house. Outside of this is a large building on one side that can be used for sniping as well as bridges that contain other sniping positions. There are many back alleys in this map and it contains vehicles in the form of tanks once again as well. | Roundhouse |
Seelow Seelow is an extremely large. and fairly open map. It's main feature is a large bridge in the middle that is often contested. Being a large map with lots of random building on it, it is a sniper's paradise. It is an extremely open map as well and contains large fields of grass. The map contains vehicles in the form of tanks as well. | Seelow |
Upheaval Upheaval is a medium sized map that features a large square in the middle with lots of buildings surrounding it. Around the buildings are open area and back alleys that can be used for sneaking around to the other sides of the maps since going through the middle is generally suicide. | Upheaval |
| Map Pack 1 | | |
|---|
Nightfire Nightfire is a relatively large map, based in the streets of Berlin at night. It pits the German Wehrmacht against the Soviet Red Army. The map is one of the darkest in the game, and for this reason the Wehrmacht's darker uniforms can occasionally give a slight advantage. This is not a major benefit to the Wehrmacht team, as the map is more than bright enough to see your enemies, but stealthy players may favor hiding in the shadows when they are on the Wehrmacht side. The burned out buildings provide an excellent source of ambushes, and suppressed sub-machine guns are extremely effective in this role. | | Nightfire |
Knee Deep Takes place in the remains of Japanese bunkers. | | Knee Deep |
Station Takes place in the bombed out ruins of a Metro station. It's a long linear map with corridors. | | Station |
| Map Pack 2 | |
|---|
Banzai Banzai is a map based in the Pacific islands, between the USMC and Imperial Japanese Army. Much of the fighting revolves around the large wooden bridge, running across the map. Banzai can be compared to Eder Dam from Call of Duty 3, as both maps use a large bridge as a main point, with the middle of the bridge having been blown out. | Banzai |
Corrosion A map set in the ruins of a Russian train yard. | Corrosion |
Sub Pens A close quarters map set in a destroyed submarine base. | Sub Pens |
| Map Pack 3 | |
|---|
Battery An armored island surrounded by anti-ship mines and shore to ship cannons, "Battery" places soldiers on a mid-sized map based on Fort Drum (El Fraile Island) in the Philippines. Expect plenty of areas to hide and heavy close quarters combat. | Battery |
Breach Overwhelm the enemy in "Breach," set in Berlin's overcast and crowded city streets surrounding the historic Brandenburg Gate. | Breach |
Revolution Revolution pits the Nazi Wehrmacht against the Red Army in the streets of a Russian city (possibly Stalingrad or Leningrad). Revolution is a large map, and due to the blitzkrieg, bears the scars of warfare, such as bombed-out buildings. The map is extremely open, and leaves many lines of attack open due to the damage caused. | Revolution |
Weapons
Bolt Action Rifles
Primary slot. Bolt-action (unless otherwise specified) and effective at long range.
All Bolt Action Rifles (other than the PTRS-41) can equip the Sniper Scope, Bayonet, or Rifle Grenade attachment.
- Arisaka (Japanese forces, unlocked in Multiplayer at level 4)
- Mosin-Nagant (Russian forces, unlocked in Multiplayer at level 21)
- Kar98k (German forces, unlocked in Multiplayer at level 41)
- PTRS-41 (Russian forces, unlocked in Multiplayer at level 57) - Semi-automatic.
Rifles
Primary slot. Semi-automatic (unless otherwise specified) and effective at medium-to-long range.
- SVT-40 (Russian forces) - Can equip the Flash Hider, Aperture Sight, or Telescopic Sight attachment.
- Gewehr 43 (German forces, unlocked in Multiplayer at level 7) - Can equip the Suppressor, Aperture Sight, Telescopic Sight, or Rifle Grenade attachment.
- M1 Garand (American forces, unlocked in Multiplayer at level 17) - Can equip the Flash Hider, Bayonet, Rifle Grenade, or Sniper Scope attachment.
- STG-44 (German forces, unlocked in Multiplayer at level 37) - Fully-automatic. Can equip the Flash Hider, Aperture Sight, or Telescopic Sight attachment.
- M1A1 Carbine (American forces, unlocked in Multiplayer at level 65) - Can equip the Flash Hider, Aperture Sight, Bayonet, or Box Magazine attachment. Technically the M1 Carbine (as it lacks the A1's folding stock).
Submachine Guns
Primary slot. Fully-automatic and effective at close-to-medium range.
- Thompson (American forces) - Can equip the Suppressor, Aperture Sight, or Round Drum attachment.
- MP40 (German forces, unlocked in Multiplayer at level 10) - Can equip the Suppressor, Aperture Sight, or Dual Magazines attachment.
- Type 100 (Japanese forces, unlocked in Multiplayer at level 25) - Can equip the Suppressor, Aperture Sight, or Box Magazine attachment.
- PPSh-41 (Russian forces, unlocked in Multiplayer at level 53) - Can equip the Aperture Sight or Round Drum attachment.
Shotguns
Primary slot. Effective at close range.
- M1897 Trench Gun (pump-action, American forces) - Can equip the Grip or Bayonet attachment.
- Double-Barreled Shotgun (break-action, Russian/German forces, unlocked in Multiplayer at level 29) - Can equip the Grip or the unique Sawed-Off attachment (the latter increasing weapon spread).
Machine Guns
Primary slot. Fully-automatic and effective at medium-to-long ranges. Players can equip a Bipod attachment that allow them to mount the gun on a solid surface, sacrificing mobility for improved accuracy.
- Type 99 (Japanese forces) - Can equip a Bayonet attachment instead.
- DP-28 (unavailable in Campaign, unlocked in Multiplayer at level 13)
- MG42 (German forces, unlocked in Multiplayer at level 33)
- FG42 (German forces, unlocked in Multiplayer at level 45) - Can equip a Telescopic Sight attachment instead.
Side Arms
Secondary slot. Semi-automatic (unless otherwise specified) and effective at close range. Cannot have attachments.
- Tokarev TT-33 (Russian forces, unlocked in Multiplayer at rank 21)
- .375 Magnum (unavailable in Campaign, unlocked in Multiplayer at rank 49) - Double-action revolver with massive power (at the cost of lower magazine size and slower reloading speed).
Wonder Weapons
Nazi Zombies mode only.
Perks
The following is a list of all multiplayer perks available and is almost identical to CoD4 apart from the addition of vehicle specific perks.
Perk 1
- Special Grenades x3 (Three special grenades, no smoke)
- M9A1 Bazooka x2 (M9A1 bazooka with two rockets)
- Bomb Squad (Ability to identify enemy explosives)
- Bandolier (Extra ammunition magazines)
- Primary Grenades x2 (Two primary grenades)
Perk 2
- Stopping Power (Increased bullet damage)
- Fireworks (Higher explosive weapon damage)
- Flak Jacket (Reduces explosive damage)
- Gas Mask (Protection against Tabun Gas)
- Juggernaut (Increased health)
- Camouflage (Undetectable to enemy Recon Planes)
- Sleight of Hand (Faster reload)
- Shades (Reduces intensity of signal flares)
- Double Tap (Increased rate of fire)
- Overkill (Carry two primary weapons, no pistol)
Perk 3
- Deep Impact (Deeper bullet penetration)
- Extreme Conditioning (Sprint for longer distances)
- Steady Aim (Increased hip-fire accuracy)
- Toss Back (Resets fuse of picked up grenades)
- Second Chance (Revive downed allies)
- Martyrdom (Drop a live grenade when killed)
- Fireproof (Reduces fire based weapon damage)
- Dead Silence (Less sound when you move)
- Iron Lungs (Longer breath hold, for steadier sniper shots)
- Reconnaissance (Show enemy's dogs, tanks and artillery on radar)
Vehicle Perk
- Water Cooler (Decreases turret overheat)
- Greased Bearings (Increased turret rotation speed)
- Ordnance Training (Decrease turret reload time)
- Leadfoot (Increases tank top speed)
- Coaxial Machine Gun (Driver controlled machine gun)
Killstreaks
World at War features the same multiplayer killstreak reward framework as CoD4, although the results are slightly different. The following rewards are granted after 3, 5 and 7 kill streaks:
- 3 kills: Recon Plane - This functions identical to the UAV in Call of Duty 4, it gives you a radar for 30 seconds.
- 5 kills: Artillery Strike - This is similar to an airstrike in Call of Duty 4, although it concentrates on one place instead of doing a sweep of terrain. Being caught in the vicinity of an artillery strike will also disorient you, even if it is friendly.
- 7 kills: Attack Dogs - This reward summons a pack of attack dogs for your team that will seek out enemy players and attack them for a set time limit. These dogs can be killed with almost any weapon in the game, but they come in a pack and move fast. If the dogs are killed, they will respawn and continue attacking until the time limit runs out. A tactical advantage of the dogs is that you can follow them to find the enemy.
Nazi Zombies
Stabbing a zombie in Nacht der UntotenNazi Zombies is an onslaught mode, where players are challenged to beat waves of undead Nazi soldiers. This mode grew extremely popular, which is surprising due to the fact it initially started as an in-joke with the employees of Treyarch. The mode is unlocked upon completion of the game's campaign, though if the console used to play the game accesses the internet and downloads an update, Treyarch made Nazi Zombies mode accessible regardless of campaign progress. Initially, Zombies contains one map: Nacht der Untoten (German for 'Night of the Dead'). However, with each of the three map packs released, an additional Zombies map was included. Technically, upon the release of Map Pack 2, it is no longer correct to call the mode 'Nazi Zombies', due to the fact that the Zombie level, Shi No Numa, is Japanese, and features Imperial Japanese zombies. Nazi Zombies can be played with up to four players, both online and offline. Through injuring or killing Zombies, player earn points. Initially they start off in a small area, with some chalk outlines of weapons on the wall. They may purchase these weapons for a set amount of points, or pay to open a door. Opening doors allows access to different areas, but Zombies can also attack through these areas. Later maps also included different machines, such as vending machines, and with Verrückt, the ability to pay in order to restore power to the facility. Upon killing all the zombies in a wave, another wave will begin. The mode has an infinite number of waves, and zombies grow stronger from round to round. It is impossible to reach an 'end' in Zombies due to the fact there is none.
PopThis mode has become a modern phenomena among players, with some prolific members of the Call of Duty community reporting easter eggs, which unveil more to the story. One of these sites is Call of Duty Zombies, or CoDz as it is also known. The site can be accessed here, and is a forum devoted mainly to the discussion of the Zombies mode. Across the three map packs for World at War, the Zombie maps increased in scope, and advanced a storyline that was told through easter eggs only. Map Pack 2 contained a modified version of the multiplayer map 'Asylum', entitled Verrückt, which is German for 'crazy'. This map was the first to contain the Perk vending machines, which gave players different perks from online gameplay in Zombies mode, which potentially could make the survival easier during tough moments. Map Pack 2 contained a map entitled Shi No Numa, which is a Japanese-based map, and roughly translates to 'Zombie Swamp'. This map introduced the characters of the 'storyline'. Furthermore, the Zombie Swamp technically stops the mode from accurately being classed as Nazi Zombies, due to the fact that the Japanese soldiers during World War II were not Nazis. Shi No Numa also introduced the 'Hellhounds' - large dogs that are ablaze, and can rip you to shreds in seconds due to their speed and strength. Hounds come in packs, and music will begin to play when they arrive in a round. During a Hellhound round, no Zombies will spawn. Furthermore, Shi No Numa introduced the 'Wonder Weapon' - the Wunderwaffe DG-2. The weapon is a fictional German creation, that fires bolts of electricity and can fry more than one zombie in a single shot. The final map pack to be released was Map Pack 3, which contained the Zombie factory (Der Riese). Der Riese is an extremely large map, and it contains such features as the 'Pack-a-Punch Machine'. This machine allows you to take a regular weapon, and then upgrade it vastly. The upgraded weapon is altered visually, and performs better than the standard weapons.
Perks
In Verruckt (Map Pack 2) perks are introduced into the action for a fee players could become more powerful along with their weapons.
Juggernog - 2500pts, increases your health
Quick Revive - 1500pts, shortens the time it takes to revive a fallen team member
Double Tap Root Beer - 2000pts, doubles your rate of fire
Speed Cola - 3000pts, decreases reload time
Mystery Box
The Mystery Box is a random weapon generator. In the box there is a possibility that a teddy bear will show up instead of a weapon. If this happens, the box disappears and moves someplace else, forcing players to dramatically change up their strategy if they are relying on the box for weapons. When the box changes positions, it is marked by a large column of light that helps players find it again.
Note: Nazi Zombies mode is not available in the Wii version.
Campaign Mission List
Call of Duty: World at War's single player campaign is divided in a total of 15 missions, which encompass both the US and the Soviet campaigns.
- Semper Fi
- Little Resistance
- Hard Landing
- Vendetta
- Their Land, Their Blood
- Burn 'em Out
- Relentless
- Blood & Iron
- Ring of Steel
- Eviction
- Black Cats
- Blowtorch & Corkscrew
- Breaking Point
- Heart of the Reich
- Downfall
On February 25th 2009, Treyarch released a new map called Makin Day. This map is a remake of a map already included in Call of Duty: World at War. It features a different lighting scheme and some of the cover has also been modified to change the experience slightly. The map was included in a patch for the PS3 version of the game while it is also available for free from the Xbox Live Marketplace here.
Map Pack 1
On the 19th of March 2009, Treyarch added 'Map Pack 1' to the game. This pack includes several new maps, and these new maps are :
Nightfire - Takes place in the fires of Berlin at night.
Knee Deep - Takes place in the remains of Japanese bunkers.
Station - Takes place in the bombed out ruins of a Metro station.
Verruckt, the second Nazi Zombies mapAs well as these three maps, the pack also includes a new Nazi Zombie map. This map takes place in a modified version of the Multiplayer map Asylum. This map is called Verruckt (German for 'crazy' or "insane"), and it features new additions, such as new animations for the zombies, and Perk-A-Cola machines. These machines give you perks that could be very helpful against the undead hordes. The perks available are :
Juggernaut (Increases your health)
Sleight of Hand (Reload faster)
Double Tap (Doubles your weapon's fire rates)
Quick Revive (Decreases the time it takes to revive an incapacitated team member)
The Map Pack is available on the Xbox 360 and PS3 for 800 Microsoft points and $9.99 respectively. It is also available on the PC as a Patch (1.4) for free at the Call of Duty website. The patch is 581MB in size.
Map Pack 2
Treyarch recently announced that they are released a second Map Pack in June. The pack comes with 3 standard multiplayer maps as well as another Nazi Zombies map. The upcoming maps are:
Banzai Banzai - A "fight for control of a tall river bridge, deep within enemy territory"
Corrosion - A map set in the ruins of a Russian train yard
Sub Pens - A close quarters map set in a destroyed submarine base
Shi No Numa* (Zombie Swamp) - A Nazi Zombies map set in a swamp using Imperial Zombies as well as introducing new features such as Hell Hounds and a new weapon called the Wunderwaffe DG-2(translated it means wonder weapon). It acts like a lightning rod that kills zombies by bouncing the lightning on another. The amount it kills depends on the number that are near the zombie you first fire at. the amount of power that the new weapon has is a lot but it has a really slow reloading time of 8 seconds.
*Nazi Zombies map
Map Pack 2 was released June11th, 2009 on the Xbox 360 and PS3 for 800 Microsoft Points and $9.99 respectively.
The PC Version's Map Pack 2 was released on July 17th, 2009 in the form of Patch 1.5 and can be downloaded from the Call of Duty Website. The Patch is 978MB is size.
- Players will need to have Patch 1.4 already installed
Map Pack 3
Map Pack 3 for Call of Duty: World at War was released in August 2009. It follows the same formula as both previous map packs: three online Multiplayer maps, and a single addition to the Nazi Zombies mode. The maps contained in Pack 3 are as follows:
Battery - An armored island surrounded by anti-ship mines and shore to ship cannons, "Battery" places soldiers on a mid-sized map based on Fort Drum (El Fraile Island) in the Philippines. Expect plenty of areas to hide and heavy close quarters combat.
Breach - Overwhelm the enemy in "Breach," set in Berlin's overcast and crowded city streets surrounding the historic Brandenburg Gate.
Revolution - "Revolution" pits soldiers against each other in Russia's cold city streets and large factory environment. This map is being pitched as a long distance friendly map with multiple flanks to the prime sniper positions.
Der Riese (Zombie Factory/ The Giant) - A Zombie map set in a secret Nazi research facility featuring the Pack-A-Punch Machine, a device capable of upgrading weapons, for a price. Players must use the teleporters to escape the vicious Hell Hounds and pray that the Wunderwaffe will appear before it's too late.
This map includes 10 new Achievements/Trophies.
Map pack 3 is priced at 800 MS points or $10.
Limited Collector's Edition
Limited Collector's EditionLimited Edition copies of Call of Duty: World at War were available at release of the game, in 2008. The Limited Edition copies of the game come in a large steel case, with the Call of Duty: World at War logo emblazoned upon it. The Limited Edition also includes a plastic 'hip-flask' ornament, styled like those which appeared in World War II. The Limited Edition contained a code for the M1 Carbine and FG42 weapons to be unlocked immediately, at Rank 1. In actuality, it did not unlock the weapons as such - it replaced the weapons in two Default classes. The game also came with a code to enter the 'Officer's Club', which afforded seven days of Double XP and a gold clan tag to members. The Double XP ran for a week after redemption of the code, but the Gold clan tag was a permanent bonus.
Soundtrack
The original score for Call of Duty: World at War was composed by Sean Murray.
| Track # | Song Title | Running Time |
|---|
| 01 | American Theme | 03.42 |
| 02 | Ambushed Again | 02.36 |
| 03 | Heroes End | 01.25 |
| 04 | Move Soldier | 02.10 |
| 05 | Russian Theme | 01.53 |
| 06 | Fountain | 00.57 |
| 07 | Dog Fire | 03.18 |
| 08 | Brave Soldat | 02.44 |
| 09 | Stalin Push | 00.58 |
| 10 | Forest Fight | 02.40 |
| 11 | Kill 'em | 00.53 |
| 12 | Fighting Mad | 01.39 |
| 13 | Final Push | 03.29 |
| 14 | Slayem | 01.15 |
| 15 | Zeros Alt. | 02.09 |
| 16 | Hell's Gate | 01.23 |
| 17 | Chernov | 01.24 |
| 18 | Fight Parliamen | 02.23 |
| 19 | Credits Soundtrack | 19.34 |
| | | |
| --- | Königgrätzer Marsch * | 02.11 |
* composed by Johann Gottfried Piefke in 1866. The song is NOT a part of the soundtrack CD, but it is featured in the game, more specifically during the penultimate mission of the single player campaign and also during the Nazi Zombies map. It is also included as the victory anthem for the Wehrmacht, alongside an excerpt of one of Adolf Hitler's speeches.
PC System Requirements
| PC Requirements |
|---|
- Supported OS: Windows XP/Vista
- Processor: Pentium 4 @ 3 GHz/AMD 64 3200
- Memory: 512 MB (1 GB for Vista)
- Hard Drive: 8 GB Free
- Graphics Card: 256 MB (nVidia GeForce 6600/ATI Radeon X1600)
- DirectX version: DirectX 9.0c
- Sound: on-board or better
|
Log in to comment